![- 1 lb boneless, skinless chicken breast - 1 cup all-purpose flour - 2 large eggs - 1 cup shredded unsweetened coconut - 1 cup panko breadcrumbs - Seasonings: garlic powder, smoked paprika, salt, pepper - Oil for frying - Dipping sauces: honey mustard, sweet chili sauce - Fresh herbs for garnish: parsley, cilantro The main ingredients for homemade chicken tenders are simple. You need chicken and a few pantry staples. I use boneless, skinless chicken breast for a tender bite. This choice is easy to cut into strips. The flour adds a nice base, while eggs help the coating stick. I mix shredded coconut with panko breadcrumbs. This combo gives a great crunch and flavor. I add garlic powder and smoked paprika for extra taste. Salt and pepper are key for seasoning. For frying, I suggest using a neutral oil like canola or vegetable. This oil has a high smoke point, making it perfect for frying to golden perfection. If you want to elevate your dish, consider using fresh herbs like parsley or cilantro for garnish. For a fun twist, try dipping sauces like honey mustard or sweet chili sauce. They add a sweet or spicy kick to your tenders. You can find the full recipe for crispy coconut chicken tenders to guide your cooking journey! - First, mix flour with garlic powder, smoked paprika, salt, and pepper. - In a second bowl, beat the eggs until smooth. - Start by coating chicken strips in the flour mixture. - Dip the floured chicken into the egg wash. - Finally, roll the chicken in the coconut and panko mixture. - Make sure the coating is even for the best crispiness. - Heat oil to 350°F (175°C) in a large skillet. - Carefully fry the chicken tenders in batches. - Cook them for 4-5 minutes on each side. - Look for a golden-brown color and an internal temperature of 165°F (74°C). - Once done, place the tenders on paper towels to drain excess oil. For the full recipe, you can check the Crispy Coconut Chicken Tenders. To make your chicken tenders crispy, start with the right oil temperature. Heat the oil to 350°F (175°C). If your oil is too cool, the tenders will soak up oil and become soggy. If it's too hot, they will burn. Use a thermometer to check the oil's temperature. This small tool can make a big difference. Not a fan of coconut? You can swap shredded coconut with crushed cornflakes for a crunchy texture. If you want a vegan option, use flaxseed meal mixed with water as an egg substitute. This mix binds the coating just like eggs do. After frying, serve your chicken tenders hot and crispy. Pair them with a selection of dipping sauces, like honey mustard or sweet chili sauce, for extra flavor. You can also serve them alongside fresh salads or crispy fries for a complete meal. This makes your plate colorful and fun! {{image_4}} You can make chicken tenders with many fun flavors. One tasty option is Asian-inspired coconut chicken tenders. Add sesame seeds to the coconut mix. This gives a nutty taste that pairs well with the coconut. Another tasty idea is to make a spicy version. Just add chili powder to the breading mix. This gives the chicken a nice kick. If you want a healthier option, try baking the chicken tenders. Preheat your oven to 400°F (200°C). Place the breaded chicken on a baking sheet. Bake for about 20 minutes, flipping halfway through. This will keep them crispy and golden. You can also use an air fryer. This method uses less oil. Preheat the air fryer to 375°F (190°C). Cook the chicken tenders in a single layer. Air fry for about 10-12 minutes, flipping them halfway. This method gives you crispy chicken with less mess. For the full recipe, check out the [Full Recipe]. To store cooked chicken tenders, first let them cool down. Place them in an airtight container. You can keep them in the fridge for up to three days. If you want to store them longer, freeze the chicken tenders. Wrap each tender in plastic wrap, then place them in a freezer bag. This way, they won’t stick together. You can freeze them for up to three months. When reheating chicken tenders, you want them crispy, not soggy. The best way is to use an oven. Preheat your oven to 375°F (190°C). Place the tenders on a baking sheet. Bake them for about 10-15 minutes. Flip them halfway to ensure even heating. You can also use an air fryer if you have one. Set the air fryer to 350°F (175°C) and cook for about 5-7 minutes. This keeps them crispy and tasty. You can prepare chicken tenders a day in advance. First, bread the chicken strips and place them on a baking sheet. Cover them with plastic wrap and store them in the fridge. This keeps them fresh. When you're ready to cook, heat the oil as you would normally. Fry them straight from the fridge. This helps keep them crispy. If you want to freeze them, place the breaded strips in a single layer on a baking sheet. Once frozen, transfer them to a freezer bag for long-term storage. To reheat, bake them at 400°F (200°C) for about 15-20 minutes or until heated through. This method preserves their crunch. Yes, you can use chicken thighs. They have more fat than breasts, which gives them a juicy flavor. The texture is also different; thighs are more tender and moist. If you prefer a richer taste, thighs are a great option. Keep in mind that they may take a bit longer to cook through. Always check the internal temperature. It should reach at least 165°F (74°C) for safe eating. If you don't have panko, you can use regular breadcrumbs. They work well but may not be as crispy. For a crunchier texture, try crushed cornflakes or crushed crackers. They add a nice flavor too. You can also use almond flour for a gluten-free option. Just make sure to adjust the seasoning since some alternatives may have added salt. This blog post covered how to make delicious coconut chicken tenders. We discussed required and optional ingredients, step-by-step instructions, tips for the perfect crispy texture, and storage information. You can also try different flavors and cooking methods. These tender, crunchy bites work well with various dips. Make them ahead of time for convenience. These chicken tenders can be a hit at any meal or gathering. Enjoy the cooking process, and have fun experimenting with your favorite flavors!](https://tastymomrecipes.com/wp-content/uploads/2025/06/7eba53c9-e00a-4067-a103-c537659f3581-768x768.webp)
Ready to elevate your dinner game? Homemade chicken tenders are crispy, flavorful, and easy to make! With just a few simple ingredients, you’ll create a dish that’s sure to please everyone at your table. Forget frozen options—these tenders will have you craving more. In this guide, I will share my best tips and tricks, ensuring your chicken tenders are juicy inside and perfectly crispy outside. Let’s get cooking!
Ingredients
Required Ingredients
– 1 lb boneless, skinless chicken breast
– 1 cup all-purpose flour
– 2 large eggs
– 1 cup shredded unsweetened coconut
– 1 cup panko breadcrumbs
– Seasonings: garlic powder, smoked paprika, salt, pepper
– Oil for frying
Optional Ingredients
– Dipping sauces: honey mustard, sweet chili sauce
– Fresh herbs for garnish: parsley, cilantro
The main ingredients for homemade chicken tenders are simple. You need chicken and a few pantry staples. I use boneless, skinless chicken breast for a tender bite. This choice is easy to cut into strips. The flour adds a nice base, while eggs help the coating stick.
I mix shredded coconut with panko breadcrumbs. This combo gives a great crunch and flavor. I add garlic powder and smoked paprika for extra taste. Salt and pepper are key for seasoning.
For frying, I suggest using a neutral oil like canola or vegetable. This oil has a high smoke point, making it perfect for frying to golden perfection. If you want to elevate your dish, consider using fresh herbs like parsley or cilantro for garnish.
For a fun twist, try dipping sauces like honey mustard or sweet chili sauce. They add a sweet or spicy kick to your tenders.
Step-by-Step Instructions
Preparing the Breading Station
– First, mix flour with garlic powder, smoked paprika, salt, and pepper.
– In a second bowl, beat the eggs until smooth.
Breading the Chicken
– Start by coating chicken strips in the flour mixture.
– Dip the floured chicken into the egg wash.
– Finally, roll the chicken in the coconut and panko mixture.
– Make sure the coating is even for the best crispiness.
Cooking the Chicken
– Heat oil to 350°F (175°C) in a large skillet.
– Carefully fry the chicken tenders in batches.
– Cook them for 4-5 minutes on each side.
– Look for a golden-brown color and an internal temperature of 165°F (74°C).
– Once done, place the tenders on paper towels to drain excess oil.
Tips & Tricks
Achieving the Perfect Crisp
To make your chicken tenders crispy, start with the right oil temperature. Heat the oil to 350°F (175°C). If your oil is too cool, the tenders will soak up oil and become soggy. If it’s too hot, they will burn. Use a thermometer to check the oil’s temperature. This small tool can make a big difference.
Ingredient Substitutions
Not a fan of coconut? You can swap shredded coconut with crushed cornflakes for a crunchy texture. If you want a vegan option, use flaxseed meal mixed with water as an egg substitute. This mix binds the coating just like eggs do.
Serving Suggestions
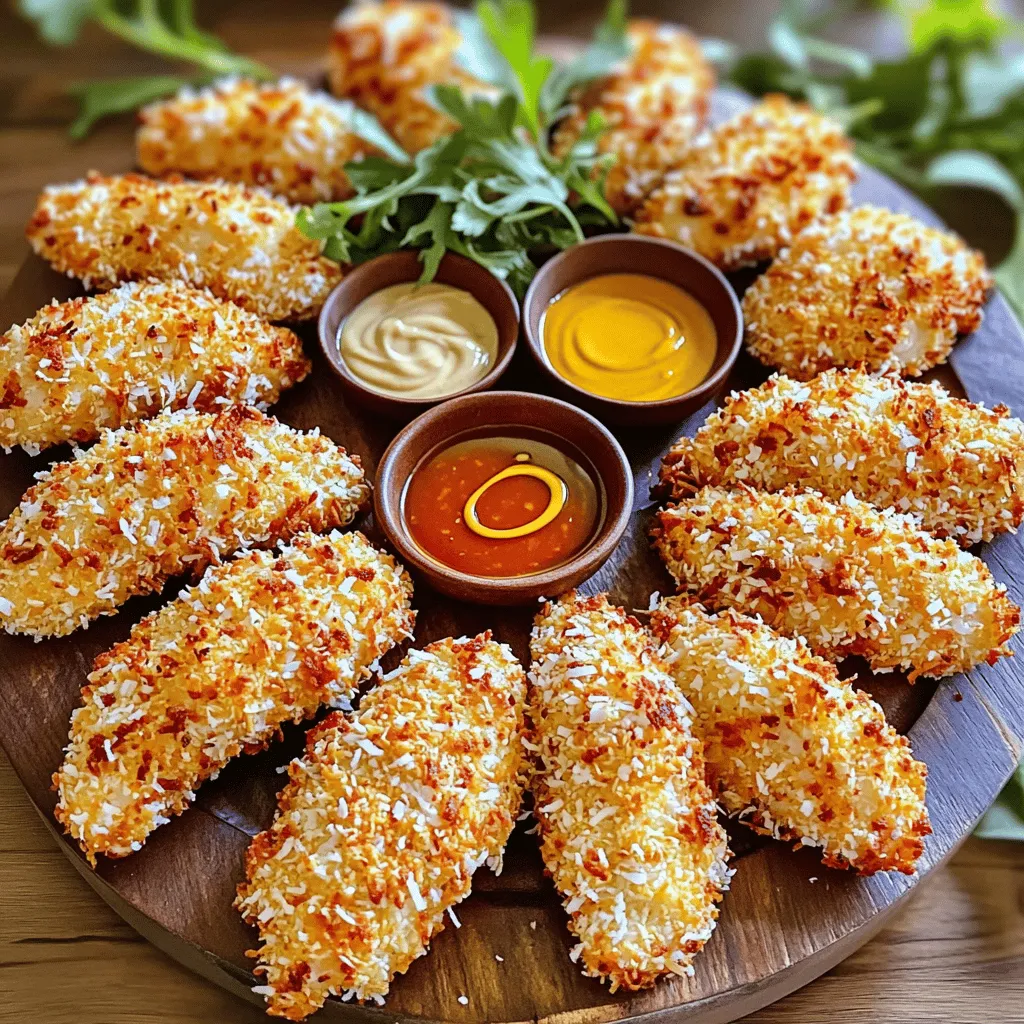
After frying, serve your chicken tenders hot and crispy. Pair them with a selection of dipping sauces, like honey mustard or sweet chili sauce, for extra flavor. You can also serve them alongside fresh salads or crispy fries for a complete meal. This makes your plate colorful and fun!
Variations
Flavor Variations
You can make chicken tenders with many fun flavors. One tasty option is Asian-inspired coconut chicken tenders. Add sesame seeds to the coconut mix. This gives a nutty taste that pairs well with the coconut. Another tasty idea is to make a spicy version. Just add chili powder to the breading mix. This gives the chicken a nice kick.
Cooking Methods
If you want a healthier option, try baking the chicken tenders. Preheat your oven to 400°F (200°C). Place the breaded chicken on a baking sheet. Bake for about 20 minutes, flipping halfway through. This will keep them crispy and golden.
You can also use an air fryer. This method uses less oil. Preheat the air fryer to 375°F (190°C). Cook the chicken tenders in a single layer. Air fry for about 10-12 minutes, flipping them halfway. This method gives you crispy chicken with less mess.
Storage Info
Storing Leftovers
To store cooked chicken tenders, first let them cool down. Place them in an airtight container. You can keep them in the fridge for up to three days. If you want to store them longer, freeze the chicken tenders. Wrap each tender in plastic wrap, then place them in a freezer bag. This way, they won’t stick together. You can freeze them for up to three months.
Reheating Tips
When reheating chicken tenders, you want them crispy, not soggy. The best way is to use an oven. Preheat your oven to 375°F (190°C). Place the tenders on a baking sheet. Bake them for about 10-15 minutes. Flip them halfway to ensure even heating. You can also use an air fryer if you have one. Set the air fryer to 350°F (175°C) and cook for about 5-7 minutes. This keeps them crispy and tasty.
FAQs
How can I make chicken tenders ahead of time?
You can prepare chicken tenders a day in advance. First, bread the chicken strips and place them on a baking sheet. Cover them with plastic wrap and store them in the fridge. This keeps them fresh. When you’re ready to cook, heat the oil as you would normally. Fry them straight from the fridge. This helps keep them crispy. If you want to freeze them, place the breaded strips in a single layer on a baking sheet. Once frozen, transfer them to a freezer bag for long-term storage. To reheat, bake them at 400°F (200°C) for about 15-20 minutes or until heated through. This method preserves their crunch.
Can I use chicken thighs instead of breasts?
Yes, you can use chicken thighs. They have more fat than breasts, which gives them a juicy flavor. The texture is also different; thighs are more tender and moist. If you prefer a richer taste, thighs are a great option. Keep in mind that they may take a bit longer to cook through. Always check the internal temperature. It should reach at least 165°F (74°C) for safe eating.
What can I substitute for panko breadcrumbs?
If you don’t have panko, you can use regular breadcrumbs. They work well but may not be as crispy. For a crunchier texture, try crushed cornflakes or crushed crackers. They add a nice flavor too. You can also use almond flour for a gluten-free option. Just make sure to adjust the seasoning since some alternatives may have added salt.
This blog post covered how to make delicious coconut chicken tenders. We discussed required and optional ingredients, step-by-step instructions, tips for the perfect crispy texture, and storage information. You can also try different flavors and cooking methods. These tender, crunchy bites work well with various dips. Make them ahead of time for convenience. These chicken tenders can be a hit at any meal or gathering. Enjoy the cooking process, and have fun experimenting with your favorite flavors!
![- 1 lb boneless, skinless chicken breast - 1 cup all-purpose flour - 2 large eggs - 1 cup shredded unsweetened coconut - 1 cup panko breadcrumbs - Seasonings: garlic powder, smoked paprika, salt, pepper - Oil for frying - Dipping sauces: honey mustard, sweet chili sauce - Fresh herbs for garnish: parsley, cilantro The main ingredients for homemade chicken tenders are simple. You need chicken and a few pantry staples. I use boneless, skinless chicken breast for a tender bite. This choice is easy to cut into strips. The flour adds a nice base, while eggs help the coating stick. I mix shredded coconut with panko breadcrumbs. This combo gives a great crunch and flavor. I add garlic powder and smoked paprika for extra taste. Salt and pepper are key for seasoning. For frying, I suggest using a neutral oil like canola or vegetable. This oil has a high smoke point, making it perfect for frying to golden perfection. If you want to elevate your dish, consider using fresh herbs like parsley or cilantro for garnish. For a fun twist, try dipping sauces like honey mustard or sweet chili sauce. They add a sweet or spicy kick to your tenders. You can find the full recipe for crispy coconut chicken tenders to guide your cooking journey! - First, mix flour with garlic powder, smoked paprika, salt, and pepper. - In a second bowl, beat the eggs until smooth. - Start by coating chicken strips in the flour mixture. - Dip the floured chicken into the egg wash. - Finally, roll the chicken in the coconut and panko mixture. - Make sure the coating is even for the best crispiness. - Heat oil to 350°F (175°C) in a large skillet. - Carefully fry the chicken tenders in batches. - Cook them for 4-5 minutes on each side. - Look for a golden-brown color and an internal temperature of 165°F (74°C). - Once done, place the tenders on paper towels to drain excess oil. For the full recipe, you can check the Crispy Coconut Chicken Tenders. To make your chicken tenders crispy, start with the right oil temperature. Heat the oil to 350°F (175°C). If your oil is too cool, the tenders will soak up oil and become soggy. If it's too hot, they will burn. Use a thermometer to check the oil's temperature. This small tool can make a big difference. Not a fan of coconut? You can swap shredded coconut with crushed cornflakes for a crunchy texture. If you want a vegan option, use flaxseed meal mixed with water as an egg substitute. This mix binds the coating just like eggs do. After frying, serve your chicken tenders hot and crispy. Pair them with a selection of dipping sauces, like honey mustard or sweet chili sauce, for extra flavor. You can also serve them alongside fresh salads or crispy fries for a complete meal. This makes your plate colorful and fun! {{image_4}} You can make chicken tenders with many fun flavors. One tasty option is Asian-inspired coconut chicken tenders. Add sesame seeds to the coconut mix. This gives a nutty taste that pairs well with the coconut. Another tasty idea is to make a spicy version. Just add chili powder to the breading mix. This gives the chicken a nice kick. If you want a healthier option, try baking the chicken tenders. Preheat your oven to 400°F (200°C). Place the breaded chicken on a baking sheet. Bake for about 20 minutes, flipping halfway through. This will keep them crispy and golden. You can also use an air fryer. This method uses less oil. Preheat the air fryer to 375°F (190°C). Cook the chicken tenders in a single layer. Air fry for about 10-12 minutes, flipping them halfway. This method gives you crispy chicken with less mess. For the full recipe, check out the [Full Recipe]. To store cooked chicken tenders, first let them cool down. Place them in an airtight container. You can keep them in the fridge for up to three days. If you want to store them longer, freeze the chicken tenders. Wrap each tender in plastic wrap, then place them in a freezer bag. This way, they won’t stick together. You can freeze them for up to three months. When reheating chicken tenders, you want them crispy, not soggy. The best way is to use an oven. Preheat your oven to 375°F (190°C). Place the tenders on a baking sheet. Bake them for about 10-15 minutes. Flip them halfway to ensure even heating. You can also use an air fryer if you have one. Set the air fryer to 350°F (175°C) and cook for about 5-7 minutes. This keeps them crispy and tasty. You can prepare chicken tenders a day in advance. First, bread the chicken strips and place them on a baking sheet. Cover them with plastic wrap and store them in the fridge. This keeps them fresh. When you're ready to cook, heat the oil as you would normally. Fry them straight from the fridge. This helps keep them crispy. If you want to freeze them, place the breaded strips in a single layer on a baking sheet. Once frozen, transfer them to a freezer bag for long-term storage. To reheat, bake them at 400°F (200°C) for about 15-20 minutes or until heated through. This method preserves their crunch. Yes, you can use chicken thighs. They have more fat than breasts, which gives them a juicy flavor. The texture is also different; thighs are more tender and moist. If you prefer a richer taste, thighs are a great option. Keep in mind that they may take a bit longer to cook through. Always check the internal temperature. It should reach at least 165°F (74°C) for safe eating. If you don't have panko, you can use regular breadcrumbs. They work well but may not be as crispy. For a crunchier texture, try crushed cornflakes or crushed crackers. They add a nice flavor too. You can also use almond flour for a gluten-free option. Just make sure to adjust the seasoning since some alternatives may have added salt. This blog post covered how to make delicious coconut chicken tenders. We discussed required and optional ingredients, step-by-step instructions, tips for the perfect crispy texture, and storage information. You can also try different flavors and cooking methods. These tender, crunchy bites work well with various dips. Make them ahead of time for convenience. These chicken tenders can be a hit at any meal or gathering. Enjoy the cooking process, and have fun experimenting with your favorite flavors!](https://tastymomrecipes.com/wp-content/uploads/2025/06/7eba53c9-e00a-4067-a103-c537659f3581-250x250.webp)
