Are you ready to elevate your snacking game? This creamy and flavorful roasted garlic hummus will become your new go-to dip. Packed with rich flavors and simple ingredients, it’s easy to make and even easier to enjoy. Whether you’re hosting a party or just craving something delicious, this hummus is a must-try. Let’s dive into the steps to achieve that perfect creamy texture and bold taste!
Ingredients for Roasted Garlic Hummus
To make a delicious roasted garlic hummus, gather these key ingredients:
– 1 cup canned chickpeas
– 1/4 cup creamy tahini
– 3-4 cloves of roasted garlic
– 2 tablespoons lemon juice
– 2 tablespoons olive oil
– 1 teaspoon ground cumin
– Salt to taste
– Fresh parsley and smoked paprika for garnish
Each ingredient plays a role in creating rich flavors. The chickpeas form the base and give a creamy texture. Tahini adds a nutty taste and smoothness. Roasted garlic brings sweetness and depth. Lemon juice adds brightness and balance. Olive oil enhances richness. Cumin gives warmth, while salt brings out all the flavors.
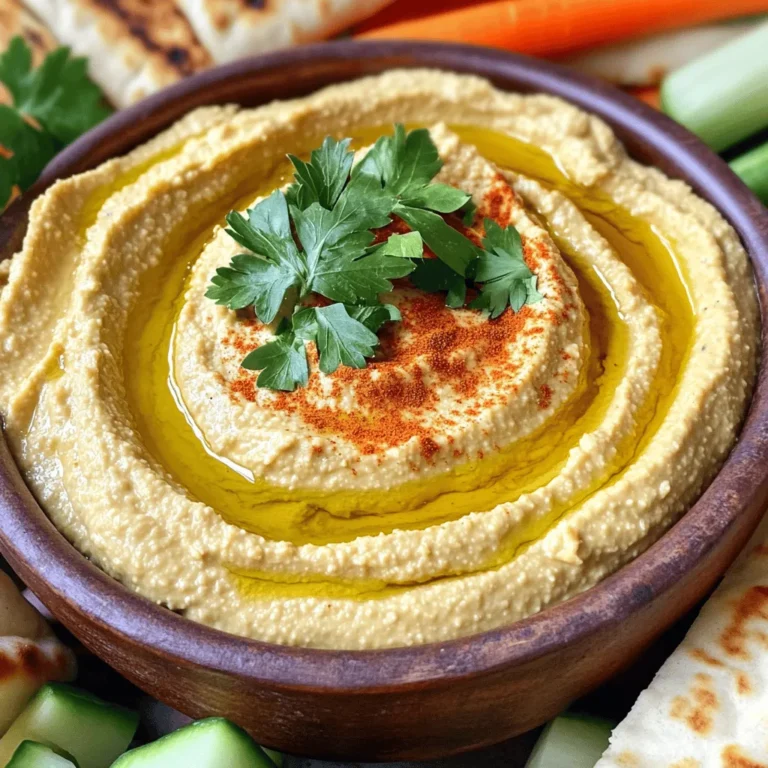
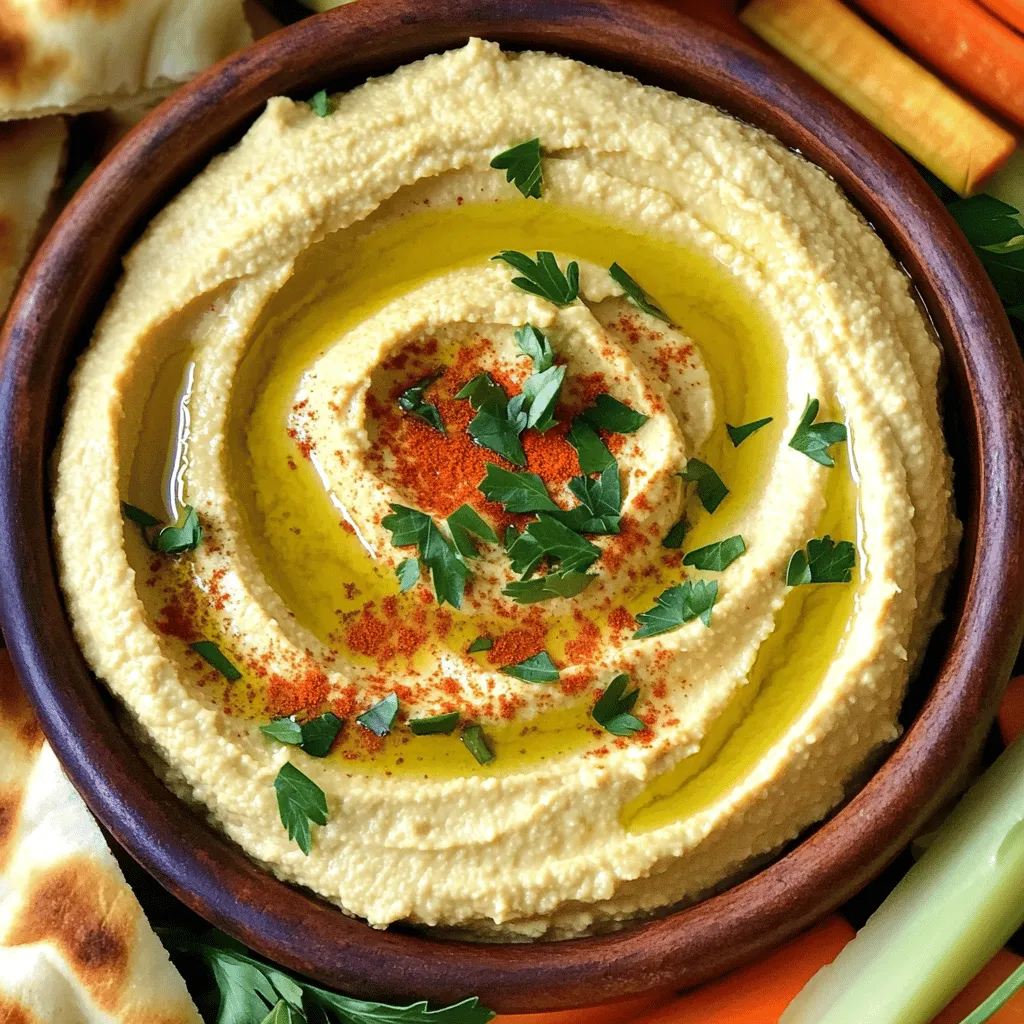
I love adding fresh parsley and smoked paprika on top for color and flavor. These garnishes make the hummus look beautiful and appetizing.Enjoy creating this treat!
Step-by-Step Instructions
Preparing the Roasted Garlic
Preheat the Oven
Start by preheating your oven to 400°F (200°C). This temperature helps the garlic turn sweet and soft.
Wrapping and Roasting Garlic Cloves
Take 3-4 garlic cloves and wrap each one in aluminum foil. Make sure to seal them well to keep the moisture in. Place the wrapped cloves on a baking sheet. Roast them in the oven for about 20-25 minutes. You’ll know they’re done when they feel soft and smell amazing.
Cooling and Unwrapping
Once roasted, take them out of the oven. Let them cool for a few minutes. Then unwrap the foil gently. The garlic will be very hot, so be careful! Set the roasted garlic aside while you prepare the hummus.
Blending the Hummus
Combining All Ingredients in a Food Processor
In a food processor, add the following ingredients:
– 1 cup canned chickpeas, thoroughly drained and rinsed
– 1/4 cup creamy tahini
– The roasted garlic cloves you just made
– 2 tablespoons freshly squeezed lemon juice
– 2 tablespoons high-quality olive oil
– 1 teaspoon ground cumin
– Salt, to taste
Blending for Desired Smoothness
Pulse the mixture until it’s smooth. You may stop and scrape down the sides to mix everything well. This step is key for that creamy texture we love.
Adjusting Consistency and Seasoning
Adding Water for Texture
If your hummus is too thick, add water. Start with one tablespoon at a time. Blend after each addition. Keep adding until you reach your desired consistency.
Tasting and Adjusting Seasoning
Once blended, taste your hummus. If you need more salt, sprinkle in a little more. This step ensures the flavors are just right.
Tips & Tricks
Serving Suggestions
– Ideal accompaniments for hummus: Roasted garlic hummus pairs well with warm pita bread, crunchy veggie sticks, and fresh pita chips. You can also serve it with olives and stuffed grape leaves for a mezze platter. This makes a fun and colorful spread.
– Presentation ideas for gatherings: To wow your guests, use a shallow bowl. Create a small well in the center of the hummus and drizzle olive oil. Top it off with fresh parsley and a sprinkle of smoked paprika for a pop of color. Serve with an array of dips and spreads for a lovely display.
Flavor Enhancements
– Customizing with spices or herbs: You can add a twist to your roasted garlic hummus by mixing in spices. Try adding a dash of cumin or smoked paprika for a warm note. Fresh herbs like cilantro or basil can also brighten the flavor.
– Experimenting with different garnishes: Get creative with your garnishes! You can sprinkle chili flakes for a bit of heat or even top with crumbled feta cheese for a salty bite. The choice is yours, so have fun and make it your own.
Variations of Roasted Garlic Hummus
Additional Flavor Infusions
You can easily change the flavor of your roasted garlic hummus. For a spicy kick, add chili powder. Start with a small amount, then taste and adjust to your liking. You can also mix in roasted red peppers. Simply blend them with your other ingredients for a sweet and smoky flavor. This adds depth and excitement to your dip. Experiment with other spices like smoked paprika or cumin for more layers of flavor. The options are endless!
Diet-Specific Adaptations
Roasted garlic hummus is very versatile. It is naturally vegan, so you can enjoy it without worrying. If you follow a gluten-free diet, this recipe fits perfectly. Just ensure your tahini and other ingredients are certified gluten-free. You can also make hummus without any added oils for a lighter version. This way, you keep all the great taste while meeting your dietary needs. Enjoy your hummus with fresh veggies, pita, or crackers for a delicious snack.
Storage Information
Best Practices for Storing Hummus
To keep your hummus fresh, store it in an airtight container. This helps prevent drying out. Place a thin layer of olive oil on top before sealing. This layer seals in moisture and adds flavor. Always refrigerate your hummus right after use. It keeps the taste and texture nice.
If you want to store hummus for longer, freezing is a great option. Just scoop portions into freezer-safe bags or containers. Remove as much air as possible to prevent freezer burn. Label the bags with the date. You can freeze hummus for up to three months. When ready to eat, let it thaw in the fridge overnight.
Shelf Life
How long does hummus last in the fridge? Homemade hummus lasts about five to seven days when stored properly. Store-bought hummus often has a longer shelf life due to preservatives. Always check the “use by” date on the package for guidance.
To determine freshness, look for signs of spoilage. If you see mold, or the hummus smells off, it’s best to discard it. Also, if the texture changes and becomes watery or grainy, it’s time to let it go. Always trust your senses: sight, smell, and taste are your best friends in the kitchen.
FAQs about Roasted Garlic Hummus
What is the best way to use roasted garlic?
You can use roasted garlic in many dishes. It adds a sweet, rich flavor. Try it in pasta sauces, mashed potatoes, or even on toast. Roasted garlic also works great in salad dressings. You can blend it into dips for extra depth. It shines in soups, too, giving them a warm taste.
Can I use dry garlic instead of roasted garlic?
Using dry garlic will change the taste and texture. Dry garlic is sharper and more bitter. Roasted garlic is sweet and smooth. If you want that creaminess, stick with roasted garlic. It makes your hummus shine and taste balanced.
How can I make hummus creamier?
To make hummus creamier, blend it well. Use a high-powered food processor. Add a bit more olive oil or tahini. If it’s grainy, add water slowly. Blend between each addition until smooth. Taste and adjust salt for the best flavor.
Where can I buy store-bought roasted garlic hummus?
You can find store-bought roasted garlic hummus at many grocery stores. Look for brands like Sabra or Tribe. These brands often have good flavor and texture. You can also check local health food stores. They might have fresh options or unique flavors.
Roasted garlic hummus combines simple ingredients for a delicious dip. It starts with canned chickpeas, tahini, and roasted garlic. You can enjoy this recipe by blending, adjusting, and even personalizing it. Explore flavor variations to suit your taste. Store leftovers correctly for lasting freshness. With the right tips and tricks, you can impress anyone at gatherings. Making roasted garlic hummus is not just easy; it’s also fun to customize. Now, you’ve got everything you need to whip up a tasty, healthy snack. Enjoy creating your hummus masterpiece!

