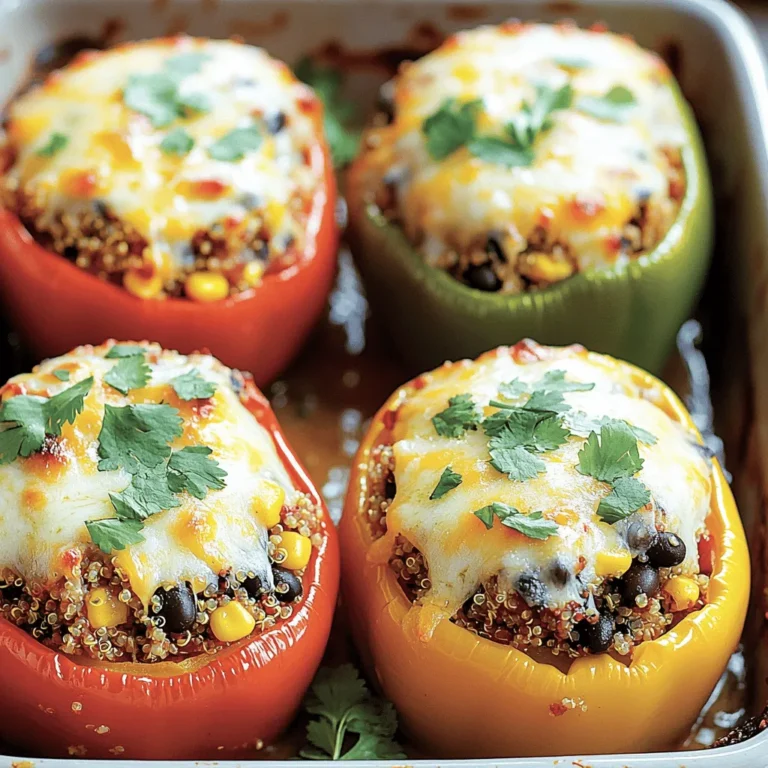
Craving a delicious, easy dinner? Cheesy stuffed bell peppers are here to save the day! These vibrant, savory treats are packed with flavor and can fit any taste. I’ll guide you through simple steps to make them, plus tips for selecting the best bell peppers. Get ready to impress friends and family with this delightful meal that’s as fun to make as it is to eat!
Ingredients
List of Essential Ingredients
To make cheesy stuffed bell peppers, you need these key ingredients:
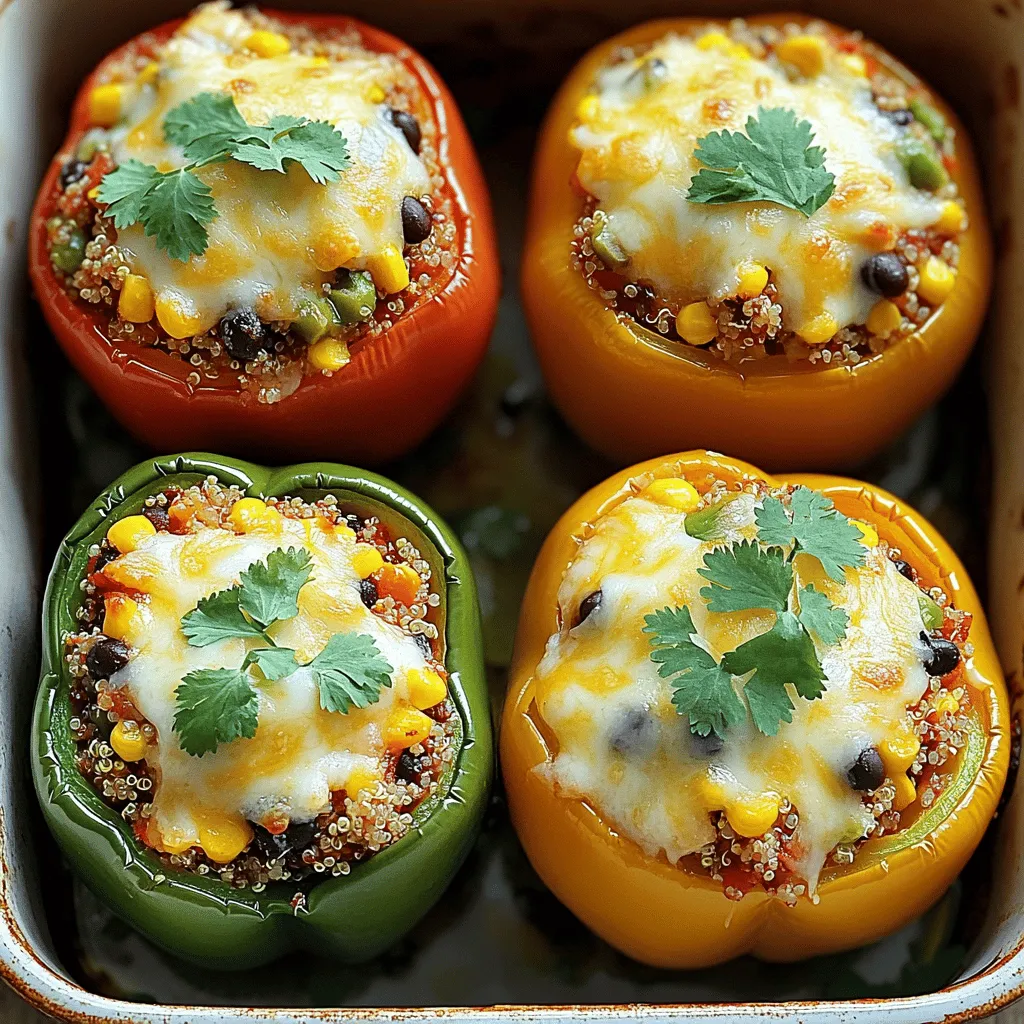
– 4 large bell peppers (choose your favorite colors)
– 1 cup cooked quinoa (or substitute with cooked rice)
– 1 cup black beans, rinsed and drained
– 1 cup corn (fresh or frozen works well)
– 1 cup diced tomatoes (fresh or canned)
– 1 teaspoon ground cumin
– 1 teaspoon smoked paprika
– 1 teaspoon garlic powder
– 1 cup shredded cheese (cheddar or mozzarella)
– ½ cup onion, finely chopped
– 2 tablespoons olive oil
– Salt and pepper to taste
– Fresh cilantro, chopped (optional for garnish)
Optional Ingredients for Customization
You can customize your stuffed peppers with these optional ingredients:
– Ground turkey or beef for added protein
– Chopped bell pepper tops for extra flavor
– Jalapeños for heat
– Avocado or sour cream for topping
– Cooked spinach for added nutrients
Tips on Selecting the Best Bell Peppers
When choosing bell peppers, look for these tips:
– Pick peppers that are firm with smooth skin.
– Choose bright colors, like red, yellow, or green.
– Avoid any with blemishes or soft spots.
– Select peppers that feel heavy for their size; they are more juicy.
– If you can, buy organic to avoid pesticides.Enjoy cooking!
Step-by-Step Instructions
Prepping the Bell Peppers
First, you need to prepare your bell peppers. Choose four large peppers in colors you love. Cut off the tops carefully. Use a spoon to remove the seeds and membranes from inside. This step is key for a tasty bite. Lightly brush the outside with olive oil. This helps them cook well and adds flavor. Place the peppers upright in a baking dish.
Cooking the Filling
Next, we’ll cook the filling. Heat two tablespoons of olive oil in a large skillet over medium heat. Add finely chopped onion. Sauté them until they turn soft and clear. This should take about three to four minutes. Then, stir in your cooked quinoa, black beans, corn, and diced tomatoes. Add ground cumin, smoked paprika, and garlic powder for flavor. Mix it all well and cook for about three to five minutes. Taste the filling and add salt and pepper as needed.
Assembling and Baking the Stuffed Peppers
With the filling ready, it’s time to assemble. Take the skillet off the heat. Spoon the filling into each pepper, packing it gently. Don’t forget to leave some space for more cheese! Top each pepper with the remaining shredded cheese. Cover the dish with foil and put it in your preheated oven at 375°F. Bake for 25 minutes. After this, remove the foil and bake for another 10 minutes. This will melt the cheese and make it bubbly. Once done, let them cool for a few minutes. If you like, sprinkle fresh cilantro on top right before serving. This adds a nice touch.
Tips & Tricks
How to Avoid Common Mistakes
When making cheesy stuffed bell peppers, keep these tips in mind to avoid common errors:
– Pick the right peppers: Choose large, firm bell peppers. Avoid soft or wrinkled ones.
– Don’t overcook the filling: Heat it just until warm. Overcooking can make it mushy.
– Pack the filling gently: Fill each pepper without squishing the ingredients too much.
– Cover while baking: Use foil for the first part of baking. This keeps the peppers moist.
Best Cheese Options for Flavor
Cheese adds a rich taste to your stuffed peppers. Here are my top picks:
– Cheddar: Sharp and tangy, it melts well and adds a nice flavor.
– Mozzarella: Mild and stretchy, it creates a lovely cheesy texture.
– Monterey Jack: Creamy and smooth, it blends nicely with other flavors.
– Feta: For a twist, try feta. It adds a salty zing that brightens the dish.
Serving Suggestions for a Complete Meal
To round out your meal, serve your stuffed peppers with these ideas:
– Side salad: A fresh green salad pairs perfectly with the cheesy flavors.
– Rice or quinoa: Serve extra grains on the side for a filling plate.
– Salsa or guacamole: Adds a fresh kick and complements the peppers well.
– Cornbread: A slice of cornbread brings a sweet touch to your meal.
Variations
Vegetarian vs. Meat-Filled Options
You can make cheesy stuffed bell peppers in many ways. If you want a vegetarian dish, stick with the recipe. The black beans and quinoa provide great protein. If you prefer meat, ground beef or turkey is a tasty addition. Brown the meat in the skillet before adding the other ingredients. This will add flavor and richness. You can also mix both options for a heartier meal.
Spice Level Adjustments
Do you like things spicy? You can easily adjust the heat in your stuffed peppers. Add diced jalapeños or crushed red pepper flakes to the filling. You can also use spicy cheese, like pepper jack, for an extra kick. If you prefer mild flavors, skip the spicy ingredients. Tasting the filling before baking helps you find the right balance.
Alternative Grains and Beans
Quinoa is a great base, but you can swap it out. Try rice, couscous, or even farro if you want. Each grain brings its own flavor and texture. When it comes to beans, black beans are popular, but feel free to experiment. Pinto beans or kidney beans work well too. Mixing different grains and beans can make each batch unique and exciting.
Storage Info
How to Store Leftovers Properly
Store your cheesy stuffed bell peppers in an airtight container. Let them cool first. Place parchment paper between layers if you stack them. This keeps them fresh for up to three days in the fridge. If you want to save space, slice them in half.
Freezing Instructions for Future Meals
To freeze, wrap each stuffed pepper in plastic wrap. Then place them in a freezer-safe bag. They can last in the freezer for up to three months. When you are ready to eat, just thaw them overnight in the fridge before cooking.
Reheating Tips for Perfect Texture
Reheat your peppers in the oven for the best taste. Preheat the oven to 350°F (175°C). Place the peppers in a baking dish and cover with foil. Heat for about 20 minutes, or until warm. For a crispy top, remove the foil for the last five minutes. Enjoy them just like you did the first time!
FAQs
Can I make Cheesy Stuffed Bell Peppers ahead of time?
Yes, you can prepare Cheesy Stuffed Bell Peppers ahead of time. Make the filling and stuff the peppers. Then, cover them and keep them in the fridge for up to 24 hours. When ready to cook, just bake them as directed. This method saves time and makes a great weeknight meal.
How can I make this recipe gluten-free?
To make Cheesy Stuffed Bell Peppers gluten-free, choose gluten-free grains. Use quinoa or rice, as both are safe options. Check your canned beans and tomatoes for gluten-free labeling. Avoid any sauces or spices that may contain gluten. This way, everyone can enjoy these tasty peppers.
What are the ideal cooking times for different oven types?
For conventional ovens, bake the stuffed peppers at 375°F (190°C) for about 35 minutes. If you use a convection oven, reduce the temperature to 350°F (175°C) and check them at 30 minutes. Always check if the cheese is melted and bubbly. For toaster ovens, keep an eye on them, as cooking times may vary.
Stuffed bell peppers are easy to make and delicious. We covered essential and optional ingredients, plus tips for picking the best peppers. You learned how to prepare the filling, assemble, and bake them right. We shared ways to avoid common mistakes, the best cheeses to use, and serving ideas.
Variations like vegetarian and spicy options add fun to your meals. Lastly, proper storage and reheating tips will keep leftovers fresh. With all these ideas, you can create tasty stuffed peppers for any meal. Enjoy cooking!

