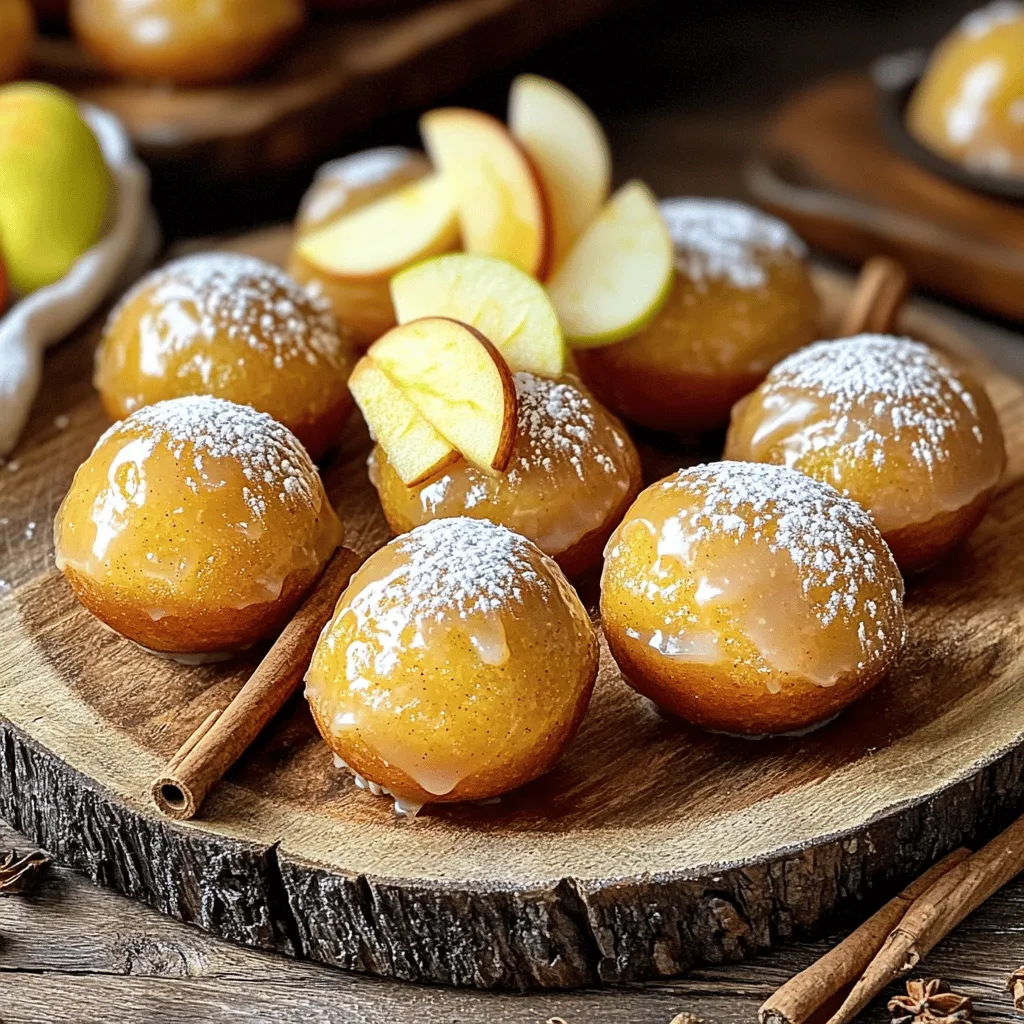
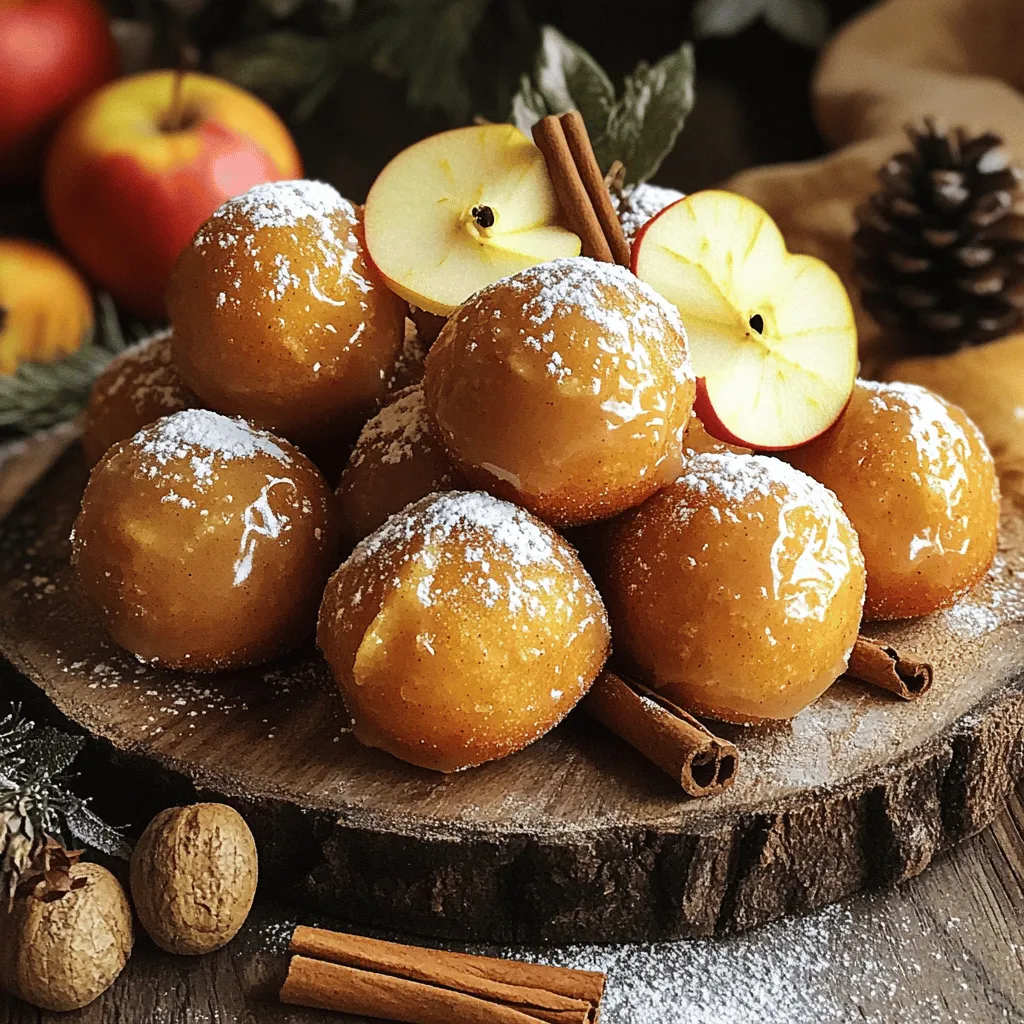
Fall is here, and there’s no better way to celebrate than with delicious Apple Cider Glazed Donut Holes! These sweet treats are packed with the warm flavors of cinnamon, nutmeg, and apple cider. Moist on the inside and perfectly glazed, they make the ideal snack for cozy gatherings or quiet autumn evenings. Ready to dive into this tasty recipe? Let’s get started and make your kitchen smell like fall!
Ingredients
Main Ingredients for Apple Cider Glazed Donut Holes
– 1 cup apple cider
– 1/2 cup granulated sugar
– 1/2 teaspoon ground cinnamon
– 1/4 teaspoon ground nutmeg
– 2 cups all-purpose flour
Apple cider forms the base of the flavor. It gives the donut holes that warm, fall taste. The sugar adds sweetness, while cinnamon and nutmeg bring spice. The all-purpose flour holds it all together, giving the donut holes their soft texture.
Additional Ingredients
– 1 tablespoon baking powder
– 1/2 teaspoon salt
– 1/4 cup unsalted butter, melted
– 1 large egg
– 1/2 cup whole milk
– 1 teaspoon vanilla extract
Baking powder helps them rise, making them fluffy. Salt enhances all the flavors. Butter adds richness, while the egg binds the mix. Whole milk keeps the batter smooth, and vanilla adds a touch of warmth.
Glaze Ingredients
– 1 cup powdered sugar
– Extra apple cider for the glaze
The powdered sugar creates a sweet coating. Mixing it with apple cider makes a smooth glaze. This glaze is the final touch, giving each donut hole a shiny, sweet finish.
Step-by-Step Instructions
Preparing the Apple Cider
To start, we must enhance the apple cider’s flavor. Pour 1 cup of apple cider into a small saucepan. Heat it over medium-high heat until it boils. This takes just a few minutes. Once boiling, turn the heat down to low. Let it simmer gently, stirring from time to time. You want the cider to reduce to about 1/4 cup. This will take around 10-15 minutes.
After it reaches the right amount, remove the pan from heat. Allow the reduced cider to cool slightly. This step is key for the best flavor in your donut holes.
Mixing the Batter
Next, it’s time to mix our batter. In a large bowl, whisk together these dry ingredients:
– 2 cups all-purpose flour
– 1 tablespoon baking powder
– 1/2 teaspoon salt
– 1/2 cup granulated sugar
– 1/2 teaspoon ground cinnamon
– 1/4 teaspoon ground nutmeg
In another bowl, mix the wet ingredients:
– 1/4 cup unsalted butter, melted
– 1 large egg
– 1/2 cup whole milk
– 1 teaspoon vanilla extract
– The cooled, reduced apple cider
Pour the wet mixture into the dry ingredients. Stir gently until just combined. It is okay to have small lumps. Overmixing will make the donut holes tough.
Frying the Donut Holes
Now, let’s get to frying. First, heat oil in a deep frying pan or pot. You need enough oil to fully cover the donut holes. Aim for a temperature of 350°F (175°C). Use a kitchen thermometer to check.
While the oil heats, shape the dough into small balls. Use a small cookie scoop or your hands. Aim for 1-inch diameter balls. Carefully drop them into the hot oil. Fry them in small batches to avoid overcrowding. Each batch should take about 2-3 minutes. They should turn golden brown as they cook. Gently turn them for even frying.
Once cooked, use a slotted spoon to transfer them to a plate lined with paper towels. This will help soak up any excess oil.
Tips & Tricks
Achieving the Perfect Texture
To get the best texture for your donut holes, you need to adjust flour and liquid. Start with the recipe’s exact amounts. If the dough feels too dry, add a little more milk. If it feels too wet, add a bit more flour. This small tweak can make a big difference!
Frying time is key, too. Aim for 2-3 minutes in hot oil. Keep an eye on the color; you want a nice golden brown. If they are browning too fast, lower the heat a bit. If they are pale, increase the heat.
Common Mistakes to Avoid
One common mistake is overcrowding the frying pan. If you add too many donut holes at once, the oil cools down. This can lead to soggy, greasy donuts. Fry in small batches for the best results.
Another mistake is not allowing the cider to reduce enough. Reducing the cider concentrates its flavor. If you skip this step, your donuts may taste bland. Let the cider simmer until it’s about 1/4 cup.
Enhancing Flavor
For a fun twist, try different spices. Besides cinnamon and nutmeg, consider adding ginger or allspice. These spices bring warmth and depth to your donut holes.
You can also add unique ingredients. Try mixing in a bit of caramel or chopped apples into the dough. This will add even more flavor and texture to your treat.
Variations
Alternative Glaze Ideas
You can switch up the glaze on these donut holes. Try a chocolate glaze for a rich twist. Just melt chocolate and mix with a bit of cream. This will coat your donut holes in a sweet chocolate layer. Another option is maple glaze. Combine maple syrup with powdered sugar for a sweet, sticky finish. Both glazes add a fun spin to the classic apple cider flavor.
Flavor Variations
Want to get creative? Add pumpkin puree to the dough for a fall touch. This gives the donut holes a soft texture and warm flavor. You can also try adding caramel to the mix. Drizzle caramel over the warm donut holes for an extra treat. Using different types of apples can change the taste too. Honeycrisp apples add a sweet crunch, while Granny Smith offers a tart kick.
Healthier Alternatives
If you want a lighter option, consider baked donut holes. They still taste great and cut down on oil. You can use whole wheat flour instead of all-purpose flour for added fiber. For those with dietary needs, substitute sugar with honey or a sugar alternative. You can also use almond milk instead of whole milk. These small changes can make your donut holes healthier without losing flavor.
Storage Info
How to Store Leftover Donut Holes
To keep your apple cider glazed donut holes fresh, store them in an airtight container. This helps maintain their moisture and flavor. Make sure they are completely cool before sealing them up. I recommend using a glass or plastic container that is easy to close tightly. Avoid stacking them too high, as this can cause them to lose their shape.
Reheating Tips
When you are ready to enjoy leftover donut holes, reheating is key. The best method is to use an oven or an air fryer. Preheat your oven to 350°F (175°C). Place the donut holes on a baking sheet and warm them for about 5-7 minutes. This method helps keep them crispy. Avoid using a microwave, as it can make them soggy.
Freezing Instructions
If you want to save some for later, freezing is a great option. First, let the donut holes cool completely. Then, place them in a single layer on a baking sheet and freeze them for about an hour. Once frozen, transfer them to a freezer-safe bag or container. They can last in the freezer for up to three months. To thaw, just leave them in the fridge overnight or let them sit at room temperature for a couple of hours.
FAQs
Can I make Apple Cider Glazed Donut Holes in advance?
Yes, you can prepare the donut holes ahead of time. I suggest frying them a day before serving. After frying, let them cool completely. Store them in an airtight container at room temperature. When you’re ready to serve, glaze them fresh. This keeps them soft and tasty.
What can I serve with these donut holes?
These donut holes pair well with several drinks and snacks. Here are some ideas:
– Coffee: A warm cup of coffee enhances the sweet flavor.
– Apple cider: Hot or cold, it adds a lovely autumn touch.
– Ice cream: Vanilla or caramel ice cream creates a nice contrast.
– Chocolate sauce: Drizzling chocolate adds a rich layer of flavor.
How do I ensure my donut holes are cooked through?
To check if your donut holes are cooked, insert a toothpick into the center. If it comes out clean, they’re ready. Fry them for 2-3 minutes until golden brown. Keep an eye on the color. If they darken too fast, lower the heat.
You now know how to make delicious apple cider glazed donut holes. We covered ingredients, steps, tips, and variations. Using the right cider and spices makes a big difference. Avoid common mistakes to ensure the best texture. I believe anyone can enjoy these treats. They’re fun to make and taste amazing. Try experimenting with different flavors or glazes for your own twist. Store them well to keep them fresh. Enjoy sharing these delightful bites with friends and family. Happy cooking!