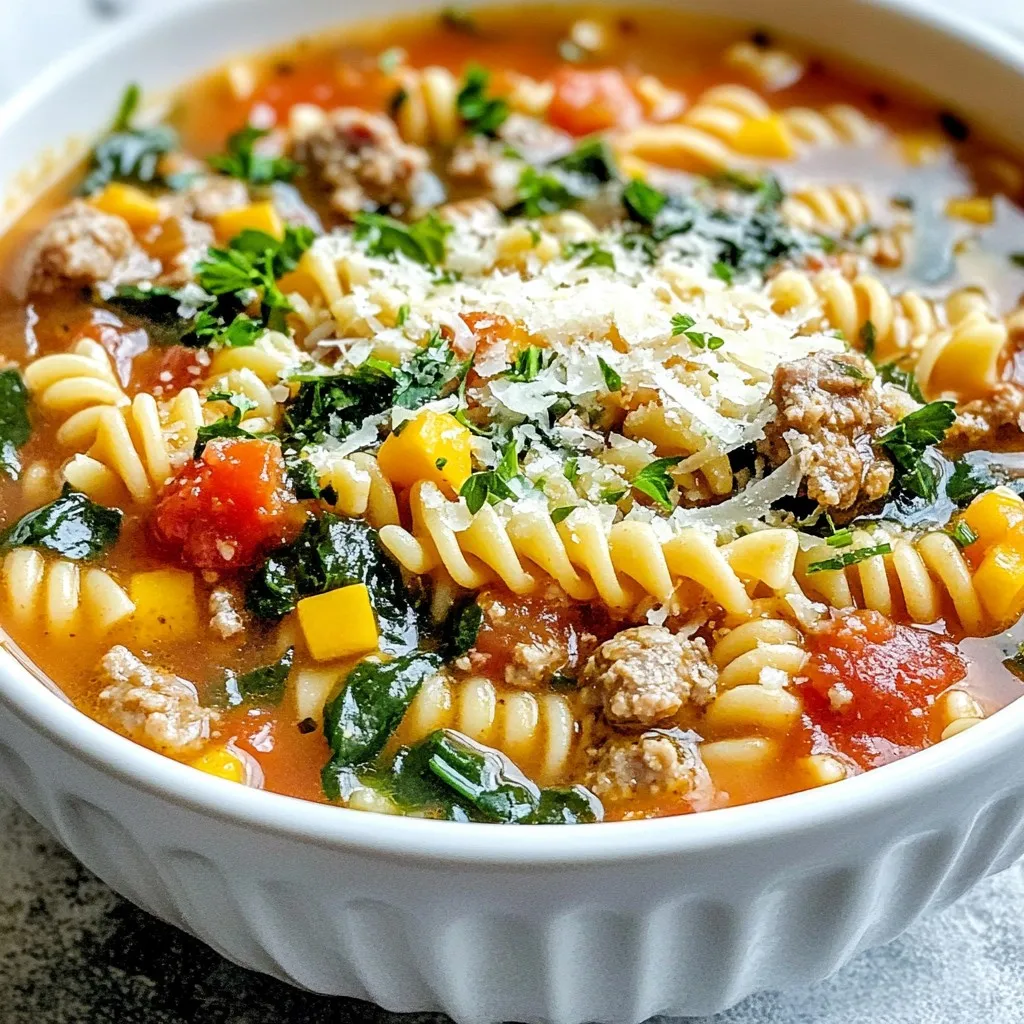
Sausage Pasta Soup Hearty and Flavorful Comfort Food
Welcome to a warm bowl of comfort with my Sausage Pasta Soup! This hearty dish combines rich Italian sausage, fresh
Welcome to a warm bowl of comfort with my Sausage Pasta Soup! This hearty dish combines rich Italian sausage, fresh

If you’re looking for a tasty dip that’s easy to make, my Creamy Roasted Red Pepper Hummus is a must-try!
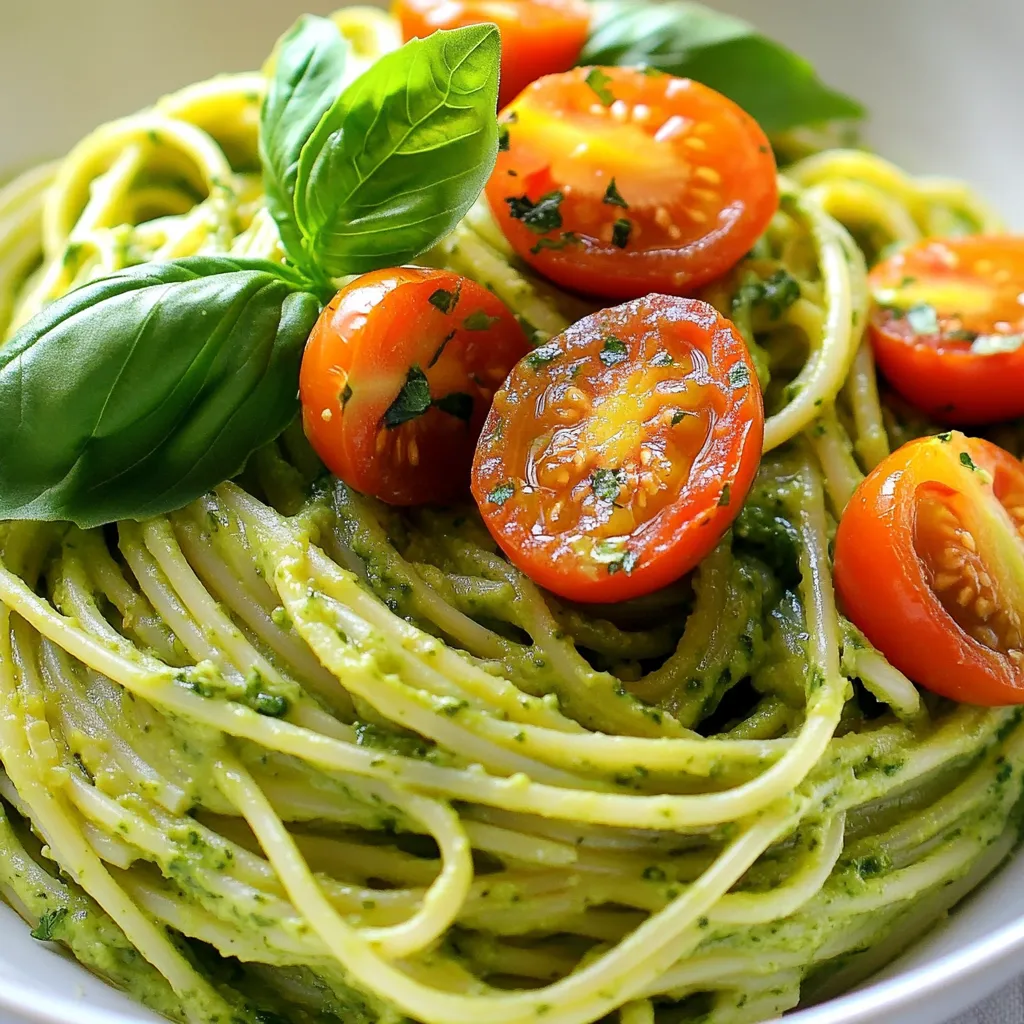
Are you ready to whip up a quick and healthy dinner? Creamy Avocado Pasta is your answer! This dish combines

Looking for a warm hug in a bowl? My Baked Potato Soup is creamy and oh-so-comforting! In this article, I’ll

Looking for a cool drink to beat the summer heat? You’ll love my Pineapple Lemonade recipe! Bursting with fresh flavors,
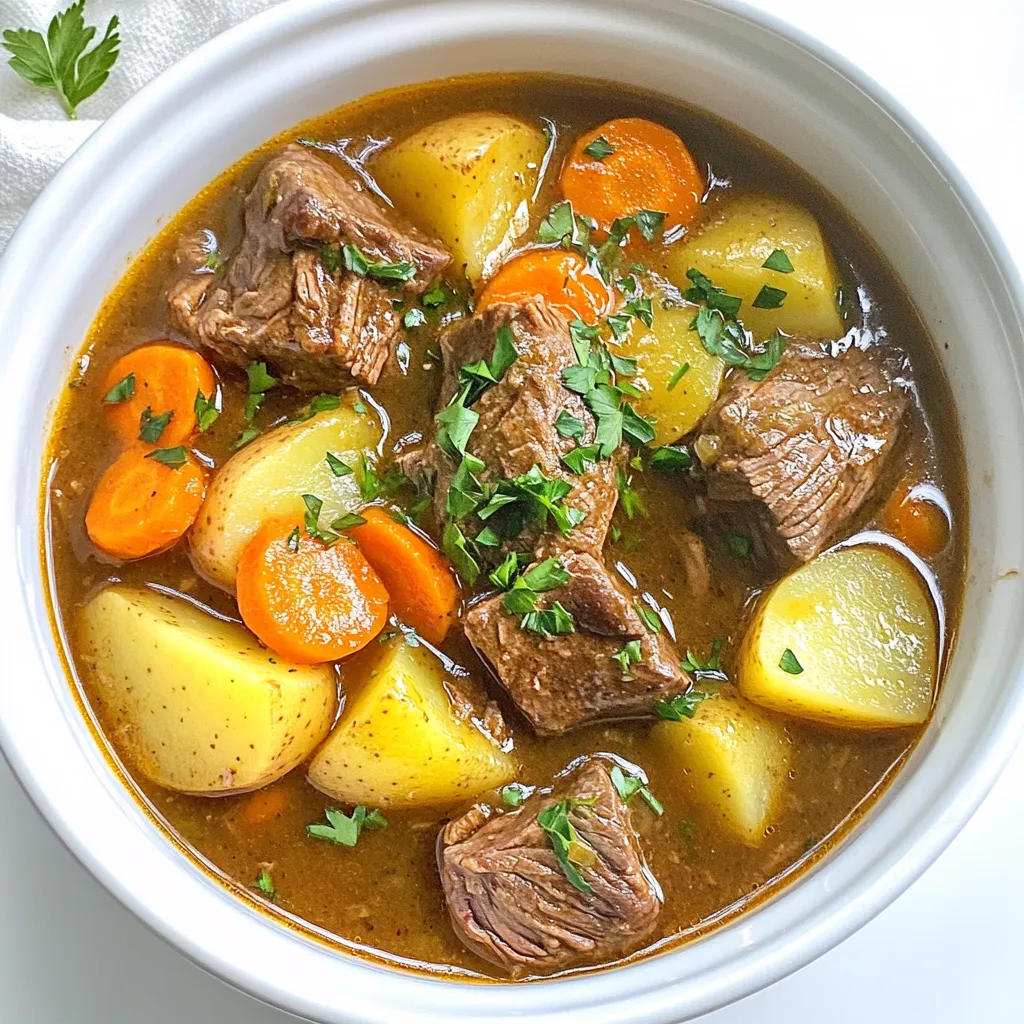
Warm up your kitchen with my Slow Cooker Rustic Beef Stew! This dish combines tender beef, fresh veggies, and rich

If you love fall flavors, you’ll adore these Pumpkin Cheesecake Brownie Bars. They combine rich chocolate brownies with creamy pumpkin

Looking for a simple yet tasty dinner idea? Brown Sugar Chicken Tenders are your answer! These sweet and savory bites
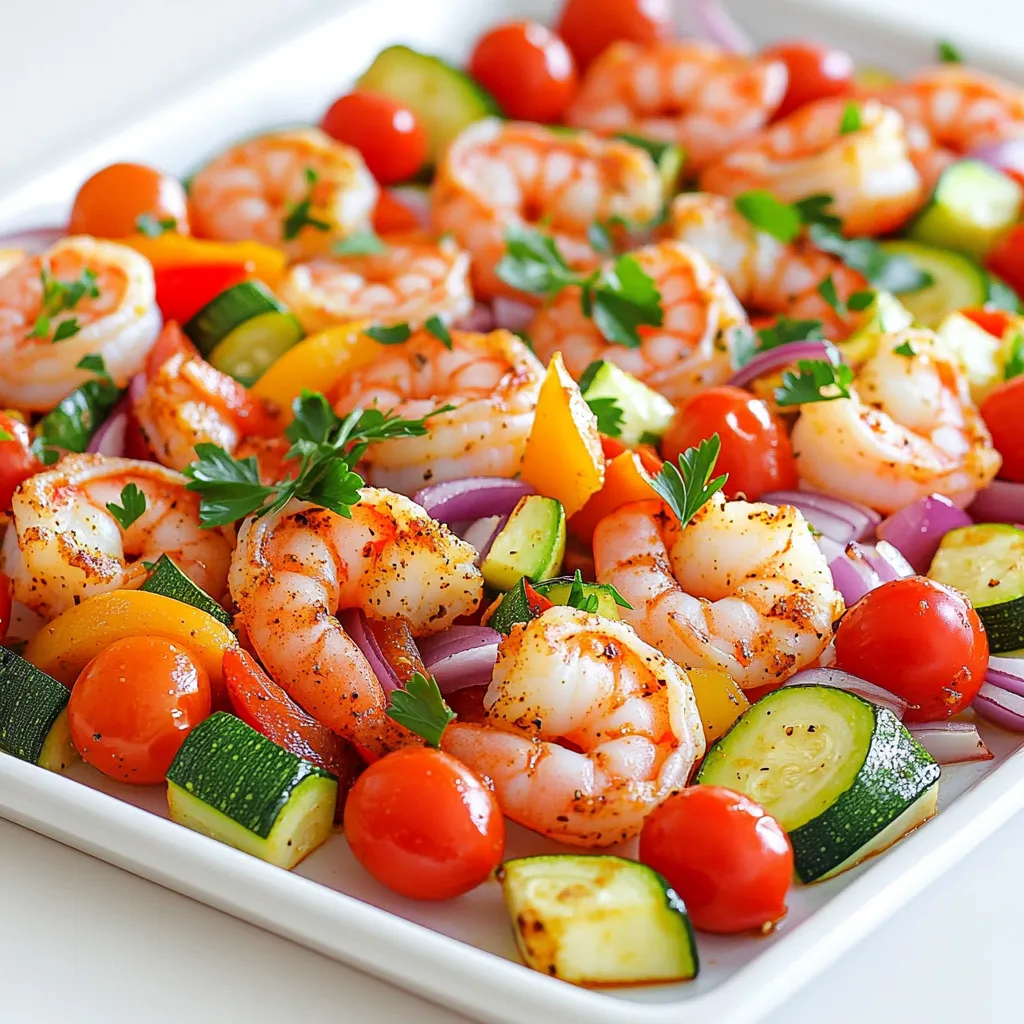
If you’re craving a simple, tasty meal that packs a punch, try my Cajun Shrimp & Veggie Sheet Pan! This
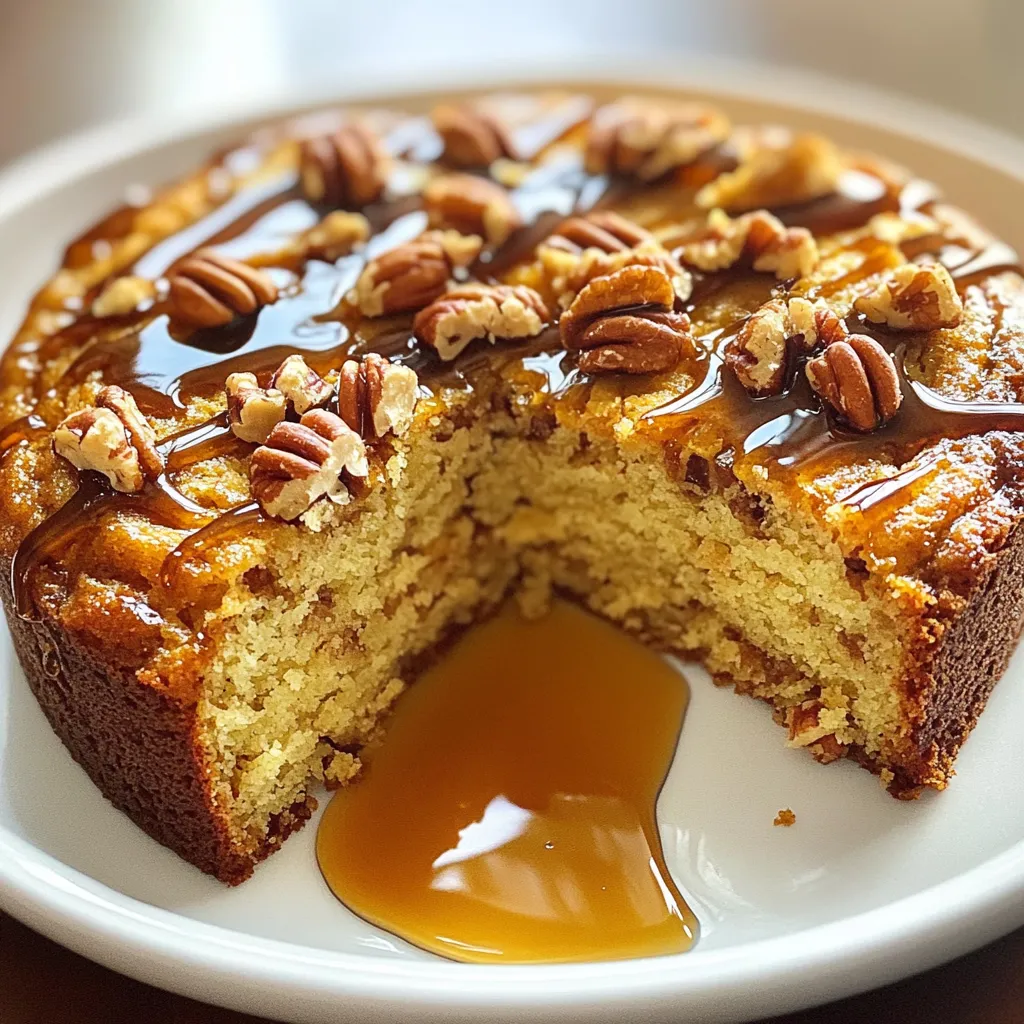
If you’re craving a sweet treat that’s both cozy and impressive, you’ve found it! This Maple Pecan Coffee Cake brings
