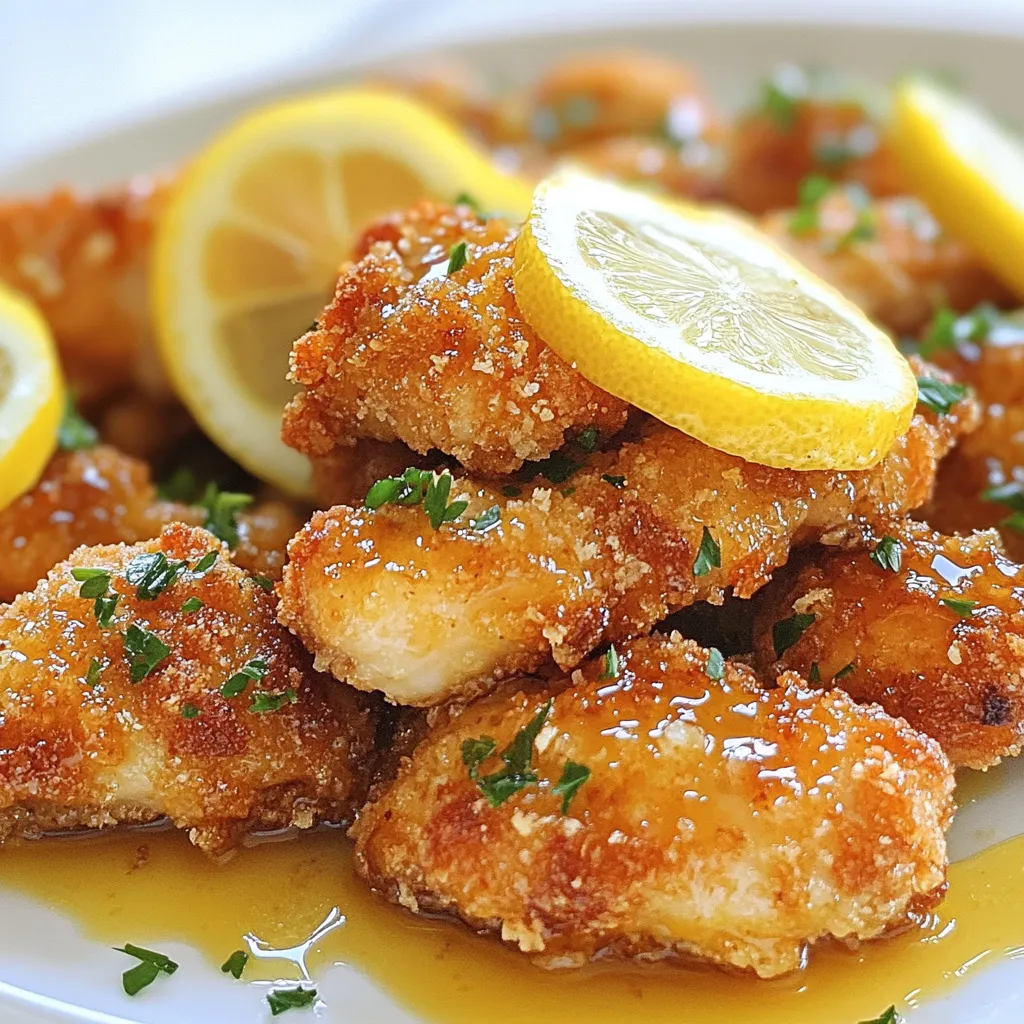
Crispy Honey Lemon Chicken Flavorful Dinner Delight
Are you ready to elevate your dinner game? This Crispy Honey Lemon Chicken brings together sweet and tangy flavors with
Are you ready to elevate your dinner game? This Crispy Honey Lemon Chicken brings together sweet and tangy flavors with
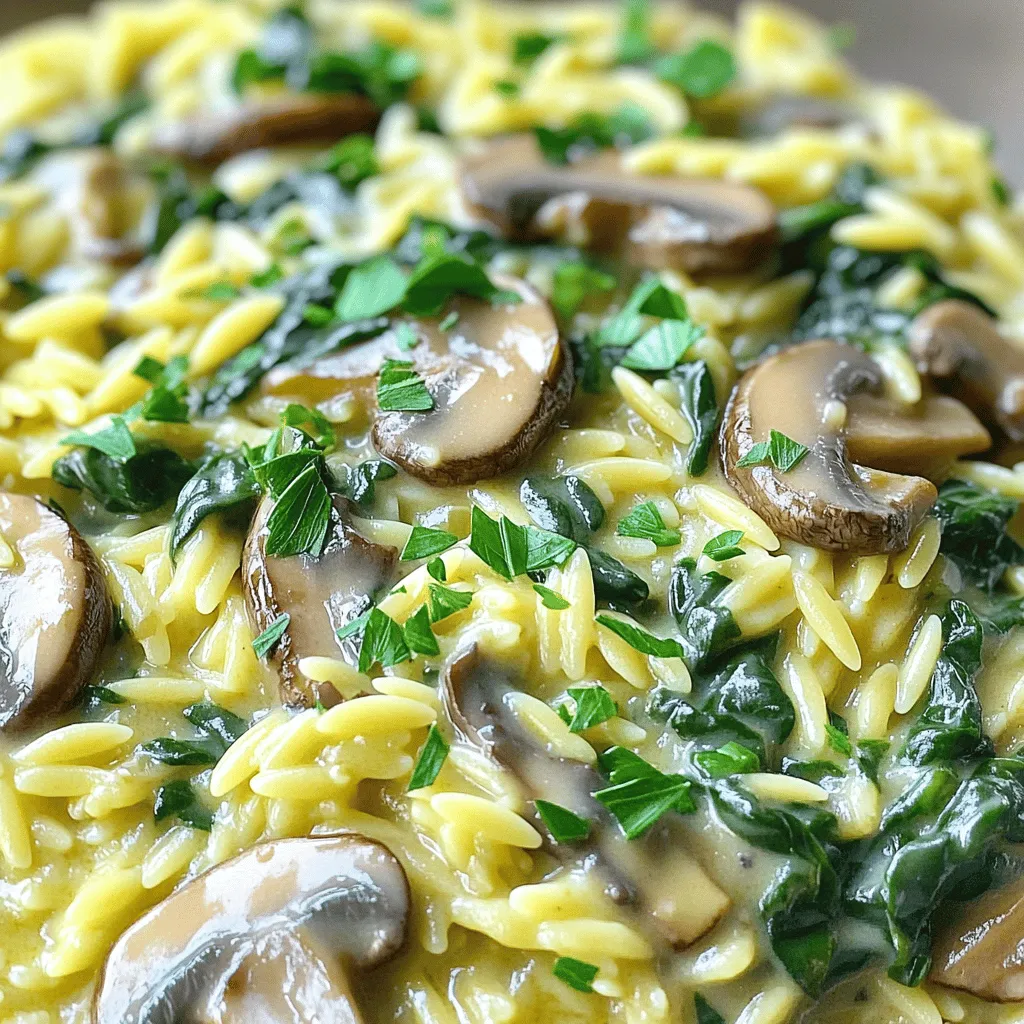
Looking for a quick, tasty dinner idea? My Creamy Mushroom Spinach Orzo is a perfect choice! This rich, creamy dish

Are you ready to elevate your dinner game with a quick and tasty dish? My Air Fryer Teriyaki Salmon Bites

Get ready to indulge in a sweet treat that’s both tart and creamy! Strawberry Lemon Cheesecake Bars are the perfect

Looking for a quick and tasty meal? This Veggie Fried Rice recipe is your answer! It’s simple, flavorful, and packed

Looking for a simple yet delicious dessert? Try this Greek Yogurt Chocolate Mousse! It combines rich dark chocolate, creamy Greek
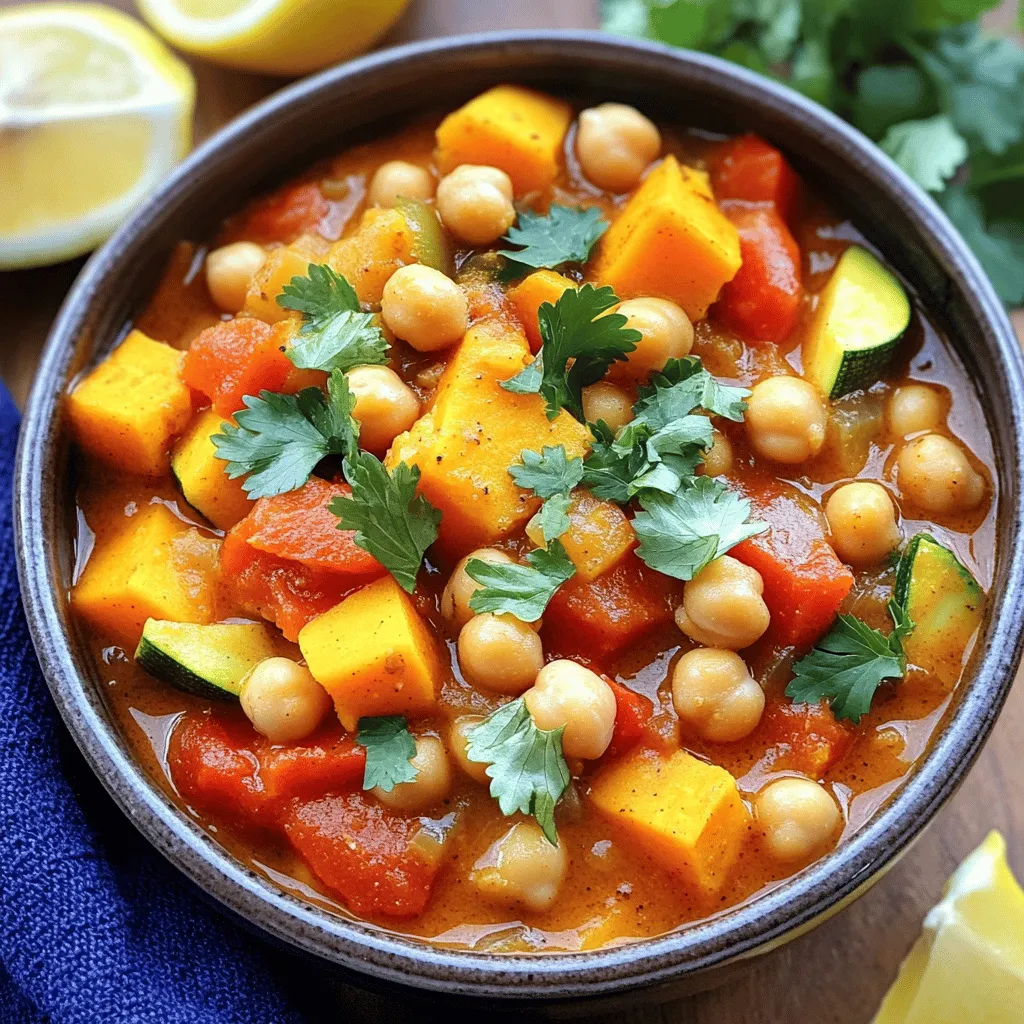
Are you ready to explore a dish that bursts with flavor and warmth? This Slow Cooker Moroccan Chickpea Stew is
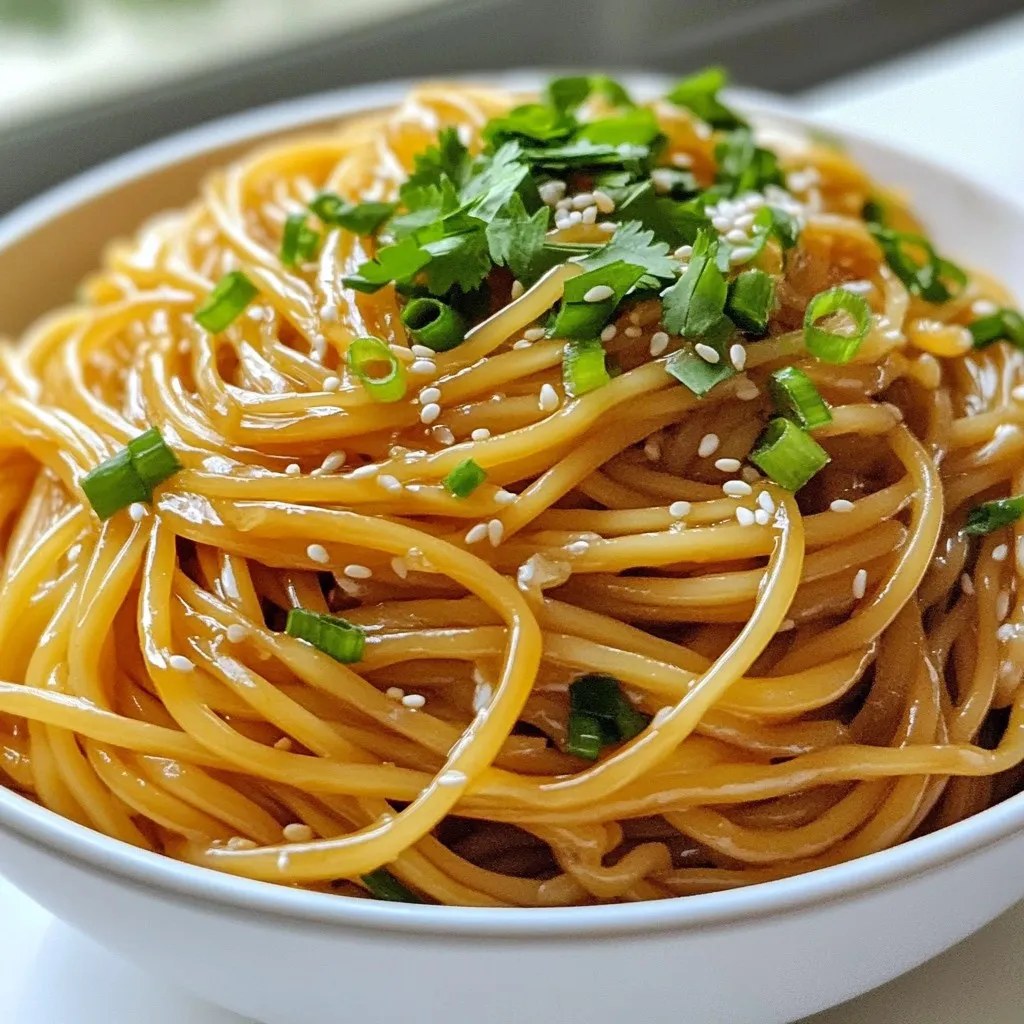
Looking for a quick and tasty meal? Try my Minute Garlic Sesame Noodles! With just a few simple ingredients, you

Warm up your kitchen and your soul with my Coconut Curry Butternut Soup! This dish is the perfect mix of

If you’re looking for a dip that’s both tasty and easy to make, this Roasted Garlic White Bean Dip is
