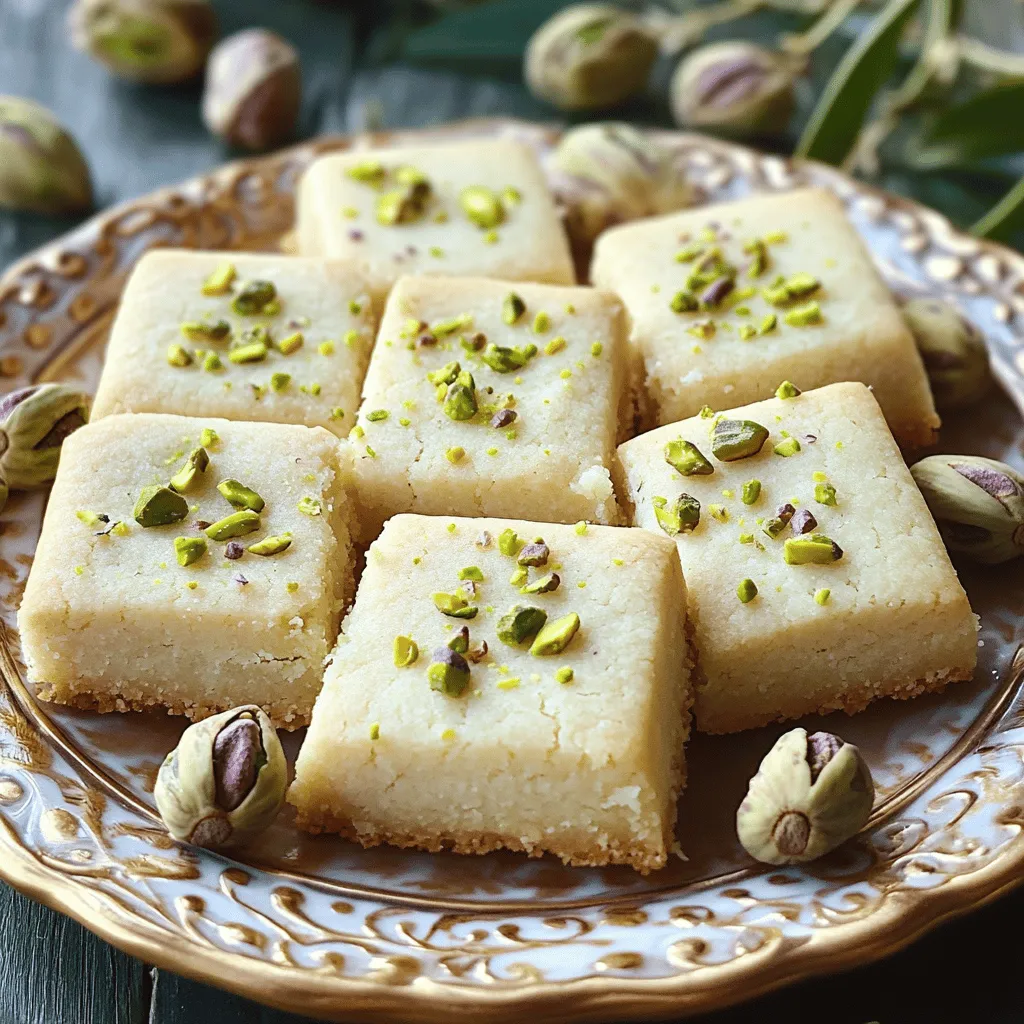
Pistachio Rosewater Shortbread Irresistible Treat
If you’re craving a sweet treat that combines exotic flavors with melt-in-your-mouth goodness, look no further! My Pistachio Rosewater Shortbread
If you’re craving a sweet treat that combines exotic flavors with melt-in-your-mouth goodness, look no further! My Pistachio Rosewater Shortbread

Are you ready to elevate your side dish game? Creamy Roasted Garlic Mashed Cauliflower Delight is a tasty twist on
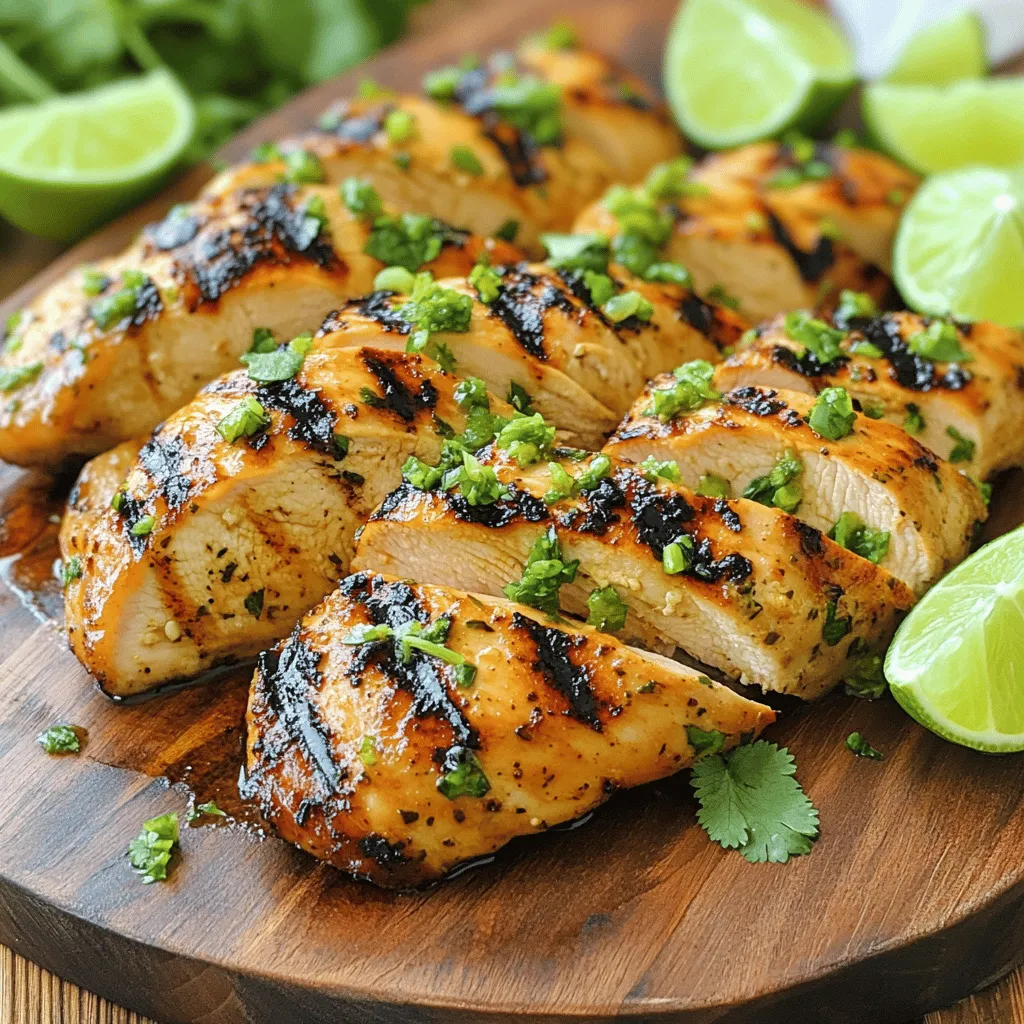
Are you ready to fire up the grill and treat yourself to a burst of flavor? My Jalapeño Lime Grilled
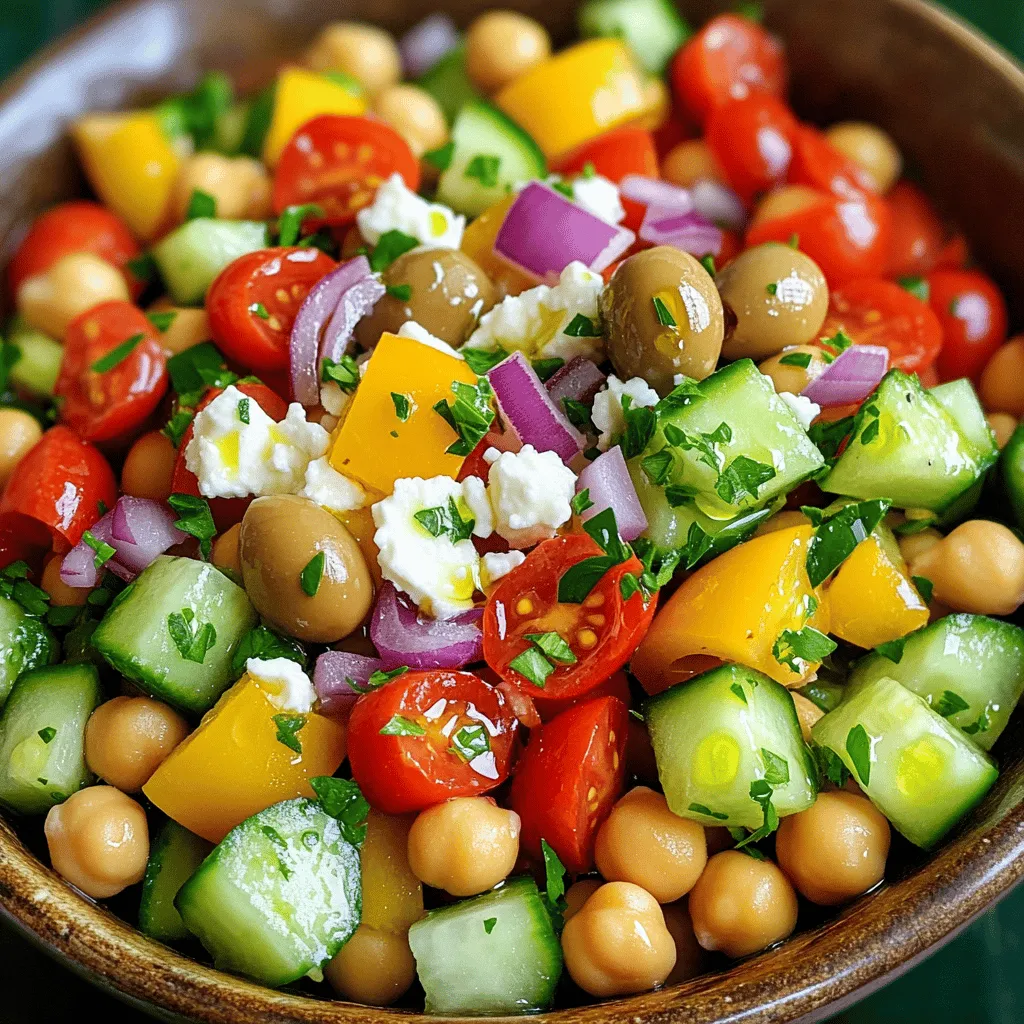
Welcome to a burst of flavor with my Mediterranean Chickpea Salad! This dish is fresh, healthy, and perfect for any

If you love bold flavors and crispy bites, chili cheese fries are a must-try! This dish combines hearty chili and
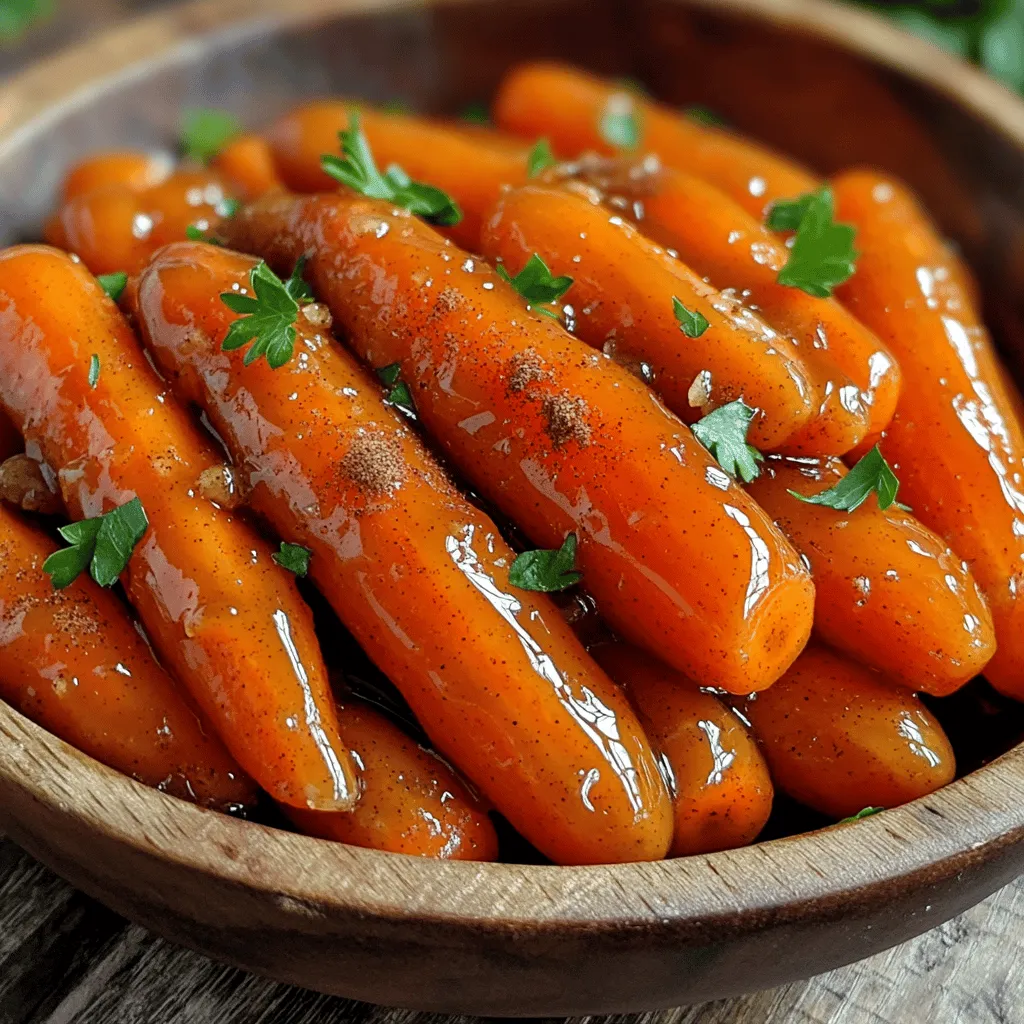
Are you ready to transform simple baby carrots into a sweet, savory delight? In this blog post, I’ll share my
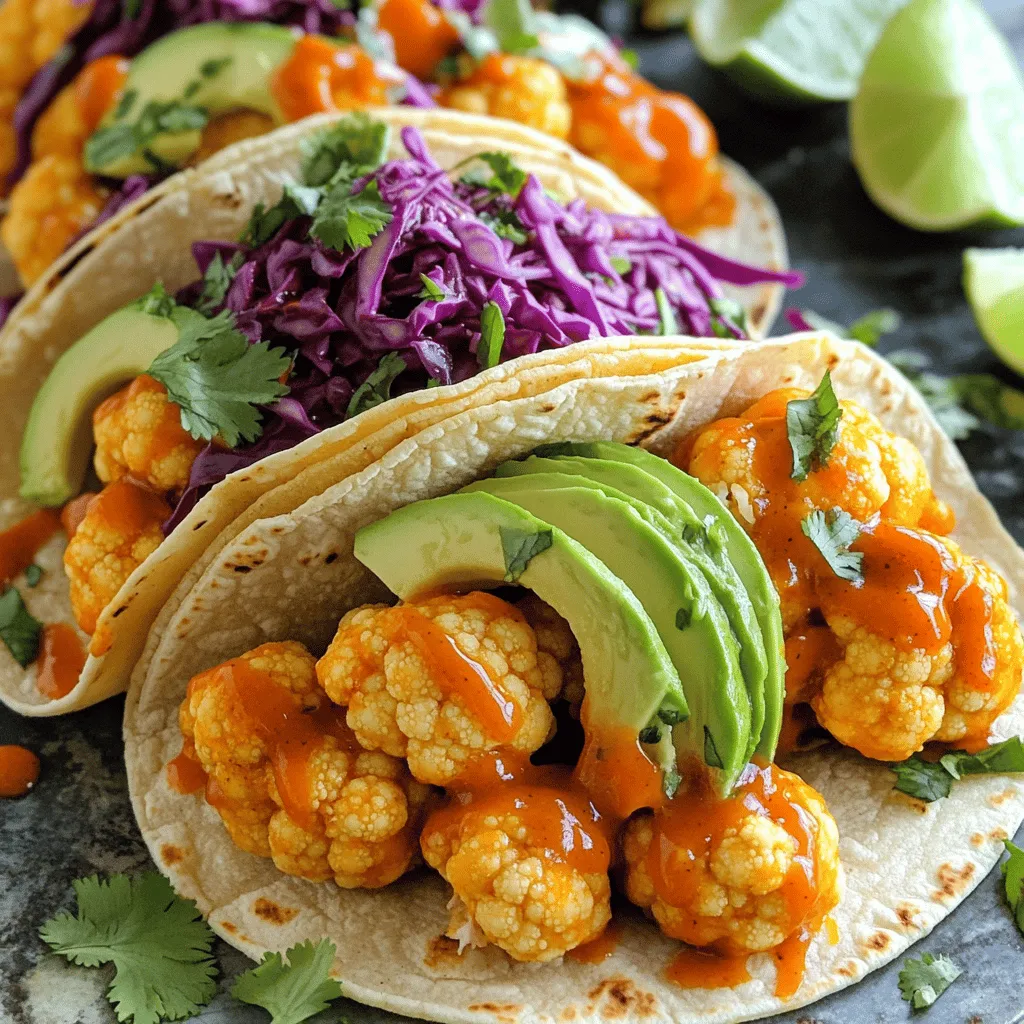
Craving a tasty twist on tacos? Try Buffalo Cauliflower Tacos! These flavorful delights are perfect for vegetarians and anyone looking

Craving a treat that’s both rich and creamy? You’re in the right spot! These Oreo Cheesecake Brownies blend soft, fudgy
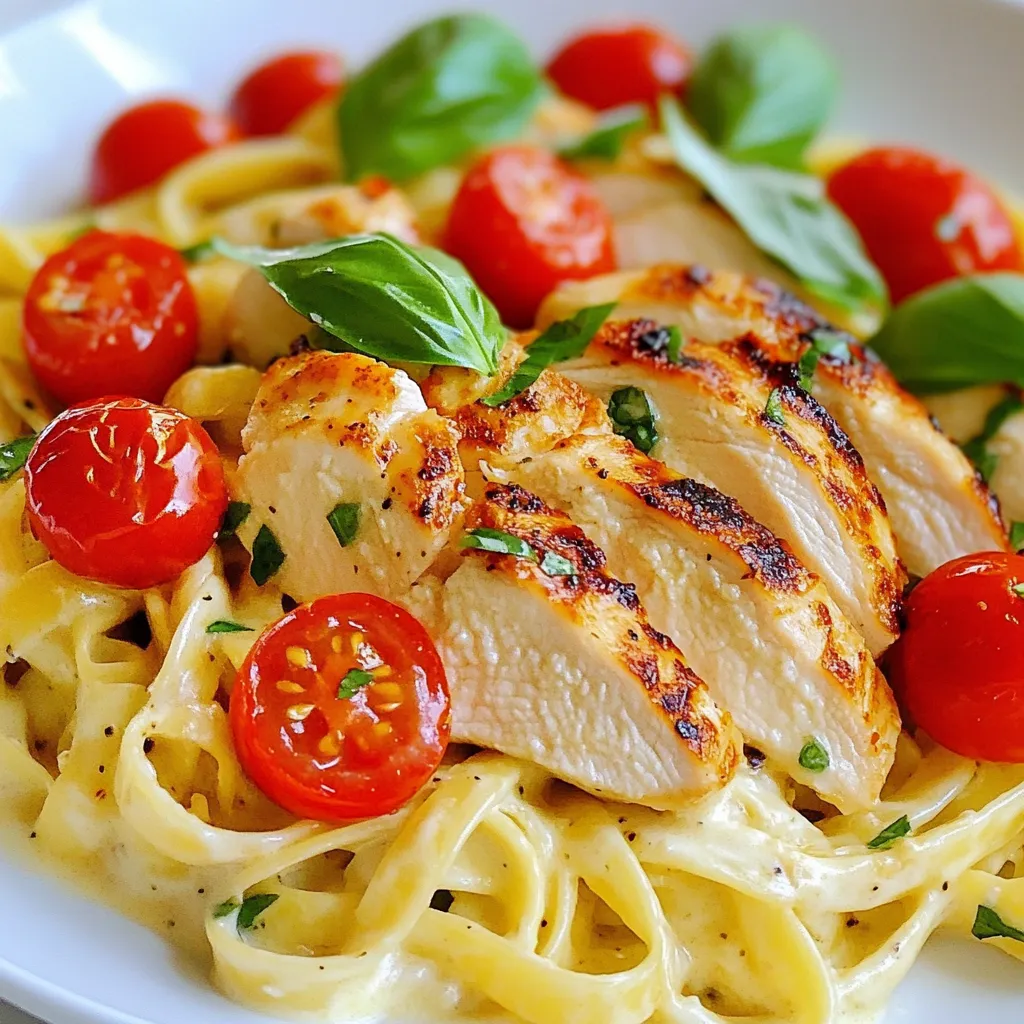
Imagine serving a meal so delicious that it might just lead to a proposal! Marry Me Chicken Pasta is that
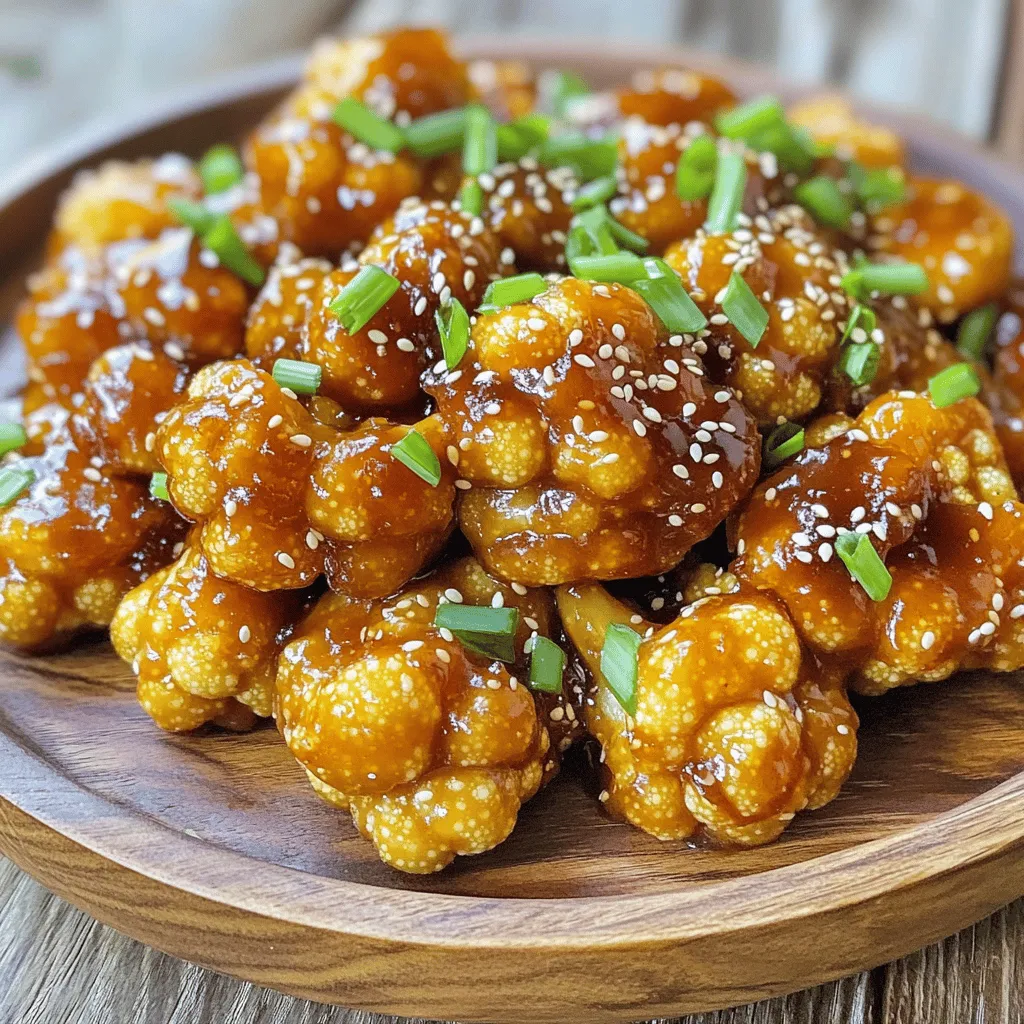
If you’re craving a dish that’s both tasty and fun to eat, look no further! My Sticky Sesame Cauliflower is
