Skip to content
DisclaimerTerms Of UseGDPR PolicyCookie Policy

tastymomrecipes

  • Home
  • Drinks
  • Appetizers
  • Dinner
  • Dessert
  • About
  • Contact
  • Privacy Policy
DisclaimerTerms Of UseGDPR PolicyCookie Policy

Olivia

- 2 large apples (preferably Granny Smith or Honeycrisp), cored and sliced - 1 cup caramel sauce (store-bought or homemade) - 8 oz cream cheese, softened - 1/4 cup powdered sugar - 1 teaspoon pure vanilla extract - 1/2 teaspoon ground cinnamon - 1/3 cup chopped nuts (walnuts or pecans) - Sea salt for garnish (optional) Caramel apple dip is a fun treat. The sweet caramel and creamy cheese mix well. To start, you need fresh apples. I prefer Granny Smith apples for their tartness or Honeycrisp for sweetness. They hold up well when dipped. Next, the dip base is all about cream cheese. You want it soft to blend easily. The powdered sugar adds sweetness. The vanilla extract brings a warm flavor. Ground cinnamon adds a cozy touch. This mix is the heart of your dip. Then, we add caramel sauce. You can buy it or make your own. If you make your own, it can taste even better. Stir the caramel into the cream cheese mix. Make sure it’s creamy and smooth. Finally, we’ll top the dip with nuts. Chopped walnuts or pecans add crunch. A sprinkle of sea salt is optional but adds a nice contrast. This dip is not just tasty; it looks good too. Serve it in a bowl with apples around it. For the full recipe, check the instructions above. Enjoy your creamy indulgence! To start, gather your ingredients. In a medium bowl, combine the softened cream cheese, powdered sugar, pure vanilla extract, and ground cinnamon. Use an electric mixer on medium speed. Mix until you get a smooth consistency, about one to two minutes. This base is the heart of your dip. It should be creamy and rich. Next, slowly add in the caramel sauce. Reserve about a quarter cup for later. Keep mixing until everything blends well. Make sure no lumps remain in the mixture. This step is key for a silky dip. The caramel adds sweetness and a lovely texture. Now it’s time to bring it all together. Carefully transfer your cream cheese and caramel mixture into a nice serving dish. Spread it evenly for a great look. Drizzle the reserved caramel sauce on top for an added treat. Then sprinkle the chopped nuts over the caramel. This adds crunch and flavor. If you want, sprinkle a pinch of sea salt on top. This will enhance the sweet flavor. Serve immediately with apple slices for dipping. Enjoy this smooth and creamy indulgence! For the full recipe, check the details above. To make your caramel apple dip shine, use a decorative platter for serving. A beautiful display makes the dip more inviting. Place the apple slices around the dip for a stunning look. You might also want to add some extra chopped nuts on top. A light dusting of cinnamon adds an extra touch of flair. The right apples can make a big difference. I suggest using Granny Smith or Honeycrisp apples. They add a nice crispness to each bite. For the dip's texture, ensure your cream cheese is softened before mixing. This helps achieve a smooth and creamy consistency. Mix it well, so there are no lumps. This dip goes well with many snacks. Try pairing it with pretzels for a sweet and salty combo. Cookies also make a great match. If you want to explore more, other fruits work well too. Slices of pears or bananas can bring new flavors. Each option adds its own twist to your caramel apple dip experience. {{image_4}} You can make your caramel apple dip even more exciting! Try adding chocolate or peanut butter. For a chocolate twist, mix in chocolate chips or melted chocolate. This will give it a rich flavor that pairs well with apples. If you choose peanut butter, blend in creamy peanut butter for a nutty taste. Both options make the dip richer and more indulgent. You can also play with spices. Adding nutmeg or pumpkin spice can change the flavor profile. A sprinkle of nutmeg gives a warm, cozy feel. Pumpkin spice adds a festive touch, perfect for fall gatherings. These simple changes can make your dip unique and enjoyable. If you have dietary needs, you can still enjoy this dip. To make it gluten-free, use gluten-free caramel sauce and check the labels on your nuts. For a vegan option, replace cream cheese with a vegan cream cheese alternative. You can also use maple syrup instead of caramel for a sweet flavor. For health-conscious readers, consider low-sugar or sugar-free versions. Use sugar-free caramel sauce and a sugar substitute for the cream cheese mixture. This way, you can enjoy your dip without the extra sugar. Seasonal ingredients can add fun to your dip. For fall, add graham crackers for dipping. They give a nice crunch and fit the season's theme. You can also mix in chopped dried fruits like cranberries or raisins for a festive touch. Incorporating seasonal fruits can elevate the flavor. Think about adding slices of pears or figs in late summer. These fruits pair well with caramel and make the dip even more delicious. Use what’s in season to keep flavors fresh and exciting. For the full recipe, check out the Caramel Apple Delight Dip. To store leftover caramel apple dip, place it in an airtight container. Make sure to cover it well. This way, it stays fresh longer. You can keep it in the fridge for up to five days. If you see any change in color or smell, it is best to throw it out. Caramel apple dip can be frozen, but the texture may change. If you freeze it, use a freezer-safe container. It is best to consume it within three months for the best taste. When you're ready to enjoy it, thaw it in the fridge overnight. Once thawed, give it a good mix before serving. Serving temperature can change the flavor. Chilled dip is refreshing and sweet. Room temperature dip is creamy and rich. I recommend serving it at gatherings based on the season. In hot weather, chilled is nice. In cooler weather, room temperature adds warmth. Enjoy the flavors that work best for you! To make homemade caramel sauce, you need just a few ingredients. Start with: - 1 cup granulated sugar - 6 tablespoons unsalted butter - 1/2 cup heavy cream - 1 teaspoon vanilla extract - A pinch of salt 1. Heat the sugar: In a medium pot, heat the sugar over medium heat. Stir until it melts into a golden liquid. 2. Add butter: Once melted, add the butter. Stir until it completely melts and combines. 3. Mix in cream: Slowly add the heavy cream while stirring. The mixture may bubble up, so be careful! 4. Finish it off: Remove from heat and stir in vanilla and salt. Let it cool before using. Homemade caramel sauce is rich and creamy. It adds a personal touch to your caramel apple dip. Yes, you can use many fruits! Here are some great options: - Pears - Bananas - Strawberries - Pineapple - Grapes Each fruit brings a unique flavor and sweetness. They balance perfectly with the creamy caramel dip. Try mixing and matching to find your favorite! If you need a substitute for cream cheese, here are some options: - Greek yogurt for a tangy taste - Silken tofu for a dairy-free choice - Mascarpone cheese for a rich and creamy texture - Cottage cheese blended smooth for a lighter option These substitutes can fit different dietary needs. They keep the dip smooth and tasty! This blog post guides you through making a delicious caramel apple dip. We covered the key ingredients, from crisp apples to rich caramel. I provided step-by-step instructions for creating a creamy dip that impresses guests. You found tips for presentation and texture, plus exciting variations to personalize your dip. Don’t forget how to store it and keep it fresh. Enjoy this treat at your next gathering. With a little creativity, you can make each batch special!

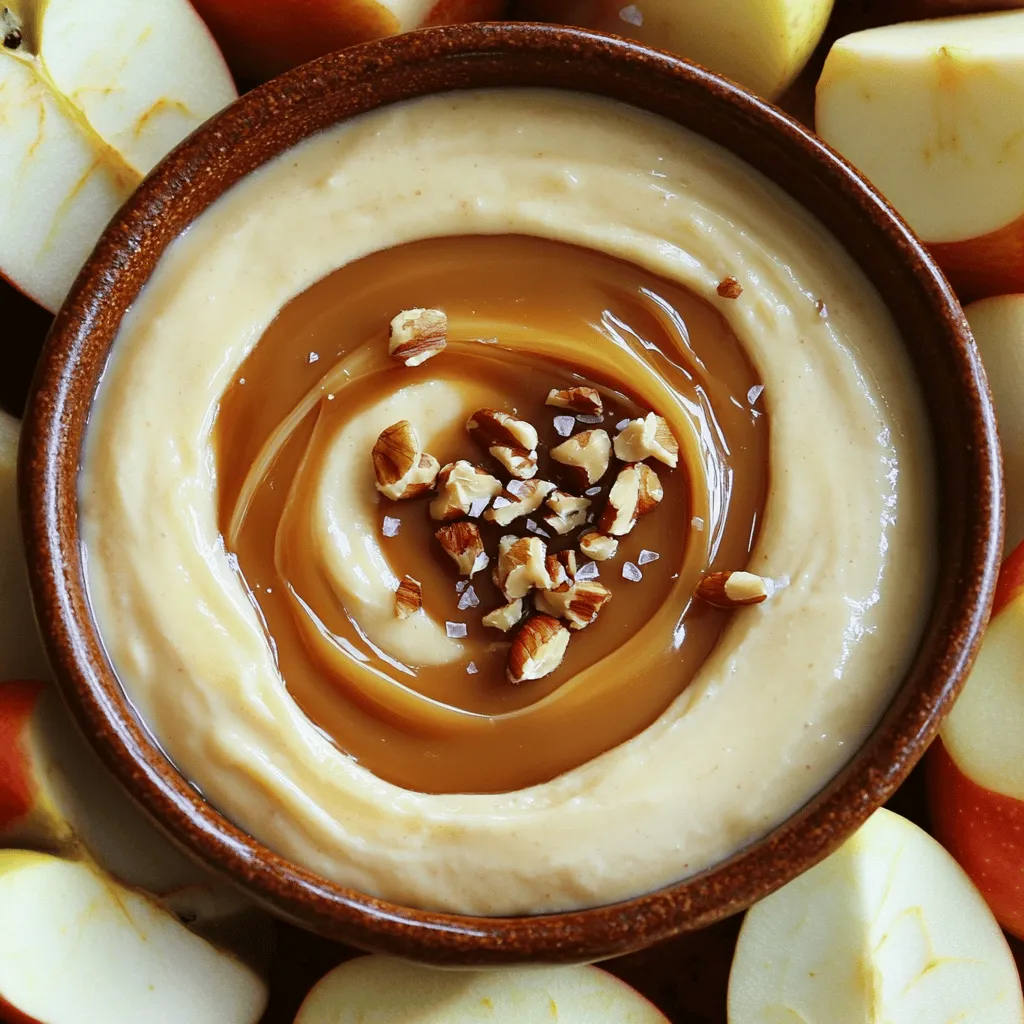
Caramel Apple Dip Smooth and Creamy Indulgence

Get ready for a treat that will make your taste buds dance! My Caramel Apple Dip is smooth, creamy, and

- 1 tablespoon extra virgin olive oil - 1 medium onion, finely diced - 2 cloves garlic, minced - 2 medium carrots, peeled and diced - 2 stalks celery, diced - 1 medium zucchini, diced - 1 cup green beans, trimmed and cut into 1-inch lengths - 1 cup kale or spinach, roughly chopped - 1 can (14 oz) diced tomatoes in juice - 4 cups vegetable broth - 1 teaspoon dried oregano - 1 teaspoon dried basil - 1 bay leaf - 1 cup canned cannellini beans, drained and rinsed - 1 cup small pasta (such as ditalini or elbow macaroni) - Salt and freshly ground black pepper to taste - Grated Parmesan cheese for serving (optional) - Fresh basil leaves for garnish (optional) This veggie loaded minestrone soup is a celebration of flavors. You can pack it with your favorite vegetables. If you want to make it heartier, add more beans or pasta. For a twist, try using different greens like chard or arugula. The great thing about this recipe is its flexibility. You can customize it based on what you have on hand. The full recipe provides a solid base, but feel free to make it your own! 1. Heat the Oil: Start by heating 1 tablespoon of extra virgin olive oil in a large pot over medium heat. Wait until the oil is hot. 2. Sauté the Aromatics: Add 1 medium onion, finely diced, and 2 cloves of minced garlic. Stir them for 3-4 minutes until the onion looks clear. 3. Add Carrots and Celery: Toss in 2 diced carrots and 2 diced celery stalks. Cook for about 5 minutes until they soften a bit. 4. Mix in Zucchini and Green Beans: Add 1 diced zucchini and 1 cup of trimmed green beans. Sauté for another 3 minutes. The zucchini should start to release some liquid. 5. Pour in Tomatoes and Broth: Next, pour in 1 can of diced tomatoes with juice and 4 cups of vegetable broth. Mix everything well. 6. Season the Soup: Sprinkle in 1 teaspoon each of dried oregano and dried basil, then add 1 bay leaf. Gently fold in 1 cup of drained cannellini beans. 7. Boil and Add Pasta: Bring the mixture to a boil. Once boiling, reduce the heat to low and add 1 cup of pasta. Cook for 8-10 minutes until the pasta is tender. 8. Add Greens: Fold in 1 cup of chopped kale or spinach. Let it simmer for an extra 2-3 minutes until the greens are bright and soft. 9. Final Touches: Remove the bay leaf. Taste the soup and add salt and black pepper to your liking. 10. Serve: Ladle the hot soup into bowls. For extra flavor, top with grated Parmesan cheese and fresh basil leaves, if you want. - Keep the heat medium to avoid burning the garlic. - Stir often to cook the veggies evenly. - Use a timer for pasta; check for the right texture. - A large, heavy-bottomed pot for even cooking. - A wooden spoon for stirring. - A sharp knife and cutting board for chopping vegetables. This step-by-step guide helps you create a delicious Veggie Loaded Minestrone Soup. For the complete details, you can check the Full Recipe. Enjoy cooking! Sautéing is key for good flavor. Start with a hot pot and olive oil. Add the onion and garlic first. Cook until they're soft. This step builds a strong base for your soup. To get the perfect pasta texture, choose small pasta shapes. Ditalini or elbow macaroni work well. Add pasta to the soup only after it boils. Cook it just until it's al dente. This means it should still have a slight bite. Herbs and spices can change your soup. Try adding fresh thyme or rosemary for a new taste. A pinch of red pepper flakes adds heat if you like spice. Using homemade broth gives better taste than store-bought. It’s richer and healthier. If you use store-bought broth, choose low-sodium options. This helps control the salt level in your soup. {{image_4}} You can easily change this soup to fit your needs. For a vegan version, skip the Parmesan cheese. Use nutritional yeast for a cheesy flavor without dairy. To make it gluten-free, swap the small pasta for rice or gluten-free pasta. You can also change up the beans. Try black beans, kidney beans, or even lentils. Each bean adds a unique taste and texture. Feel free to mix in different vegetables. Bell peppers, peas, or corn can all shine in this soup. Using what you have on hand helps reduce waste. Using fresh, seasonal vegetables makes this soup vibrant and tasty. In spring, use asparagus or peas. In summer, try fresh zucchini or tomatoes. Fall brings in squash or root veggies. Winter is perfect for hearty greens like kale or chard. If you have leftover veggies in your fridge, toss them in! Carrots, broccoli, or even a bit of cabbage can add great flavor. This soup is flexible, so feel free to experiment. For the full recipe, check out the details above. To store leftover veggie loaded minestrone soup, let it cool first. Pour the soup into a clean container. Seal it tightly with a lid. This keeps the soup fresh and prevents spills. You can keep it in the fridge for about 3 to 5 days. Make sure to label the container with the date. This helps you remember when you made it. If you want to store minestrone soup for longer, freezing is a great option. Start by letting the soup cool completely. Next, pour it into freezer-safe bags or containers. Leave some space at the top for expansion. Seal them well to avoid freezer burn. You can freeze it for up to 3 months. When you’re ready to eat it, take the soup out of the freezer. Thaw it in the fridge overnight or use the microwave. Reheat it in a pot on the stove over medium heat. Stir it well to ensure even heating. If the soup is too thick, add a little vegetable broth or water. This keeps it tasty and fresh! For more details, check out the Full Recipe. To make Veggie Loaded Minestrone Soup in a slow cooker, start by prepping your ingredients. Chop the onion, garlic, carrots, celery, zucchini, and green beans. In your slow cooker, add these veggies along with diced tomatoes, vegetable broth, and all the spices. Stir well to combine. Cover and cook on low for 6-8 hours or high for 3-4 hours. About 30 minutes before serving, add the cannellini beans and pasta. This method allows flavors to blend beautifully while you go about your day. Yes, you can easily substitute pasta with grains or quinoa. If you prefer quinoa, use about 1/2 cup, cooking it separately. Add it to the soup near the end of cooking. For grains like rice or barley, you can add them directly to the soup. Just keep in mind that cooking times may vary. Adjust your cooking time based on the grain you choose for the best texture. To reheat your Veggie Loaded Minestrone Soup, use a pot on medium heat. Pour in the soup and stir occasionally. This helps it heat evenly. If the soup seems too thick, add a splash of vegetable broth or water. You can also use the microwave; just heat it in short bursts, stirring in between. Both methods keep the flavor intact and make for a warm, tasty meal. This blog post covered all you need to know to make Veggie Loaded Minestrone Soup. We discussed the key ingredients, step-by-step cooking instructions, and useful tips for better flavor. You also learned about variations for dietary needs, storage tips, and answers to common questions. With these insights, you can now create a hearty soup that suits your tastes and needs. Enjoy experimenting and making it your own!

Veggie Loaded Minestrone Soup Flavorful and Healthy Recipe

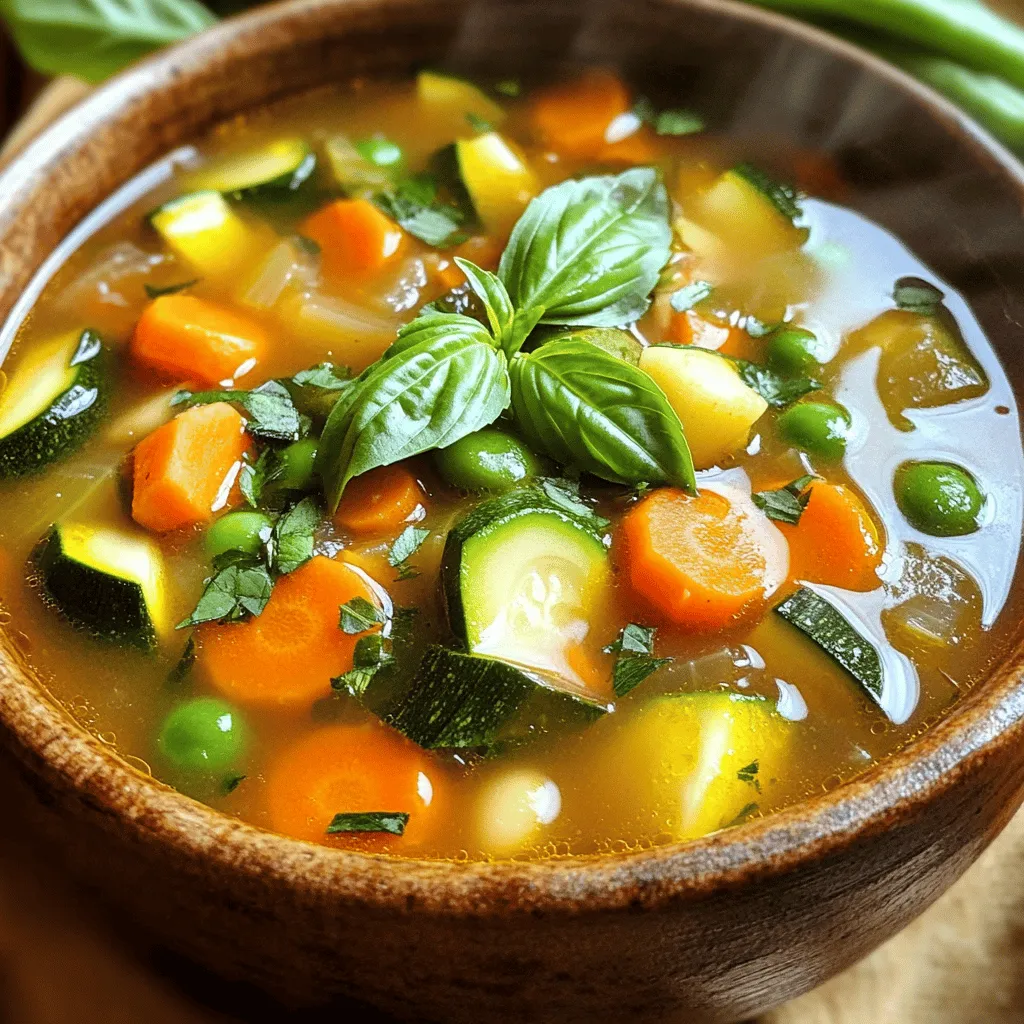
Are you ready to dive into a bowl of comfort? My Veggie Loaded Minestrone Soup is packed with vibrant flavors

- 1 lb ground beef (or ground turkey) - 1/2 cup breadcrumbs - 1/4 cup grated Parmesan cheese - 2 cloves garlic, minced - 1 tablespoon fresh ginger, grated - 1 large egg The main ingredients are key to the meatballs' flavor and texture. Ground beef gives a rich taste, while turkey offers a lighter option. Breadcrumbs add a nice texture, and Parmesan brings a savory kick. Garlic and ginger enhance the flavor, giving the meatballs a lovely aroma. The egg helps bind everything together. - 1/4 cup honey - 2 tablespoons soy sauce - 1 tablespoon sesame oil - 1 tablespoon rice vinegar The honey garlic sauce is what makes these meatballs shine. Honey adds sweetness, while soy sauce brings depth. Sesame oil adds a nutty flavor, and rice vinegar gives a slight tang. Together, they create a sauce that is both sticky and delicious. - 1/2 teaspoon ground black pepper - 1/4 teaspoon red pepper flakes (optional, for a hint of spice) - Chopped green onions, for garnish Optional ingredients can enhance your dish. Black pepper adds warmth, while red pepper flakes give a little heat. Green onions not only look great but also add a fresh taste. Feel free to adjust these to match your personal preference. For the full recipe, check out the cooking guide. To start, I take a large bowl. I add 1 pound of ground beef, or ground turkey if I want a lighter dish. Next, I mix in 1/2 cup of breadcrumbs and 1/4 cup of grated Parmesan cheese. Then, I crack in 1 large egg. I also add 2 minced garlic cloves and 2 tablespoons of soy sauce. To boost the flavor, I add 1 tablespoon of fresh ginger and 1/2 teaspoon of black pepper. If you like a bit of heat, feel free to add 1/4 teaspoon of red pepper flakes. I mix gently with my hands or a spoon. It's important not to over-mix, as this can make the meatballs tough. Next, I preheat the oven to 400°F (200°C). I line a baking sheet with parchment paper. This helps the meatballs cook evenly and makes cleanup easier. Once the oven is ready, I take small portions of the meat mixture and roll them into balls. Each ball should be about 1 inch wide. I place the meatballs on the baking sheet, leaving some space between them. While the meatballs bake for 15-20 minutes, I prepare the sauce. In a small saucepan, I combine 1/4 cup of honey, 1 tablespoon of sesame oil, and 1 tablespoon of rice vinegar. I heat this over medium heat and stir until mixed well. I make sure not to let it boil, as I want the flavors to blend nicely without burning. After baking, I carefully move the meatballs to the saucepan with the honey garlic sauce. Using a spatula, I gently toss the meatballs, making sure each one is covered in sauce. I let them simmer on low heat for 2-3 minutes. This step helps the flavors meld together beautifully. Follow these steps, and you'll create a dish that's both easy and comforting. For the full recipe, check out the earlier section! To get the best meatballs, do not over-mix your meat mixture. When you mix too much, it makes the meatballs tough. Just combine everything until it is mixed well. This keeps them soft and juicy. When baking, use parchment paper on your baking sheet. This helps prevent sticking and makes cleanup easy. Bake the meatballs evenly spaced. This way, they cook all the way through without steaming each other. Add more flavor by using fresh herbs and spices. Try adding parsley, basil, or even cilantro. Fresh ingredients bring out the best taste. You might also want to add a bit of garlic powder or onion powder for extra depth. If you want a kick, sprinkle in some crushed red pepper flakes. This adds a nice touch without being too spicy. Honey garlic meatballs pair well with rice or noodles. Both soak up the delicious sauce, making every bite tasty. You can also serve them with a fresh salad for a lighter meal. For presentation, arrange the meatballs on a big platter. Drizzle leftover sauce over the top for a glossy finish. Top with chopped green onions for a pop of color. This makes your dish look as good as it tastes! {{image_4}} You can easily swap ground beef for ground turkey or chicken. These options give a lighter taste and reduce fat. Ground turkey works well with the honey garlic sauce, keeping the dish flavorful. If you want a vegetarian or vegan option, use plant-based meat substitutes. Many brands offer great products that mimic the texture of meat. You can also make meatballs with lentils or chickpeas. Just mash them and follow the same steps as the meat version. For a spicy kick, try adding sriracha to the sauce. Just mix in a tablespoon for heat. You can also create a sweet and sour sauce by adding vinegar and brown sugar. This gives a nice twist to the dish. Feel free to experiment with different sauces. Each version can change the flavor, making the meatballs exciting every time you make them. You can cook these meatballs in a slow cooker for a hands-off approach. Just place them in the cooker with the sauce and let them simmer on low for 4-6 hours. This method makes the meatballs very tender. If you prefer stove-top cooking, heat a pan and brown the meatballs first. Then, add the sauce and let them simmer on low heat. This method gives a nice crust on the outside while keeping them juicy inside. To keep your honey garlic meatballs fresh, store them properly. Place any leftovers in an airtight container. They will last in the fridge for up to three days. Make sure to let them cool before sealing. This prevents moisture buildup, which can make them soggy. For long-term storage, you can freeze the meatballs. Use a freezer-safe bag or container. They can last up to three months in the freezer. Just remember to flatten the bag to save space. It’s best to freeze them without the sauce. This helps keep their texture nice. When it's time to enjoy your leftovers, reheating properly is key! The best method is to use the oven. Preheat it to 350°F (175°C). Place the meatballs on a baking sheet and cover them with foil. This keeps them moist. Heat for about 15-20 minutes. If you want to use the microwave, place the meatballs in a safe dish. Add a little splash of water or sauce to keep them juicy. Heat them in short intervals, about 30 seconds at a time. Stir in between to ensure even heating. Regardless of the method, check that they are warmed through. This will help keep the flavor and texture you love. Enjoy your honey garlic meatballs just as tasty as the first time! How long to cook meatballs in the oven? Cook meatballs for 15 to 20 minutes at 400°F (200°C). Check for an internal temp of 160°F (71°C) for safety. Can I make this dish ahead of time? Yes, you can prepare the meatballs and sauce in advance. Store them in the fridge for up to two days. What can I substitute for soy sauce? Try tamari or coconut aminos as soy sauce substitutes. Both options work well in the sauce. Can I use different types of meat? Absolutely! Ground turkey or chicken are great substitutes. They offer lighter flavors and work nicely with the sauce. Is there a gluten-free option for breadcrumbs? Yes, use gluten-free breadcrumbs or ground oats. Both options maintain texture without gluten. How do I know when meatballs are done? Use a meat thermometer to check. Meatballs should reach an internal temperature of 160°F (71°C) to ensure they are fully cooked. Can I bake these without parchment paper? Yes, but using parchment paper helps prevent sticking. If you don’t have it, grease the baking sheet well. This article covered how to make delicious honey garlic meatballs. We discussed main ingredients like ground beef, breadcrumbs, and honey garlic sauce. You learned step-by-step instructions for preparation, cooking, and serving. I also shared tips for texture and flavor, along with storage advice. Experiment with variations for new tastes or dietary needs. Enjoy making this easy and tasty dish again and again!

Honey Garlic Meatballs Easy Comfort Food Recipe

Looking for an easy comfort food recipe that’s packed with flavor? You’ve found it! This Honey Garlic Meatballs recipe combines

To make a tasty Loaded Baked Potato Soup, you need these key items: - 4 large russet potatoes, peeled and diced into bite-sized pieces - 1 medium onion, finely chopped - 3 cloves garlic, minced - 4 cups vegetable broth (or chicken broth if preferred) - 1 cup heavy cream or for a lighter option, use coconut cream (vegan) - 1 cup shredded sharp cheddar cheese (plus extra for serving) - 1/2 cup sour cream or Greek yogurt for added creaminess - 4 slices turkey bacon or tempeh bacon, cooked until crispy (optional) - 1 teaspoon smoked paprika for depth of flavor - Salt and freshly ground black pepper to taste - 2 green onions, chopped (for garnish) - Fresh chives, finely chopped (for garnish) To make your soup even better, consider adding these extras: - Fresh herbs like thyme or rosemary for a fresh taste - A squeeze of lemon juice for brightness - A dash of hot sauce for a spicy kick - Different types of cheese, like gouda or mozzarella, for unique flavors If you don’t have certain items, here are some swaps: - Use sweet potatoes instead of russet potatoes for a sweeter flavor. - Swap vegetable broth for chicken broth for a richer taste. - For a non-dairy option, use almond milk in place of heavy cream. - Replace sour cream with cashew cream for a vegan choice. Finding the right ingredients makes your Loaded Baked Potato Soup shine. I love using fresh, high-quality items to boost flavor and nutrition. You can find the Full Recipe to guide you through making this warm and cozy dish. Start by gathering your ingredients. You will need: - 4 large russet potatoes, peeled and diced into bite-sized pieces - 1 medium onion, finely chopped - 3 cloves garlic, minced - 4 cups vegetable broth (or chicken broth if preferred) - 1 cup heavy cream or coconut cream for a lighter option - 1 cup shredded sharp cheddar cheese (plus extra for serving) - 1/2 cup sour cream or Greek yogurt - 4 slices turkey bacon or tempeh bacon, cooked until crispy (optional) - 1 teaspoon smoked paprika - Salt and freshly ground black pepper to taste - 2 green onions, chopped (for garnish) - Fresh chives, finely chopped (for garnish) Wash and peel the potatoes. Dice them into bite-sized pieces. Chop the onion finely and mince the garlic. Set these aside for later. In a large pot, pour a splash of vegetable broth. Heat it over medium heat. Add the chopped onion and sauté for about 5 minutes. You want the onions to turn soft and translucent. Add the minced garlic next. Stir for another 1-2 minutes until the garlic smells great. Now, add the diced potatoes to the pot. Pour in the rest of the vegetable broth. Bring this mixture to a rolling boil. Lower the heat and cover the pot. Let it simmer for about 15-20 minutes. The potatoes should be tender when you pierce them with a fork. Once the potatoes are cooked, use an immersion blender to puree the soup. You want it to be smooth. If you don’t have an immersion blender, you can use a regular blender. Just be careful; let the soup cool a bit first to avoid splattering. After blending, stir in the heavy cream or coconut cream. Add the smoked paprika for a nice depth of flavor. Then, toss in the shredded cheddar cheese. Stir continuously until the cheese melts completely into the soup. If you chose to use bacon, cook it in a separate skillet until it’s crispy. Crumble it into smaller pieces and set it aside. Taste the soup, then season with salt and freshly ground black pepper to your liking. Let it simmer for a few more minutes. This helps the flavors mix well. When serving, ladle the soup into bowls. Top each bowl with a dollop of sour cream or Greek yogurt. Add extra shredded cheese, crumbled bacon, chopped green onions, and fresh chives. This adds a bright touch to your dish. Enjoy your creamy loaded baked potato soup! For the full recipe, refer to the earlier section. To make this soup creamy, start with high-quality heavy cream. If you want a lighter option, coconut cream works well too. Adding sour cream or Greek yogurt enhances the richness. Blend the soup well after cooking to create a smooth texture. This will help mix in all the creamy elements. When you sauté onions, use a splash of broth to start. This keeps them from sticking and adds flavor. Cook them on medium heat until they turn soft and clear. Add garlic to the pan only after the onions are ready. Garlic cooks fast, so stir it for just 1-2 minutes. This brings out its strong flavor without burning it. Serve this soup hot in bowls. Top each bowl with a dollop of sour cream or Greek yogurt. Sprinkle extra shredded cheese for a cheesy finish. Crumbled bacon adds a nice crunch, while green onions and chives bring freshness. You can enjoy this dish with warm bread or crackers on the side for a complete meal. For the full recipe, check out the [Full Recipe]. {{image_4}} You can add protein to your loaded baked potato soup for extra flavor and heartiness. - Bacon: Crispy bacon adds a salty crunch. Cook it until crispy, then crumble it on top before serving. - Chicken: Shredded rotisserie chicken can make the soup even more filling. Stir it in right before serving. - Tofu: For a vegetarian option, use firm tofu. Cube it and sauté it until golden. Mix it in for added protein without meat. These protein options enhance the soup’s texture and make it more satisfying. Cheese can change the soup’s flavor profile significantly. Here are some great options to consider: - Sharp Cheddar: This is a classic choice, giving a bold flavor. - Monterey Jack: It melts well and adds a creamy texture without being too sharp. - Gouda: This cheese adds a nutty, smoky flavor that pairs nicely with potatoes. Feel free to mix and match these cheeses for unique taste experiences. Making this soup vegetarian or vegan is easy. Here are some swaps to consider: - Broth: Use vegetable broth instead of chicken broth. - Cream: Replace heavy cream with coconut cream or cashew cream for a vegan version. - Bacon: Use tempeh bacon or skip it altogether. You can add smoked paprika for a similar smoky flavor. These options ensure everyone can enjoy a comforting bowl of soup. For the full recipe, check out the details above! To store leftover Loaded Baked Potato Soup, let it cool first. Then, pour it into an airtight container. Make sure to leave some space at the top, as the soup may expand when frozen. Label the container with the date for easy reference. Place it in the fridge if you plan to eat it within three days. For longer storage, use the freezer. When you're ready to enjoy the soup again, reheat it on the stove for the best flavor. Pour the soup into a pot and heat it over medium-low heat. Stir often to prevent sticking. If the soup is too thick, add a splash of broth or water to reach your desired consistency. You can also use a microwave. Heat in short intervals, stirring in between until warm. If you want to freeze your Loaded Baked Potato Soup, it’s best to do so without adding cream or cheese. This helps keep the texture nice. After cooling, pour it into freezer-safe bags, removing as much air as possible. To thaw, place the bag in the fridge overnight. Reheat it gently on the stove and stir in cream and cheese before serving. This way, every bowl tastes fresh and creamy! Yes, you can make Loaded Baked Potato Soup ahead of time. This soup stores well in the fridge. I suggest making it a day in advance. This allows the flavors to blend and deepen. Just cool the soup, then place it in an airtight container. When you're ready to eat, reheat it on low heat. Stir gently to keep it creamy. To thicken your Loaded Baked Potato Soup, you have a few great options. One easy way is to add more potatoes. Cook a few extra and mash them before adding. Another option is to use a cornstarch slurry. Mix one tablespoon of cornstarch with two tablespoons of cold water. Stir this mixture into the soup and let it simmer. It will thicken nicely! If you want a spicy kick in your Loaded Baked Potato Soup, try adding jalapeños. You can chop fresh jalapeños and sauté them with the onions. For a milder heat, use diced green chilies. Another option is to add hot sauce or red pepper flakes. Start with a small amount, then taste and add more as needed. This way, you control the heat! Loaded baked potato soup is a hearty meal made with simple ingredients. We discussed main and optional ingredients, plus substitutions for flavor. The step-by-step guide makes cooking easy and fun. I shared tips for a creamy texture and best practices for sautéing. Variations allow you to add proteins or go vegetarian. Proper storage ensures leftovers stay tasty. With these methods, you can enjoy this soup any time. Dive into your cooking, and share your delicious results!

Loaded Baked Potato Soup Creamy and Comforting Dish

Warm, cozy, and utterly delicious—loaded baked potato soup is a dish you’ll crave again and again. It’s creamy, simple to

- Shrimp and seasonings - 1 pound shrimp, peeled and deveined - 2 tablespoons olive oil - 1 tablespoon chipotle chili powder - 1 teaspoon garlic powder - 1 teaspoon ground cumin - 1 tablespoon fresh lime juice - Salt and freshly ground black pepper to taste Shrimp is the star of this dish. I prefer medium-sized shrimp for a nice bite. Chipotle chili powder adds a smoky kick. Garlic powder and cumin deepen the flavor. Lime juice brightens everything up. - Tortillas and toppings - 8 small corn or flour tortillas - 1 ripe avocado, sliced - 1 cup red cabbage, thinly sliced - 1/4 cup fresh cilantro, chopped Tortillas hold all the goodness together. Corn tortillas add a nice texture, while flour tortillas are softer. Avocado brings creaminess, and red cabbage adds crunch. Fresh cilantro gives a burst of flavor. - Optional garnishes - Lime wedges for serving Lime wedges are a must! They enhance the flavors and add zest. You can also use jalapeños or salsa for extra heat. Feel free to get creative with your garnishes! {{ingredient_image_2}} To start, we need to marinate the shrimp. In a medium bowl, mix 1 pound of peeled and deveined shrimp with 2 tablespoons of olive oil. Add 1 tablespoon of chipotle chili powder, 1 teaspoon of garlic powder, 1 teaspoon of ground cumin, and 1 tablespoon of fresh lime juice. Season with salt and black pepper to taste. Toss gently until the shrimp are well coated. Next, we will cook the shrimp in a skillet. Preheat a non-stick skillet over medium-high heat. Once it's hot, add the shrimp in a single layer. Cook for about 2-3 minutes on one side. Flip the shrimp and cook for another 2-3 minutes until they turn opaque and pink. Remove the skillet from heat when they are done. Now, let’s warm the tortillas. You can heat them in a skillet for around 30 seconds on each side. Alternatively, wrap them in a damp paper towel and microwave for 15-20 seconds. This step helps the tortillas stay flexible and tasty. For the best results, use small corn or flour tortillas. They hold the fillings well and add flavor. Warm tortillas make for easier folding and eating. It’s time to assemble your tacos! Start with a warm tortilla as your base. Place a good portion of the cooked shrimp on top. Next, add a few slices of ripe avocado for creaminess. Then sprinkle a handful of thinly sliced red cabbage for some crunch. To finish, add freshly chopped cilantro on top. A squeeze of lime juice adds a zesty kick. Serve the tacos right away on a platter, with lime wedges on the side. This makes for a bright and fresh meal that is sure to impress! To cook shrimp just right, you want them pink and firm. Shrimp cook fast, so watch them closely. Cook them for just 2-3 minutes on each side. If they curl up tightly, they are overcooked. When shrimp are cooked, they should be opaque. - Use medium-high heat for a good sear. - Do not overcrowd the pan; cook in batches if needed. Choosing the right tortilla matters. Corn tortillas are traditional, while flour tortillas are soft. Corn adds a nice crunch, while flour is chewy. You can pick based on your taste. - Warm tortillas to keep them flexible. - Heat them in a skillet for 30 seconds on each side. - You can also wrap them in a damp paper towel and microwave for 15-20 seconds. Want more heat? Add extra chipotle chili powder or some hot sauce. For a milder taste, skip the extra spice. Pair your tacos with these tasty condiments: - Sour cream for creaminess. - Guacamole for richness. - Fresh salsa for a burst of flavor. These tips will help you make your Chipotle Lime Shrimp Tacos pop with flavor! Pro Tips Freshness is Key: Always use fresh shrimp for the best flavor and texture. Frozen shrimp can be used, but ensure they are properly thawed and patted dry before cooking. Adjust the Spice Level: Feel free to modify the amount of chipotle chili powder according to your heat preference. Start with less if you're unsure, and add more gradually. Rest the Shrimp: After cooking, let the shrimp rest for a minute before assembling the tacos. This allows the juices to redistribute, enhancing flavor. Customize Your Toppings: Experiment with different toppings like diced tomatoes, jalapeños, or a drizzle of sour cream to create your perfect taco. {{image_4}} You can switch up the shrimp for other proteins. Chicken works great. Use boneless chicken thighs or breasts. Cut them into small pieces. Season and cook just like the shrimp. Fish is another tasty option. I love using firm fish like tilapia or cod. Just keep the same spice mix. For a vegetarian twist, try using mushrooms. Portobello or oyster mushrooms are best. They soak up flavors well. You can also use black beans or lentils for a protein boost. Tacos are fun because you can add many toppings. Try diced tomatoes for freshness. A sprinkle of cheese adds creaminess. Pickled onions give a nice tang. Don't forget the sauces! A drizzle of chipotle mayo adds extra heat. A squeeze of fresh lime juice brightens the flavor. You could also add a cilantro-lime dressing for a zesty kick. You can serve your shrimp tacos in new ways. Try a taco salad by adding greens and your favorite toppings. Use a bowl to hold everything together. If you're feeling creative, make quesadillas. Use the same shrimp mix and cheese inside a tortilla. Cook it until it's golden and crispy. Cut into wedges and serve with salsa. Store your shrimp tacos in an airtight container. This keeps them fresh and prevents odors. You can place the tacos in the fridge for up to three days. If you have leftover shrimp, store it separately from the tortillas and toppings. This helps keep everything crisp and tasty. To reheat shrimp, use a skillet over low heat. This method warms the shrimp without making them tough. Stir gently to avoid breaking them apart. You can also use a microwave, but be careful. Heat in short bursts to keep the shrimp juicy. For easy meals, prep ingredients in advance. Chop the cabbage and cilantro, and slice the avocado. You can store shrimp in the fridge for up to two days. If you want to freeze shrimp, use a freezer bag. Remove as much air as possible for the best results. When ready to use, thaw in the fridge overnight. For shrimp tacos, I prefer using fresh shrimp. Fresh shrimp has a sweet taste and a firm texture. However, frozen shrimp can also work well. It’s often more convenient and just as tasty. When using frozen shrimp, remember to thaw it properly. Place it in the fridge overnight or run it under cold water for a quick thaw. Yes, you can make these tacos ahead of time! Prepare the shrimp and toppings in advance. Store them separately in airtight containers. This keeps everything fresh. You can cook the shrimp a few hours before serving. Just warm them up briefly before assembling the tacos. Chipotle Lime Shrimp Tacos have a bit of heat. The chipotle chili powder adds a smoky kick. If you like less spice, reduce the amount of chipotle powder. You can also add toppings like sour cream to cool down the heat. Adjusting the spice level is easy to fit your taste! You learned how to make great shrimp tacos from start to finish. We covered the main ingredients, step-by-step cooking, and even tips for storing leftovers. You also explored tasty variations and creative serving ideas. Shrimp tacos are fun to make and enjoy. With a bit of practice, you'll create your favorite meals. Remember to try different proteins and toppings to keep things fresh. Enjoy your taco journey!

Chipotle Lime Shrimp Tacos Flavorful and Fresh Meal

If you’re craving a bright and zesty meal, look no further than my Chipotle Lime Shrimp Tacos. Bursting with fresh

- 1 cup unsalted butter, melted - 2 cups granulated sugar - 4 large eggs - 1 teaspoon pure vanilla extract - 1 cup all-purpose flour - 1 cup unsweetened cocoa powder - 1/2 teaspoon baking powder - 1/4 teaspoon fine salt - 1 cup mint chocolate chips - 1/2 teaspoon peppermint extract Gathering the right ingredients is key to making great chocolate mint brownies. Each one plays an important role in flavor and texture. Unsalted butter: This gives a rich taste. Melt it for the best mix. Granulated sugar: It sweetens the brownies and helps them rise. Large eggs: They bind everything together and add moisture. Pure vanilla extract: This adds a warm, sweet note. All-purpose flour: It gives structure to the brownies. Unsweetened cocoa powder: This makes the brownies chocolatey and rich. Baking powder: This helps them rise, making them fluffy. Fine salt: Just a little salt enhances all the flavors. Mint chocolate chips: These add bursts of minty sweetness. Peppermint extract: This boosts the mint flavor, making it refreshing. You can easily adjust this recipe to fit your needs. Gluten-free alternatives: Use almond flour or gluten-free all-purpose flour instead of regular flour. Vegan substitutes: Replace eggs with flax eggs. Mix one tablespoon of flaxseed meal with three tablespoons of water for each egg. You can also use coconut oil instead of butter. These swaps allow everyone to enjoy these chocolate mint brownies! If you want to see the full recipe, check back to the beginning. Start by preheating your oven to 350°F (175°C). This temperature gives the brownies the right texture. Next, grab a 9x13 inch baking pan. Grease it lightly with non-stick spray or line it with parchment paper. This step helps with easy removal after baking. In a large mixing bowl, pour in 1 cup of melted butter and 2 cups of granulated sugar. Mix them together until smooth. This creates a sweet base for your brownies. Now, add 4 large eggs, one at a time. Beat well after each egg. This helps the eggs blend fully. Finally, stir in 1 teaspoon of pure vanilla extract for extra flavor. In another bowl, mix 1 cup of all-purpose flour, 1 cup of unsweetened cocoa powder, 1/2 teaspoon of baking powder, and 1/4 teaspoon of fine salt. Make sure there are no lumps in this dry mix. Now, gently fold this mixture into the wet ingredients. Use a spatula to blend them together. Be careful not to overmix. This step keeps your brownies light and chewy. Pour the brownie batter into your prepared pan. Spread it evenly with a spatula. Place the pan in the oven and bake for 25 to 30 minutes. To test for doneness, insert a toothpick into the center. It should come out with a few moist crumbs but no wet batter. After baking, take the pan out of the oven. Let the brownies cool in the pan for 15 to 20 minutes. This cooling time helps them set up. Then, transfer them to a wire rack to cool completely. Once cool, cut them into squares. Enjoy these delicious Chocolate Mint Brownies with friends and family. For the full recipe, please refer to the previous sections. To get the best texture in your brownies, avoid overmixing. Mix just until combined. Overmixing can make them tough. If you prefer fudgy brownies, use less flour or add an extra egg. For cake-like brownies, use a bit more flour and bake a little longer. Using high-quality cocoa powder makes a big difference. Look for brands with rich flavor. You can adjust the mint flavor to fit your taste. Start with half the amount of peppermint extract, then add more if you want a stronger mint taste. For serving, place the brownies on a nice platter. You can cut them into squares or triangles for variety. Garnish each piece with powdered sugar and fresh mint leaves. This adds a lovely touch and makes them look fancy. Enjoy your delicious treats! {{image_4}} You can get creative with Chocolate Mint Brownies. Adding nuts like walnuts or pecans gives a nice crunch. You can also mix in different types of chocolate. Dark chocolate chips can add richness, while white chocolate can bring sweetness. If you want to swap mint for other flavors, try orange zest for a citrus twist. This brings a fresh taste that pairs well with chocolate. You can make these brownies fit different diets easily. For gluten-free Chocolate Mint Brownies, use gluten-free flour instead of all-purpose flour. This keeps the texture while making them safe for those with gluten issues. If you want vegan Chocolate Mint Brownies, replace eggs with flax eggs. To make a flax egg, just mix one tablespoon of ground flaxseed with three tablespoons of water. Let it sit for a few minutes until it thickens. Also, use plant-based butter and dairy-free chocolate chips. These swaps help everyone enjoy these tasty brownies. For the full recipe, check out the detailed instructions above! To keep your chocolate mint brownies fresh, use airtight containers. This helps lock in the moisture and flavor. You can store them at room temperature for up to three days. If you want them to last longer, put them in the fridge. Just wrap them well to avoid drying out. Chocolate mint brownies last about one week in an airtight container at room temperature. For longer storage, you can freeze them. Cut the brownies into squares first. Wrap each piece in plastic wrap. Then place them in a freezer bag. They can stay frozen for up to three months. When you are ready to enjoy them, let them thaw in the fridge overnight. You can tell the brownies are done when a toothpick comes out with a few moist crumbs. Insert the toothpick into the center of the brownies. If it comes out clean, they may be overcooked. Aim for that perfect balance of gooeyness. Yes, you can use regular chocolate chips if you prefer. You can also try dark chocolate chips for a richer taste. If you want a different flavor, consider using white chocolate chips. Just keep in mind that the mint flavor will change. Store leftover brownies in an airtight container. This keeps them fresh and moist. You can keep them at room temperature for up to four days. For longer storage, refrigerate them for up to a week. Absolutely! You can make these brownies a day or two in advance. Just store them in an airtight container. This way, they will stay fresh for your event or gathering. Yes, you can make dairy-free brownies! Substitute the unsalted butter with a dairy-free butter or coconut oil. Also, check the mint chocolate chips for dairy content. There are many dairy-free options available now. You now have all the steps to make delicious chocolate mint brownies. We covered the key ingredients and how to mix and bake them. You learned tips for the best texture and flavor. We also explored tasty variations and how to store your brownies. Remember, baking is fun and a great way to share with friends. Enjoy your brownies, and don't be afraid to experiment with flavors. Happy baking!

Chocolate Mint Brownies Decadent and Easy Recipe

Indulging in chocolate mint brownies is a treat that brings joy to every bite. In this easy recipe, I will

To make Lemon Herb Quinoa, you will need: - 1 cup quinoa, thoroughly rinsed - 2 cups vegetable broth - 1 large lemon (zested and juiced) - 1 tablespoon extra virgin olive oil - 1 small red onion, finely chopped - 2 cloves garlic, minced - 1 cup cherry tomatoes, halved - 1/2 cup fresh parsley, finely chopped - 1/4 cup fresh mint, finely chopped - Sea salt and freshly cracked pepper to taste If you don’t have quinoa, you can use rice or couscous. They offer a similar texture. Vegetable broth can be swapped with chicken broth for a different flavor. If you prefer, use lime instead of lemon. That gives a nice twist to the dish. You can also switch parsley and mint with basil or cilantro for a fresh taste. Lemon Herb Quinoa is not just tasty; it’s also healthy. Quinoa is high in protein and has all nine essential amino acids. This makes it a great choice for a healthy meal. It’s also packed with fiber, which is good for digestion. The fresh herbs add vitamins and antioxidants. Lemons are rich in vitamin C, which boosts your immune system. Overall, this dish is not only refreshing but also nourishing. You can enjoy it guilt-free! 1. Begin by boiling the vegetable broth in a medium-sized pot over medium-high heat. 2. Once it bubbles, add the rinsed quinoa. Reduce heat to low and cover. 3. Let it simmer for about 15 minutes. The quinoa will absorb the broth. 4. After 15 minutes, remove the pot from heat, keeping it covered for 5 minutes. 5. In a skillet, pour in the olive oil and heat over medium heat. 6. Add the chopped red onion to the skillet. Sauté for about 5 minutes. 7. Once the onion is soft and clear, add the minced garlic. Cook for 1-2 minutes. 8. Next, mix in the halved cherry tomatoes. Stir gently for 3-4 minutes until soft. 9. Fluff the cooked quinoa with a fork. Add it to the skillet with the veggies. 10. Squeeze the lemon juice over the mixture, and toss in the zest, parsley, and mint. 11. Stir everything well. Season with salt and pepper to taste. - Always rinse quinoa before cooking. This removes a bitter coating called saponin. - Use a ratio of 2 cups of liquid for every cup of quinoa. This ensures fluffy grains. - Avoid lifting the lid while it cooks. This traps steam and helps the quinoa cook evenly. - After cooking, let it rest. This keeps it fluffy and prevents clumping. - Start with a hot skillet. This helps the vegetables cook evenly and quickly. - Use enough oil to coat the bottom of the pan. This prevents sticking and burning. - Add onions first, as they take longer to soften than other veggies. - Stir gently but frequently. This keeps the vegetables from burning and allows even cooking. - Add garlic later, as it cooks faster and can burn easily. - Experiment with different vegetables for varied flavors. Try bell peppers or zucchini! For the full recipe, check out the [Full Recipe]. To boost the taste of your Lemon Herb Quinoa, try adding zest. Lemon zest gives a bright and fresh flavor. You can also mix in different herbs. Basil or cilantro can add a unique twist. A pinch of red pepper flakes adds heat for a fun kick. Always taste your dish as you go. This lets you find the right balance of flavors. One big mistake is not rinsing quinoa. Rinsing removes bitter saponins, making the quinoa taste better. Another mistake is overcooking. Quinoa should be fluffy, not mushy. Make sure to follow the cooking time closely. Lastly, don’t skip the seasoning. Salt and pepper help bring all the flavors together. Lemon Herb Quinoa pairs well with grilled chicken or fish. The light flavors complement each other nicely. You can also serve it with roasted veggies. A simple salad with greens works well too. For a fun twist, try it with chickpeas or beans for extra protein. If you want a fresh bite, serve with a side of tzatziki sauce. Check the Full Recipe for more ideas! {{image_4}} You can easily make this lemon herb quinoa vegan. Simply use vegetable broth as your base. This recipe is already vegetarian, so you’re all set! Add more veggies like bell peppers or zucchini for extra flavor. You can also toss in some chickpeas for protein and texture. Great news! Quinoa is naturally gluten-free. This makes it a perfect choice for those avoiding gluten. Just ensure your vegetable broth is also gluten-free. Check the labels to be safe. You can serve it with grilled chicken or fish if you want to add protein. Experimenting with herbs can change the whole dish. Try basil for a sweet twist or cilantro for a fresh kick. You can even mix in dill for a unique flavor. Each herb adds its own character, making your quinoa exciting. Don’t be afraid to get creative with what you have on hand. For the Full Recipe, check out the earlier section. Store any leftover Lemon Herb Quinoa in an airtight container. Keep it in the fridge. It will stay fresh for up to four days. Make sure to let it cool before sealing. This helps prevent moisture build-up, which can make it soggy. Reheat your quinoa in a few simple steps. You can use the microwave or a stovetop. For the microwave, place the quinoa in a bowl. Add a splash of water to keep it moist. Heat for one to two minutes. Stir halfway through. If using the stovetop, warm it in a pan over low heat. Add a little olive oil or water to help it warm evenly. Stir frequently to avoid sticking. To freeze Lemon Herb Quinoa, first let it cool completely. Portion it into freezer-safe bags or containers. Be sure to remove as much air as possible before sealing. Label the bags with the date. You can store it in the freezer for up to three months. When you are ready to use it, thaw it in the fridge overnight before reheating. This keeps the flavor fresh and tasty. For more details, check out the Full Recipe. The best way to prepare quinoa is to rinse it first. Rinsing removes bitterness. Use two cups of vegetable broth for every cup of quinoa. Bring the broth to a boil, add the quinoa, and cover. Let it simmer on low heat for about 15 minutes. After cooking, let it rest for five minutes with the lid on. This method ensures fluffy quinoa that is perfect for any dish. Yes, you can use other grains instead of quinoa. Brown rice, farro, or bulgur are great options. Each grain has a unique taste and texture. Just remember to adjust the cooking time and liquid ratio. For example, brown rice usually takes longer to cook than quinoa. Experiment with different grains to find your favorite. To increase the protein content, add beans or legumes to the dish. Chickpeas or black beans work well. Another option is to mix in nuts or seeds, like almonds or pumpkin seeds. You can also serve the quinoa with grilled chicken or fish for more protein. These additions make the meal more filling and nutritious. For a full recipe, check out the lively lemon herb quinoa. Lemon Herb Quinoa is a tasty and healthy dish. We explored key ingredients, including substitutions and their benefits. I shared step-by-step instructions for cooking it perfectly. You learned tips to enhance the flavor and avoid common mistakes. Plus, I covered variations like vegan options and herb combinations. Storing leftovers and reheating them was also discussed. In the end, this dish offers great nutrition and flexibility. Enjoy making it your own!

Lemon Herb Quinoa Fresh and Flavorful Recipe

Are you ready to enjoy a fresh and zesty dish that’s easy to make? Lemon Herb Quinoa is a simple

- 1 cup (2 sticks) unsalted butter - 1 cup light brown sugar, packed - 1/2 cup granulated sugar - 2 large eggs The main ingredients create a rich, buttery base for your blondies. The unsalted butter gives a nutty flavor when browned. The sugars add sweetness and help the blondies stay moist. Eggs bind everything together, making the texture soft and chewy. - 2 cups all-purpose flour - 1 teaspoon baking powder - 1/2 teaspoon baking soda - 1/4 teaspoon fine salt These baking essentials are key to your blondies' structure. All-purpose flour provides the backbone, while baking powder and baking soda help them rise. The salt enhances the flavors, balancing the sweetness from the sugars. - 1 cup white chocolate chips - 1/2 cup chopped nuts (such as pecans or walnuts) Add-ins elevate your blondies to the next level. White chocolate chips bring creaminess and sweetness. Nuts add a delightful crunch and extra flavor. You can mix and match based on your taste or what you have on hand. For the full recipe, be sure to check out the complete instructions above. 1. First, preheat your oven to 350°F (175°C). Grease a 9x13 inch baking pan. You can use butter or non-stick spray. For easy removal, line it with parchment paper. 2. Next, melt 1 cup of unsalted butter in a medium saucepan over medium heat. Stir the butter constantly. Keep an eye on it as it foams and turns a golden brown color. This should take about 5-7 minutes. The smell will be rich and nutty. Once it reaches that point, remove the saucepan from heat. Let it cool for a few minutes. 3. In a large mixing bowl, combine 1 cup of packed light brown sugar and 1/2 cup of granulated sugar. Pour the warm brown butter into this mixture. Whisk until the sugars blend smoothly with the butter. 4. Now it’s time to add eggs. Crack 2 large eggs into the bowl, adding them one at a time. Mix each egg in fully before adding the next. Finally, stir in 1 tablespoon of pure vanilla extract until it is evenly mixed. 5. In another bowl, whisk together 2 cups of all-purpose flour, 1 teaspoon of baking powder, 1/2 teaspoon of baking soda, and 1/4 teaspoon of fine salt. Slowly add this dry mixture to the wet ingredients. Fold them together gently until just combined. It’s okay if a few lumps remain; do not overmix. 6. Now, gently fold in 1 cup of white chocolate chips and 1/2 cup of chopped nuts, like pecans or walnuts, if you want. Make sure they are spread evenly in the batter. 7. Pour the batter into the prepared baking pan. Use a spatula to spread it out evenly across the pan. 8. Bake in your preheated oven for 20-25 minutes. The blondies are done when the edges turn golden. You can check for doneness by inserting a toothpick into the center. If it comes out with a few moist crumbs, they are ready. 9. Once baked, let the blondies cool in the pan for about 10 minutes. Then, transfer them to a wire rack to cool completely. For the full recipe, check the earlier section! To get the best texture in your blondies, you must not overmix the batter. When you mix too much, the blondies can turn out tough. Mix just until the flour disappears. It's okay to see a few lumps. Cooling time is also key. After baking, let the blondies cool in the pan for 10 minutes. Then, move them to a wire rack to cool completely. This helps them set properly and makes them easier to cut. Want to add more flavor? You can mix in a pinch of cinnamon or nutmeg. These spices add warmth and depth. You can also try almond extract instead of vanilla for a twist. These small changes can make your blondies even more special. When it's time to serve, cut the blondies into neat squares. You can serve them warm or at room temperature. For a fun touch, dust the top with powdered sugar. Pair them with a scoop of vanilla ice cream for a tasty treat. You can also serve them with fresh berries for a burst of color and flavor. Enjoy your delicious brown butter blondies! {{image_4}} For a nut-free blondie, you can leave out the nuts entirely. Instead of using chopped nuts, try adding a bit of extra chocolate. You can use more white chocolate chips or even mix in some milk chocolate chips. This keeps the blondie sweet and rich without the crunch. Want a gluten-free version? Use a gluten-free flour blend in place of all-purpose flour. This swap works well and keeps the texture soft. For a vegan version, replace the eggs with flax eggs. Mix 1 tablespoon of ground flaxseed with 2.5 tablespoons of water. Let it sit for a few minutes until it thickens. Use dairy-free butter and vegan chocolate chips for a tasty treat everyone can enjoy. Get creative with mix-ins! Swap the white chocolate chips for dark chocolate or semi-sweet chocolate. You can also add dried fruit like cranberries or blueberries for a fruity twist. If you want a fun crunch, try adding pretzel pieces or toffee bits. These add unique flavors and textures to the blondies. To keep your blondies fresh, store them in an airtight container. This will help maintain their soft and chewy texture. Place a piece of wax paper between layers if you stack them. This way, they won’t stick together. Keep the container at room temperature for two to three days. If you want them to last longer, put them in the fridge. They can stay fresh for up to a week in the fridge. Freezing blondies is easy and a great way to save some for later. First, let the blondies cool completely. Then, cut them into squares. Wrap each piece in plastic wrap. After that, place the wrapped blondies in a freezer-safe bag. Make sure to remove as much air as possible. They can last for up to three months in the freezer. To thaw, just take them out and let them sit at room temperature for an hour. You can also warm them up in the microwave for a few seconds. Understanding how long blondies can last is key. When stored in an airtight container at room temperature, they stay fresh for about three days. In the fridge, they last up to a week. If you freeze them, they can last up to three months. Just remember, the sooner you eat them, the better! For the best taste and texture, enjoy your blondies within a few days of baking. Brownies and blondies have different flavors and textures. Brownies are rich and chocolatey. They often have a fudgy texture. Blondies, on the other hand, taste like caramel and brown sugar. They are usually softer and chewier. Blondies do not have cocoa or chocolate in the batter, making their flavor unique. Yes, you can use salted butter. However, it will change the saltiness of your blondies. If you use salted butter, reduce the added salt in the recipe. This way, you keep a balanced flavor. Unsalted butter is best for precise control over saltiness. To test if your blondies are done, insert a toothpick into the center. If it comes out with a few moist crumbs, they are ready. If it has wet batter, they need more time. The edges should look golden and slightly firm. Trust your eyes and the toothpick test! You can substitute brown sugar with white sugar. However, it will change the flavor and texture. Brown sugar adds moisture and a caramel taste. Using only white sugar makes blondies less chewy and drier. For the best results, stick to brown sugar. Check out the Full Recipe for more details! In this blog post, we explored the key ingredients for delicious blondies, from butter to optional mix-ins. I provided step-by-step instructions to guide you through making the batter, baking, and checking doneness. We also covered useful tips for achieving the perfect texture, ways to enhance flavor, and creative presentation ideas. Remember, blondies can be customized to fit your diet, whether nut-free or gluten-free. With the right storage, they’ll stay fresh and tasty. Enjoy your baking adventures!

Brown Butter Blondies Irresistible Baked Delight

Are you ready to indulge in a sweet treat? Brown Butter Blondies are a game changer. These golden bars are

To make your cinnamon roll blondies, you will need: - 1 cup unsalted butter, melted - 1 cup packed brown sugar - 1/2 cup granulated sugar - 2 large eggs - 2 teaspoons vanilla extract - 2 cups all-purpose flour - 1 teaspoon baking powder - 1/2 teaspoon baking soda - 1/2 teaspoon salt - 2 teaspoons ground cinnamon - 1/2 cup chopped pecans (optional) These ingredients come together to create a rich and soft base. The melted butter gives a nice depth of flavor. The brown sugar adds moisture and sweetness. Eggs help bind everything, while the baking powder and soda give the blondies a lovely lift. To top your blondies with a sweet glaze, you will need: - 1 cup powdered sugar - 2 tablespoons milk - 1/2 teaspoon vanilla extract - 1/2 teaspoon ground cinnamon The glaze is simple yet adds a delightful finish. Powdered sugar gives it that nice sweetness. Milk helps to create a smooth texture. Vanilla and cinnamon add that classic flavor we all love. Feel free to get creative! Here are some fun ideas: - Chopped nuts like walnuts or almonds - Mini chocolate chips for a sweet twist - A sprinkle of sea salt for contrast - A dusting of extra cinnamon on top These add-ins can enhance the flavor and texture of your blondies. Don’t be afraid to mix and match! You can find more details in the [Full Recipe]. Start by preheating your oven to 350°F (175°C). Grab a 9x13-inch baking pan. Lightly grease it with butter or cooking spray. Line the bottom with parchment paper. Let some paper hang over the edges. This helps you lift the blondies out later. In a large bowl, mix 1 cup of melted butter, 1 cup of brown sugar, and 1/2 cup of granulated sugar. Use a whisk to blend until smooth. Add 2 large eggs one at a time. Mix well after each egg. Then, pour in 2 teaspoons of vanilla extract and stir until combined. In another bowl, combine 2 cups of all-purpose flour, 1 teaspoon of baking powder, 1/2 teaspoon of baking soda, 1/2 teaspoon of salt, and 2 teaspoons of ground cinnamon. Whisk these dry ingredients together. Gradually add the dry mix to the wet mix. Stir gently until combined. If you want nuts, fold in 1/2 cup of chopped pecans now. Pour the blondie batter into your prepared pan. Spread it evenly with a spatula. For the cinnamon swirl, mix 1 tablespoon of cinnamon with 3 tablespoons of brown sugar. Sprinkle this over the batter. Use a knife or skewer to swirl it gently. Don't overdo it; you want pretty marbled patterns. Now you're ready to bake! Follow the full recipe for the next steps, as your blondies will be warm and gooey. Enjoy the sweet, cinnamon aroma filling your kitchen! To get soft and chewy blondies, don’t overmix the batter. Mix just until you see no flour. This keeps the texture light. Bake until a toothpick comes out clean, but not too long. If you bake too long, they become dry. If you want less sweetness, cut back on the granulated sugar. You can also add a pinch of salt to balance flavors. For a richer taste, swap some brown sugar with maple syrup. This adds a unique twist. Serve these blondies warm, drizzled with the cinnamon glaze. They are great with a scoop of vanilla ice cream. For a fun twist, pair them with coffee or tea. You can also sprinkle extra cinnamon or chopped nuts on top for a nice touch. For the full recipe, check out the detailed instructions above! {{image_4}} You can easily change the taste of your cinnamon roll blondies. Add a pinch of nutmeg for warmth. Try mixing in some chocolate chips for a sweet twist. A splash of maple syrup gives a rich flavor. You can also use different nuts, like walnuts or almonds. Each option makes your blondies unique and fun. Want to make these blondies gluten-free? Use almond flour or a gluten-free blend instead of all-purpose flour. For a vegan version, replace the butter with coconut oil. You can use flax eggs instead of regular eggs. These swaps keep the blondies tasty and kind for everyone. Toppings can take your blondies to a new level. Try a cream cheese frosting for a creamy touch. You can sprinkle chopped fruits, like apples or bananas, on top. For a crunchy finish, add crushed graham crackers or caramel bits. Each topping adds charm and flavor, making them extra special. Check out the Full Recipe for more ideas! To keep your cinnamon roll blondies fresh, store them in an airtight container. Use parchment paper between layers to prevent sticking. Keep them at room temperature for up to three days. For longer storage, refrigerate them. This helps maintain their soft texture. If you want to enjoy them later, freezing is a great option. To reheat your blondies, preheat your oven to 350°F. Place the blondies on a baking sheet. Cover them with foil to keep them moist. Heat for about 10 minutes. You can also use the microwave. Heat them for 10-15 seconds to warm them up. Avoid overheating, or they may become dry. To freeze cinnamon roll blondies, first cool them completely. Cut them into squares. Wrap each piece tightly in plastic wrap. Then, place the wrapped blondies in a freezer bag. They can stay frozen for up to three months. When ready to eat, thaw them in the fridge overnight. Enjoy them at room temperature or reheat as desired. For the full recipe, refer to the earlier section. Cinnamon roll blondies are delicious treats that blend soft blondie dough with cinnamon swirls. They are chewy, sweet, and have a warm flavor. You can enjoy them warm or cool. The cinnamon glaze adds the perfect touch of sweetness. Yes, you can easily make these blondies without nuts. Just skip the chopped pecans in the recipe. The blondies will still taste great. You can also add other fun mix-ins, like chocolate chips or dried fruit. To keep your blondies moist, do not overbake them. Check for doneness around 25 minutes. The toothpick should come out with a few crumbs but not wet batter. Also, let them cool in the pan for at least 10 minutes before transferring them. Cinnamon roll blondies stay fresh for about 3-4 days at room temperature. Store them in an airtight container to keep them soft. If you want to keep them longer, you can freeze them. Yes, you can prepare the batter in advance. Mix the wet and dry ingredients separately, then combine them before baking. You can store the batter in the fridge for up to 24 hours. Just remember to let it come to room temperature before baking. For the full recipe, check out the [Full Recipe]. Cinnamon roll blondies are a sweet treat worth trying. We covered ingredients and how to make them. You learned tips for the best texture and flavor. I shared storage tips for lasting freshness and creative variations. Enjoy these blondies warm or iced with glaze. You can customize them to fit your taste. Make them for a fun dessert or snack. With these easy steps, you’ll impress your friends and family. Happy baking!

Cinnamon Roll Blondies Delightful and Easy Recipe

Get ready to indulge in a sweet treat that combines two favorites: cinnamon rolls and blondies! In this easy recipe,

- 2 cups crispy rice cereal - 1 cup mini marshmallows - 1/4 cup unsalted butter These main ingredients form the base of our churro marshmallow treats. The crispy rice cereal gives the treats their crunch. Mini marshmallows bring sweetness and gooeyness, while unsalted butter adds richness and helps everything stick together. - 1/2 cup granulated sugar - 1 tablespoon ground cinnamon - 1 cup churro bites (store-bought or homemade) The sugar and cinnamon create that classic churro flavor we all love. Mixing these together gives the treats a sweet and spicy coating. Churro bites bring extra flavor and texture, making each bite a delight. - 1/4 cup chocolate chips (for drizzling) - Additional cinnamon-sugar for topping If you want to take your treats up a notch, try adding chocolate chips. They add creaminess that pairs well with the cinnamon. You can also sprinkle extra cinnamon-sugar on top for more sweetness and flavor. This simple mix of ingredients makes it easy to create a fun and tasty snack. For the full recipe and detailed steps, check out the [Full Recipe]. 1. Prepare the churro coating: In a small bowl, mix granulated sugar and ground cinnamon. Stir well and set it aside. 2. Melt the butter: In a large saucepan, add unsalted butter. Heat it over medium heat until it melts. Stir often to keep it from browning. 3. Incorporate marshmallows: Once the butter is melted, add mini marshmallows to the pan. Stir for 3 to 5 minutes until smooth and creamy. 1. Mix in the cereal: Remove the pan from heat. Add crispy rice cereal and stir gently. Make sure every piece is coated well with the marshmallow mix. 2. Fold in churro bites: Carefully fold churro bites into the mixture. This step gives every bite a nice churro flavor. 3. Shape the treats: Lightly grease a 9x9 inch baking dish with non-stick spray or butter. Press the mixture firmly into the dish. Make sure it is even for nice shapes. 1. Sprinkle with cinnamon sugar: Generously sprinkle the cinnamon-sugar mixture on top of the pressed treats. This adds a sweet and spicy touch. 2. Cool and cut into squares: Let the treats cool in the dish for about 30 minutes. Once set, cut them into squares or rectangles. 3. Optional chocolate drizzle: If you want, melt chocolate chips in a bowl. Heat them in 30-second intervals, stirring until smooth. Drizzle the melted chocolate over the treats for an extra treat. Follow these steps to make your churro marshmallow treats shine. For a full recipe, check out the Full Recipe section. - Avoid overcooking the marshmallows: If you cook them too long, they can get hard. Keep stirring until they melt completely, about 3 to 5 minutes. - Ensure even coating of cereal: It’s key to mix the crispy rice cereal well. If you don’t mix enough, some pieces will miss out on that tasty marshmallow goodness. - Pair with warm chocolate sauce or caramel: This makes a great dip. The rich sauce adds a nice contrast to the sweet treats. - Presentation tips for a decorative platter: Use a colorful platter to serve. Sprinkle some cinnamon-sugar on top for a fancy touch. It makes your treats stand out! - How to prep in advance: You can make these treats a day ahead. Just store them in an airtight container to keep them fresh. - Tips for keeping treats fresh: Keep them at room temperature. If you see them getting hard, you can microwave them for a few seconds to soften them up again. For the full recipe, check out the complete details to whip up these churro marshmallow treats! {{image_4}} You can change your churro marshmallow treats to fit your taste. Here are a few ideas: - Adding nuts or dried fruits: Mix in chopped nuts like almonds or walnuts for crunch. You can also add dried fruits like raisins or cranberries for a sweet twist. These add-ins make your treats more fun and nutritious. - Using flavored churro bites: If you find churro bites with unique flavors, use them! Cinnamon sugar, chocolate, or even spicy churro bites can give your treats a fun kick. Experiment with different flavors to discover your favorite. Making your treats fit your diet is easy with a few swaps: - Gluten-free options for cereals: Look for gluten-free crispy rice cereal. Brands like Rice Chex or gluten-free alternatives work great. This way, everyone can enjoy your delicious churro marshmallow treats. - Dairy-free alternatives for butter and chocolate: Use coconut oil instead of butter. For chocolate, try dairy-free chocolate chips. These swaps keep your treats tasty while meeting dietary needs. You can create churro marshmallow treats for special occasions: - Holiday-themed churro treats: For Christmas, add red and green sprinkles. For Halloween, use orange and black colors. These festive touches make your treats more appealing for parties. - Seasonal spices for flavor enhancement: Try adding nutmeg or pumpkin spice in the fall. In the spring, use a touch of lemon zest for a fresh flavor. These seasonal spices can make your treats stand out all year long. To keep your churro marshmallow treats fresh, use an airtight container. A glass or plastic container with a tight lid works best. Store them at room temperature for the best taste and texture. If you live in a warm area, consider putting them in the fridge. Just remember, cold storage can make them a bit chewy. These treats last about a week when stored properly. You will know they are past their prime if they become hard or dry. Watch for any signs of mold or an off smell. If you see any of these, it's best to toss them out. To freeze churro marshmallow treats, follow these steps: 1. Cool Completely: Let the treats cool at room temperature. 2. Wrap: Cut the treats into squares. Wrap each piece in plastic wrap. 3. Container: Place the wrapped treats in a freezer-safe bag or container. 4. Label: Write the date on the bag for reference. For reheating, take a frozen treat and microwave it for about 10-15 seconds. This method keeps them soft and tasty. Enjoy your delicious churro marshmallow delights! For the complete recipe, check out the Full Recipe. Churro marshmallow treats are quick to prepare. The total time is about 45 minutes. You spend 15 minutes prepping the ingredients. The cooking process takes about 30 minutes. It’s a perfect treat for a busy day! Yes, you can make some swaps! For a gluten-free option, use gluten-free crispy rice cereal. If you need a dairy-free treat, try using coconut oil instead of butter. You can also use dairy-free chocolate chips for drizzling. These swaps keep your treats delicious! To reheat churro treats, use the microwave. Place them on a plate and heat for about 10-15 seconds. This warms them up without making them hard. You can also use an oven. Preheat to 350°F (175°C) and warm for about 5-7 minutes. Both methods bring back the soft texture. Absolutely! You can prepare these treats ahead of time. Make them and let them cool, then cut them into squares. Store in an airtight container at room temperature. They taste great for up to three days. If you want to keep them longer, freeze them. Just thaw before serving for a fresh taste. This blog post shared easy steps to make delicious churro marshmallow treats. We covered key ingredients, tips to avoid common mistakes, and fun variations. You can serve them with warm sauces or store them for later enjoyment. Remember, these treats are fun to customize and share. Enjoy making your churro treats and let your creativity shine!

Churro Marshmallow Treats Irresistible and Easy Recipe

If you love sweet treats, you’ll adore these Churro Marshmallow Treats! They are easy to make, delicious, and perfect for

Older posts
Newer posts
← Previous Page1 … Page15 Page16 Page17 … Page75 Next →

dsad

© 2025 tastymomrecipes • Built with GeneratePress

Our Policies

  • Copyright Policy
  • Cookie Policy
  • GDPR Policy
  • Privacy Policy
  • Disclaimer
  • Terms Of Use

More Information

  • Home
  • About
  • Contact
  • Appetizers
  • Dessert
  • Dinner
  • Drinks
©2025, tastymomrecipes About Back To Top