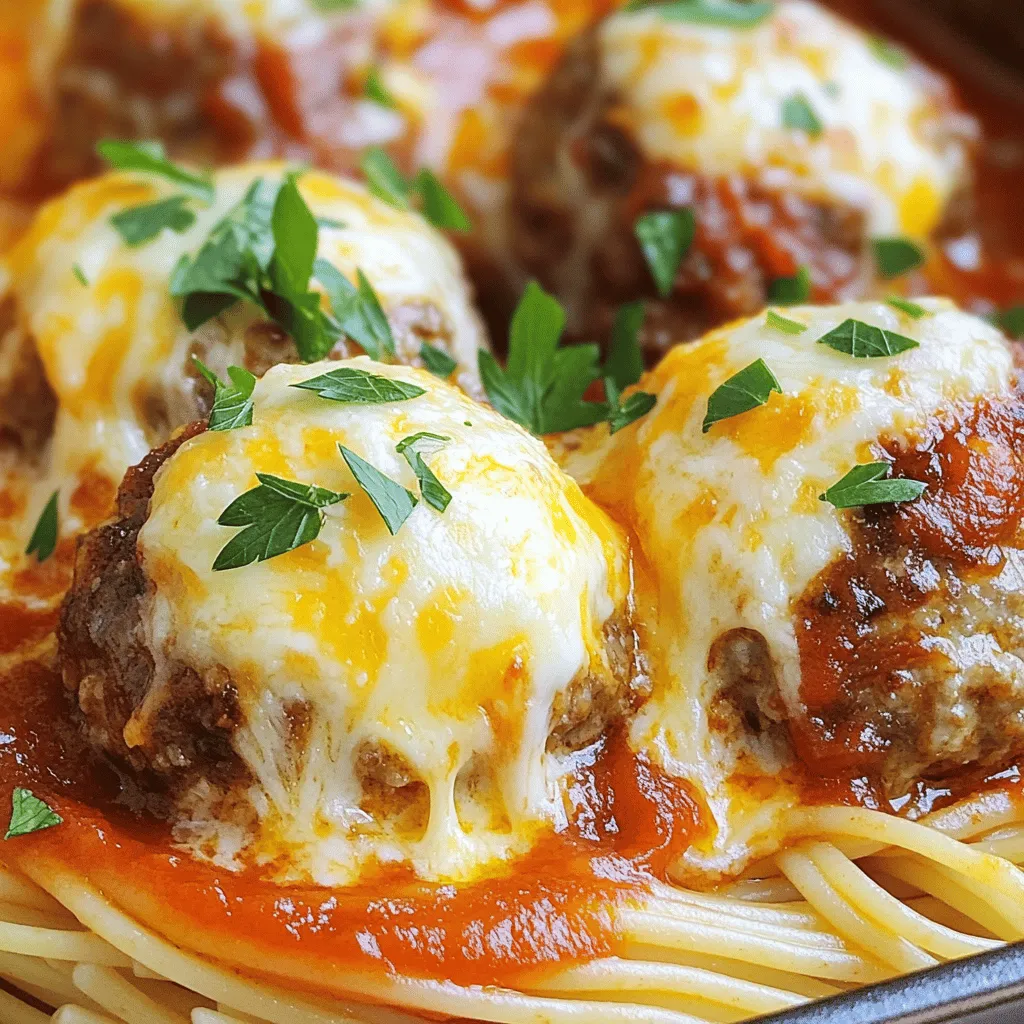
Mozzarella Stuffed Meatballs Flavorful and Simple Recipe
Are you ready to elevate your dinner game? Mozzarella Stuffed Meatballs are a flavorful, simple dish that will impress everyone
Are you ready to elevate your dinner game? Mozzarella Stuffed Meatballs are a flavorful, simple dish that will impress everyone
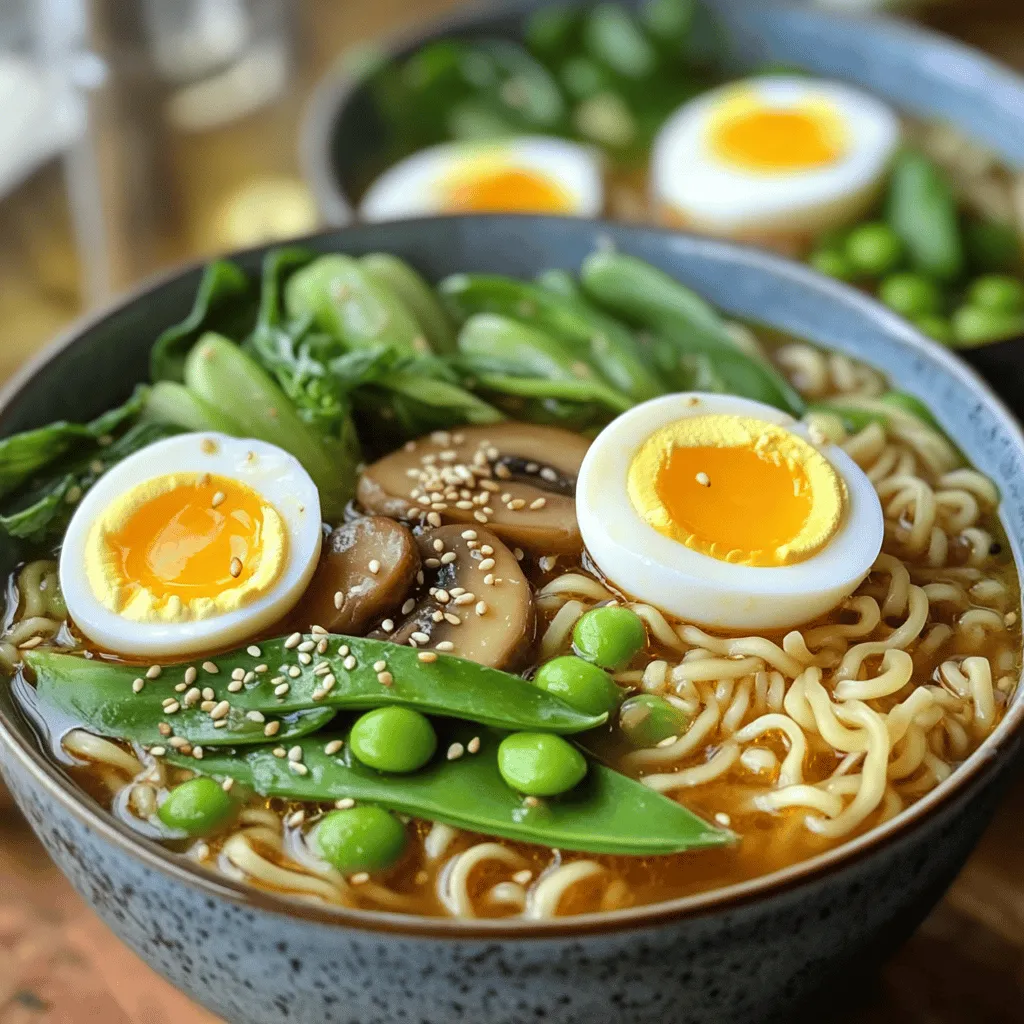
If you’re craving a bowl of ramen that’s both flavorful and hearty, look no further! My Sweet Chili Garlic Ramen

Are you ready to take your dinner game to the next level? This Sticky Orange Chicken recipe combines juicy chicken

Are you ready to warm up with a bowl of rich and flavorful Southwest Chicken Tortilla Soup? This hearty recipe
![- 1 cup apple cider - 1/2 cup granulated sugar - 1/2 teaspoon ground cinnamon - 1/4 teaspoon ground nutmeg - 2 cups all-purpose flour Apple cider forms the base of the flavor. It gives the donut holes that warm, fall taste. The sugar adds sweetness, while cinnamon and nutmeg bring spice. The all-purpose flour holds it all together, giving the donut holes their soft texture. - 1 tablespoon baking powder - 1/2 teaspoon salt - 1/4 cup unsalted butter, melted - 1 large egg - 1/2 cup whole milk - 1 teaspoon vanilla extract Baking powder helps them rise, making them fluffy. Salt enhances all the flavors. Butter adds richness, while the egg binds the mix. Whole milk keeps the batter smooth, and vanilla adds a touch of warmth. - 1 cup powdered sugar - Extra apple cider for the glaze The powdered sugar creates a sweet coating. Mixing it with apple cider makes a smooth glaze. This glaze is the final touch, giving each donut hole a shiny, sweet finish. For the full recipe, follow the steps to create these delightful treats! To start, we must enhance the apple cider's flavor. Pour 1 cup of apple cider into a small saucepan. Heat it over medium-high heat until it boils. This takes just a few minutes. Once boiling, turn the heat down to low. Let it simmer gently, stirring from time to time. You want the cider to reduce to about 1/4 cup. This will take around 10-15 minutes. After it reaches the right amount, remove the pan from heat. Allow the reduced cider to cool slightly. This step is key for the best flavor in your donut holes. Next, it's time to mix our batter. In a large bowl, whisk together these dry ingredients: - 2 cups all-purpose flour - 1 tablespoon baking powder - 1/2 teaspoon salt - 1/2 cup granulated sugar - 1/2 teaspoon ground cinnamon - 1/4 teaspoon ground nutmeg In another bowl, mix the wet ingredients: - 1/4 cup unsalted butter, melted - 1 large egg - 1/2 cup whole milk - 1 teaspoon vanilla extract - The cooled, reduced apple cider Pour the wet mixture into the dry ingredients. Stir gently until just combined. It is okay to have small lumps. Overmixing will make the donut holes tough. Now, let’s get to frying. First, heat oil in a deep frying pan or pot. You need enough oil to fully cover the donut holes. Aim for a temperature of 350°F (175°C). Use a kitchen thermometer to check. While the oil heats, shape the dough into small balls. Use a small cookie scoop or your hands. Aim for 1-inch diameter balls. Carefully drop them into the hot oil. Fry them in small batches to avoid overcrowding. Each batch should take about 2-3 minutes. They should turn golden brown as they cook. Gently turn them for even frying. Once cooked, use a slotted spoon to transfer them to a plate lined with paper towels. This will help soak up any excess oil. For the full recipe, including the glaze instructions, be sure to check the [Full Recipe]. To get the best texture for your donut holes, you need to adjust flour and liquid. Start with the recipe's exact amounts. If the dough feels too dry, add a little more milk. If it feels too wet, add a bit more flour. This small tweak can make a big difference! Frying time is key, too. Aim for 2-3 minutes in hot oil. Keep an eye on the color; you want a nice golden brown. If they are browning too fast, lower the heat a bit. If they are pale, increase the heat. One common mistake is overcrowding the frying pan. If you add too many donut holes at once, the oil cools down. This can lead to soggy, greasy donuts. Fry in small batches for the best results. Another mistake is not allowing the cider to reduce enough. Reducing the cider concentrates its flavor. If you skip this step, your donuts may taste bland. Let the cider simmer until it’s about 1/4 cup. For a fun twist, try different spices. Besides cinnamon and nutmeg, consider adding ginger or allspice. These spices bring warmth and depth to your donut holes. You can also add unique ingredients. Try mixing in a bit of caramel or chopped apples into the dough. This will add even more flavor and texture to your treat. For more ideas, check out the Full Recipe for Apple Cider Glazed Donut Holes! {{image_4}} You can switch up the glaze on these donut holes. Try a chocolate glaze for a rich twist. Just melt chocolate and mix with a bit of cream. This will coat your donut holes in a sweet chocolate layer. Another option is maple glaze. Combine maple syrup with powdered sugar for a sweet, sticky finish. Both glazes add a fun spin to the classic apple cider flavor. Want to get creative? Add pumpkin puree to the dough for a fall touch. This gives the donut holes a soft texture and warm flavor. You can also try adding caramel to the mix. Drizzle caramel over the warm donut holes for an extra treat. Using different types of apples can change the taste too. Honeycrisp apples add a sweet crunch, while Granny Smith offers a tart kick. If you want a lighter option, consider baked donut holes. They still taste great and cut down on oil. You can use whole wheat flour instead of all-purpose flour for added fiber. For those with dietary needs, substitute sugar with honey or a sugar alternative. You can also use almond milk instead of whole milk. These small changes can make your donut holes healthier without losing flavor. For the full recipe, check out the Apple Cider Glazed Donut Holes recipe above. To keep your apple cider glazed donut holes fresh, store them in an airtight container. This helps maintain their moisture and flavor. Make sure they are completely cool before sealing them up. I recommend using a glass or plastic container that is easy to close tightly. Avoid stacking them too high, as this can cause them to lose their shape. When you are ready to enjoy leftover donut holes, reheating is key. The best method is to use an oven or an air fryer. Preheat your oven to 350°F (175°C). Place the donut holes on a baking sheet and warm them for about 5-7 minutes. This method helps keep them crispy. Avoid using a microwave, as it can make them soggy. If you want to save some for later, freezing is a great option. First, let the donut holes cool completely. Then, place them in a single layer on a baking sheet and freeze them for about an hour. Once frozen, transfer them to a freezer-safe bag or container. They can last in the freezer for up to three months. To thaw, just leave them in the fridge overnight or let them sit at room temperature for a couple of hours. Yes, you can prepare the donut holes ahead of time. I suggest frying them a day before serving. After frying, let them cool completely. Store them in an airtight container at room temperature. When you’re ready to serve, glaze them fresh. This keeps them soft and tasty. These donut holes pair well with several drinks and snacks. Here are some ideas: - Coffee: A warm cup of coffee enhances the sweet flavor. - Apple cider: Hot or cold, it adds a lovely autumn touch. - Ice cream: Vanilla or caramel ice cream creates a nice contrast. - Chocolate sauce: Drizzling chocolate adds a rich layer of flavor. To check if your donut holes are cooked, insert a toothpick into the center. If it comes out clean, they’re ready. Fry them for 2-3 minutes until golden brown. Keep an eye on the color. If they darken too fast, lower the heat. You now know how to make delicious apple cider glazed donut holes. We covered ingredients, steps, tips, and variations. Using the right cider and spices makes a big difference. Avoid common mistakes to ensure the best texture. I believe anyone can enjoy these treats. They’re fun to make and taste amazing. Try experimenting with different flavors or glazes for your own twist. Store them well to keep them fresh. Enjoy sharing these delightful bites with friends and family. Happy cooking!](https://tastymomrecipes.com/wp-content/uploads/2025/07/94f6227b-0ebf-4265-8690-a2ff5c8daeed.webp)
Fall is here, and there’s no better way to celebrate than with delicious Apple Cider Glazed Donut Holes! These sweet
![- 1 cup rolled oats - 1/2 cup natural peanut butter - 1/3 cup honey or maple syrup - 1/4 cup unsweetened cocoa powder The main ingredients create a strong base for these energy balls. Rolled oats give them fiber and a chewy texture. Natural peanut butter adds protein and healthy fats. Honey or maple syrup provides sweetness and binds everything together. Unsweetened cocoa powder gives a rich chocolate flavor. - 1/4 cup chocolate chips - 1/4 cup ground flaxseed - 1 teaspoon pure vanilla extract - A pinch of salt The additional ingredients boost flavor and nutrition. Chocolate chips add a sweet burst in each bite. Ground flaxseed offers omega-3s and fiber. Pure vanilla extract deepens the taste. A pinch of salt enhances the overall sweetness. For the complete recipe, check out the [Full Recipe]. - In a large mixing bowl, combine: - 1 cup rolled oats - 1/4 cup unsweetened cocoa powder - 1/4 cup ground flaxseed Mix these dry ingredients well. Make sure they blend evenly. - In a second bowl, mix: - 1/2 cup natural peanut butter - 1/3 cup honey or maple syrup - 1 teaspoon pure vanilla extract - A pinch of salt Stir until the mix is smooth and creamy. - Slowly add the wet mixture to the dry bowl. Stir gently. Ensure all dry items are well coated. - Now, fold in: - 1/4 cup chocolate chips Make sure the chocolate chips spread evenly through the mix. - Cover the bowl and chill the mix in the fridge for 30 minutes. This helps it firm up. - After chilling, scoop out portions of the mix. Roll them into small balls, about 1 inch wide. Place the balls on a parchment-lined baking sheet. - Chill the rolled balls for another 15-20 minutes to harden them. Once ready, store these treats in an airtight container. They last up to a week in the fridge. Enjoy your Peanut Butter Chocolate Energy Balls! For more details, check the Full Recipe. Choosing between smooth or crunchy peanut butter is a fun decision. Smooth peanut butter gives a creamy texture, while crunchy adds a nice bite. If you love a bit of crunch, go for the chunky kind. You can also adjust sweetness levels easily. If you prefer less sweetness, reduce the honey or maple syrup. Taste as you mix! This way, you can find the perfect balance for your taste buds. Presentation matters! Serve the energy balls in a small bowl. You can stack them in a mason jar for an eye-catching treat. For a fun twist, dust some energy balls with cocoa powder. This adds a nice touch and makes them look fancy. Pair these bites with almond milk or a hot cup of tea. They also taste great with fresh fruit like bananas or apples. To keep your energy balls fresh, store them in an airtight container. The fridge is the best spot for them. They can stay good for up to a week. If you want to keep them longer, freeze them! Just place them in a freezer-safe bag or container. They will last up to three months in the freezer. When you're ready, let them thaw in the fridge overnight. Enjoy your tasty snacks whenever you need a boost! {{image_4}} You can easily make these energy balls fit your diet. If you're vegan, swap honey for maple syrup. This keeps the sweet flavor while sticking to plant-based choices. For a gluten-free option, choose gluten-free rolled oats. It’s simple to make these treats work for everyone. Want to change things up? You can add spices like cinnamon or nutmeg for warmth. Just sprinkle a little in with the dry ingredients. This gives your energy balls a cozy flavor. You can also experiment with different nut butters. Try almond or cashew butter instead of peanut butter. Each nut butter adds its unique taste. Looking to add more protein? You can incorporate protein powder into the mix. Just a scoop or two will boost the nutrition. You can also mix in seeds or nuts for added crunch. Chia seeds or chopped almonds work great. This not only adds flavor but also increases the health benefits. These variations keep your Peanut Butter Chocolate Energy Balls fresh and exciting. You can enjoy them in many fun ways! For the full recipe, check out the earlier section. Peanut Butter Chocolate Energy Balls offer great health benefits. The oats provide fiber, which helps digestion. They keep you full and energized. Flaxseed adds omega-3 fatty acids, which are good for your heart. It also helps with inflammation. Together, these ingredients make a nutritious snack. Each serving of these energy balls contains: - Calories: About 120 - Protein: 4g - Carbohydrates: 15g - Fat: 5g - Fiber: 2g These energy balls are lower in calories than many store-bought snacks. A typical energy bar can have 200-300 calories. In contrast, our energy balls provide a satisfying snack at only 120 calories each. You get great taste and nutrition without the extra calories. These energy balls fit many lifestyles. Athletes can enjoy them for a quick snack before or after workouts. They give a boost of energy without weighing you down. Busy people also love them. You can grab one on the go and stay fueled throughout the day. They're a perfect solution for a busy life. To make these tasty energy balls, start by mixing dry ingredients. In a large bowl, combine rolled oats, cocoa powder, and ground flaxseed. Stir well until everything blends. Next, in another bowl, mix the wet ingredients. Combine natural peanut butter, honey (or maple syrup), vanilla extract, and a pinch of salt. Whisk until it's smooth and creamy. Then, pour the wet mixture into the dry ingredients. Stir until the dry ingredients are fully coated. This step ensures every bite is flavorful. Now, fold in the chocolate chips. Make sure they spread evenly throughout the mixture. After this, cover the bowl and chill it in the fridge for about 30 minutes. This helps the mixture firm up. Once chilled, scoop out the mixture and roll it into small balls, about one inch wide. Place them on a parchment-lined baking sheet. Chill them again for 15-20 minutes to set. Lastly, store the energy balls in an airtight container in the fridge for up to a week. You can find the full recipe to guide you through these fun steps. Yes, you can substitute some ingredients. If you want a nut-free option, try sun butter instead of peanut butter. For sweeteners, agave nectar works well in place of honey or maple syrup. If you need a gluten-free snack, ensure your oats are labeled gluten-free. You can also swap cocoa powder for carob powder for a different flavor. For added nutrition, you can mix in chia seeds instead of flaxseed. Don't have chocolate chips? Use dried fruit, like raisins or cranberries, for a sweet twist. These energy balls last up to a week when stored properly. Keep them in an airtight container in the refrigerator. This helps maintain their texture and flavor. If you want to store them longer, freeze them. Place them in a freezer-safe container. They can last for up to three months in the freezer. Just let them thaw in the fridge before enjoying. Peanut Butter Chocolate Energy Balls are easy to make and great for snacks. We covered the main ingredients like oats, peanut butter, and cocoa powder. You learned step-by-step how to mix and shape them. Remember to chill the mixture before rolling. Feel free to adjust the recipe to fit your taste, using tips for storage and variations. These energy balls provide a delicious and healthy option for everyone. Enjoy your homemade treats, knowing they are packed with nutrients and flavor!](https://tastymomrecipes.com/wp-content/uploads/2025/07/ef33f1c7-d4ea-4b1c-b1af-bb89321958aa.webp)
Are you looking for a quick, tasty snack that packs a punch? Look no further! My Peanut Butter Chocolate Energy
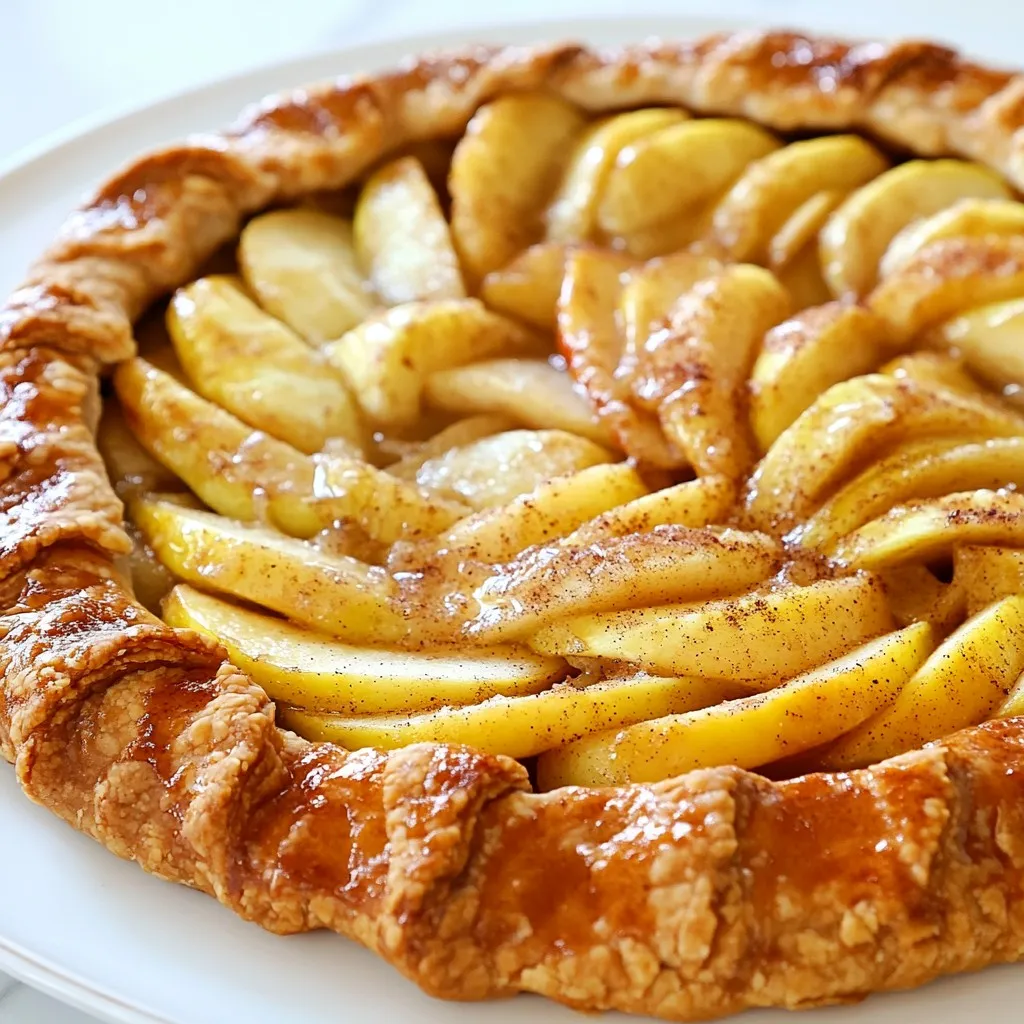
If you love sweets, you’ll adore this Rustic Apple Galette. It’s easy to make and packed with flavor. Fresh apples,

Do you love the smell of fresh garlic and melted cheese? If so, you’ll adore this simple Garlic Parmesan Knots
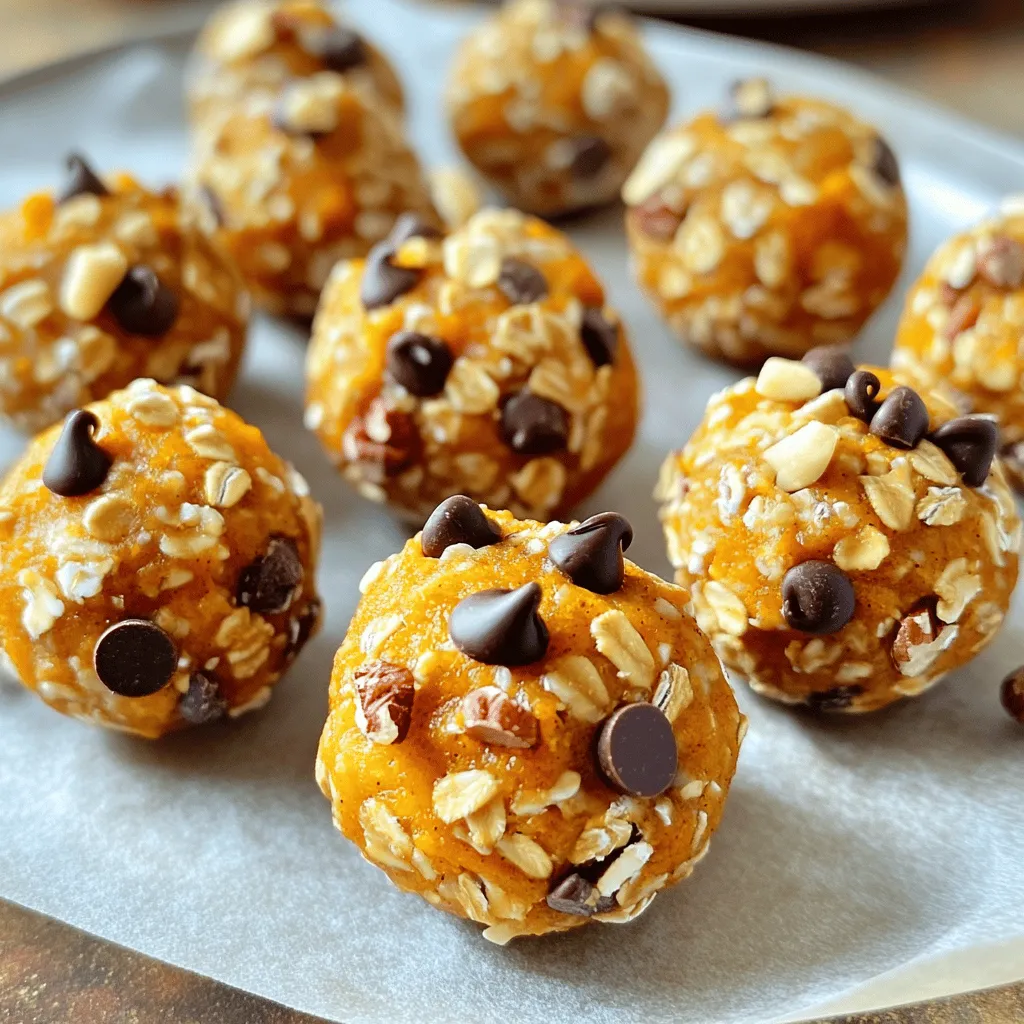
Looking for a snack that’s both tasty and healthy? You’ve just found it! These Pumpkin Spice Energy Bites are packed
![To make the best Mocha Chip Icebox Cake, you need just a few key ingredients. Each one plays an important role in creating this delicious dessert. - 2 cups heavy whipping cream - 1/2 cup powdered sugar - 1 tablespoon instant coffee granules - 1 teaspoon vanilla extract - 2 cups semi-sweet chocolate chips - 1 package (14 ounces) coffee-flavored or chocolate graham crackers - Optional garnish: chocolate shavings or cocoa powder You can find these ingredients at your local grocery store. Heavy whipping cream gives the cake its rich texture. Powdered sugar adds sweetness without grittiness. Instant coffee granules give it that strong coffee flavor. Vanilla extract adds warmth and depth. Semi-sweet chocolate chips bring chocolatey goodness in every bite. The graham crackers are the base that holds everything together. Optional garnishes like chocolate shavings or cocoa powder make it look fancy. These simple ingredients come together to create a delightful no-bake dessert. For the complete recipe, check out Full Recipe. 1. Whipping the Cream: Start by taking a large mixing bowl. Add 2 cups of heavy whipping cream, 1/2 cup of powdered sugar, 1 tablespoon of instant coffee granules, and 1 teaspoon of vanilla extract. With an electric mixer, beat the mixture on medium-high speed. This takes about 3-4 minutes until stiff peaks form. Be careful not to overwhip, as it can turn grainy. 2. Preparing the Base Layer: Grab a 9x13 inch baking dish. Spread a thin layer of the whipped cream mixture at the bottom. This layer keeps the graham crackers from sticking to the dish. 3. Assembling the Layers: Place a single layer of coffee-flavored or chocolate graham crackers on top of the cream. You can break the crackers if needed to fit your dish. Next, take half of the whipped cream mixture and spread it evenly over the graham crackers. Then, sprinkle half of the 2 cups of semi-sweet chocolate chips on top. This gives a nice chocolatey surprise in every bite. 1. Adding the Second Layer of Graham Crackers: Now, place another layer of graham crackers over the chocolate chips. This creates a nice balance of flavors. 2. Topping with the Remaining Whipped Cream and Chips: Spread the remaining whipped cream mixture over this layer. Make sure it’s even. After that, sprinkle the rest of the chocolate chips on top for extra flavor. 3. Sealing the Cake for Chilling: Finally, add one last layer of graham crackers on top. This seals in all the yummy layers below. Cover the dish tightly with plastic wrap. 1. Recommended Chilling Time: Place the baking dish in the refrigerator. Chill for at least 4 hours. For best results, leave it overnight. This allows all the flavors to blend well. 2. Importance of Chilling for Flavor Development: Chilling helps the graham crackers soften and soak up the cream. This makes the cake taste richer and creamier when you serve it. For the complete recipe, check [Full Recipe]. Enjoy making this delightful no-bake dessert! To make smooth whipped cream, avoid overwhipping. When you see soft peaks, stop mixing. You want a light and fluffy texture. Use a medium-high mixer speed. This speed helps the cream whip evenly without turning grainy. When breaking graham crackers, use a sharp knife. This method gives you clean edges. You can also place them in a zip-top bag and crush them gently. For even layers, spread the cream consistently across the crackers. Press down lightly to help the layers stick together. Serve the cake on a nice platter to impress your guests. For a pop of color, add whole chocolate chips or mint leaves by each slice. You can also dust cocoa powder on top for added flair. Chocolate shavings make a lovely garnish, too! {{image_4}} You can switch up the chocolate for a new twist. Dark chocolate chips give a rich taste. White chocolate can add a sweet touch. You might like milk chocolate for a creamier feel. For coffee, try using espresso powder instead of instant coffee. It brings a bold kick. You can also use flavored coffee granules, like hazelnut or vanilla, for a fun twist. If you want a lighter cake, swap heavy cream for Greek yogurt. This cuts calories and adds protein. You can also use a sugar substitute, like stevia, instead of powdered sugar. For a dairy-free option, choose coconut cream. It whips up nicely and adds a tropical flavor. Use dairy-free chocolate chips to keep it all plant-based. For special occasions, add festive garnishes. Use crushed peppermint candies for a holiday feel. In fall, sprinkle cinnamon on top for warmth. You can even add seasonal fruit like berries or sliced bananas for freshness. Adjust flavors to match the season. In winter, try adding a hint of nutmeg. For summer, a splash of orange zest can brighten the dessert. These little changes keep your icebox cake exciting! For the full recipe, check out the Mocha Chip Icebox Cake. To keep your Mocha Chip Icebox Cake fresh, store it in the fridge. Use an airtight container to keep out air and moisture. If you have leftovers, slice the cake before storing. This way, it’s easy to grab a piece when you want a treat. For longer storage, you can freeze the cake. Wrap it tightly in plastic wrap, then place it in a freezer-safe container. This helps prevent freezer burn. When stored in the fridge, the cake lasts about 4 to 5 days. It may still taste good after this, but the texture can change. If you freeze it, the cake can last up to 2 months. Watch for signs that the cake has gone bad. If you see mold or it has an off smell, it’s best to throw it away. If you freeze your cake, thaw it in the fridge overnight. This keeps the texture nice. Before serving, consider refreshing the look. Add a sprinkle of cocoa powder or chocolate shavings on top. You can also place fresh mint leaves beside each slice. These simple touches make your cake look fancy and inviting. You can check the [Full Recipe] for more tips and tricks! You can store Mocha Chip Icebox Cake in the fridge for up to five days. Keep it covered with plastic wrap to keep it fresh. After that, the flavor and texture may start to change. Yes! This cake is perfect for making ahead of time. You can prepare it a day or two before you plan to serve it. Just keep it in the fridge to let the layers meld together. This waiting time enhances the flavors and makes each bite even better. I suggest using instant coffee granules for this recipe. Brands like Nescafé or Starbucks VIA work well. They dissolve easily and give a nice coffee flavor. You can also use espresso powder for a stronger taste if you prefer. Absolutely! Using homemade whipped cream can add a fresh taste. Just make sure you whip it to stiff peaks. Store-bought whipped cream is easy and saves time, but it may not have the same creamy texture as homemade. Yes, you can make this dessert gluten-free. Look for gluten-free graham crackers made from almond flour or rice flour. Brands like Schär or Kinnikinnick offer great options. Just check the package to ensure they are certified gluten-free. For the complete recipe and steps, check out the [Full Recipe]. To make a Mocha Chip Icebox Cake, gather simple yet tasty ingredients. You whip cream, layer graham crackers and chocolate chips, and chill the cake. This helps the flavors blend well. Remember, perfect whipped cream is key. You can get creative with flavors and toppings too. Store leftovers properly to enjoy later. With these tips, you'll impress everyone with your delicious cake. Now, get ready to enjoy a fun treat!](https://tastymomrecipes.com/wp-content/uploads/2025/07/c2e35832-593f-4439-b049-87388dcc814f.webp)
Looking for a quick and irresistible dessert? The Mocha Chip Icebox Cake is your answer! This no-bake delight combines rich
