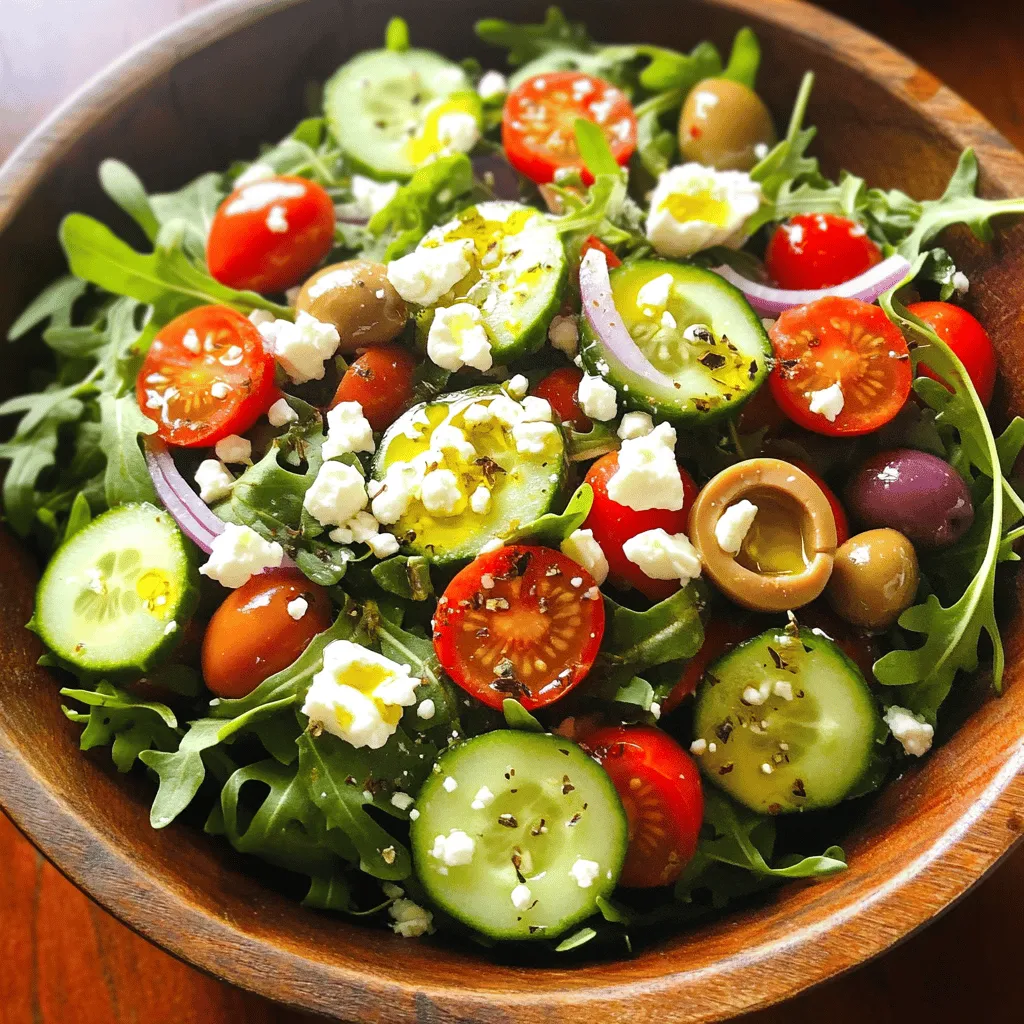
Simple Greek Salad Fresh and Healthy Summer Dish
Looking for a fresh and healthy dish to brighten your summer meals? This Simple Greek Salad combines vibrant colors and
Looking for a fresh and healthy dish to brighten your summer meals? This Simple Greek Salad combines vibrant colors and

Are you ready to elevate your dinner game with a dish that marries simplicity and bold flavor? My Lemon Garlic

Are you ready to whip up a delightful dessert that shines in its simplicity? This Easy Strawberry Shortcake recipe is
![To make Classic Tabouli Salad, you need fresh and simple items. Here’s what you will use: - 1 cup bulgur wheat, thoroughly rinsed and drained - 2 cups boiling water - 1 cup fresh parsley, finely chopped - 1/2 cup fresh mint leaves, finely chopped - 2 medium ripe tomatoes, diced into small pieces - 1 small cucumber, diced - 1/4 cup red onion, finely chopped - 1/4 cup high-quality olive oil - 3 tablespoons freshly squeezed lemon juice - Salt and freshly cracked black pepper to taste Using the best ingredients makes a big difference. Fresh parsley and mint give the salad a bright taste. Choose ripe tomatoes for sweetness and juicy texture. The cucumber adds crunch. Always use extra virgin olive oil for rich flavor. Freshly squeezed lemon juice brightens the dish. When you use high-quality and fresh ingredients, your tabouli will shine. Not everyone can eat bulgur wheat. For a gluten-free option, use quinoa instead. If you don’t like mint, try using basil or cilantro for a twist. You can add bell peppers or radishes if you want more crunch. This salad is flexible, so feel free to adjust based on your needs. For the full recipe, check the details above. Start by rinsing the bulgur wheat in cold water. This helps remove any dust. Next, place the rinsed bulgur in a large bowl. Pour two cups of boiling water over the bulgur. Ensure all the grains are covered. Cover the bowl tightly with a lid or plastic wrap. Let it soak for 20 to 30 minutes. This time allows the bulgur to absorb the water and soften. After soaking, fluff the bulgur gently with a fork. This helps keep the grains separate and light. Once the bulgur has cooled to room temperature, it’s time to mix in the veggies. Add the finely chopped parsley and mint to the bulgur. Next, toss in the diced tomatoes, cucumber, and red onion. Stir everything gently to mix the vegetables evenly throughout the bulgur. Now, it’s time to add the dressing. Drizzle high-quality olive oil and freshly squeezed lemon juice over the mixture. Season with salt and freshly cracked black pepper to taste. This step brings all the flavors together. Using a large spoon or spatula, carefully toss all the ingredients. Make sure everything is well combined. Taste the salad and check the seasoning. If it needs more flavor, add a bit more lemon juice or salt. It’s important to adjust the taste to your liking. For the best results, cover the salad and chill it in the fridge. Let it marinate for at least 30 minutes. This resting time helps the flavors blend beautifully. For a lovely presentation, serve the tabouli in chilled bowls. Garnish with fresh mint and a lemon wedge. Enjoy this refreshing dish! To get the best texture in your tabouli salad, start with bulgur wheat. Use fine bulgur for a softer bite. Soak it in boiling water, as the recipe suggests. This makes it fluffy and light. After soaking, fluff the grains gently with a fork. Be careful not to mash them. Tabouli salad pairs well with many dishes. Serve it alongside grilled chicken or fish. The fresh herbs brighten up rich flavors. You can also enjoy it with pita bread and hummus for a light meal. For a twist, add feta cheese for a salty bite. Letting tabouli chill is key for flavor. After mixing, cover the salad and place it in the fridge for at least 30 minutes. This allows the herbs to release their oils and flavors. The longer it chills, the better it tastes. Enjoy this refreshing dish with friends or family. You can find the full recipe in the main article. {{image_4}} You can play with the herbs in tabouli. Besides parsley and mint, try basil or cilantro. These herbs add fresh flavors. You can also mix in veggies like bell peppers or radishes. They bring extra crunch and color. For a twist, add roasted red peppers for a smoky taste. Tabouli is easy to make vegan. Just stick to the basic ingredients. If you want a gluten-free option, swap bulgur wheat with quinoa or cauliflower rice. Both options work well and keep the dish light and healthy. While lemon juice and olive oil are classic, you can switch things up. Try adding tahini for creaminess or balsamic vinegar for sweetness. You can even mix in yogurt for a tangy twist. Each dressing gives a new flavor to the salad. For the full recipe, check out the [Full Recipe]. To store leftover tabouli salad, place it in an airtight container. This keeps the salad fresh and prevents odors from other foods. Make sure to press out any extra air before sealing the container. Tabouli salad lasts about 3 to 5 days in the fridge. The fresh herbs and veggies stay crisp for a few days. However, the flavors meld and get better over time. Check for any signs of spoilage before eating. Freezing tabouli salad is not ideal because it affects texture. If you must freeze it, use a freezer-safe container. Thaw it in the fridge overnight when ready to eat. Expect some sogginess due to the veggies losing water. For best results, enjoy your tabouli fresh. You can find the Full Recipe [here](#). Tabouli salad comes from the Middle East. It is a traditional dish from Lebanon and Syria. The name "tabouli" means "seasoned" in Arabic. It is made with bulgur, fresh herbs, and vegetables. People have enjoyed tabouli for centuries. It reflects the region's love for fresh, healthy foods. Yes, you can make tabouli salad ahead of time. In fact, it tastes better after resting. Allowing it to sit helps the flavors blend well. I recommend chilling it in the fridge for at least 30 minutes. You can make it a day before serving. Just store it in an airtight container. Avoid adding too much salt until serving time. To make tabouli gluten-free, simply replace bulgur wheat. Use quinoa as a great substitute. Quinoa cooks easily and has a nice texture. Prepare it the same way as bulgur. Rinse it, cook it, and then mix it with the veggies. You’ll still enjoy a fresh and tasty salad. For the full recipe, check out the detailed steps above. In this blog post, we explored the key ingredients for classic tabouli salad and their quality. We provided step-by-step instructions for making it perfectly. Tips for texture and flavor help make it stand out. Variations show you how to adapt to dietary needs and preferences. Lastly, we covered storage methods and answered common questions. Tabouli salad is fun to make and share. With these tips, you can enjoy this dish for any meal!](https://tastymomrecipes.com/wp-content/uploads/2025/07/d3245c53-02c4-480d-b6a4-443c1d63ba1e.webp)
Are you ready to dive into a dish that’s both refreshing and healthy? Classic Tabouli Salad is bursting with flavor

Dive into a fresh and flavorful delight with my Strawberry Spinach Salad! This dish balances sweet strawberries and crunchy spinach,

Looking for a dish that packs a punch in flavor and nutrition? You’ve found it! This Crispy Chickpea Buddha Bowl

Who doesn’t love a crunchy snack? Baked Zucchini Parmesan Chips are your answer! With just a few fresh ingredients, you
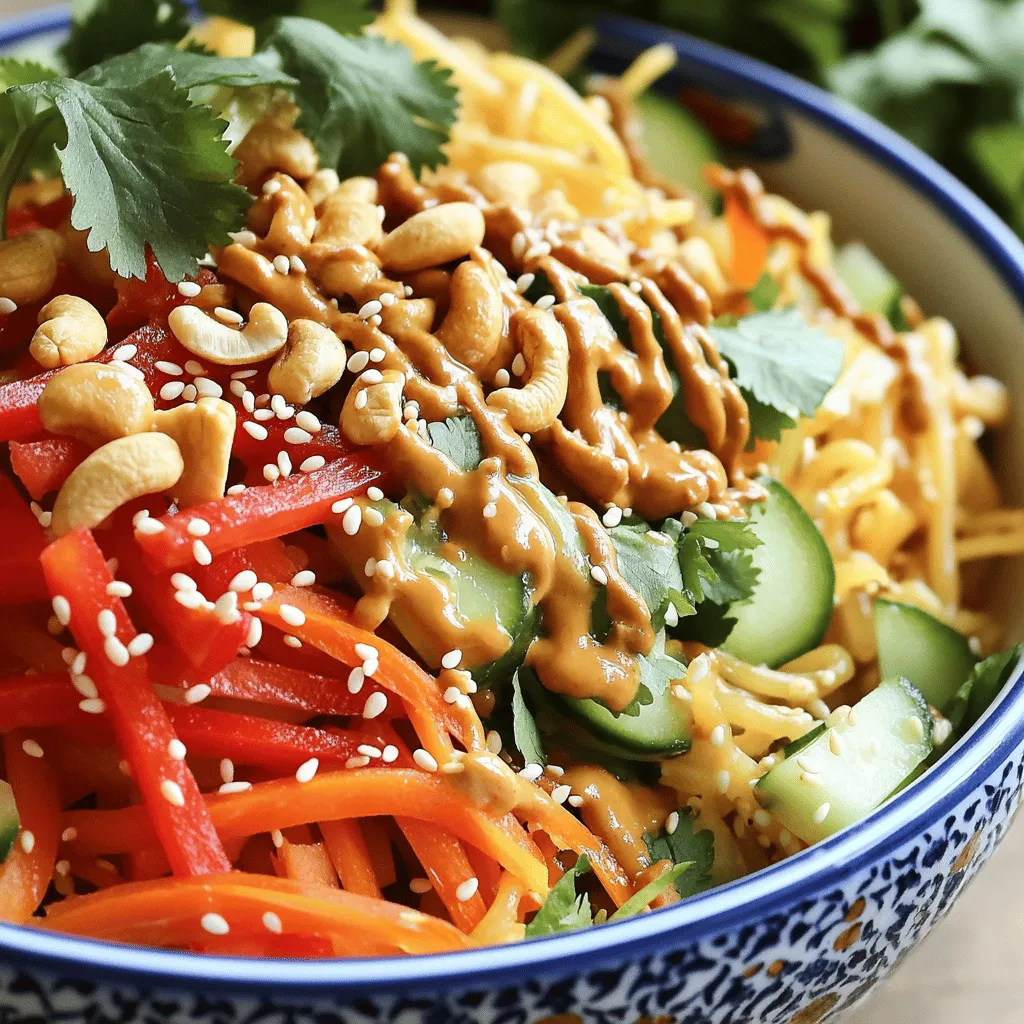
Ready to spice up your meal routine? This Spicy Cashew Noodle Salad is both tasty and easy to prepare! Packed
. You learned how to make Sweet Chili Salmon Bowls with tasty ingredients. We covered marinating salmon, cooking rice, and preparing fresh veggies. Each bowl can be unique with different garnishes and flavors. Storage tips help save leftovers, and you can customize the recipe to fit your taste. I hope you feel ready to try making this dish. Enjoy your cooking and share it with others. You won’t regret it!](https://tastymomrecipes.com/wp-content/uploads/2025/07/9961b73b-492f-45db-bb9d-a55ab9fe158c.webp)
Are you looking for a delicious dinner idea? Try my Savory Sweet Chili Salmon Bowls! This dish combines tender salmon

Looking for a treat that’s both delicious and healthy? Mango Coconut Chia Pudding is the answer! With rich coconut milk,
