Skip to content
DisclaimerTerms Of UseGDPR PolicyCookie Policy

tastymomrecipes

  • Home
  • Drinks
  • Appetizers
  • Dinner
  • Dessert
  • About
  • Contact
  • Privacy Policy
DisclaimerTerms Of UseGDPR PolicyCookie Policy

Olivia

To make Mango Coconut Chia Pudding, you need a few simple ingredients: - 1 cup coconut milk (either canned or carton) - 1/4 cup chia seeds - 2 tablespoons maple syrup or honey (to taste) - 1 ripe mango, diced into small cubes - 1/2 teaspoon vanilla extract - A pinch of sea salt - Toasted coconut flakes (for garnish) - Fresh mint leaves (for garnish) When choosing ingredients, quality matters. Opt for unsweetened coconut milk for a rich flavor. Use ripe mangoes for the best sweetness and texture. Always check for the freshest chia seeds. They should be whole, not broken. For those with dietary restrictions, there are alternatives. Almond milk or oat milk can replace coconut milk. If you want a sugar-free option, use a sugar substitute for the maple syrup or honey. For a nut-free version, stick with rice milk. These swaps keep the recipe delicious while meeting your needs. If you want to explore more delicious options, check out the Full Recipe. 1. Mixing the base ingredients: Start by pouring 1 cup of coconut milk into a medium bowl. Add in 1/4 cup of chia seeds, 2 tablespoons of maple syrup or honey, 1/2 teaspoon of vanilla extract, and a pinch of sea salt. Whisk these ingredients well. This step mixes everything together smoothly and ensures the chia seeds spread out evenly. 2. Importance of refrigeration time: Cover the bowl tightly with plastic wrap or a lid. Place it in the refrigerator for at least 4 hours, but overnight is best. This cooling time allows the chia seeds to absorb the coconut milk. They swell and create a thick, creamy pudding. Skipping this step means you miss out on that perfect texture. 3. Layering the pudding for serving: After the pudding has chilled, stir it well to break up clumps. Grab your serving glasses or bowls. Start with a layer of chia pudding, then add a layer of diced mango. Repeat this until the glasses are full. Finish by topping each serving with toasted coconut flakes and fresh mint leaves. This adds a nice crunch and a pop of color. - Overview images of each preparation step: Picture the vibrant coconut milk mixing with chia seeds. Next, see the thick, creamy pudding after chilling. Finally, imagine the beautiful layers of pudding and mango in clear glasses. - Final presentation photos: Visualize the final dish, topped with golden coconut flakes and bright green mint leaves. It's a treat for both the eyes and the palate, making it perfect for any occasion. For the complete recipe, check out the Full Recipe. To get the best texture in your Mango Coconut Chia Pudding, whisk the chia seeds well. This step helps them mix evenly in the coconut milk. If you skip this, you may end up with clumps. After the pudding sets, give it a good stir. This breaks up any lumps and gives you that smooth feel you want. Garnishing makes your pudding pop! I love to sprinkle toasted coconut flakes on top. They add crunch and a nice look. Fresh mint leaves are great too. They add a bright color and fresh taste. Serve your pudding cold for the best experience. It’s refreshing and perfect for warm days. For a fun twist, try layering the pudding in clear cups to show off those bright mango chunks! For the full recipe, check out the details above. Enjoy your creation! {{image_4}} You can easily change the taste of mango coconut chia pudding. Here are some fun ideas: - Substituting fruit options: Try using different fruits. Pineapple, berries, or banana work well too. Each fruit adds a unique flavor and color. You can mix and match to find your favorite. - Adding spices or flavors: Add a pinch of cinnamon for warmth. Coconut extract boosts the coconut taste. You can also try nutmeg or cardamom for a twist. Just a small amount can change the whole dish. This pudding can fit many diets. Here are some options: - Vegan, gluten-free options: All the ingredients are vegan and gluten-free. Use maple syrup for sweetness. This makes it safe for those who avoid animal products or gluten. - Low-sugar versions: To cut back on sugar, use less maple syrup or honey. You can also skip the sweetener entirely if you prefer it less sweet. The fruit adds natural sweetness, so it remains tasty. For the complete recipe, check out the [Full Recipe]. To keep your Mango Coconut Chia Pudding fresh, store it in the refrigerator. Use a clean, airtight container. This helps prevent any odors from other foods. Your pudding will last up to five days when stored properly. Just remember to give it a good stir before you enjoy it again. You cannot freeze this pudding because it changes texture. If you do freeze it, thaw it in the fridge overnight. Stir it well after thawing to get a smoother consistency. For the best taste, enjoy it cold right from the fridge. For the full recipe, check out the instructions above. What can I use instead of coconut milk? You can use almond milk, soy milk, or oat milk. These are good choices if you want a different flavor. Just make sure to pick unsweetened types for the best taste. Each milk will change the pudding's flavor. Can I prepare this pudding in advance? Yes, you can prepare Mango Coconut Chia Pudding ahead of time. I often make it the night before. It tastes best after sitting for at least four hours. This gives the chia seeds time to soak up the liquid. You can store it in the fridge for up to five days. How can I make it vegan? This recipe is almost vegan! Just switch honey with maple syrup. This small change keeps it plant-based. All the other ingredients are already vegan. You can enjoy this tasty treat while sticking to your diet. For the full recipe, check out the earlier section. In this post, we covered key ingredients, preparation steps, tips, and variations for making pudding. Quality ingredients make a big difference, and knowing how to store your pudding helps it last longer. Using substitutions ensures everyone can enjoy this treat. Remember, experimenting with flavors keeps it fun. Keep these tips in mind for the best results. Now you have the tools to make a delicious, customized pudding at home. Enjoy every bite!

Mango Coconut Chia Pudding Tasty and Healthy Treat

If you’re craving a sweet treat that’s not only delicious but also healthy, you’re in the right place. Mango Coconut

- 4 boneless, skinless chicken thighs - 1/4 cup soy sauce (low sodium recommended for a lighter option) - 1/4 cup honey or maple syrup (for sweetness) - 2 tablespoons rice vinegar (for tanginess) - 2 tablespoons sesame oil (for nuttiness) - 2 cloves garlic, minced (for aroma) - 1 teaspoon fresh ginger, grated (for a spicy kick) - 1 tablespoon cornstarch (for thickening) - 2 tablespoons water (to mix with the cornstarch) - Sesame seeds (to garnish) - Sliced green onions (to garnish) When making Baked Teriyaki Chicken, the ingredients play a vital role. The chicken thighs are juicy and flavorful, making them the perfect choice. The soy sauce brings saltiness, while honey or maple syrup adds a sweet touch. Rice vinegar adds tang, and sesame oil gives a nutty flavor that is hard to resist. You can customize the dish with optional ingredients. Try adding red pepper flakes for heat or fresh herbs for brightness. These tweaks can make the dish unique to your taste. Presentation is key! After baking, sprinkle sesame seeds and sliced green onions on top. This not only looks great but also adds fresh flavor. You can serve this dish with rice and vegetables for a complete meal. Check the [Full Recipe] for detailed instructions on preparing this delicious dish. How to prepare the marinade Start by mixing your marinade. In a bowl, add the soy sauce, honey or maple syrup, rice vinegar, sesame oil, minced garlic, and grated ginger. Whisk until smooth. This blend gives your chicken a rich flavor. Marinating the chicken for optimal flavor Place the chicken thighs in a baking dish. Pour the marinade over the chicken. Ensure each piece is covered well. For best results, cover the dish and chill it in the fridge for at least 30 minutes. If you have more time, marinate for up to 2 hours. This will boost the flavor. Arranging chicken for baking After marinating, take the chicken out of the fridge. Arrange the chicken thighs in a single layer in the baking dish. Set aside the leftover marinade for later. This step is key for even cooking. Baking time and temperature details Preheat your oven to 400°F (200°C). Bake the chicken for 25-30 minutes. This will cook the chicken evenly and make it juicy. Checking doneness with a meat thermometer To check if the chicken is done, use a meat thermometer. Insert it into the thickest part of the thigh. The chicken should reach an internal temperature of 165°F (75°C). This ensures it is safe to eat. Thickening the leftover marinade While the chicken bakes, take the reserved marinade and pour it into a saucepan. In a bowl, mix cornstarch with water until smooth. Gradually stir this mixture into the marinade. Heat the saucepan over medium heat. Bring it to a gentle boil, stirring for 2-3 minutes. It will thicken nicely for serving. This recipe gives you a juicy and flavorful dish that is sure to impress. For the complete instructions, see the Full Recipe. To marinate chicken effectively, choose a deep dish. This helps the chicken soak up all the flavors. Use a mix of soy sauce, honey, rice vinegar, sesame oil, garlic, and ginger. For the best taste, let the chicken sit in the marinade for at least 30 minutes. If you can, go for 2 hours. The longer it sits, the better it tastes. You can use leftover marinade in many ways. After baking, heat it to make a sauce. Just add cornstarch mixed with water to thicken it. You can also use it as a dipping sauce for veggies or rice. Adjust the recipe to fit your taste. Want it sweeter? Add more honey or maple syrup. If you like it spicy, toss in some red pepper flakes. Play around with the ingredients to find your perfect blend. When baking chicken thighs, make sure they fit in one layer. This helps them cook evenly. Preheat your oven to 400°F (200°C) for best results. Use a meat thermometer to check if the chicken is done. It should reach 165°F (75°C). For preparation, a good baking dish makes a difference. Use glass or ceramic for even heat. A whisk will help mix your marinade well, so keep one handy. To achieve the perfect glaze, drizzle the thickened sauce on the chicken right after baking. Let it sit for a bit to soak in. This step adds shine and flavor. Enjoy the delicious results of your baked teriyaki chicken! {{image_4}} You can change some ingredients if you want. Here are some ideas: - Honey or maple syrup: Try using agave syrup or brown sugar. Both add sweetness. - Low-sodium soy sauce: Look for coconut aminos for a gluten-free option. It tastes great too! - Different proteins: Swap chicken thighs for chicken breasts or use tofu for a plant-based option. Tofu absorbs flavor well. Want to spice things up? Here are some ways to enhance your dish: - Adding spices: Add red pepper flakes for some heat or black pepper for a slight kick. - Incorporating vegetables: Toss in broccoli or bell peppers to turn this into a one-pan meal. They roast well and add color. - Fusion ideas: Try adding a hint of curry powder for an Indian twist or citrus zest for a fresh flavor. These small changes can make your meal exciting. You can find the Full Recipe to explore more ideas! To keep your Baked Teriyaki Chicken fresh, store it in an airtight container. Place it in the fridge right after it cools. This helps maintain its juicy texture. Baked Teriyaki Chicken lasts about 3 to 4 days in the fridge. After that, it may dry out or lose flavor. If you want to save it for longer, freezing is a great option. Wrap the chicken tightly in plastic wrap or foil, then place it in a freezer bag. This method helps prevent freezer burn. Baked Teriyaki Chicken can last up to 3 months in the freezer. To reheat, thaw it overnight in the fridge, then warm it in the oven at 350°F (175°C) until hot. You can create exciting meals with your leftovers. Try slicing the chicken and adding it to salads or wraps. This adds a delicious teriyaki flavor to your lunch. You can also serve it over rice or noodles for a quick dinner. Pair Baked Teriyaki Chicken with sides like steamed broccoli or fried rice. These dishes complement the sweet and savory flavors well. For drinks, consider serving it with iced tea or sparkling water. For meal prep, portion out the chicken with your favorite sides. This makes it easy to grab a meal during busy days. Using Baked Teriyaki Chicken in meal prep helps you enjoy tasty dishes all week long! You can find the full recipe above to start your culinary adventure. How long should I marinate Baked Teriyaki Chicken? I recommend marinating for at least 30 minutes. For better flavor, try 2 hours. This helps the chicken soak up all that yummy teriyaki sauce. Can I use chicken breast instead of thighs? Yes, you can use chicken breast. Keep in mind that chicken thighs stay juicier. If you use breasts, watch the bake time so they don't dry out. What can I substitute for sesame oil? You can use olive oil or canola oil. These oils won’t give the same nutty taste, but they work well in a pinch. Is Baked Teriyaki Chicken gluten-free? Not always. Regular soy sauce contains gluten. Look for gluten-free soy sauce or tamari for a safe option. How do I know when my chicken is fully cooked? Use a meat thermometer. The chicken should reach 165°F (75°C). This ensures it is safe to eat and juicy. Baked Teriyaki Chicken is simple and fun to make. We covered key ingredients, steps, and tips. You learned how to marinate chicken and achieve a tasty glaze. Remember to customize your recipe with your favorite flavors. Enjoy leftovers in new meals or snacks. With these insights, you can create a delicious dish that impresses everyone at the table. Get cooking, and savor every bite of your Teriyaki Chicken delight!

Baked Teriyaki Chicken Juicy and Flavorful Dish

Are you ready to impress your taste buds with a delicious Baked Teriyaki Chicken? This juicy and flavorful dish is

- 1 cup pumpkin puree - 2/3 cup brown sugar - 1/3 cup granulated sugar - 1/2 cup vegetable oil - 2 large eggs - 1 teaspoon vanilla extract - 1 1/2 cups all-purpose flour - 1 teaspoon baking soda - 1 teaspoon baking powder - 1 tablespoon pumpkin pie spice - 1/2 teaspoon salt - Optional additions: 1/2 cup chopped walnuts or pecans, 1/2 cup chocolate chips When I make pumpkin spice muffins, I choose high-quality pumpkin puree. You can use fresh pumpkin, but canned puree works well. Look for brands with no added sugar or spices. Always check the label for quality. Fresh ingredients make a big difference. Fresh eggs give the muffins a nice rise. Fresh spices also add a strong flavor. If you can, buy whole spices and grind them yourself. Each muffin is about 200 calories. They contain around 8 grams of fat, 30 grams of carbs, and 3 grams of protein. Pumpkin is great for your health. It is low in calories but high in vitamins. Pumpkin spice adds flavor and has some health benefits too. Spices like cinnamon may help with digestion and blood sugar control. Enjoy these muffins as a tasty treat that also offers some nutrition! For the full recipe, check out the Cozy Pumpkin Spice Muffins section. 1. Preheat your oven to 350°F (175°C). Prepare a muffin tin by lining it with paper liners or greasing each cup with non-stick spray. This step helps the muffins release easily after baking. 2. In a large bowl, mix the pumpkin puree, brown sugar, granulated sugar, vegetable oil, eggs, and vanilla extract. Whisk these ingredients together until the mixture is smooth. 3. In another bowl, sift together the all-purpose flour, baking soda, baking powder, pumpkin pie spice, and salt. Sifting removes lumps and helps mix the dry ingredients well. 1. Gradually add the dry mixture to the wet mixture. Use a spatula to fold them together gently. Be careful not to overmix, as this makes muffins dense. 2. If you want, fold in chopped walnuts or pecans and/or chocolate chips. These add great texture and flavor. 1. Using a scoop, fill each muffin cup about 3/4 full. This allows the muffins to rise without overflowing. 2. Place the muffin tin in the oven and bake for 18-22 minutes. To check if they are done, insert a toothpick into the center of a muffin. It should come out clean or with just a few moist crumbs. 3. After baking, let the muffins cool in the tin for about 5 minutes. Then, transfer them to a wire rack to cool completely. Enjoy the lovely smell as they cool. For the full recipe, refer to the Cozy Pumpkin Spice Muffins section above. To make light muffins, avoid overmixing the batter. Stir just until you see no dry flour. This keeps air in the batter. Air gives muffins their fluffy texture. Testing for doneness is simple. Insert a toothpick into the center of a muffin. If it comes out clean, your muffins are ready. If there are crumbs, bake for a few more minutes. You can add spices to boost flavor. Try cinnamon, nutmeg, or even a dash of ginger. These spices make your muffins warm and cozy. For dietary needs, there are easy swaps. Use almond flour or oat flour for gluten-free muffins. To make them vegan, replace eggs with applesauce or flaxseed meal. Both options work well in this recipe. Don’t throw away leftover pumpkin puree! It’s great in many dishes. Add it to smoothies for a creamy texture. You can mix it into soups for added flavor. Try using it in pancakes or waffles too. The options are endless! {{image_4}} I love to play with flavors in my pumpkin spice muffins. Adding chocolate chips turns them into a sweet treat. The rich chocolate blends well with the warm spices. You can also try nutty variations. Chopped walnuts or pecans add a nice crunch. They complement the soft muffin texture perfectly. Both options make the muffins even more enjoyable. You can easily adjust this recipe for different diets. For gluten-free muffins, use a gluten-free flour blend. This keeps the texture light and fluffy. If you want vegan muffins, substitute the eggs. You can use flaxseed meal or applesauce instead. Both options work well and keep the muffins moist. These adjustments make the recipe more inclusive. Pairing your muffins with drinks enhances the experience. Coffee and tea go well with these warm muffins. I also love to make muffin parfaits. Layer muffin pieces with yogurt and fruit for a fun twist. You can add toppings like cream cheese frosting or a sprinkle of cinnamon. These ideas make your muffins even more inviting and delicious. To keep your pumpkin spice muffins fresh, store them at room temperature. Place them in an airtight container. This helps maintain their moisture and flavor. You can also wrap them in plastic wrap. Just be sure they cool completely before wrapping. If you want to enjoy these muffins later, freeze them. To do this, wrap each muffin in plastic wrap, then place them in a freezer bag. This keeps them fresh for about three months. When you're ready to eat, thaw them in the fridge overnight. You can also microwave them for 20-30 seconds to warm them up. These muffins stay fresh for about three days at room temperature. If stored properly in the fridge, they can last up to a week. Watch for signs of spoilage. If they smell off or have mold, it’s best to toss them. Enjoy your cozy pumpkin spice muffins while they are at their best! For the full recipe, check out the recipe section. To make fluffy muffins, mix wet and dry ingredients well, but do not overmix. Use room temperature eggs for better rise. Choose all-purpose flour for the right texture. Baking powder and baking soda help with fluffiness. They create air pockets during baking. This gives your muffins a light, soft bite. Yes, you can use fresh pumpkin. Start by roasting a pumpkin until soft, then puree it. Fresh pumpkin gives a richer flavor. However, it may have more moisture than canned. Adjust the liquids in your recipe if needed. Canned pumpkin is more convenient and consistent in texture. You can use several egg substitutes. For one egg, try 1/4 cup of unsweetened applesauce or mashed banana. Ground flaxseed mixed with water works too—1 tablespoon flaxseed with 2.5 tablespoons water. Each option adds moisture but changes flavor slightly. Choose what fits your taste best. To prevent sticking, grease the muffin tin well. Use non-stick spray or butter. You can also line the tin with paper liners for easy removal. Allow muffins to cool for a few minutes before taking them out. This helps them release easily without breaking. Absolutely! You can add chopped walnuts, pecans, or chocolate chips for extra flavor. Dried fruits like cranberries or raisins also work well. If you add too much, the muffins may become dense. So, stick to about 1/2 cup of mix-ins. Enjoy experimenting with your favorite flavors! You learned how to make delicious pumpkin muffins from scratch. We covered the key ingredients, preparation steps, and tips for success. Remember to select high-quality ingredients for the best taste. Don’t forget the options for dietary needs and creative variations. With these tips, you can enjoy tasty muffins anytime. I hope you feel ready to bake and try these ideas. Enjoy your pumpkin muffins fresh, and share them with friends!

Pumpkin Spice Muffins Irresistible Fall Treat

Get ready for the ultimate fall treat: Pumpkin Spice Muffins! With their warm, cozy flavors, these muffins are perfect for

- 6 large eggs - 1/4 cup milk - 1 cup fresh spinach, chopped - 1/2 cup bell peppers, diced (red and yellow) - 1/2 cup cherry tomatoes, halved - 1/4 cup red onion, finely chopped - 1/2 cup zucchini, grated - 1/2 teaspoon garlic powder - 1/2 teaspoon dried oregano - Salt and pepper to taste - 1/2 cup shredded cheese (cheddar or mozzarella) - 2 tablespoons olive oil The ingredients in this veggie packed frittata not only taste great but also provide many nutrients. Eggs serve as the base, bringing protein and healthy fats. The milk keeps the frittata moist and fluffy. Fresh spinach adds iron and vitamins. The bell peppers and cherry tomatoes burst with flavor and color. Zucchini gives a nice texture, while onion adds a sweet touch. The garlic powder and oregano give it a delightful aroma. A sprinkle of salt and pepper enhances all the flavors. Finally, cheese adds richness and makes the top golden and cheesy. Each serving contains about 250 calories, with 18g of protein, 15g of fat, and 10g of carbohydrates. This makes it a balanced meal, perfect for breakfast or brunch. - Oven-safe skillet - Mixing bowl - Whisk You need an oven-safe skillet to cook the frittata on the stovetop and then finish it in the oven. A mixing bowl helps in whisking the eggs, milk, and seasonings. A whisk is essential for making the egg mixture light and fluffy. For the full recipe, refer to the detailed cooking instructions shared earlier. - Preheat the oven to 400°F (200°C). - In a mixing bowl, whisk 6 large eggs with 1/4 cup milk. Add 1/2 teaspoon garlic powder, 1/2 teaspoon dried oregano, salt, and pepper. Set it aside. - Heat 2 tablespoons olive oil in an oven-safe skillet over medium heat. - Add 1/4 cup finely chopped red onion and 1/2 cup diced bell peppers. Sauté for about 3-4 minutes until soft. - Next, add 1/2 cup grated zucchini and 1 cup chopped spinach. Stir for 2-3 minutes until the spinach wilts. - Fold in 1/2 cup halved cherry tomatoes, mixing them well with veggies. - Pour the egg mixture over the vegetables. Use a spatula to stir gently. - Cook on the stovetop for about 3-4 minutes until the edges start to set. - Transfer the skillet to the preheated oven and bake for 12-15 minutes until puffed and golden. - Check doneness by inserting a toothpick into the center; it should come out clean. - Remove from the oven and let it cool for a few minutes before slicing into wedges. For the complete recipe, check out the Full Recipe section. To make a fluffy frittata, whisk the eggs well. Use a fork or whisk and mix until the eggs are light and frothy. This adds air and makes the frittata rise nicely. When sautéing veggies, timing is key. Start with onions and bell peppers. Cook them for about 3-4 minutes until soft. Then add zucchini and spinach. Sauté these for 2-3 more minutes. This step helps bring out their flavors. Different cheeses can change the taste of your frittata. Cheddar adds a sharp bite. Mozzarella gives a creamy texture. You can also try feta for a tangy twist. Mixing cheeses can create a unique flavor profile too. Herbs and spices can boost your frittata's taste. Fresh herbs like basil or parsley add brightness. Dried herbs like thyme or rosemary bring depth. You can also sprinkle in red pepper flakes for a hint of heat. Experiment with flavors you enjoy to make it your own. For the full recipe, check the details above. {{image_4}} You can make your veggie packed frittata even heartier by adding protein. Try crispy bacon or savory sausage for a meaty twist. Chop them finely and sauté them first in the skillet. This gives your frittata a nice flavor boost. If you prefer vegetarian options, consider adding beans or lentils. Chickpeas are also a great choice. They add protein and a nice texture. You can mix them in with the veggies. This way, you keep the dish filling and nutritious. One of the best parts of a frittata is how flexible it is. You can swap in seasonal vegetables to match what you have. In spring, use fresh asparagus or peas for a bright touch. Summer is great for zucchini and fresh corn. In fall, think about adding roasted butternut squash or sweet potatoes. Winter calls for hearty greens like kale or Swiss chard. This keeps your frittata fresh and exciting all year long. When it’s time to serve your frittata, think about sides that balance its richness. A light salad of mixed greens works great. Add a simple vinaigrette to keep it fresh. You can also serve it with crusty bread or toast for a filling meal. For a fun twist, try some sliced avocado on the side. It adds creaminess and a pop of flavor. Pair your dish with a refreshing drink like iced tea or a sparkling water. This makes for a complete and satisfying meal. For the full recipe, check out the Veggie Packed Frittata section above. To store your frittata, let it cool first. Once cool, cut it into slices. Place the slices in an airtight container. This helps keep the frittata fresh. Store it in the fridge for up to four days. If you want to keep it longer, consider freezing. When you are ready to eat, reheat your frittata for the best taste. Use the oven or a skillet. If using the oven, preheat it to 350°F (175°C). Place the frittata slices on a baking sheet. Heat for about 10-15 minutes. If using a skillet, warm it over medium heat. Cover with a lid to keep moisture. This keeps the frittata soft and tasty. You can freeze leftover frittata for later use. Wrap each slice in plastic wrap. Then place the wrapped slices in a zip-top bag. Label the bag with the date. Use the frozen frittata within three months for the best flavor. To thaw, move the frittata to the fridge overnight. Reheat as mentioned earlier for a warm meal. For the full recipe, check out the Veggie Packed Frittata. Enjoy your delicious meal! A frittata lasts about 3 to 4 days in the fridge. Store it in an airtight container. This keeps it fresh and safe to eat. Yes, you can make a frittata ahead of time. Prepare it the night before and store it in the fridge. This saves time for busy mornings. The main difference is in the crust. Quiche has a crust, while a frittata does not. Frittatas use more eggs and fewer dairy products than quiches. You know it’s done when it is puffed and golden. Insert a toothpick in the center; it should come out clean. This means the eggs are fully cooked. For the full recipe, check the section above. In this blog post, I shared a simple frittata recipe, covering ingredients, steps, and helpful tips. I included ways to customize your dish and how to store any leftovers. Frittatas are tasty, healthy, and easy to make. You can mix in your favorite veggies or proteins. Remember, cooking should be fun! Experiment with flavors and enjoy your meals. With practice, you’ll become a frittata pro; share your tasty creations with friends and family!

Veggie Packed Frittata Flavorful and Nourishing Meal

Are you ready to make a meal that’s both tasty and packed with nutrients? My Veggie Packed Frittata is the

- 2 cups cooked brown rice - 1 lb boneless, skinless chicken breasts - 1 can (15 oz) black beans - 1 cup corn kernels - 1 cup cherry tomatoes, halved - 1 ripe avocado - 1/4 cup fresh cilantro - Shredded cheese (cheddar or Mexican blend) - Optional toppings: Sour cream, tortilla chips - Extra virgin olive oil - Garlic powder - Ground cumin - Smoked paprika - Sea salt and black pepper When making chicken burrito bowls, the right ingredients make all the difference. Start with cooked brown rice as your base. This grain adds fiber and keeps you full. For protein, use boneless, skinless chicken breasts. This meat is lean and easy to cook. Next, open a can of black beans. These beans add texture and flavor. Add corn kernels for a sweet crunch. Cherry tomatoes provide freshness. Don't forget a ripe avocado for creaminess. Chop fresh cilantro for a burst of flavor. Top the bowls with shredded cheese for richness. If you like, add sour cream or tortilla chips for extra taste and crunch. For seasoning, use extra virgin olive oil to sauté the chicken. Sprinkle in garlic powder, ground cumin, and smoked paprika for depth. Season with sea salt and black pepper to enhance all the flavors. With these ingredients ready, you can create a colorful and tasty meal. Check out the Full Recipe for more details on cooking these burrito bowls. To start, heat 1 tablespoon of extra virgin olive oil in a large skillet over medium heat. When the oil shimmers, add 1 pound of diced boneless, skinless chicken breasts. Sauté for about 7-10 minutes. Stir the chicken often until it turns a nice golden brown. This step locks in the flavor. Next, season the chicken well. Mix in 1 teaspoon of garlic powder, 1 teaspoon of ground cumin, and 1 teaspoon of smoked paprika. Add sea salt and black pepper to taste. This mix gives the chicken a bold flavor. Make sure every piece is coated well. While the chicken cooks, you can prepare the brown rice. If you haven’t cooked it yet, follow the package instructions. Typically, you need 2 cups of water for 1 cup of rice. Bring the water to a boil, add the rice, and cover. Cook on low heat for about 40-45 minutes. Fluff it with a fork when done. This rice adds a hearty base to your bowls. For the veggie medley, grab a mixing bowl. Combine 1 can of rinsed black beans, 1 cup of corn (fresh, frozen, or canned), and 1 cup of halved cherry tomatoes. Then, add 1 diced ripe avocado and 1/4 cup of finely chopped fresh cilantro. Next, drizzle the juice of 1 lime over the mixture. Season with salt and pepper to taste. Toss gently to mix without mashing the avocado. This medley adds color and freshness to your burrito bowls. Now, it's time to assemble your bowls. Start with a generous scoop of cooked brown rice at the bottom. Next, layer on the seasoned chicken. Finally, add the veggie mix on top. To finish, sprinkle each bowl with 1 cup of shredded cheese. You can use cheddar or a Mexican cheese blend. For extra creaminess, top with a dollop of sour cream or Greek yogurt if you like. To add a bit of crunch, serve with tortilla chips on the side or break some on top. Enjoy your colorful and tasty chicken burrito bowls! For the complete recipe, check out the Full Recipe. To make juicy, flavorful chicken, start with good quality meat. Use boneless, skinless chicken breasts for the best results. Season the chicken well with garlic powder, cumin, and smoked paprika. This adds depth to the flavor. Cook the chicken on medium heat for 7 to 10 minutes. This gives it a nice golden brown color. Always check that the chicken is fully cooked. The internal temperature should reach 165°F. When serving your burrito bowls, get creative! Use colorful bowls to showcase your vibrant ingredients. Layer the rice, chicken, and veggie medley in a way that looks appealing. Add a sprinkle of chopped cilantro on top. For a fun twist, add tortilla chips for crunch. You can also serve the bowls with lime wedges for extra zest. Pair these bowls with iced tea or flavored water for a refreshing drink. Each serving of these chicken burrito bowls has about 450 calories. You get a nice balance of protein, carbs, and healthy fats. To lighten the meal, use less cheese or skip the sour cream. You can also replace brown rice with quinoa for a different taste. If you want a vegetarian option, swap chicken for black beans or tofu. These substitutions keep the meal satisfying and nutritious. {{image_4}} You can easily swap chicken for plant-based protein. Tofu or tempeh works well here. Just season it like the chicken. You can also try lentils or chickpeas for a hearty texture. Adding more vegetables makes it colorful and tasty. Try bell peppers, zucchini, or spinach. Roasting them enhances their flavor. You can get creative with toppings and sauces. Add fresh salsa, guacamole, or jalapeños for heat. Want to keep it simple? Use shredded lettuce or diced onions. For the base, rice options are endless. Use brown rice, cauliflower rice, or quinoa. For beans, try pinto beans or refried beans. They bring different flavors and textures. Preparing bowls ahead saves time on busy days. Cook your rice and protein in advance. Store them in separate containers. This keeps each ingredient fresh. You can also chop veggies ahead of time. Keep them in the fridge for quick access. Assemble your bowls right before serving for the best taste. Check out the Full Recipe for more tips! To store your chicken burrito bowls, first, let them cool down. Then, place them in airtight containers. This keeps the flavors fresh and prevents spills. You can put them in the fridge for up to three days. When you’re ready to eat, reheat the bowls in the microwave. Use medium power to warm them evenly. If you want the best taste, add a splash of lime juice before serving. This brightens the flavors and makes your meal feel fresh again. If you want to save your burrito bowls for later, freezing is a great option. Start by freezing each component separately. For example, you can freeze the chicken, rice, and veggies in different bags. This helps keep the textures nice. Use freezer-safe bags or containers to avoid freezer burn. Your burrito bowl components can last up to three months in the freezer. When you're ready to eat, thaw the ingredients in the fridge overnight. Then reheat them on the stove or in the microwave before serving. This way, you enjoy a tasty meal anytime! Chicken burrito bowls stay fresh in the fridge for up to 4 days. Store them in airtight containers. This keeps the flavors strong and the food safe. Make sure to cool them before sealing. Check for any off smells or changes in texture before eating. Yes, you can prep burrito bowls in advance. Cook the chicken and rice, then store them separately. This keeps everything fresh. Chop your veggies and store them in a sealed bag. When you are ready to eat, just mix and enjoy! This method saves time during busy days. If you can’t use avocados, try diced cucumbers or roasted sweet potatoes. Both add great flavor and texture. Another choice is using guacamole if you want that creamy taste. These options work well and keep your bowls tasty. Enjoy finding what you love! For more details, check the Full Recipe above. Creating burrito bowls is simple and fun. We covered all the essential ingredients, from chicken to beans and spice. Each step ensures a delicious meal that you can customize. Remember to store leftovers properly and get creative with variations. Your options are endless! Enjoy experimenting with flavors and find what you love best. A tasty burrito bowl is always a great choice for a meal!

Chicken Burrito Bowls Flavorful and Filling Meal Idea

Craving something hearty and delicious? Chicken burrito bowls are your answer! Packed with tender chicken, fresh veggies, and zesty flavors,

- 2 cups cooked chicken, shredded - 1 cup shredded cheese (cheddar or Monterey Jack) - 1 bell pepper, diced - 1 small onion, finely chopped Easy chicken quesadillas start with simple and tasty ingredients. The key is shredded chicken. It adds protein and flavor. Use leftover chicken or rotisserie chicken for ease. Shredded cheese melts beautifully and gives a creamy texture. I prefer cheddar or Monterey Jack for their great taste. Diced bell pepper adds color and crunch. Finely chopped onion brings sweetness and depth. These four main ingredients create a solid base for your quesadillas. - 1 teaspoon ground cumin - 1 teaspoon smoked paprika - Salt and pepper, to taste Spices elevate the flavor of your quesadillas. Ground cumin gives a warm, earthy taste. Smoked paprika adds a hint of smokiness that is delightful. Use salt and pepper to enhance all the flavors. These spices are easy to find and make a big difference in taste. - 1 tablespoon extra-virgin olive oil - 4 large flour tortillas - Salsa or guacamole for serving Extra-virgin olive oil helps cook the veggies nicely. It also prevents sticking in the skillet. Flour tortillas are soft and hold the filling well. They are easy to fold and cook. Salsa or guacamole adds freshness when you serve. These extras bring your meal together and make it special. For the full recipe, refer to the detailed instructions provided earlier. - Heat one tablespoon of olive oil in a medium skillet over medium heat. - Add one small onion, finely chopped, and one diced bell pepper. - Cook for about five minutes. Stir often until the vegetables are soft and fragrant. - Next, add two cups of shredded chicken to the skillet. - Sprinkle in one teaspoon of ground cumin and one teaspoon of smoked paprika. - Season with salt and pepper to taste. Stir well and heat for three to four minutes. - Take one large flour tortilla and lay it flat on a clean surface. - On one half, spread a quarter of the chicken mixture evenly. - Top it with one cup of shredded cheese. Fold the tortilla over to seal the filling. - Wipe the skillet clean and return it to medium heat. - Place one folded quesadilla in the skillet and cook for three to four minutes until golden brown. - Carefully flip the quesadilla and cook the other side for another three to four minutes. - Once cooked, remove the quesadilla from the skillet and let it cool for about a minute. - Slice it into wedges. Serve warm with salsa or guacamole on the side for dipping. For the full recipe, check out the detailed list and steps above. - Use a non-stick skillet: This helps prevent the quesadillas from sticking. It makes flipping easy and keeps them intact. - Avoid overcrowding the pan: Cook one quesadilla at a time. If you crowd the pan, they won’t get crispy. Give each quesadilla space to cook evenly. - Best cheese options for melts: I love using cheddar or Monterey Jack. They melt well and add great flavor. You can also try pepper jack for a spicy twist. - Tips for layering cheese: Layer cheese both inside and on the outside of the quesadilla. This creates a gooey center and a crispy shell. Don’t be shy with the cheese; it makes everything better! - Creative serving suggestions: Arrange quesadilla wedges in a fan shape on a platter. This looks fancy and invites people to dig in. - Adding garnishes: Drizzle with sour cream or sprinkle fresh cilantro on top. This adds color and flavor. You can also serve with salsa or guacamole on the side for dipping. For the full recipe, check out the Cheesy Chicken Quesadillas Delight! {{image_4}} You can easily swap the chicken for ground beef or turkey. These meats add a rich flavor that many enjoy. Ground beef works well with the same spices. Cook it until it's browned before adding it to the quesadilla. For vegetarian options, try black beans or sautéed mushrooms. These ingredients bring a hearty feel without meat. You can also mix in some corn for added sweetness. Kick up the flavor by adding jalapeños or fresh spinach. Jalapeños give a nice heat that warms the dish. Spinach adds a healthy touch and bright color. Both mix well with the chicken and cheese. Using different cheese blends can also enhance the taste. Try pepper jack for a spicy kick or feta for a tangy twist. Mixing cheeses can create a rich, creamy texture that's hard to resist. If you're feeling adventurous, use corn tortillas instead of flour. They add a different texture and flavor. Corn tortillas are also great at holding the filling together. For those who need gluten-free options, look for gluten-free tortillas. Many stores offer good choices that taste great. These options ensure everyone can enjoy your quesadillas. Want to see the full recipe? Check it out [Full Recipe]. To keep your cooked quesadillas fresh, store them in an airtight container. Place a layer of parchment paper between each quesadilla to prevent sticking. They will last in the fridge for up to three days. Before serving, check for any signs of spoilage, like an off smell or discoloration. If you want to save some for later, freezing is a great option. Start by letting the quesadillas cool completely. Then, wrap each one tightly in plastic wrap. Place them in a freezer-safe bag or container. They can stay frozen for up to two months. When you're ready to eat, remove them from the freezer and let them thaw in the fridge overnight. For the best taste, reheat quesadillas in a skillet. Warm it over medium heat for about 3-4 minutes on each side. This keeps them crispy. You can also use an oven. Preheat it to 350°F (175°C) and bake for about 10-15 minutes. If you're in a hurry, a microwave works too, but it may make them a bit soggy. Just heat for 30 seconds to 1 minute. For the full recipe, check out the easy chicken quesadillas details above. Making Easy Chicken Quesadillas is quick. You need about 10 minutes to prep. Cooking takes another 10 minutes. That means you can have a tasty meal ready in just 20 minutes! Yes, using leftover chicken works great! Just shred it and add it to the mix. It saves time and reduces waste. Leftovers can make this dish even more flavorful. You can serve quesadillas with many sides. A fresh salad pairs well. You can also serve rice or beans. These sides will add color and taste to your meal. You can prep quesadillas in advance! Assemble them, then store them in the fridge. Just cook them when you're ready to eat. This is a great time-saver for busy days. To get crispy quesadillas, use a non-stick skillet. Heat it well before adding the quesadilla. Cook it until golden brown on both sides. This ensures a nice, crunchy texture. Easy chicken quesadillas are quick and fun to make at home. You need simple ingredients like chicken, cheese, and spices. Follow our steps to sauté, combine, assemble, and cook. Use tricks to perfect your quesadillas, choose your favorite cheese, and get creative with serve ideas. You can even vary the protein and tortillas for new flavors. Storing and reheating leftovers is easy, too. Enjoy making these tasty meals with family or friends. Happy cooking!

Easy Chicken Quesadillas Flavorful and Quick Recipe

Are you craving something quick, tasty, and easy to make? Look no further! This Easy Chicken Quesadilla recipe features juicy

- 1 large red bell pepper, cut into 1-inch chunks - 1 large yellow bell pepper, cut into 1-inch chunks - 1 medium zucchini, sliced into thick rounds - 1 large red onion, cut into wedges - 8 cherry tomatoes, whole - 1 cup mushrooms (button or cremini), halved - 3 tablespoons extra virgin olive oil - 2 tablespoons balsamic vinegar - 2 cloves garlic, finely minced - 1 teaspoon dried oregano - 1 teaspoon smoked paprika - Salt and freshly ground black pepper, to taste - Fresh basil leaves When I create grilled veggie skewers, I always start with these fresh vegetables. Red and yellow bell peppers bring sweetness and color. Zucchini adds a nice texture, while red onion gives a mild bite. Cherry tomatoes burst with flavor, and mushrooms soak up all the marinade goodness. For the marinade, I use extra virgin olive oil for richness and balsamic vinegar for tang. Minced garlic adds depth, while dried oregano and smoked paprika give that extra kick. I always season with salt and pepper to bring all the flavors together. Don't forget the fresh basil! It adds a lovely touch just before serving. Check out the Full Recipe for more details on how to prepare these delightful skewers. First, preheat your grill to medium-high heat. Aim for about 400°F (200°C). This heat gives the veggies nice grill marks and a great flavor. While your grill heats, soak your wooden skewers in water for 10-15 minutes. This step keeps the skewers from burning while grilling. In a large bowl, combine three tablespoons of extra virgin olive oil, two tablespoons of balsamic vinegar, and two finely minced garlic cloves. Add one teaspoon of dried oregano, one teaspoon of smoked paprika, and a pinch of salt and fresh pepper. Whisk until it blends well. This marinade adds a punch of flavor to your veggies. After the veggies soak in the marinade for about 15 minutes, it's time to assemble. Start threading the marinated vegetables onto the soaked skewers. Use red and yellow bell peppers, zucchini, red onion, cherry tomatoes, and mushrooms. Alternate the colors and types of veggies. Aim for 2-3 pieces of each per skewer. This keeps your skewers colorful and fun! For the full recipe, check out the complete instructions. - Grill temperature settings: Preheat your grill to medium-high heat, around 400°F (200°C). This temperature gives a nice char without burning the veggies. - Turning skewers for even cooking: Turn the skewers every 2-3 minutes. This step helps the vegetables cook evenly, ensuring each side gets that perfect grill mark. - Recommended marination time: Marinate your veggies for about 15 minutes. This short time allows flavors to soak in well. - Enhancing flavor absorption: Toss the vegetables gently in the marinade. This action helps coat each piece well, leading to a burst of flavor in every bite. - How to prevent vegetables from falling off: Use soaked wooden skewers. Soaking prevents burning and helps keep the veggies in place while grilling. - Best practices for arranging skewers: Alternate colors and types of veggies on each skewer. This not only looks nice but also ensures a mix of flavors in every bite. For a complete guide, check the Full Recipe for Grilled Veggie Skewers. {{image_4}} You can mix and match vegetables based on what you like or what’s in season. Here are some great ideas: - Asparagus for a crunchy bite. - Eggplant for a meaty texture. - Sweet corn for a juicy pop. - Bell peppers of all colors for a rainbow effect. If you have allergies, you can swap out ingredients easily. For instance, if you can't have mushrooms, try using zucchini or squash. You can also use any firm vegetable that holds its shape on the grill. Changing the marinade can give your skewers a fresh taste. Here are some options: - Use avocado oil instead of olive oil for a different flavor. - Try lime juice or vinegar for a tangy kick. - Add cumin or chili powder for a spicy twist. You can also mix in fresh herbs like cilantro or parsley for added flavor. This way, you can customize the taste for your family or guests. These skewers fit many diets. They are naturally vegan and vegetarian. If you want gluten-free skewers, just ensure your marinade has no gluten ingredients. You can also mix in plant-based protein like tofu or tempeh for a heartier meal. These variations allow everyone to enjoy grilled veggie skewers. Whether you use the full recipe or change it up, you can create a dish that suits your taste and dietary needs. To store your grilled veggie skewers, place them in an airtight container. Keep them in the fridge. They will stay fresh for up to three days. Make sure they cool down before sealing the container. Avoid letting them sit out too long to keep bacteria at bay. When reheating grilled veggies, use a microwave or oven. If you use a microwave, heat in short bursts. This helps keep them from becoming mushy. If you prefer the oven, set it to 350°F (175°C). Place the skewers on a baking sheet for about 10 minutes. You can also add them to a stir-fry for a quick meal. Meal prepping skewers is easy. Chop your veggies and marinate them a day ahead. Store the veggies in the marinade in the fridge. When you’re ready to cook, just skewer and grill. You can also freeze the marinated veggies. Just place them in a freezer bag. They will last up to three months. Thaw them in the fridge overnight before grilling. This makes cooking quick and fun! For the full recipe, check the earlier section. Grilled veggie skewers last about 3 to 4 days in the fridge. Store them in an airtight container to keep them fresh. If you want to freeze them, they can last up to 3 months. Just remember, freezing may change their texture when thawed. Yes, you can use frozen vegetables for your skewers. Just remember to thaw them first. Pat them dry to remove excess moisture before skewering. This step helps prevent steaming instead of grilling. Grill frozen veggies for a few extra minutes. Check for doneness by piercing them with a fork. I love serving grilled veggie skewers with a variety of dips. Here are some great options: - Hummus: A classic choice with a creamy texture. - Tzatziki: A refreshing yogurt-based dip with cucumber. - Balsamic glaze: Adds a sweet and tangy flavor. - Chimichurri: A zesty sauce made from herbs and oil. These dips enhance the flavors and make your meal even more enjoyable. For the full recipe, dive into the details and get grilling! Grilling veggie skewers is fun and simple. You learned about key ingredients, marinades, and assembly tips. These steps keep your vegetables fresh and tasty. Remember to let your skewers soak and marinate well for great flavors. Explore different veggies and marinades to match your taste. Storing leftovers and prepping ahead can save you time. Dive into this delicious cooking method that caters to many diets. Enjoy delicious skewers with friends and family; they’re sure to please!

Grilled Veggie Skewers Flavorful and Easy Recipe

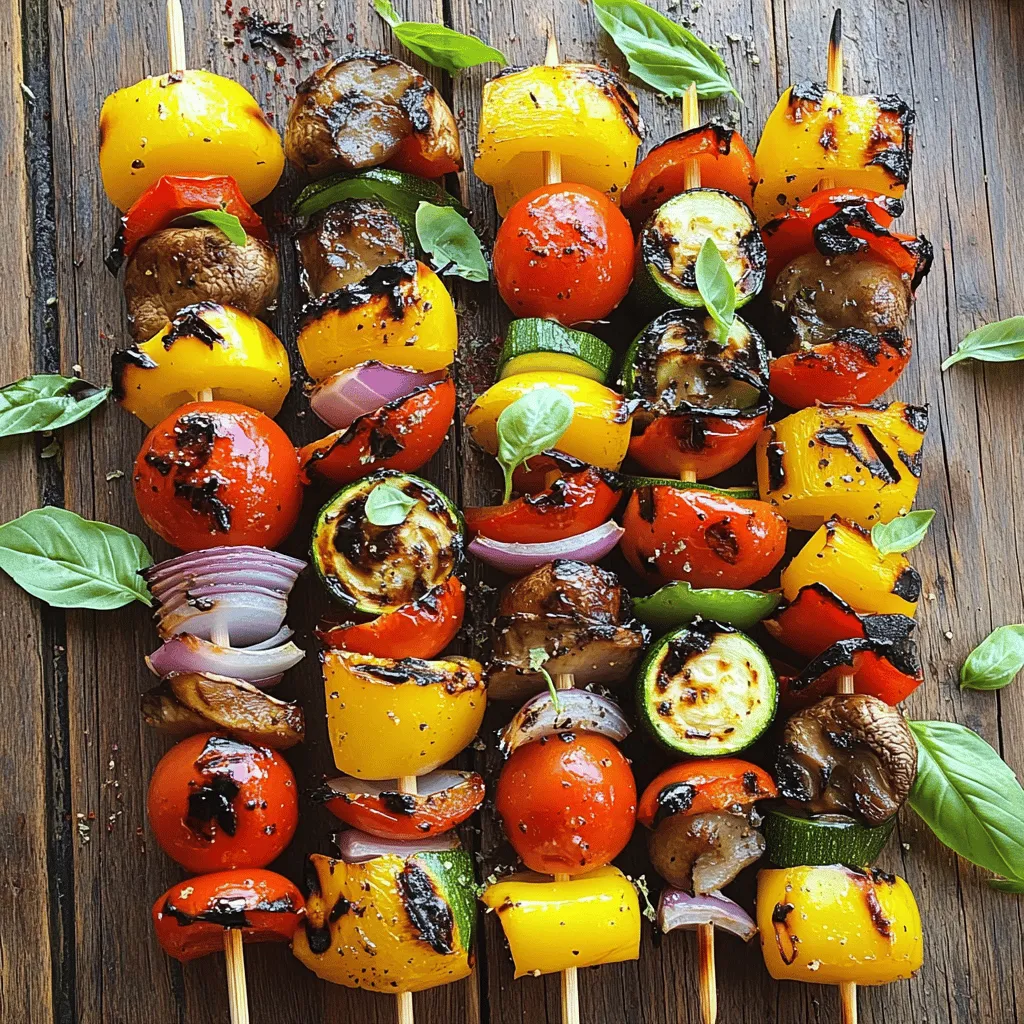
Looking for a delicious and simple meal? Grilled veggie skewers are your answer! Packed with vibrant flavors and colorful vegetables,

- 1 cup rolled oats - 1 ½ cups almond milk (or milk of your choice) - 1 medium apple, diced - 1 teaspoon ground cinnamon - 2 tablespoons maple syrup (or honey) - 1 tablespoon chia seeds (optional) - ¼ cup walnuts or pecans, chopped - A pinch of salt The ingredients for Apple Cinnamon Overnight Oats are simple yet full of flavor. The oats are the base. They soak up all the tasty goodness overnight. Almond milk adds creaminess without the dairy. You can choose any milk you like. Apples bring natural sweetness and crunch. I prefer to keep the skin on for added texture. Cinnamon adds warmth and spice, making each bite feel cozy. Maple syrup or honey sweetens the dish. You can adjust the amount based on your taste. Chia seeds are optional but great. They add fiber and help thicken the oats. Walnuts or pecans give a nice crunch. A pinch of salt balances the flavors perfectly. In one serving, you get about 300 calories. This includes 10 grams of protein, 10 grams of fat, and 45 grams of carbohydrates. Oats are high in fiber, which is good for digestion. Apples are rich in vitamins, boosting your immune system. Together, they make a healthy breakfast choice. Eating oats can help lower cholesterol. Apples provide antioxidants, improving heart health. This meal keeps you full, making it perfect for busy mornings. Enjoy your tasty morning boost with Apple Cinnamon Overnight Oats! For the full recipe, check the details above. 1. Mixing the base ingredients In a medium mixing bowl, add 1 cup of rolled oats, 1 ½ cups of almond milk, 1 teaspoon of ground cinnamon, 2 tablespoons of maple syrup, and a pinch of salt. Stir well until the mixture combines. This step is crucial as it makes the oats creamy and flavorful. 2. Adding apple and chia seeds Gently fold in 1 medium diced apple and 1 tablespoon of chia seeds, if you choose to use them. Chia seeds add a nice texture and boost nutrition. Make sure the apple pieces spread evenly throughout the mixture for a burst of flavor in every bite. 3. Covering and refrigerating Cover the bowl with plastic wrap or divide the mixture into jars. Place them in the fridge overnight, or for at least 4 hours. This chilling time allows the oats to soak up the liquid and the flavors to meld together beautifully. - Tips for garnishing and presentation When ready to serve, stir the oats well. If they seem thick, add a splash of milk. Serve in clear jars to show off the layers. A sprinkle of cinnamon and a slice of fresh apple on top makes it look appetizing. - Recommended toppings for added flavor Top your oats with chopped walnuts or pecans for a satisfying crunch. You can also add a drizzle of honey or a dollop of yogurt for extra creaminess. These toppings enhance the taste and make your dish even more delightful. For the complete recipe, refer to the [Full Recipe]. To make the best apple cinnamon overnight oats, focus on two important areas: consistency and flavor. - Achieving the right consistency: Start with rolled oats. They absorb liquid well and give a creamy texture. If your mixture is too thick, add a splash of milk before serving. This simple step makes a big difference. - Adjusting sweetness and flavor: Taste your mixture before refrigerating. If you want it sweeter, add more maple syrup or honey. You can also adjust the cinnamon. A little more can give you that cozy, warm flavor that pairs perfectly with apples. Even small mistakes can change your oats from good to great. Here are two mistakes to watch out for: - Over-soaking oats: Don’t let your oats soak for more than 12 hours. If you do, they may become mushy. Stick to a minimum of 4 hours and a maximum of 12 hours for the perfect texture. - Choosing the wrong type of apples: Not all apples are the same. I recommend using sweet-tart apples like Honeycrisp or Fuji. They add a great crunch and flavor. Avoid soft apples like McIntosh, as they break down too much. For a complete guide on how to make this dish, check out the Full Recipe. {{image_4}} You can spice up your Apple Cinnamon Overnight Oats in many fun ways. Here are some ideas: - Fruits: Try adding bananas or berries. They add flavor and color. Bananas give creaminess, while berries add a nice tartness. - Spices: You can use nutmeg or vanilla. Nutmeg adds warmth, and vanilla gives a sweet aroma. Just a pinch of either can change your dish. You can adjust the recipe to fit your dietary needs. Here are some easy swaps: - Gluten-free: Use certified gluten-free oats. This way, anyone can enjoy these oats without worry. - Vegan-friendly: Substitute almond milk with any plant milk. You can also use maple syrup instead of honey to keep it vegan. These variations make the recipe flexible. You can enjoy it your way, whether you like fruits, spices, or need dietary changes. To store your overnight oats, choose airtight containers. Glass jars work great. They keep the oats fresh and let you see the pretty layers. You can also use plastic containers, but make sure they seal well. These oats will last in the fridge for up to five days. This makes them perfect for meal prep. Just grab one each morning for a quick breakfast. If you want to reheat your oats, use the microwave. Pour the oats into a bowl and heat for 30 seconds. Stir and check the temperature. If they are still cool, heat for another 15 seconds. To keep them fresh, add a splash of milk after reheating. This revives the creamy texture. You can also top with more apple or nuts to keep the flavor strong. Enjoy your tasty morning boost! For the full recipe, check out [Full Recipe]. Apple Cinnamon Overnight Oats stay fresh in the fridge for up to five days. They are best enjoyed within three days for optimal taste and texture. Store them in airtight containers to keep them fresh. Yes, you can make these oats in advance. Preparing them the night before is perfect. You can also make a batch for the week. Just follow the Full Recipe and store them in the fridge. Rolled oats work best for overnight oats. They soak up the liquid well and create a creamy texture. Avoid instant oats, as they become too mushy. To make this recipe nut-free, use oat milk or soy milk instead of almond milk. Skip the walnuts or pecans. You can add seeds like sunflower or pumpkin seeds for crunch. In this blog post, we explored how to make delicious Apple Cinnamon Overnight Oats. We covered key ingredients, preparation steps, and tasty variations. You learned how to achieve the perfect texture and avoid common mistakes. Storing and reheating tips help keep your oats fresh. Overall, this recipe is healthy and easy, making it a great choice for busy mornings. I hope you enjoy making and eating your overnight oats!

Apple Cinnamon Overnight Oats Tasty Morning Boost

Start your day with a burst of flavor and energy with Apple Cinnamon Overnight Oats! This simple recipe combines wholesome

Cooking these Raspberry Almond Shortbread Bars is simple and fun. You will need: - 1 cup unsalted butter, softened - 3/4 cup powdered sugar - 1 teaspoon pure vanilla extract - 2 cups all-purpose flour - 1/4 teaspoon fine sea salt - 1 cup almond meal - 1 cup fresh raspberries - 1/4 cup sliced almonds - Optional: 1 tablespoon granulated sugar These ingredients come together to create a sweet and nutty treat. The butter gives richness, while the powdered sugar adds sweetness. Vanilla extract brings warmth to the flavor. The combination of all-purpose flour and almond meal makes the bars tender and crumbly. Fresh raspberries provide a tart burst of flavor. Sliced almonds on top add a lovely crunch. You can add granulated sugar to the raspberries if you want extra sweetness. This recipe is flexible, and you can adjust as you like. For the full recipe, check out the detailed instructions to make this delightful dessert. Enjoy baking! - Preheat the oven and prepare the baking pan: Start by setting your oven to 350°F (175°C). Take a 9x9-inch square baking pan and line it with parchment paper. Make sure the paper hangs over the edges. This will help you lift out the bars later. - Cream butter and sugar mixture: In a large bowl, use an electric mixer to beat 1 cup of softened butter with 3/4 cup of sifted powdered sugar. Mix until it becomes light and fluffy. Then, add 1 teaspoon of pure vanilla extract and blend it well. - Combine dry ingredients: Gradually mix in 2 cups of all-purpose flour, 1 cup of almond meal, and 1/4 teaspoon of fine sea salt. Stir gently until you form a soft dough. - Press the dough into the pan: Take about two-thirds of the dough and evenly press it into the bottom of the lined baking pan. Use your fingers or a measuring cup to smooth it out. - Distribute raspberries and sprinkle sugar: Carefully place 1 cup of fresh raspberries on top of the shortbread layer. If you want, sprinkle 1 tablespoon of granulated sugar over the berries to make them sweeter. - Crumble remaining dough on top: Take the rest of the dough and crumble it evenly over the raspberries. Make sure some berries peek through to look great. - Adding sliced almonds for texture: Sprinkle 1/4 cup of sliced almonds over the crumbled dough. This adds a nice crunch and flavor. - Bake and cool before slicing: Place the pan in the oven and bake for 30-35 minutes. Look for a golden brown top and firm edges. Once done, take it out and let it cool completely in the pan. - Cutting into squares for serving: Once cool, lift the bars out using the parchment paper. Place them on a cutting board and cut into 16 squares. You can find the Full Recipe to follow these steps easily. To get the best texture for your Raspberry Almond Shortbread Bars, mix the dough well. Start by creaming the butter and sugar until fluffy. This step adds air and helps your bars rise. Next, when you combine the dry ingredients, don’t overmix. You want a soft dough, not a tough one. For a golden top, watch the oven closely. Bake until the edges are firm and the top is light brown. If you see browning early, cover the pan with foil. This keeps the bars from burning while they finish baking. Pair your bars with drinks like tea or coffee. The sweet and tart flavors work well together. For a special occasion, serve them on a nice platter. Add some fresh raspberries around the bars for color. This makes the dish look fancy without extra effort. To make your bars look even better, dust them with powdered sugar. This adds a sweet touch that looks great. Use a fine sieve to sprinkle it evenly. Garnishing with fresh raspberries is another nice touch. Place a few on top of each bar or next to them on the plate. This adds freshness and makes the dish pop. For more ideas, check the Full Recipe for details on creating stunning presentations. {{image_4}} You can make these raspberry almond shortbread bars your own by changing a few key ingredients. - Using different berries: Instead of raspberries, you can use blueberries, strawberries, or blackberries. Each fruit brings its own flavor. For example, blueberries add a sweet note, while strawberries give a juicy burst. - Alternatives to almond meal: If you need a change, you can swap almond meal for hazelnut flour or even sunflower seed flour. These options will change the taste but still keep a nutty flavor. You can also adjust these bars for special times of the year. - Adjusting for holidays and events: For fall, add pumpkin spice to the dough. For winter, use cranberries instead of raspberries for a festive touch. You can even shape the bars into holiday-themed forms. - Creative toppings for various occasions: Try adding a drizzle of white chocolate for birthdays or a sprinkle of crushed candy canes for Christmas. If you or your guests have dietary needs, you can adapt this recipe. - Gluten-free options: To make these bars gluten-free, replace all-purpose flour with a gluten-free blend. Many blends work well and keep the texture nice. - Vegan alternatives to butter: You can use coconut oil or a vegan butter substitute for a dairy-free option. This keeps the bars soft and tasty. These variations allow you to enjoy raspberry almond shortbread bars in new ways. Check out the Full Recipe for more details! Store your raspberry almond shortbread bars at room temperature. They stay fresh in a cool, dry place. If your kitchen is warm, use the fridge. To keep them soft, wrap them tightly in plastic wrap or use a sealed container. This keeps moisture in and prevents them from drying out. You can freeze these bars for longer storage. Cut them into squares first. Place them on a baking sheet and freeze for about two hours. Once frozen, put them in a freezer bag. Remove as much air as you can. For the best taste, thaw them in the fridge overnight before serving. These bars last about five days at room temperature. If you store them in the fridge, they can last up to a week. Watch for signs of spoilage, like an off smell or mold. If they feel hard or dry, it's time to toss them. Enjoy your bars while they’re fresh for the best flavor! How do I prevent the bars from being too crumbly? To keep the bars from crumbling, make sure to mix the dough well. When you press the dough into the pan, use your fingers to pack it down tightly. This helps it stick together. Also, avoid overbaking, as this can dry them out. Can I use frozen raspberries? Yes, you can use frozen raspberries. Just make sure to thaw and drain them first. This helps reduce extra moisture. Keep some whole while chopping others for a nice texture. What type of almond meal should I use? You should use finely ground almond meal for the best results. This gives the bars a nice texture and flavor. You can find almond meal in most grocery stores or make your own by grinding blanched almonds. What to do if they are undercooked? If the bars are undercooked, return them to the oven. Bake them in five-minute increments until they firm up. Check for a golden top and edges. This will ensure they are fully cooked. How to fix bars that are too sweet? If the bars are too sweet, you can balance the flavor. Serve them with a dollop of unsweetened whipped cream or plain yogurt. This adds a creamy, tangy touch that cuts the sweetness nicely. Can I add chocolate to the recipe? Absolutely! You can sprinkle chocolate chips on top of the raspberry layer before adding the crumbled dough. Dark or white chocolate both work well. This adds richness and a fun twist to the bars. How to incorporate other flavors? To mix it up, try adding citrus zest, like lemon or orange, to the dough. You could also substitute different berries, like blueberries or blackberries. This keeps the recipe fresh and exciting! For the full recipe, check out the detailed instructions above. This blog post covered all you need to know to make delicious raspberry almond bars. You learned about the key ingredients, step-by-step instructions, and useful tips for great results. We also explored variations, storage tips, and answered common questions. Enjoy these tasty bars at your next gathering or as a simple treat. Baking can be fun and rewarding, especially when you share your creations with others. Happy baking!

Raspberry Almond Shortbread Bars Flavorful and Easy

Welcome to a sweet journey where flavor meets ease! If you love desserts that are both tasty and simple, you’re

- 1 cup orzo pasta - 2 cups vegetable broth - 1 cup cherry tomatoes, halved - 1 cucumber, diced - 1 cup Kalamata olives, pitted and sliced - 1 bell pepper (any color), diced - ½ red onion, finely chopped - 1 cup feta cheese, crumbled - ¼ cup fresh parsley, chopped - 2 tablespoons olive oil - 2 tablespoons red wine vinegar (or substitute with fresh lemon juice) - 1 teaspoon dried oregano - Salt and pepper to taste Each ingredient plays a key role in making this salad fresh and tasty. Orzo pasta gives a light base. It cooks quickly and absorbs flavors well. Vegetable broth adds depth to the orzo. Use a low-sodium broth for better control over saltiness. Cherry tomatoes bring sweetness and color. Cucumbers add crunch, while Kalamata olives give a briny kick. Bell peppers offer more crunch and a pop of color. Red onion gives a sharp bite, balancing the salad. Feta cheese gives creaminess and tang. Fresh parsley adds brightness and a touch of green. Olive oil and vinegar make a simple, tasty dressing. Dried oregano adds a hint of Mediterranean flavor. Quality matters. Choose fresh veggies, good olives, and tasty feta. The better your ingredients, the better your salad will be. This Easy Greek Orzo Salad is a joy to prepare and eat. You can find the Full Recipe for complete cooking steps. To cook orzo, start by boiling vegetable broth. This adds flavor to the pasta. Use a medium saucepan and bring 2 cups of broth to a gentle boil. Add 1 cup of orzo pasta. Stir it occasionally to prevent sticking. Cook it as per package instructions, usually about 9-10 minutes. Aim for al dente, as it will continue to cook later. Once done, drain the orzo and rinse it with cold water. This step stops the cooking process and helps keep it firm. While your orzo cooks, prepare the veggies. Wash your cherry tomatoes, cucumber, bell pepper, and red onion. When chopping, aim for uniform sizes. This ensures even flavor in every bite. You can also add seasonal veggies like zucchini or bell peppers for variety. Just make sure they are fresh and crisp to enhance your salad. When the orzo cools, it’s time to mix. Add the cooled orzo into the bowl with your chopped veggies. Gently combine the ingredients using a spatula. Be careful not to mash them together. You want each piece to keep its shape. This way, every bite is packed with flavor. For the dressing, whisk together olive oil, red wine vinegar, and dried oregano in a small bowl. You can also use fresh lemon juice for a zesty kick. Adjust the flavor by adding salt and pepper. Taste it as you go. If you want a stronger taste, add more vinegar or lemon juice. The right balance makes the salad pop. This is just a brief overview of the process. For the full recipe, including detailed steps and serving suggestions, check out the Full Recipe. - Overcooking orzo: Orzo cooks quickly. If you leave it too long, it becomes mushy. Aim for al dente for the best texture. - Skipping the chilling step: Chilling the salad enhances the flavors. It allows the ingredients to mix well. Don’t skip this for a tastier dish. - Suggestions for garnishing: Add a sprinkle of feta on top. A few parsley leaves can make it look fresh. Use a drizzle of olive oil for shine and flavor. - Serving suggestions for gatherings: Present your salad in a large, shallow bowl. This invites guests to help themselves. Pair with warm pita for a full Mediterranean experience. - Ideas for boosting the salad’s nutritional value: Add some chickpeas for protein. You can also toss in leafy greens like spinach for added vitamins. - Alternatives for dietary restrictions: If you're vegan, skip the feta and use avocado. For gluten-free options, replace orzo with quinoa or rice. {{image_4}} You can easily change some ingredients in this salad. If you don’t like Kalamata olives, try green olives or even capers. For cheese, goat cheese works well. It gives a creamy taste that blends nicely with the other flavors. Want to add some protein? Cooked chicken or chickpeas are great choices. They add heartiness to the dish. Toss in shredded chicken for a light option, or use canned chickpeas for a quick fix. Both options make the salad more filling and nutritious. To change the flavor, add fresh herbs. Dill or mint gives a nice twist. You can also sprinkle in spices like cumin or paprika for warmth. These small changes can take your salad to the next level. Seasonal ingredients can also change the taste. In summer, add fresh corn or bell peppers. In fall, try roasted butternut squash or sweet potatoes. Using what’s in season makes your salad fresh and fun. It also helps you explore different tastes throughout the year. For the full recipe, check out Mediterranean Orzo Delight. To store leftovers, place the salad in an airtight container. This keeps the flavors fresh and prevents spills. If you have extra dressing, store it separately. This way, your salad won't get soggy. To maintain texture, avoid mixing all the ingredients together until you're ready to eat. Keep the salad chilled in the fridge. It tastes best within three days, but it can last up to five days if stored properly. Can you freeze Greek orzo salad? I do not recommend it. Freezing changes the texture of the vegetables and feta cheese. They can become mushy when thawed. If you must freeze it, make sure to separate the dressing. Before serving, thaw the salad in the fridge overnight. This gives the flavors time to blend back together. Enjoy your easy Greek orzo salad fresh for the best taste! For the full recipe, check the [Full Recipe]. You can store the Easy Greek Orzo Salad in the fridge for about three days. Make sure to keep it in an airtight container. Check for signs of spoilage, such as a sour smell or slimy texture. If you notice either, it's best to throw it away. Yes, you can make this salad ahead of time. It tastes even better after sitting for a few hours. Prepare it up to 24 hours in advance. Store it in the fridge until you are ready to serve. Orzo is a great source of carbohydrates. It gives you energy for your day. One cup of cooked orzo has about 200 calories. It also contains some protein and fiber. Compared to other pasta, orzo is smaller and cooks faster. It is versatile and pairs well with many ingredients, making it a great choice for salads like this one. This blog post covered everything you need to know for a tasty Greek orzo salad. We explored key ingredients and the best cooking methods. I shared tips to avoid common mistakes and enhance presentation. You also learned about fun variations for your salad. Try out these ideas to create a dish that suits your taste. With an easy approach and fresh ingredients, you can make a salad everyone will love. Enjoy your culinary journey!

Easy Greek Orzo Salad Delicious and Simple Recipe

Looking for a quick, tasty dish? My Easy Greek Orzo Salad packs flavor, freshness, and nutrition. This simple recipe combines

Older posts
Newer posts
← Previous Page1 … Page28 Page29 Page30 … Page68 Next →

dsad

© 2025 tastymomrecipes • Built with GeneratePress

Our Policies

  • Copyright Policy
  • Cookie Policy
  • GDPR Policy
  • Privacy Policy
  • Disclaimer
  • Terms Of Use

More Information

  • Home
  • About
  • Contact
  • Appetizers
  • Dessert
  • Dinner
  • Drinks
©2025, tastymomrecipes About Back To Top