Skip to content
DisclaimerTerms Of UseGDPR PolicyCookie Policy

tastymomrecipes

  • Home
  • Drinks
  • Appetizers
  • Dinner
  • Dessert
  • About
  • Contact
  • Privacy Policy
DisclaimerTerms Of UseGDPR PolicyCookie Policy

Olivia

- 8 slices of artisanal whole grain or crusty sourdough bread - 8 crisp leaves of romaine or iceberg lettuce - 8 thick slices of ripe vine tomatoes - 8 slices of smoky turkey bacon (or classic bacon for traditionalists) - 2 tablespoons creamy mayonnaise - 1 teaspoon zesty Dijon mustard - Fresh sea salt and cracked black pepper to taste - Optional: 1 avocado, sliced, or a handful of microgreens for added freshness The ingredients for a Classic BLT Sandwich are simple yet powerful. The bread forms the base. Choose artisanal whole grain for health or crusty sourdough for crunch. The lettuce adds freshness. Romaine or iceberg works well to keep it crisp. Tomatoes are key. Use ripe vine tomatoes for juiciness and flavor. The bacon brings that iconic taste. I often use turkey bacon for a lighter option, but classic bacon is always a hit. The creamy mayonnaise and zesty Dijon mustard blend perfectly. They add a rich and tangy flavor. Don’t forget the sea salt and cracked black pepper. They enhance the taste of the tomatoes. For a twist, add sliced avocado or microgreens. These optional ingredients boost freshness and nutrition. Using the Full Recipe ensures you have the right balance of flavors. Each ingredient plays a vital role in making your sandwich unforgettable. How do you cook bacon to make it crispy? Use a large skillet over medium heat. Add your turkey bacon in a single layer. Cook it for about 5 to 7 minutes on each side. You want it crispy, not burnt! If you prefer, you can also bake the bacon in the oven. Place it on a baking sheet and bake at 400°F for about 15 to 20 minutes. This method lets the grease drip away while cooking. How do you toast the bread to get that golden-brown color? Use the same skillet after cooking the bacon. Toast each slice for 2 to 3 minutes per side. You can also use a toaster if you want it done faster. For sourdough or whole grain bread, pay attention. They take a bit longer to toast. What’s the best way to mix the sauce? In a small bowl, combine 2 tablespoons of creamy mayonnaise with 1 teaspoon of Dijon mustard. Mix them well until you get a smooth blend. This ratio gives a great balance of creaminess and zest. What’s the best way to layer your sandwich? Start with a slice of toasted bread. Spread a generous amount of the mayo-mustard sauce on it. Next, add 2 leaves of crisp lettuce and 2 thick slices of ripe tomato. Sprinkle some sea salt and cracked black pepper on the tomato. Then, add 2 slices of crispy bacon. If you like, you can top it with sliced avocado or microgreens for some extra flavor. Finish with another slice of toasted bread. How do you cut and present the sandwiches? Use a sharp knife to slice each sandwich in half diagonally. This creates nice triangles that are easy to hold. For a great presentation, serve the sandwiches on a wooden board. Add a bowl of pickles and some crunchy chips for a fun touch. For the full recipe, check out the details above. You can make your BLT fit many diets. Here are some easy swaps: - Bread: Use gluten-free bread for a gluten-free option. - Bacon: Try turkey bacon or tempeh bacon for a lower fat choice. - Mayonnaise: Use avocado or hummus for a creamy texture without dairy. - Lettuce: Spinach or arugula can add a new taste. - Tomatoes: Cherry tomatoes can give a sweet twist. These swaps keep your BLT tasty while meeting your needs. Crispiness is key in a great BLT. Here are my favorite tips: - Bacon: Cook it in a hot skillet until it's very crispy. Let it drain on paper towels to remove extra grease. - Lettuce: Use fresh, cold lettuce. This keeps it crunchy. - Bread: Toast the bread until golden brown. This adds texture. - Assembly: Layer the ingredients gently. This helps keep everything intact. Follow these tips to enjoy that perfect crunch in every bite. Pairing sides with your BLT can elevate your meal. Here are some ideas: - Potato Chips: Crispy chips add a nice crunch. - Pickles: Tangy pickles bring a great contrast to the sandwich. - Salad: A fresh side salad can lighten the meal. - Fruit: Serve fresh fruit for a sweet touch. These sides make your meal more fun and tasty. For the full recipe, check out the Classic BLT Sandwich with a Twist! {{image_4}} The classic BLT is simple and tasty. You use bacon, lettuce, and tomato. The bread is often white or whole grain. Gourmet BLTs add fun twists. They use special breads like ciabatta or focaccia. Some chefs swap regular bacon for smoked or flavored varieties. They might even use crispy prosciutto or pancetta. Gourmet BLTs often have unique spreads too. Instead of plain mayo, try garlic aioli or spicy sriracha mayo. You can also add fresh herbs or even pesto for a fresh taste. The result is a delicious mix of flavors that excite your taste buds. Different areas have their own takes on the BLT. In the South, you might find fried green tomatoes instead of fresh ones. This adds a crunchy texture and a unique flavor. Some places add fried eggs for a hearty breakfast option. On the West Coast, it’s common to see avocado slices added. This makes the sandwich creamier. In New England, you might find a lobster BLT, mixing seafood with the classic flavors. Each region brings its own local ingredients to create exciting versions of this beloved sandwich. You can easily make a BLT without meat. For a vegetarian option, use crispy fried eggplant or tempeh bacon. These substitutes give a nice crunch and flavor. For a vegan version, try coconut bacon or marinated tofu strips. You also need to swap out the mayo. Use a vegan mayo or mash up an avocado instead. This gives a rich and creamy texture without any animal products. These meat-free versions keep the spirit of the classic while being friendly for all diets. To keep your BLT fresh, store each ingredient separately. Wrap the bread in plastic. This keeps it soft and prevents it from getting stale. Place the bacon in an airtight container in the fridge. It stays crispy and tasty. Store veggies like lettuce and tomatoes in a sealed bag or container. They remain fresh and crunchy this way. If you have avocado, use lemon juice on it before storing. This helps prevent browning. You can prep each part of the sandwich ahead of time. Cook the bacon and let it cool. Store it in the fridge until you are ready to use it. Wash and slice your tomatoes and lettuce, then place them in separate containers. This keeps them fresh. Spread the mayonnaise mixture on the bread just before serving. This keeps the bread from getting soggy. For the best taste, eat your assembled BLT within 24 hours. If you have leftover parts, use them within three days. Bacon can last up to a week in the fridge. Just remember to keep ingredients separate until you are ready to eat. This will ensure every bite is as fresh and delicious as the first. For full details, check the Full Recipe. For a Classic BLT, choose bread that brings crunch and flavor. I recommend: - Artisanal whole grain for its nutty taste. - Crusty sourdough for a chewy bite. - White bread for a classic, soft texture. These breads hold up well against juicy tomatoes and crispy bacon. You can prepare a BLT in advance, but some parts should stay fresh. Here are my tips: - Cook the bacon ahead and store it in the fridge. - Toast the bread just before serving for that perfect crunch. - Keep tomatoes and lettuce separate until you assemble. This way, your sandwich stays fresh and tasty! If you want healthier options, try these substitutes: - Turkey bacon for a leaner choice. - Crispy tempeh for a plant-based option. - Roasted mushrooms for a savory flavor. These alternatives still give you that satisfying crunch. To boost flavor, think about adding these ingredients: - A slice of ripe avocado for creaminess. - A sprinkle of fresh herbs like basil or cilantro. - Hot sauce or a zesty aioli for a kick. These extras make your BLT even more delicious. For the full recipe, check out the Classic BLT Sandwich with a Twist! In this guide, we explored the art of making the perfect BLT. We covered the ideal ingredients, from the best bacon to the freshest veggies. You learned how to cook, toast, and assemble for maximum flavor. Tips on substitutions and variations let you customize to your liking. Storing leftovers and meal prep advice ensures you enjoy every bite. With this knowledge, you can craft your perfect sandwich. Enjoy your creations and share them with others!

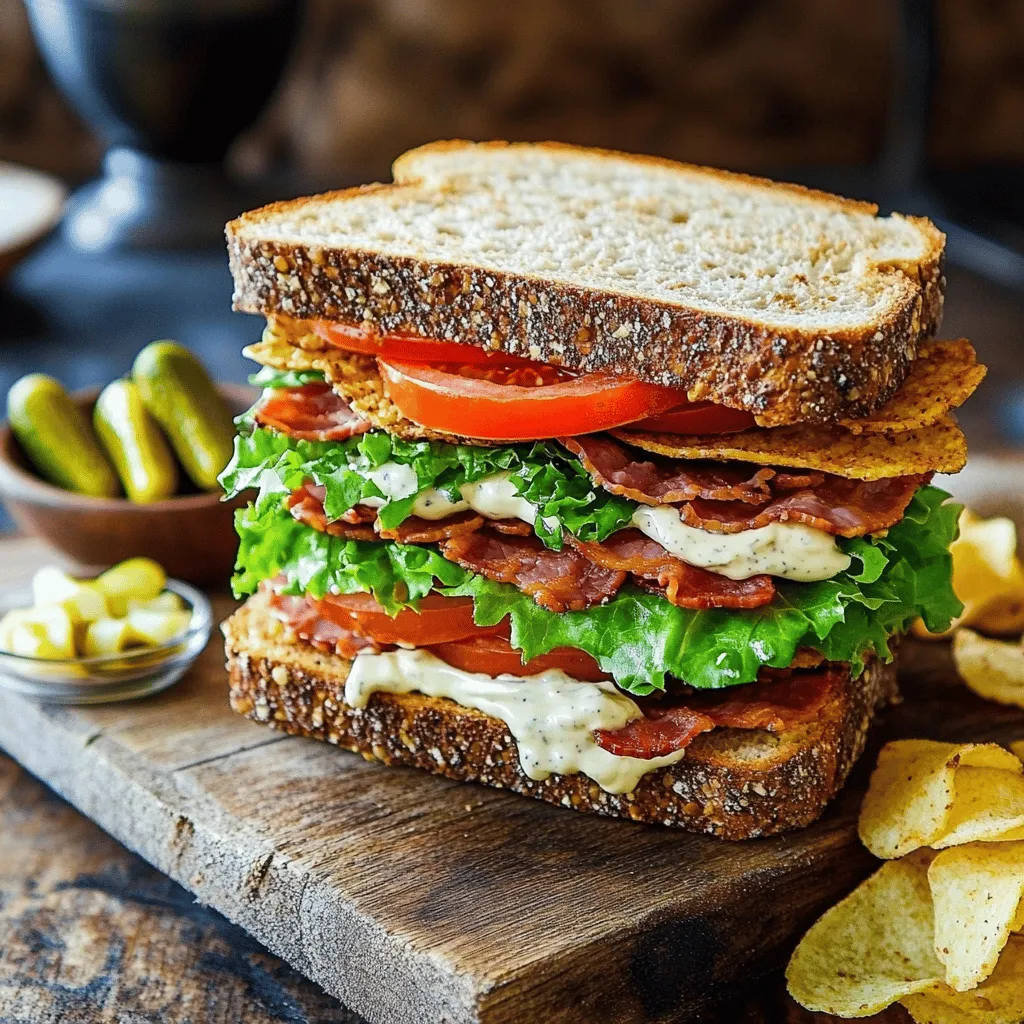
Classic BLT Sandwich Crunchy and Flavorful Delight

If you crave a sandwich that’s both crunchy and packed with flavor, you’re in the right place! The Classic BLT

Here’s a complete list of ingredients for your easy chicken salad: - 2 cups cooked chicken breast, shredded - 1 cup mixed greens - 1/2 cup orange segments - 1/2 cup cucumber, diced - 1/4 cup red bell pepper, chopped - 1/4 cup red onion, thinly sliced - 1/4 cup feta cheese (optional) - 1/4 cup walnuts, roughly chopped - 3 tablespoons extra virgin olive oil - 2 tablespoons freshly squeezed lemon juice - 1 tablespoon honey - Salt and pepper to taste If you want to switch things up, here are some ideas: - Use rotisserie chicken instead of cooking your own. - Swap mixed greens for spinach or romaine. - Try using tangerine or grapefruit segments for a twist. - Replace walnuts with pecans or almonds for a different crunch. - Omit feta for a dairy-free option, or use avocado for creaminess. Want to make your salad even better? Add some of these: - A handful of fresh herbs like cilantro or mint. - Sliced avocado for extra creaminess. - Diced apples or grapes for a sweet touch. - A pinch of chili flakes for some heat. - A sprinkle of sunflower seeds for extra texture. This easy chicken salad is not only quick to make, but it also lets you personalize it to your taste. You can find the full recipe and more tips in the Zesty Citrus Chicken Salad section. Enjoy! Start with the chicken. Use cooked chicken breast. Shred it into bite-sized pieces. You can use leftover chicken or rotisserie chicken for speed. Next, wash the mixed greens well. I like to mix spinach, arugula, and romaine. Chop the cucumber into small cubes. Cut the red bell pepper into small chunks. Slice the red onion thinly. If you use feta cheese, crumble it into small pieces. In a large bowl, combine all the prepared ingredients. Add the shredded chicken, mixed greens, orange segments, diced cucumber, chopped red bell pepper, sliced red onion, and feta cheese. Using two salad spoons, toss everything gently. Make sure all the ingredients blend well together. This helps the flavors mix nicely. In a small bowl, whisk together the olive oil, lemon juice, honey, salt, and pepper. Keep whisking until the dressing is smooth. This step is key to making the dressing creamy. It adds a nice flavor to the salad. Drizzle the dressing over the salad mixture. Toss again gently to coat everything. Let the salad sit for about 10 minutes. This helps the flavors blend. Before serving, sprinkle the chopped walnuts on top. They add a nice crunch. For a pretty display, serve the salad in shallow bowls. You can add extra orange segments or fresh herbs as a garnish. This makes your dish look even more inviting. To make this chicken salad fast, use pre-cooked chicken. You can buy it or cook it ahead. Shredding the chicken is quick with two forks. Also, chop your veggies while the chicken cools. This way, you save time and keep things moving. When choosing greens, look for bright colors. They should feel crisp, not wilted. For cucumbers, pick ones that are firm with no soft spots. Choose bell peppers that are shiny and firm. Fresh oranges should feel heavy for their size. These tips ensure your salad tastes great and is healthy. When tossing your salad, use two large spoons. This method helps mix all the ingredients without smashing them. Add the dressing before tossing for better coverage. Toss gently so the greens stay crisp. Letting the salad rest helps all the flavors blend well. You can find the full recipe for this zesty chicken salad to try these tips. {{image_4}} You can change the flavor of your chicken salad with different dressings. Try ranch for a creamy touch. A yogurt-based dressing offers a lighter option. If you like spice, add sriracha to your dressing. For a zesty kick, consider a cilantro-lime vinaigrette. Each dressing gives you a new taste experience. Adding new ingredients can make your chicken salad special. Consider adding: - 1/2 avocado, diced for creaminess - 1/4 cup dried cranberries for sweetness - 1/4 cup chopped apples for crunch - 1/4 cup celery, diced for freshness - 1/4 cup cooked quinoa for added protein These additions create exciting flavors and textures. Feel free to mix and match! If you want a vegetarian or vegan option, replace chicken with chickpeas. You can also use tofu or tempeh for a protein boost. For the dressing, swap honey with maple syrup. This keeps the dish sweet and vegan-friendly. You can make this salad work for everyone! For more details, check out the Full Recipe. To store your chicken salad, use an airtight container. This keeps moisture in and air out. Place the salad in the fridge right after serving. If you have extra salad, try to separate the dressing. This keeps the greens fresh and crunchy. You can keep chicken salad in the fridge for about three to four days. Check for any off smells or changes in color before eating. If you notice any changes, it is best to throw it away. Freezing chicken salad is not ideal because of the ingredients. However, if you want to freeze it, do so without the greens. Place the salad in a freezer-safe container. It can last for up to three months. When you are ready to eat, thaw it in the fridge overnight. Add fresh greens and dressing just before serving. For the best taste, always try to enjoy the salad fresh. For the full recipe, check out the Zesty Citrus Chicken Salad. The best way to cook chicken for salad is to grill or bake it. This method keeps the chicken moist and adds flavor. You can also poach chicken in water or broth for tender results. Make sure to season it well with salt and pepper for added taste. Once cooked, shred the chicken into bite-sized pieces for easy mixing in your salad. Yes, you can make this recipe ahead of time. Prepare the chicken salad and store it in an airtight container in the fridge. It tastes even better when the flavors have time to blend. Just keep the dressing separate until you are ready to serve it to maintain the crunchiness of the greens. Chicken salad lasts about three to four days in the fridge. Make sure to keep it in an airtight container. Always check for any signs of spoilage before you eat it. If it smells off or looks unusual, it’s best to throw it away. Yes, you can use canned chicken for this salad. Canned chicken is a great option for a quick meal. Just drain and rinse it before adding it to your salad. This saves time and still gives you a tasty dish. You can serve chicken salad in many ways. Try it on a sandwich, in a wrap, or over a bed of greens. You can also serve it with crackers or on a plate of fresh veggies. It pairs well with fruit or a light soup for a full meal. For the complete recipe, check out the Full Recipe section. This chicken salad recipe combines tasty ingredients and simple steps. You need cooked chicken, fresh veggies, and a zesty dressing. I shared tips for fresh ingredients and time-saving hacks. Try variations with different dressings and add-ins to keep it fun. Store your leftovers properly to enjoy later. This dish is not just easy to make, but also packed with flavor and nutrition. Enjoy creating your own version; the possibilities are endless!

Easy Chicken Salad Tasty and Quick Meal Option

Looking for a quick meal that’s both tasty and easy to make? I’ve got just the recipe for you! My

- 1 lb baby carrots (or regular carrots, sliced) - 2 tablespoons extra virgin olive oil - 1 tablespoon honey - 1 teaspoon smoked paprika - 1 teaspoon ground cumin - 1/2 teaspoon cayenne pepper - Salt and pepper to taste - Fresh parsley for garnish - 1 tablespoon sesame seeds (for nutty finish) - Mixing bowl - Baking sheet - Parchment paper - Whisk When I make oven-roasted carrots, I gather my main ingredients first. I love using baby carrots for their sweetness and tenderness. If I can’t find them, I slice regular carrots into sticks. They still taste great! I then grab my extra virgin olive oil. This oil adds richness and helps the carrots roast well. A touch of honey gives them a lovely sweetness. I always use smoked paprika for a warm, smoky flavor. Ground cumin adds depth, while cayenne pepper gives a little kick. I finish with salt and pepper to enhance the flavors. Optional ingredients like fresh parsley brighten the dish. Sesame seeds add a nice crunch, making the dish extra special. For equipment, I use a mixing bowl to combine my ingredients. A baking sheet lined with parchment paper helps with easy cleanup. A whisk is perfect for mixing the marinade. This simple setup makes it easy to bring out the flavors in my carrots. For the full recipe, follow along as we roast these delightful veggies! - Preheat your oven to 425°F (220°C). This will help the carrots roast nicely. - In a large mixing bowl, whisk together the marinade ingredients. This includes olive oil, honey, smoked paprika, cumin, cayenne pepper, and a good pinch of salt and pepper. Mixing well is key to a great flavor. - Add the baby carrots to your bowl. Toss them well in the marinade until every carrot gets coated. This step adds lots of flavor and helps them roast beautifully. - Line a baking sheet with parchment paper. This makes cleanup easy. Arrange the marinated carrots on the sheet in a single layer. Make sure they have space between them to roast evenly. - Roast the carrots in your preheated oven for 25-30 minutes. Stir them halfway through to ensure they cook evenly. You want them to be tender with a slight caramelization for the best taste. Enjoy your delicious oven-roasted carrots! For the full recipe and more details, check the [Full Recipe]. To get the best oven-roasted carrots, pay attention to size. If your carrots are large, cut them into smaller pieces. This helps them cook evenly. For baby carrots, the cooking time stays around 25-30 minutes. Space is key on the baking sheet. Make sure the carrots are in a single layer. If they overlap, they will steam instead of roast. Good spacing allows them to brown nicely. You can change the flavor of your roasted carrots by adjusting the marinade. If you like sweetness, add more honey. It balances the spices and adds a nice glaze. Feel free to experiment with spices. Try thyme or rosemary for a fresh taste. If you love heat, add more cayenne. Mixing in garlic powder gives a savory kick. Roasted carrots pair well with many dishes. They go great with grilled chicken or fish. You can also serve them alongside rice or quinoa for a wholesome meal. For a beautiful dish, serve the carrots in a shallow bowl. Let their vibrant colors stand out. Add a sprig of parsley on top for a pop of green. This makes your dish look even more inviting. For the full recipe, check out the [Full Recipe]. {{image_4}} You can cook carrots in a foil pack. This method makes cleanup much easier. Start by cutting a large piece of aluminum foil. Add the marinated carrots to the center. Fold the edges to make a sealed packet. Place the packet on a baking sheet and roast in the oven. This keeps the carrots tender and juicy. Plus, you do not need to worry about a messy pan. To make a vegetable medley, add other veggies. Bell peppers, zucchini, or onions work well. Cut them into similar sizes as the carrots. Toss them with the same marinade. This adds color and flavor to your dish. You can mix and match your favorite vegetables for a fun twist. Experimenting with herbs and spices can elevate your carrots. Try adding fresh thyme or rosemary for a fragrant touch. If you like a tangy flavor, a splash of balsamic vinegar is great. For a sweeter flavor, use cinnamon or nutmeg. You can customize the taste based on your mood or meal. Each choice brings out new flavors in the carrots. After enjoying your oven-roasted carrots, store them in an airtight container. This helps keep them fresh and tasty. Make sure the container is clean and dry before adding the carrots. Place the carrots in the fridge as soon as they cool down. They will last for about 3 to 5 days. To enjoy your roasted carrots again, reheat them in the oven or on the stove. For the oven, set it to 350°F (175°C). Place the carrots on a baking sheet and heat for about 10 to 15 minutes. This will help them regain their crispness. If you prefer the stove, heat a pan over medium heat. Add a splash of olive oil and toss the carrots until warmed through. If you want to save some for later, freezing is a great option. First, let the carrots cool completely. Then, spread them in a single layer on a baking sheet. Freeze them for about an hour. Once frozen, transfer the carrots to a freezer-safe bag. Remove as much air as possible before sealing. For best quality, use them within 3 months. When ready to eat, thaw in the fridge overnight before reheating. This method keeps the flavor intact and makes for a quick side dish later. For more tips and tricks, check out the Full Recipe! To make your oven-roasted carrots crispy, follow these tips: - Cut Uniformly: Slice your carrots into similar sizes. This helps them cook evenly. - Use High Heat: Roast at 425°F (220°C). This temperature promotes caramelization. - Don’t Overcrowd: Space the carrots out on the baking sheet. This allows hot air to circulate. - Toss Halfway: Stir the carrots halfway through cooking. This helps them brown evenly. By using these techniques, you'll achieve a delightful crunch that complements the sweet flavor. You can use frozen carrots, but they may not roast as well. Frozen carrots contain more water. This extra moisture can lead to steaming instead of roasting. For best results, use fresh carrots. They caramelize nicely and provide a better texture. If you must use frozen carrots, try these steps: - Thaw First: Let them thaw and drain excess water. - Increase Cooking Time: You may need to cook them longer to achieve the right texture. Fresh carrots will always give you that perfect roast. If you want to switch up the flavors, try these healthy seasonings for your carrots: - Garlic Powder: Adds a rich, savory taste. - Thyme: Brings a fresh, herbal note. - Lemon Zest: Offers a bright, citrus flavor. - Cumin: Adds warmth and earthiness. Feel free to mix and match these seasonings. Experiment and find your favorite flavor combination! Oven-roasted carrots are simple yet delicious. You learned the key ingredients, preparation steps, and tips for perfect results. Don't forget the optional ingredients to enhance flavor. Take advantage of variations to keep things fresh. Proper storage extends their life, making them convenient for meals later. With these steps and ideas, you can enjoy tasty, healthy carrots. Happy cooking!

Oven-Roasted Carrots Delightful Side Dish Recipe

Looking for a side dish that impresses without the fuss? Try these oven-roasted carrots! This quick and easy recipe transforms

To make a tasty veggie omelette, you need just a few key ingredients: - 3 large eggs - 1/4 cup milk (or plant-based milk) - 1/2 cup diced bell peppers (mix red and green) - 1/2 cup fresh spinach, chopped - 1/4 cup onion, finely diced - 1/4 cup shredded cheese (cheddar or feta) - Salt and pepper, to taste - 1 tablespoon olive oil or butter These ingredients work well together. The eggs provide protein, while the veggies add color and flavor. The cheese gives a creamy texture. You can enhance your omelette with extra ingredients: - Mushrooms, sliced - Tomatoes, diced - Zucchini, grated - Avocado, sliced - Hot sauce or salsa for a kick Adding these ingredients can give your omelette new tastes and textures. Feel free to mix and match based on what you like! If you need substitutes, here are some easy swaps: - Use egg whites instead of whole eggs for a lighter option. - Swap milk for yogurt for creaminess. - Any cheese works in place of cheddar or feta. - Try any veggies you have on hand; just chop them small. These substitutes help you customize your omelette. You can create your own unique flavor profile. For the full recipe, check the earlier section. Start by cracking three large eggs into a medium bowl. Add 1/4 cup of milk. I love using plant-based milk for a lighter touch. Whisk the mixture until it looks frothy. This step helps create a fluffy omelette. Sprinkle in a pinch of salt and freshly cracked pepper to taste. Next, heat a non-stick skillet over medium heat. Add 1 tablespoon of olive oil or butter, coating the skillet evenly. Once hot, toss in the finely diced onion and colorful bell peppers. Sauté for about 2-3 minutes. You want them to soften and smell great. Then, add 1/2 cup of chopped spinach. Cook for another minute until the spinach wilts. Carefully pour the egg mixture over the sautéed veggies in the skillet. Tilt the skillet a bit to spread the eggs evenly. Let it cook for 3-4 minutes. Watch as the edges set. Use a spatula to lift them gently, letting uncooked egg flow underneath. When the top is slightly runny, sprinkle 1/4 cup of shredded cheese over one half. Fold the other half over the cheese. Cook for another 1-2 minutes until the cheese melts. Slide the omelette onto a plate and garnish with fresh herbs. Enjoy your vibrant veggie omelette! For the full recipe, check out the earlier section. To make your omelette fluffy, start with fresh eggs. Crack the eggs into a bowl and whisk them well. Add a splash of milk to the eggs. This small step adds air and creaminess. Whisk until the mixture is light and frothy. This helps create that fluffy texture we all love. When cooking your omelette, choose the right fat. Olive oil adds a nice flavor. Butter makes it rich and creamy. Use about one tablespoon to coat your skillet. This not only prevents sticking but also adds a delicious taste. Heat the fat over medium heat for the best results. Cooking time is key for a perfect omelette. Cook for about three to four minutes on medium heat. Watch the edges closely; they should start to set. Use a spatula to lift the edges, allowing uncooked egg to flow underneath. When the top is slightly runny, it's time to add cheese. Fold your omelette gently, and let it cook for one to two more minutes. This ensures the inside is cooked and the cheese melts perfectly. For more details, check the Full Recipe. {{image_4}} You can make your veggie omelette exciting by trying different vegetables. Zucchini, mushrooms, or tomatoes work well. For a sweet touch, add corn or peas. You can even mix in some cooked broccoli or asparagus. The key is to chop them small so they cook well. This way, you get a colorful and tasty dish. Cheese can change the taste of your omelette. If you want something different, try goat cheese or mozzarella. They melt nicely and add a creamy texture. For a stronger taste, use blue cheese or smoked gouda. If you prefer a dairy-free option, use nutritional yeast for a cheesy flavor without the milk. Herbs and spices add flavor and freshness to your omelette. Fresh basil, cilantro, or dill can brighten up your dish. For a little heat, sprinkle in some red pepper flakes. You can also use garlic powder or onion powder for more depth. Experiment with these to find your perfect blend. Remember, these variations keep your breakfast fun and full of flavor. You can find the full recipe for the Quick Veggie Omelette to get started! To keep your leftover omelette fresh, let it cool first. Wrap it in plastic wrap or foil. You can also place it in an airtight container. Store it in the fridge for up to three days. This keeps it safe and tasty for later. When you are ready to eat your omelette, reheat it gently. Use a skillet over low heat to warm it up. Cover the skillet with a lid to keep it moist. You can also use a microwave for quick reheating. Just heat it in short bursts of 15 to 30 seconds. This way, you can avoid overcooking it. If you want to prepare meals ahead of time, freezing works well. Cut the omelette into portions and wrap each piece tightly. Use freezer-safe bags or containers to prevent freezer burn. Your omelette can last up to three months in the freezer. Thaw it in the fridge overnight before reheating. This method helps you have a quick meal ready to go! If your omelette breaks, don’t worry! You can still save it. Gently push the pieces together in the pan. You can add more cheese to help hold it together. If it looks messy, serve it on a plate with fresh herbs on top. It will taste great even if it looks funny! Yes, you can make a veggie omelette ahead of time! Cook it fully and let it cool. Then, wrap it in foil or a container. Store it in the fridge for up to three days. When you are ready to eat, heat it in a pan or microwave until warm. Veggie omelettes pair well with many sides. Here are a few tasty options: - Fresh fruit salad - Whole grain toast - Crispy hash browns - A light green salad - Sliced avocado These sides add color and flavor to your meal. Enjoy your delicious veggie omelette with any of these tasty choices! For the full recipe, check out the Vibrant Veggie Omelette Delight. You learned about making a quick veggie omelette. We discussed key ingredients, cooking steps, and helpful tips. Using the right veggies and techniques can make your omelette fluffy and delicious. You can also explore variations to suit your taste. With proper storage, leftovers remain tasty for later. Experiment with these ideas to find your perfect omelette. Enjoy the process and share your creations!

Quick Veggie Omelette Fast and Flavorful Breakfast Dish

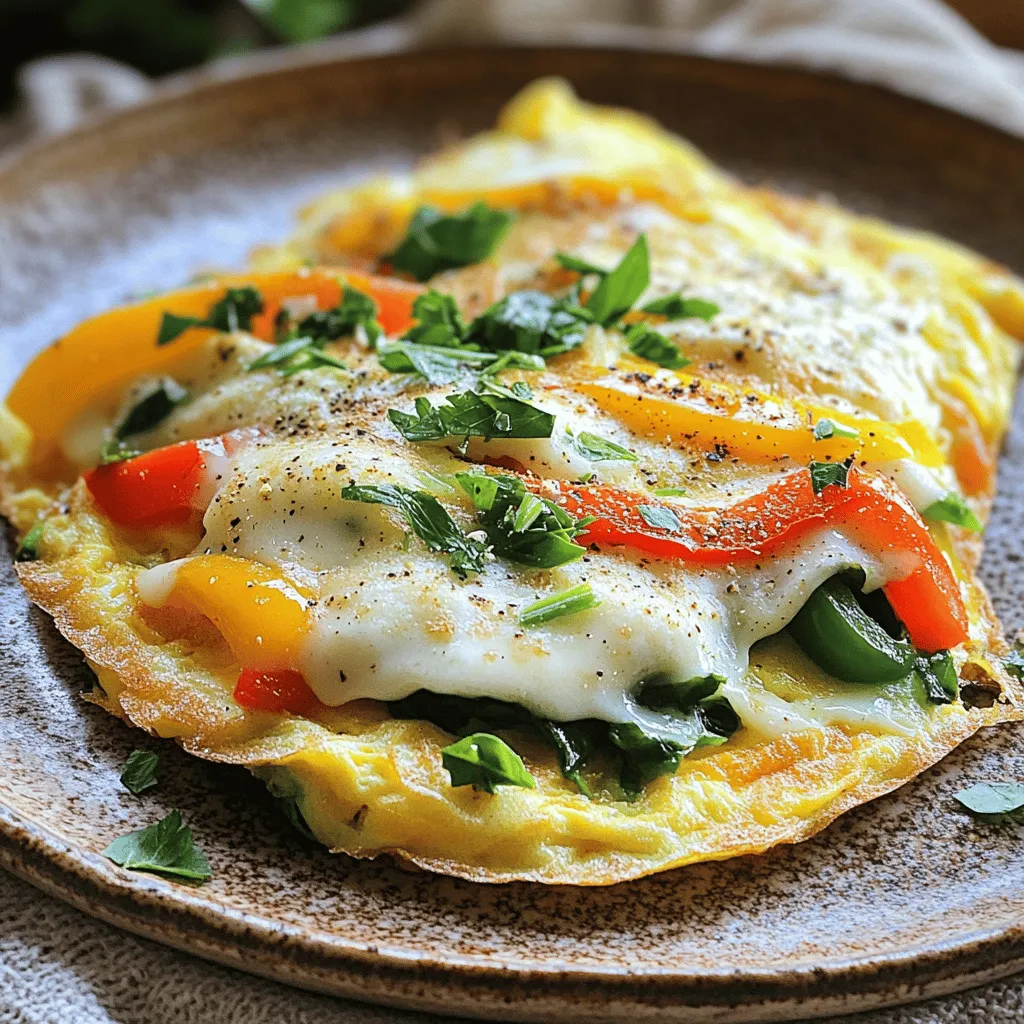
Are you ready to whip up a fast and flavorful breakfast? A Quick Veggie Omelette is perfect for busy mornings

- 6 large eggs - 1/2 cup milk (dairy or non-dairy) - 1 cup fresh spinach, chopped - 1/2 cup bell peppers, diced - 1/2 cup cherry tomatoes, halved - 1/2 cup cheese, shredded - Seasonings: salt, black pepper, garlic powder The main ingredients are simple and fresh. Eggs are the star, giving protein and flavor. Milk adds creaminess. Spinach brings health benefits and color. Bell peppers and tomatoes add crunch and sweetness. Cheese makes everything better with its rich taste. Salt, pepper, and garlic powder enhance all these flavors. - Additional veggies: onions, zucchini, or mushrooms - Different types of cheese: feta, goat cheese, or pepper jack - Proteins: cooked bacon, sausage, or ham Feel free to mix it up! Add onions or zucchini for more flavor. You can also try other cheeses like feta or pepper jack. If you want more protein, throw in some cooked bacon or sausage. Each choice makes the muffins unique. - Muffin tin - Cooking spray or muffin liners - Mixing bowl and whisk You'll need a muffin tin to bake the muffins. Cooking spray or liners help with easy removal. A mixing bowl and whisk are essential for combining the eggs and milk. These items make the process quick and fun. You can find everything in your kitchen. For the full recipe, check out the detailed steps to make these egg muffins. Set your oven to 375°F (190°C). This step gets your muffins baking quickly. Grease the muffin tin with cooking spray or use muffin liners. This makes clean-up easy. In a large bowl, crack 6 large eggs. Add 1/2 cup of milk and whisk until smooth. Then, fold in the veggies and seasonings: - 1 cup fresh spinach, chopped - 1/2 cup bell peppers, diced - 1/2 cup cherry tomatoes, halved - 1/2 cup cheese, shredded - 1/4 teaspoon salt - 1/4 teaspoon black pepper - 1/2 teaspoon garlic powder Mix until everything is well combined. Carefully pour the egg mixture into the muffin tin, filling each cup about three-quarters full. This gives them room to rise. Bake for 18-20 minutes. Check with a toothpick; it should come out clean when done. Let the muffins cool in the tin for about 5 minutes. Then, gently remove them. You can serve them warm or store them for later. Enjoy your egg muffins as a quick breakfast or snack! For the full recipe, refer to the earlier section. To make tasty egg muffins, avoid overfilling the muffin cups. Fill each cup about three-quarters full. This gives the muffins room to rise without spilling over. Using fresh ingredients also makes a big difference. Fresh veggies and cheese add more flavor. You can try alternatives for baking. An air fryer works great for egg muffins. Silicone molds are also a fun option. They are easy to use and clean. Always check your oven's heat. Different ovens may bake at different rates, so adjust the time if needed. Egg muffins taste great with avocado, salsa, or Greek yogurt. These toppings add creaminess and zest. They also make a quick meal prep option. You can store them in the fridge for easy breakfasts all week. For the full recipe, check the recipe section above. {{image_4}} You can easily make these muffins vegetarian. Just swap in your favorite veggies or cheese. Try adding zucchini, mushrooms, or even kale. For cheese, feta or pepper jack gives a nice twist. These changes keep the taste fresh and fun. Want to boost your protein? Add cooked meats like bacon or turkey sausage. They make the muffins heartier. You can chop the meat into small pieces and mix them in with the egg mix. This option is great for those who love a savory kick. Pair these muffins with a refreshing fruit smoothie. A smoothie can add sweetness and balance the meal. Blend your favorite fruits like bananas, berries, or mango. This combo makes for a quick, tasty breakfast that feels complete. You can find the Full Recipe for the egg muffins above. After making your egg muffins, you may have some left. Store them by putting them in an airtight container. This keeps them fresh and tasty. Place the container in the fridge. Your muffins will stay good for up to four days. Enjoy them as grab-and-go meals throughout the week! If you want to save muffins for later, freezing is a great option. First, let the muffins cool completely. Then, wrap each muffin in plastic wrap or foil. Put the wrapped muffins in a freezer bag. Make sure to squeeze out as much air as you can. To reheat, take a muffin out and remove the wrap. Microwave it for 30-60 seconds, or until warm. You can also bake it at 350°F (175°C) for about 10 minutes. The shelf life for these muffins is pretty good. In the fridge, they last about four days. If you choose to freeze them, they can stay fresh for up to three months. Just remember to label your containers with the date. This helps you keep track of how long they have been stored. Enjoy your muffins anytime! Bake your egg muffins for 18 to 20 minutes at 375°F (190°C). They are done when they puff up and a toothpick comes out clean. Keep an eye on them. Oven times can vary. Yes, you can. Meal prep is easy with egg muffins. Bake a batch and store them in the fridge. They stay good for about five days. Just reheat them in the microwave when you are ready to eat. Egg muffins can be gluten-free. Eggs and veggies are safe for gluten-free diets. If you use cheese, make sure it is gluten-free too. Always check labels for any hidden gluten. You can mix it up! Try adding herbs like basil or cilantro. Spices like paprika or chili powder add a kick. You can also add cooked bacon, sausage, or other veggies. The options are endless! Egg muffins pair well with many sides. Serve them with fresh fruit or a green salad. You can also enjoy them with a cup of coffee or tea. For a light dip, try salsa or Greek yogurt. These pair great for breakfast! Simple egg muffins are easy to make and perfect for any meal. You can customize them with veggies, cheeses, or proteins to fit your taste. The steps are straightforward, and you can enjoy baked muffins in no time. Remember to store them well for future meals or snacks. Experiment with flavors to find your favorites, and consider pairing them with tasty sides. Enjoy making these muffins, and share them with friends and family for a fun cooking experience!

Simple Egg Muffins Quick and Tasty Breakfast Recipe

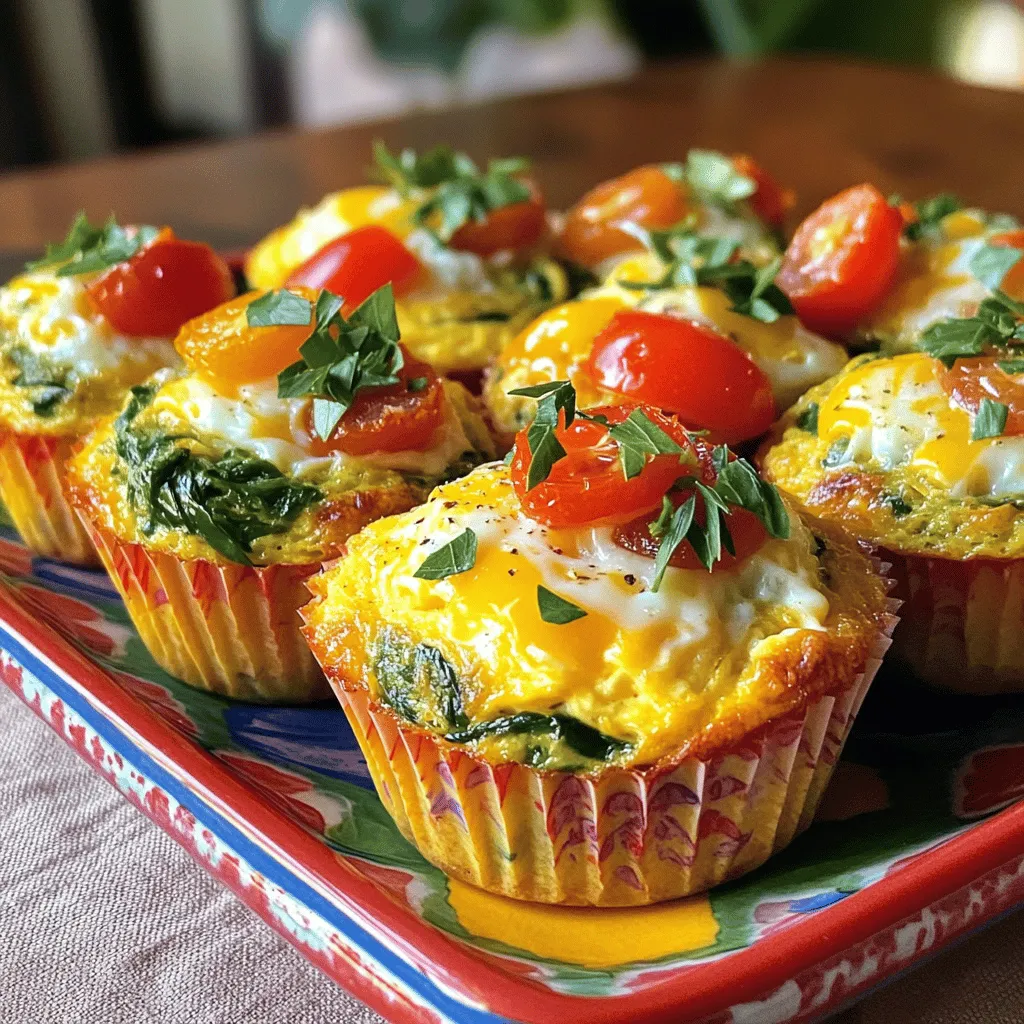
Start your day with a burst of flavor and nutrition! These Simple Egg Muffins are not just quick to make;

- 8 slices of day-old brioche or challah bread - 6 large eggs - 2 cups whole milk - 1/2 cup heavy cream - 1/4 cup pure maple syrup - 1 tablespoon vanilla extract - 1 teaspoon ground cinnamon - 1/4 teaspoon freshly grated nutmeg - A pinch of salt - 1/2 cup chopped pecans (optional) - Powdered sugar for dusting - Fresh berries for serving To start, I love using day-old brioche or challah bread. This type of bread has a great texture and taste. The stale bread soaks up all the yummy egg mixture. You can cut it into cubes to ensure every piece gets that tasty flavor. Next, you need six large eggs. Eggs help bind the casserole together and create a nice custard texture. Whole milk and heavy cream add richness and creaminess. The combination gives your casserole that decadent feel. For sweetness, I use pure maple syrup. It brings a warm, natural flavor. Add a tablespoon of vanilla extract for a lovely aroma. Ground cinnamon and freshly grated nutmeg give it a cozy, spiced taste. Don’t forget a pinch of salt! It enhances all the flavors. If you want a little crunch, consider adding chopped pecans. They are optional but add a nice texture. Finally, when serving, I like to dust the top with powdered sugar. It adds a sweet touch. Fresh berries make a perfect garnish. They add color and a fresh taste to the dish. For the full recipe, check out the detailed instructions to make this easy French toast casserole. 1. Preheat the oven and prepare the baking dish: Start by preheating your oven to 350°F (175°C). Grease a 9x13 inch baking dish with butter or non-stick spray. This step is key to ensure your casserole comes out easily. 2. Mix the egg and milk mixture: In a large bowl, whisk together 6 large eggs, 2 cups of whole milk, and 1/2 cup of heavy cream. Add 1/4 cup of pure maple syrup, 1 tablespoon of vanilla extract, 1 teaspoon of ground cinnamon, 1/4 teaspoon of freshly grated nutmeg, and a pinch of salt. Mix until it’s frothy and all ingredients blend well. 3. Combine the bread with the egg mixture: Cut 8 slices of day-old brioche or challah bread into cubes. Gently fold these cubes into your egg mixture. Make sure each piece is well coated. If you like, add 1/2 cup of chopped pecans for extra crunch. 4. Refrigerate for flavor absorption: Pour the mixture into the prepared baking dish. Spread it out evenly. Cover the dish with aluminum foil and refrigerate for at least 30 minutes. You can also leave it overnight for even more flavor. 5. Bake the casserole: When you're ready to bake, remove the casserole from the fridge. Place it in the preheated oven and bake it for 25 minutes covered. Then, carefully take off the foil and bake for an additional 15-20 minutes. Look for a golden brown top and a firm, custard-like center. - Timing for best results: The key is to bake the casserole until the center is set. Keep an eye on the time to avoid over-baking. - Ensuring a custard-like center: Make sure to whisk the egg mixture well so that it gets nice and fluffy. This helps create that soft custard texture you want. - Tips for even baking: Rotate the casserole halfway through baking. This helps it cook evenly and prevents one side from browning too much. Check out the Full Recipe for more details and enjoy making this tasty dish! To make your French toast casserole even better, think about spices. You can swap vanilla extract for almond extract for a nutty twist. If you want more warmth, add a dash of ginger or cardamom. For sweetness, use brown sugar instead of maple syrup. This adds a deeper flavor. When serving, top your casserole with fresh berries. Strawberries, blueberries, and raspberries bring color and taste. You can also sprinkle powdered sugar on top for a sweet touch. For drinks, serve with coffee or a creamy hot chocolate. These pair well and make breakfast feel special. You can prepare this casserole the night before. Just mix the bread and egg mixture, then let it sit in the fridge. This helps the flavors blend. If you need to reheat leftovers, do it slowly in the oven. Set the oven to 300°F and bake until warm. This keeps the texture soft and tasty. For the full recipe, check out the Decadent French Toast Casserole guide. {{image_4}} You can change the bread used in this dish. If you do not have brioche or challah, try using sourdough or French bread. These options give a nice texture and flavor. You can also use whole wheat bread for a healthier choice. If you need dairy-free options, choose almond milk or oat milk instead of whole milk. You can swap the heavy cream for coconut cream or a dairy-free version. These swaps make the dish lighter but still tasty. Adding chocolate chips or dried fruits can make this casserole even better. Dark chocolate chips add a rich taste. Dried fruits like raisins or cranberries give a nice chew. You can mix in these treats right before baking for a sweet surprise. Don’t forget about seasonal fruits! In summer, fresh berries work great. In fall, you can add sliced apples or pears. These toppings not only add flavor but also make the dish look pretty. For gluten-free options, use gluten-free bread. Many brands offer good choices that work just as well. You can even make your own bread if you want a fun challenge. If you need low-sugar modifications, try using less maple syrup. You can also use a sugar substitute, like stevia or monk fruit. These changes keep the dish sweet without all the sugar. You can find the full recipe for this Easy French Toast Casserole to try these variations! To keep your Easy French Toast Casserole fresh, store it well. First, let any leftovers cool to room temperature. Then, place them in an airtight container. A glass or plastic container works best. Make sure to cover it tightly. This helps keep moisture in and air out, preserving flavor. You can refrigerate the casserole for up to four days. If you want to save some for later, freezing is a great option. Cut the casserole into individual portions before freezing. Wrap each piece in plastic wrap and then place them in a freezer-safe bag. This method prevents freezer burn and keeps them fresh. When you're ready to eat, thaw them in the fridge overnight. Reheat in the oven or microwave until warm. This way, you maintain the tasty texture. Your French Toast Casserole can last in the fridge for four days. If properly frozen, it can last up to three months. However, always check for signs of spoilage. Look for changes in color, smell, or texture. If it smells off or looks weird, it's best to throw it away. Enjoy your dish while it’s fresh for the best taste. To check if your casserole is ready, look for two main signs. First, the top should be golden brown. Second, the center should feel firm when you gently shake the dish. You can also use a food thermometer to check. The internal temperature should reach 160°F (70°C). This ensures that the eggs are fully cooked. Yes, making it the night before is a great idea! Here’s how to do it step-by-step: 1. Follow the recipe to mix your egg and milk mixture. 2. Combine the cubed bread in the egg mixture as usual. 3. Pour everything into your greased baking dish. 4. Cover the dish with aluminum foil or plastic wrap. 5. Place it in the fridge overnight. This lets the bread soak up the flavors nicely. If you lack brioche or challah, don’t worry! You can use other bread types. Here are some good options: - White bread - Whole grain bread - French bread - Sourdough bread These will still give you a tasty casserole, just with a different texture. Absolutely! You can make your casserole even more exciting. Here are some ideas: - Add a pinch of ground ginger or cardamom for warmth. - Stir in some chocolate chips for a sweet twist. - Mix in fruit like diced apples or bananas for added flavor. Feel free to experiment, as every twist adds its own charm! This blog post covered a delicious French toast casserole recipe. You learned about ingredients, step-by-step instructions, and tips to enhance flavor. I shared advice on serving ideas, storage, and variations. Making this dish can be easy and fun. Remember to experiment with flavors and toppings. Whether for breakfast or a treat, it’s sure to delight. Enjoy your cooking and savor each bite!

Easy French Toast Casserole Tasty and Simple Recipe

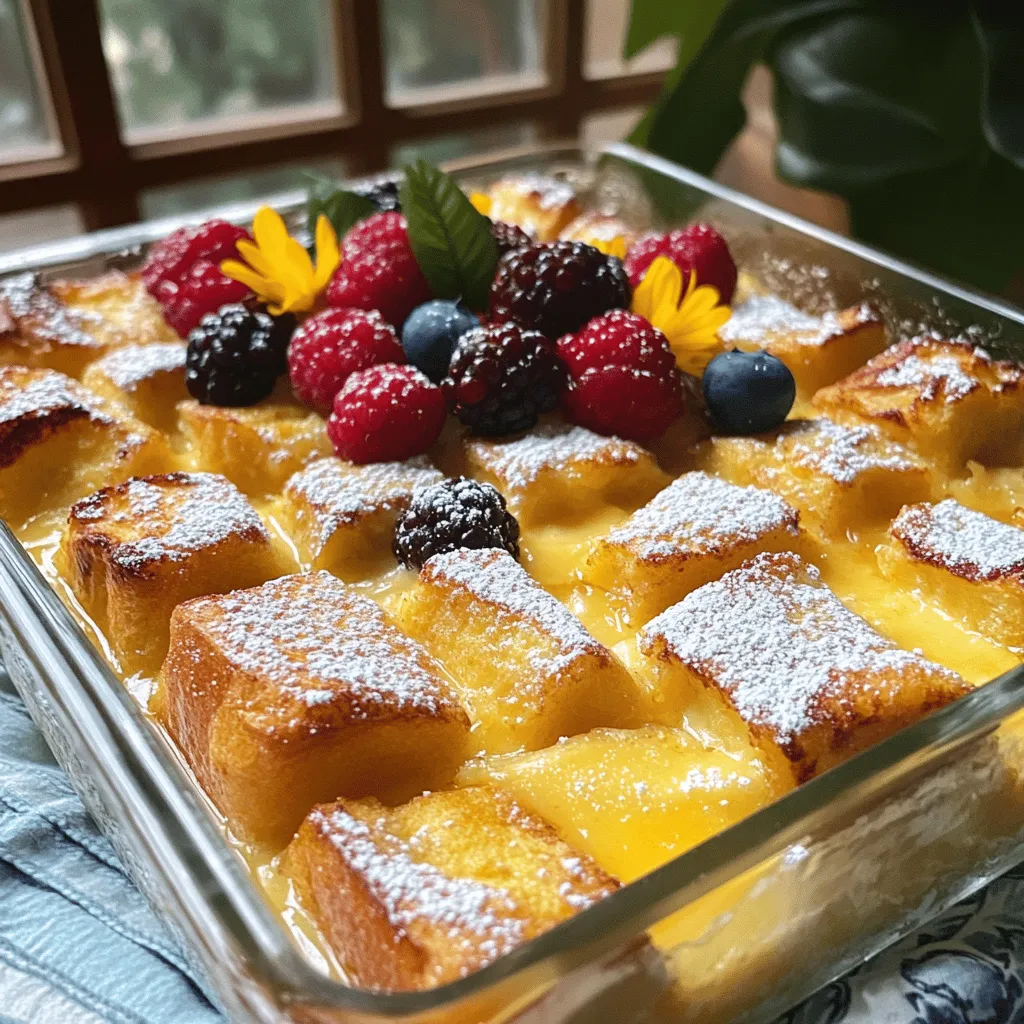
Get ready to delight your taste buds with my Easy French Toast Casserole! This dish combines sweet, rich flavors with

When making a simple grilled cheese sandwich, the right ingredients matter. Here’s what you need: - 2 slices of crusty sourdough bread - 2 tablespoons unsalted butter, softened - 1 clove garlic, finely minced - 1 teaspoon fresh thyme leaves, chopped - 1 teaspoon fresh rosemary, finely minced - 1 cup sharp cheddar cheese, shredded - 1/2 cup mozzarella cheese, shredded - Salt and pepper to taste - Optional: red pepper flakes These ingredients come together to create a tasty and satisfying meal. The sourdough adds a nice crunch, while the garlic and herbs give it a warm flavor. The mix of sharp cheddar and mozzarella melts beautifully, making each bite delicious. If you like a bit of heat, sprinkle in some red pepper flakes for a kick. Using fresh herbs elevates this classic dish. You can swap the bread or cheese based on what you have. The Full Recipe will guide you through each step of making this grilled cheese. Let’s get cooking! - First, combine garlic and herbs with butter. In a small bowl, mix softened butter with minced garlic, thyme, and rosemary. This blend adds bold flavor. - Preheat the skillet. Set your non-stick skillet over medium heat. Wait until it warms up but is not too hot. - Spread the garlic herb mixture on the bread. Take your slices of sourdough. Spread the garlic herb mix on one side of each slice. Be generous for great taste. - Assemble the sandwich in the skillet. Place one slice of bread in the skillet, herb-side down. Layer shredded cheddar and mozzarella cheese on top. Then, add the second slice of bread, herb-side up. - Grill the first side. Cook the sandwich for about 3-4 minutes. Look for a nice golden brown color on the bottom. Cheese will start melting. - Flip and grill the second side. With a spatula, gently flip the sandwich. Cook the other side for another 3-4 minutes until golden brown and gooey. - Cooling and slicing the sandwich. Once cooked, take the sandwich out of the skillet. Let it cool for a minute on a cutting board. Slice it in half for serving. For a complete guide, check out the Ultimate Garlic Herb Grilled Cheese. - Use room temperature butter for easy spreading. This makes it smooth and quick. - Monitor heat to prevent burning. Keep it on medium heat for best results. - Experiment with cheese combinations. Try mixing cheddar with mozzarella or gouda. - Pair your grilled cheese with sides like pickles or a salad. This adds crunch and freshness. - Use specialty breads for unique flavors. Sourdough or rye can elevate your meal. - Non-stick skillet. This helps prevent sticking and burning. - Spatula. A good spatula makes flipping easy. - Mixing bowl. You need this for mixing your garlic herb spread. For a full recipe, check out the Ultimate Garlic Herb Grilled Cheese. Enjoy making your sandwich! {{image_4}} You can make your grilled cheese even better by adding more flavors. Try using different cheeses like gouda or fontina. They melt well and add depth. You can also add veggies to your sandwich. Spinach gives a nice green touch, while tomatoes add juiciness. Both options make your sandwich more healthy and tasty. Don’t stop at just cheese and bread. Use flavored butters or spreads for more zest. You can mix herbs or garlic into your butter for a unique taste. Adding spices can also change the game. Smoked paprika gives a nice smoky flavor, while oregano adds a fresh kick. These twists make your simple meal exciting. The bread you choose can change your grilled cheese. Whole grain bread adds a nutty taste and more fiber. Rye bread offers a slightly sweet flavor that pairs well with cheese. If you need gluten-free options, many brands make gluten-free bread that still tastes great. These alternative breads bring new life to your classic sandwich. To keep your grilled cheese fresh, wrap it in foil or place it in an airtight container. This will help keep the bread from getting too dry. You can store it in the fridge for up to three days. If you want to enjoy it later, be sure to cool it first. This way, it won't trap steam and become soggy. You can reheat grilled cheese in several ways. The best method is using a skillet on low heat. This keeps the bread crisp while melting the cheese. Another option is using an air fryer. Set it to 350°F for about 5 minutes. Avoid microwaving, as this can make it soggy. If you do use a microwave, place a paper towel under the sandwich to help absorb moisture. Yes, you can freeze grilled cheese! To freeze, wrap each sandwich tightly in plastic wrap, then place it in a freezer bag. It can last for about a month in the freezer. When ready to eat, take it out and let it thaw in the fridge overnight. Then, reheat it using the skillet method for the best results. This will give you that fresh, crispy texture again. What types of cheese are best for grilled cheese? I love using sharp cheddar and mozzarella. Cheddar gives a rich taste, while mozzarella melts beautifully. Other great choices are gouda, fontina, and provolone. Mixing cheeses adds layers of flavor. How do I make my grilled cheese extra crispy? To achieve extra crispiness, use room temperature butter. It spreads easily and coats the bread well. Cook on medium heat to let the bread brown slowly. You can also sprinkle a pinch of salt on the outside for an extra crunch. Can I make grilled cheese without butter? Yes! You can use olive oil, mayonnaise, or margarine instead. These options can add unique flavors. Olive oil gives a nice taste, while mayonnaise creates a golden crust. What's the best way to flip a grilled cheese sandwich? Use a spatula to gently lift one side. Carefully slide the spatula under the sandwich, and tilt it up. Flip quickly and confidently to avoid spills. Practice makes perfect. How can I prevent the bread from burning? Keep the heat on medium. If the skillet gets too hot, the bread can burn. Check the color often. If it’s browning too fast, reduce the heat and cook longer. Can I use margarine instead of butter? Yes, margarine is a great substitute! It spreads well and gives a nice flavor. Just use the same amount as butter. What can I use as a gluten-free alternative for bread? Look for gluten-free bread options like rice or almond flour bread. These can work well for grilled cheese. Just remember to adjust cooking time, as they may cook differently. We covered all the key points to make a tasty grilled cheese. You learned about the right ingredients, preparation steps, and how to cook it perfectly. I shared tips for greatness and fun variations to try. Keep your grilled cheese fresh with smart storage practices. Whether you enjoy classic cheese or new flavors, this recipe is a win. Now, grab your ingredients and start cooking. Your perfect grilled cheese awaits!

Simple Grilled Cheese Sandwich Easy and Flavorful Meal

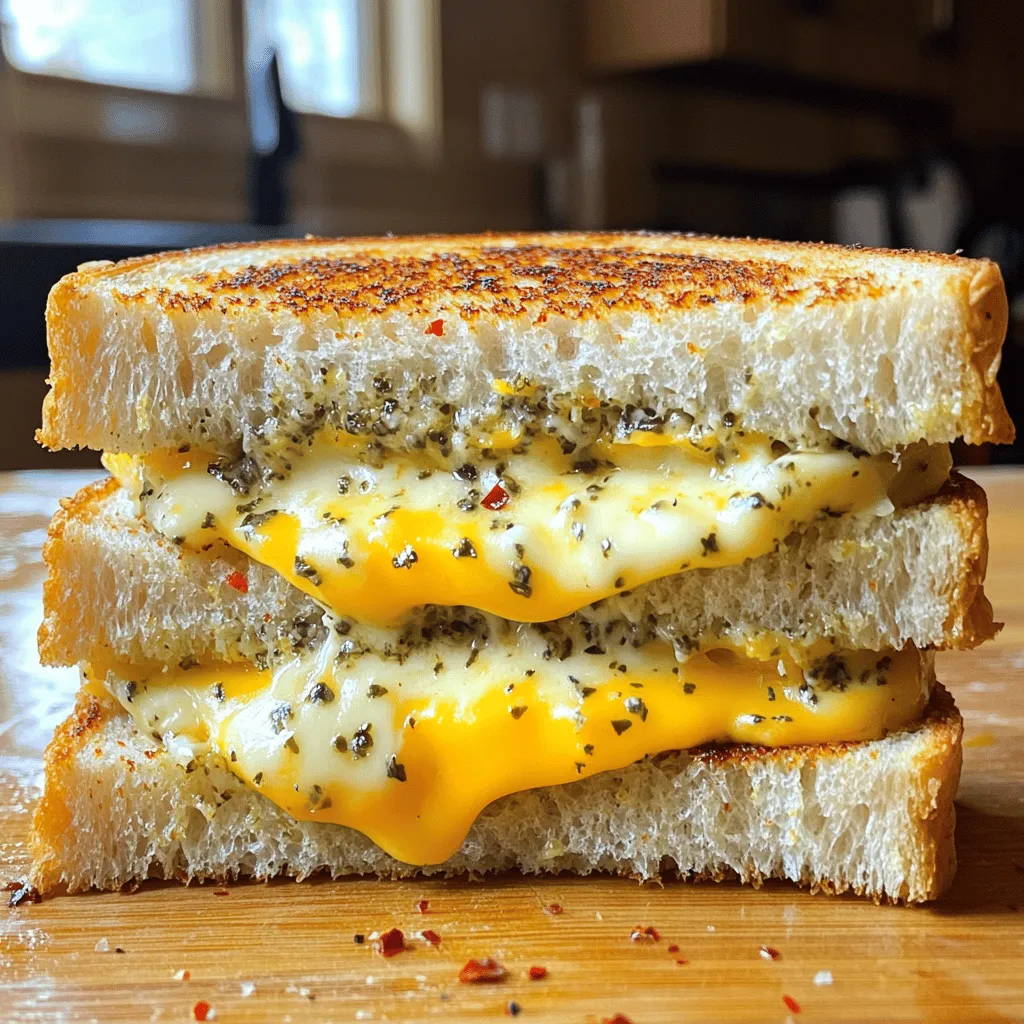
Craving a simple yet delicious meal? The classic grilled cheese sandwich is here to satisfy! In this guide, I’ll show

- 4 filets of white fish (cod, tilapia, or haddock) - 1 cup panko breadcrumbs - 1/2 cup freshly grated Parmesan cheese - 1 teaspoon garlic powder - 1 teaspoon onion powder - 1/2 teaspoon smoked paprika - 1/2 teaspoon dried oregano - 1/2 teaspoon fine sea salt - 1/4 teaspoon freshly ground black pepper - 2 large eggs - 2 tablespoons Dijon mustard - 1 tablespoon fresh lemon juice - Cooking spray or olive oil - Fresh herbs (parsley or dill) - Lemon wedges for serving When making crispy oven-baked fish, choosing great ingredients is key. First, select your fish. Cod, tilapia, and haddock all work well. You want fresh filets for the best taste. Next, panko breadcrumbs are a must. They create that nice crunch. Grated Parmesan cheese adds a rich flavor to the dish. Garlic and onion powders give a savory kick. Smoked paprika adds warmth; oregano adds depth. The seasonings work together, making each bite flavorful. Eggs and Dijon mustard help your breadcrumbs stick. Lemon juice brightens the dish and adds freshness. You can use cooking spray or olive oil for a golden finish. For extra flavor, consider fresh herbs. Parsley or dill can brighten your plate. Lemon wedges add a zesty touch when serving. To see the full recipe, check the Full Recipe section. Enjoy the process of gathering your ingredients. The right mix will make your crispy oven-baked fish shine! - Preheat oven to 425°F (220°C) - Line a baking sheet with parchment paper Start by preheating your oven. This step is key to getting crispy fish. Lining your baking sheet with parchment paper helps prevent sticking. It also makes cleanup a breeze. - Mixing the breadcrumb coating ingredients - Whisking the eggs with mustard and lemon juice Now, let’s create the tasty coating. In a large bowl, mix the panko breadcrumbs with Parmesan cheese, garlic powder, onion powder, smoked paprika, oregano, sea salt, and black pepper. This mix gives your fish flavor and crunch. In another bowl, whisk the eggs together with Dijon mustard and lemon juice. This mixture will help the crumbs stick to the fish. The mustard adds zest, while lemon gives a fresh taste. - Dipping filets in the egg mixture - Applying the breadcrumb mixture Take each fish filet and first dip it in the egg mix. Make sure to coat it well. Let any extra egg drip off. Next, roll the filet in the breadcrumb mix. Press gently so the crumbs stick evenly. Place the coated filets on your baking sheet. - Spraying filets with oil - Baking time and how to check for doneness Before baking, lightly spray the fish with cooking spray or drizzle olive oil on top. This step helps the fish turn golden brown. Bake in your preheated oven for 15-20 minutes. Check for doneness by using a fork. The fish should flake easily when cooked. Enjoy your crispy oven-baked fish! For the full recipe, check out the earlier sections. For the best crunch, use panko breadcrumbs instead of regular breadcrumbs. Panko is lighter and flakier, which helps create that perfect crispy texture. It allows more air and moisture to escape, making your fish nice and crunchy. Also, don’t skip the oil! Lightly spraying or drizzling oil on the fish before baking ensures even browning. This helps your fish get golden and crispy all around. When choosing fish, I recommend cod, tilapia, or haddock. These types have a mild flavor and hold up well when baked. Look for fresh filets with a clean smell and firm texture. Freshness is key! If the fish smells fishy or looks dull, it’s best to pass on it. Crispy fish pairs well with various side dishes. Think about serving it with a fresh salad or some roasted vegetables. You can also add a side of fries for a classic touch. For garnishing, try fresh herbs like parsley or dill. A squeeze of lemon juice brightens the dish, and a dollop of tartar sauce adds a nice creaminess. You can find the full recipe [here](#). {{image_4}} To make your crispy oven-baked fish even better, try adding spices. You can mix in some chili powder for heat or lemon zest for freshness. Experiment with herbs like thyme or dill for a new twist. You can also change the cheese. Instead of Parmesan, try using mozzarella or cheddar. Each cheese gives a different flavor and texture. Get creative and find what you love! If you want a gluten-free option, use gluten-free breadcrumbs. Many brands offer tasty choices that still provide a nice crunch. You can also use crushed nuts or cornmeal for a unique texture. To keep it crispy, make sure to coat your fish well. A light spray of oil helps too. This way, it stays golden and crunchy without gluten. You can make this recipe in an air fryer for a quicker option. Set the air fryer to 400°F (200°C) and cook for about 10-12 minutes. This method gives you a crispy outside and tender inside. Grilling is another fun way to cook your fish. Just preheat your grill and place the coated fish on it. Cook for about 5-7 minutes on each side. You’ll get a lovely smoky flavor while keeping the crispy texture! For the full recipe, check out the full recipe link provided. After enjoying your crispy oven-baked fish, store any leftovers in the fridge. To keep the fish fresh, place it in an airtight container. Glass or plastic containers work well. Make sure to cover the fish tightly. This helps keep the moisture in and the fish flavorful. To reheat your crispy fish, the oven is your best friend. Preheat the oven to 350°F (175°C). Place the fish on a baking sheet. Heat for about 10 to 15 minutes. This method keeps the crust crispy. You can also use an air fryer for the same time. Make sure the fish is hot all the way through before serving. If you want to save your crispy fish for later, freezing is a great option. Wrap each fish filet in plastic wrap. Then, place them in a freezer bag. Remove as much air as possible. This helps prevent freezer burn. When you're ready to eat, thaw the filets overnight in the fridge. Reheat them in the oven as described earlier. Enjoy the same great flavor as when you first made them! Baking fish takes about 15 to 20 minutes at 425°F (220°C). Factors like fish thickness and oven type affect cooking time. Thicker filets need a bit longer, while thinner ones cook fast. Always check for doneness to be sure. Yes, you can use frozen fish filets! However, you should thaw them first. To thaw, place them in the fridge overnight or run them under cold water. You may need to adjust the cooking time slightly. Make sure they are fully coated before baking. Great sides for crispy fish include: - Steamed vegetables - Rice or quinoa - French fries or sweet potato fries - Fresh salad with lemon vinaigrette - Tartar sauce or aioli for dipping These pair well and enhance the meal. Check the fish for a few signs. It should flake easily with a fork. The inside should appear opaque, not translucent. The breadcrumb coating should be golden brown. If you see these signs, your fish is perfectly cooked! This blog post shared a simple recipe for crispy oven-baked fish. We listed key ingredients, easy steps, and helpful tips to ensure success. You can make it tastier with optional ingredients and variations. Remember, fresh fish and the right breadcrumbs are key to crispiness. Enjoy your meal with good sides and fresh herbs. With these steps, you will cook delicious fish every time!

Crispy Oven-Baked Fish Delightful and Easy Recipe

Craving a delicious, healthy meal? This Crispy Oven-Baked Fish recipe is here to impress you! With just a few simple

- 4 medium zucchini, spiralized into zoodles - 3 tablespoons extra virgin olive oil - 4 cloves garlic, finely minced - 1/2 teaspoon red pepper flakes (optional for spice) - 1/2 cup freshly grated Parmesan cheese - Salt and freshly ground black pepper, to taste - 2 tablespoons fresh parsley, finely chopped (for garnish) The main star of this dish is zucchini, which serves as the base for our zoodles. I love how easy it is to spiralize zucchini into noodle-like strands. The extra virgin olive oil adds richness. Fresh garlic gives a nice kick. If you like some heat, add red pepper flakes. The Parmesan cheese brings a creamy, salty flavor that elevates the dish. Don’t forget salt and pepper to make everything pop. Lastly, fresh parsley adds a burst of color and flavor. If you want to switch it up, there are great alternatives. For cheese, you can use nutritional yeast if you want a vegan version. Avocado oil works well if you need a substitute for olive oil. If you can’t find zucchini, summer squash is a perfect alternative. These simple swaps can help you cater to different diets or preferences while keeping your dish delicious. For the full recipe, see the section above. How to spiralize zucchini To make zoodles, you need zucchini. First, wash the zucchini well. Then, cut off both ends. Next, use a spiralizer or a julienne peeler to create long strands. You can make them as thick or thin as you like. Set the zoodles aside in a bowl. Tips for perfect zoodle texture To get the best texture, choose firm zucchinis. Avoid any that are soft or bruised. After spiralizing, let the zoodles sit for a few minutes. This helps to remove some moisture. You can also lightly sprinkle salt on them. This will draw out extra water, keeping them from getting soggy. Sautéing garlic In a large skillet, pour in the olive oil over medium heat. Wait until it shimmers, then add the minced garlic. Sauté it for about 30 seconds. You want it to smell great but not brown. Burnt garlic tastes bad and ruins your dish. Adding zoodles and spices Once the garlic is fragrant, add the zoodles to the skillet. Toss them in the garlic oil. If you like some heat, sprinkle in red pepper flakes. Mix everything well so the zoodles soak up the flavor. Incorporating Parmesan cheese Cook the zoodles for 3-4 minutes. Stir them occasionally, but keep them slightly crunchy. When they are just right, take the skillet off the heat. Fold in the grated Parmesan cheese. Toss the zoodles until they are coated in cheesy goodness. Season with salt and pepper as you like. Serve hot for the best taste. For the full recipe, check out the complete ingredient list. To avoid soggy zoodles, start by salting your spiralized zucchini. This draws out excess water. Let them sit for about 10 minutes before cooking. Pat them dry with a paper towel. This small step helps keep your zoodles firm. When cooking zoodles, don't rush. Cook them for 3 to 4 minutes. Stir them often to ensure even cooking. You want them tender but not mushy. This gives you a nice bite, just like regular pasta. For a beautiful presentation, serve the zoodles in shallow bowls. Top with extra grated Parmesan cheese. A drizzle of high-quality olive oil adds a nice touch. Fresh parsley gives color and a fresh taste. Garlic Parmesan zoodles pair well with grilled chicken or shrimp. They also go great with a side salad. This adds freshness and crunch to your meal. Enjoy the balance of flavors and textures! {{image_4}} You can make garlic Parmesan zoodles even better by adding proteins. Chicken, shrimp, or tofu all work well. Simply cook the protein first, then toss it in with the zoodles at the end. This adds more flavor and makes your meal heartier. You can also play with spices. Italian herbs like oregano and basil bring a fresh taste. Adding lemon zest gives a bright, zesty kick. Experimenting with these flavors can create a new dish each time. Garlic Parmesan zoodles are great for many diets. They are gluten-free since they use zucchini instead of pasta. This makes them safe for those with gluten allergies. If you seek low-carb options, zoodles fit perfectly. They have fewer carbs than traditional pasta. This makes them a fantastic choice for a healthy dinner. For the full recipe, check out the detailed instructions to make this delicious dish! To keep your garlic Parmesan zoodles fresh, place them in an airtight container. Store in the fridge for up to three days. Do not leave them out at room temperature. This will keep them safe and tasty. When it's time to reheat, use a skillet or microwave. If using a skillet, add a splash of water and heat on low. This helps keep the zoodles from getting too soft. Stir gently to revive their texture. If microwaving, heat in short bursts and stir in between. This way, you avoid mushy zoodles. If you want to save zoodles for later, freezing is an option. First, spiralize the zucchini and blanch the zoodles in boiling water for about two minutes. Then, quickly transfer them to an ice bath to stop cooking. Drain and dry them well. Place zoodles in a freezer bag, remove as much air as possible, and seal. They can last up to three months in the freezer. However, avoid freezing if you plan to serve zoodles raw. Freezing raw zoodles can lead to a watery texture after thawing. Always cook them first if you want to freeze. When you're ready to use them, simply thaw in the fridge overnight and reheat as previously mentioned. For the full recipe, check out the Garlic Parmesan Zoodles recipe. Zoodles are zucchini noodles. They are made by spiralizing fresh zucchini. This creates long, thin strands that look like pasta. Zoodles are low in carbs and calories. They are a great option for those watching their weight. They are also rich in vitamins and minerals. Zoodles provide fiber, which helps with digestion. This makes them a healthy choice for meals. To keep zoodles from getting soggy, you can take a few steps: - Salt the zoodles: Before cooking, sprinkle salt on the zoodles. Let them sit for 10-15 minutes to draw out moisture. - Dry them off: After salting, pat the zoodles with a paper towel to soak up the extra liquid. - Cook quickly: Sauté them over medium heat for just 3-4 minutes. This keeps them firm and crunchy. Yes, you can prepare garlic Parmesan zoodles in advance. Here are some best practices: - Store raw zoodles: You can spiralize zucchini and store it in an airtight container for up to 3 days. - Cook just before serving: To maintain the best texture, cook the zoodles just before you eat. - Reheat carefully: If you have leftovers, gently reheat them in a skillet. This keeps them from getting too soft. Garlic Parmesan zoodles make a great side or main dish. Here are some ideas: - Grilled chicken: The flavors of garlic and cheese complement chicken well. - Shrimp scampi: The seafood pairs nicely with the garlic in the zoodles. - Salad: A fresh green salad can balance the rich flavors of the zoodles. - Meatballs: They can add protein and heartiness to your meal. For the full recipe, check out the detailed instructions on how to make this delicious dish. Garlic Parmesan zoodles are a tasty twist on pasta. We've covered the ingredients, from zucchini to cheese, and how to prepare them. I shared tips to avoid sogginess and ways to add protein for more flavor. You can also store and reheat zoodles to enjoy later. Whether you're new to zoodles or a fan, these steps make it easy. Enjoy experimenting with flavors and share your creations. Garlic Parmesan zoodles can bring joy to your meals, keeping them fun and healthy.

Garlic Parmesan Zoodles Flavorful and Easy Dinner Dish

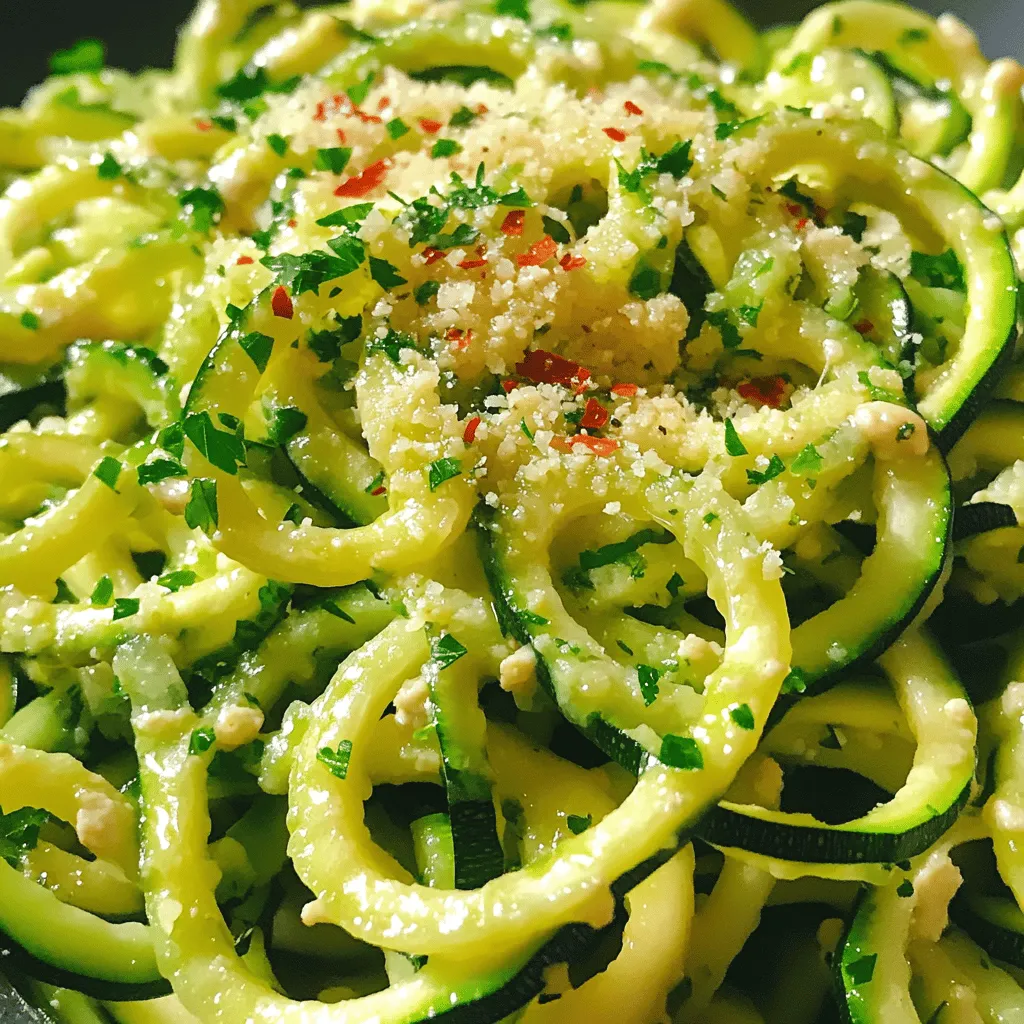
Are you ready to whip up a quick yet delicious dinner? Garlic Parmesan Zoodles are your answer! This dish is

- 1 pound of baby carrots (or sliced regular carrots) - 3 tablespoons pure maple syrup - 2 tablespoons unsalted butter - 1 tablespoon extra virgin olive oil - 1 teaspoon ground cinnamon - 1/2 teaspoon sea salt - 1/4 teaspoon freshly ground black pepper - Fresh parsley or thyme sprigs for garnish To make these maple glazed carrots, you need simple, fresh ingredients. Start with baby carrots, which are sweet and tender. If you can't find them, sliced regular carrots work well too. Maple syrup adds a rich sweetness. Unsalted butter adds creaminess, while olive oil helps the glaze stick. Ground cinnamon gives a warm spice, and sea salt enhances all the flavors. Freshly ground black pepper adds just a hint of heat. To finish, use fresh parsley or thyme to make the dish pop. - Large mixing bowl - Baking sheet - Parchment paper - Whisk Having the right tools makes cooking easier. A large mixing bowl helps you blend the glaze smoothly. A baking sheet is key for roasting the carrots evenly. Parchment paper saves you from a messy cleanup. A whisk is perfect for mixing your glaze until it's nice and smooth. With these tools, you're set for success! For the full recipe, check out the link provided. First, you need to preheat your oven. Set it to 400°F (200°C). This step is key to getting those lovely roasted carrots. Now, let’s make the maple glaze. In a large mixing bowl, combine the following: - 3 tablespoons pure maple syrup - 2 tablespoons unsalted butter, melted - 1 tablespoon extra virgin olive oil - 1 teaspoon ground cinnamon - 1/2 teaspoon sea salt - 1/4 teaspoon freshly ground black pepper Whisk these ingredients together. You want a smooth and tasty glaze that will coat the carrots well. Next, add 1 pound of baby carrots to your glaze. If you use regular carrots, slice them into even pieces. Toss the carrots in the glaze. Make sure each carrot is well-coated. This step is where the magic begins! Now, it’s time to roast. Line a baking sheet with parchment paper. This makes cleanup easy. Spread the glazed carrots evenly on the sheet. Keep them in a single layer for even roasting. Place the baking sheet in your preheated oven. Roast the carrots for 20-25 minutes. Halfway through, stir them gently. This helps them caramelize nicely. The carrots are done when they are tender and golden brown. Once they are ready, take them out of the oven. Let them cool for a minute. Then, transfer the maple-glazed carrots to a serving dish. You can garnish them with fresh parsley or thyme for a nice touch. For the full recipe, check the details above! To achieve the best caramelization, focus on the heat and time. Use pure maple syrup for a rich flavor. High heat helps the sugars in the glaze brown. I recommend roasting the carrots at 400°F (200°C). This temperature allows them to cook through and caramelize nicely. Stir the carrots halfway to ensure they brown evenly. Keep an eye on them; you want a golden color without burning. Maple-glazed carrots pair well with many dishes. They complement roasted chicken or pork beautifully. For a veggie feast, serve them alongside sautéed greens or mashed potatoes. You can also add these carrots to a grain bowl for a sweet touch. They bring color and flavor to any plate. To make your dish pop, garnish with fresh herbs. Chopped parsley or thyme sprigs add a bright touch. Place them on top right before serving. This not only adds color but also enhances the aroma. You can even serve the carrots in a beautiful dish to impress your guests. For even more flair, consider a drizzle of extra maple syrup for shine. Check out the Full Recipe for more tips! {{image_4}} You can make maple-glazed carrots even better! Try adding nuts like walnuts or pecans for crunch. You can also mix in other veggies. Think of green beans or sweet potatoes. They roast well and add color to the dish. If you want a nut-free option, skip the nuts and enjoy the carrots on their own. Spices can change the taste of your carrots. Try adding a pinch of nutmeg for warmth. Ginger adds a nice kick and pairs well with maple. You can also use a dash of cayenne pepper for heat. Each spice gives the carrots a different flavor. Feel free to experiment and find what you like best. You don't have to roast your carrots in the oven. You can cook them on the stovetop. Just add the glazed carrots to a pan and sauté them over medium heat. Stir often until they are tender. Grilling is another fun option. Toss the glazed carrots on the grill for a smoky flavor. Each method gives a unique twist to this simple dish. For the full recipe, check out the section above. After enjoying your maple-glazed carrots, let them cool. Place the leftovers in an airtight container. Store them in the fridge for up to four days. Before serving, reheat them in the microwave or on the stovetop. A splash of water helps keep them moist. To freeze, first cool the carrots completely. Then, spread them in a single layer on a baking sheet. Freeze for a few hours until solid. Once frozen, transfer the carrots to a freezer bag. Remove as much air as you can. They can last up to three months. To reheat, thaw them in the fridge overnight. Warm them gently on the stove or in the oven. Maple-glazed carrots are best eaten fresh. If stored properly, they last for four days in the fridge. If frozen, enjoy them within three months for the best taste. After these times, the flavor and texture may decline. Always check for signs of spoilage before eating. I like to use baby carrots for this dish. They are sweet and tender. If you prefer, sliced regular carrots work well too. Just cut them into equal pieces. This helps them cook evenly. Yes, you can! Honey is a great choice. It gives a nice sweetness. Agave syrup works too if you want a milder flavor. Just remember, each sweetener will change the taste a bit. To make this recipe vegan, skip the butter. Use coconut oil or a vegan butter instead. This keeps the glaze rich without dairy. It still tastes amazing! Of course! If you want to double the recipe, just increase each ingredient. Use two pounds of carrots and adjust the glaze. Make sure your baking sheet has space for all the carrots. This way, they roast well and get that nice caramel color. This blog post covered the tasty maple-glazed carrots recipe. We explored key ingredients, tools needed, and step-by-step instructions. I shared tips for perfecting the glaze and alternative cooking methods. You can personalize this dish with spices or extra veggies. Lastly, I addressed common questions about storage, substitutions, and recipe scaling. Enjoy these sweet, roasted carrots as a healthy side. They will impress your family and friends!

Maple Glazed Carrots Simple and Tasty Side Dish

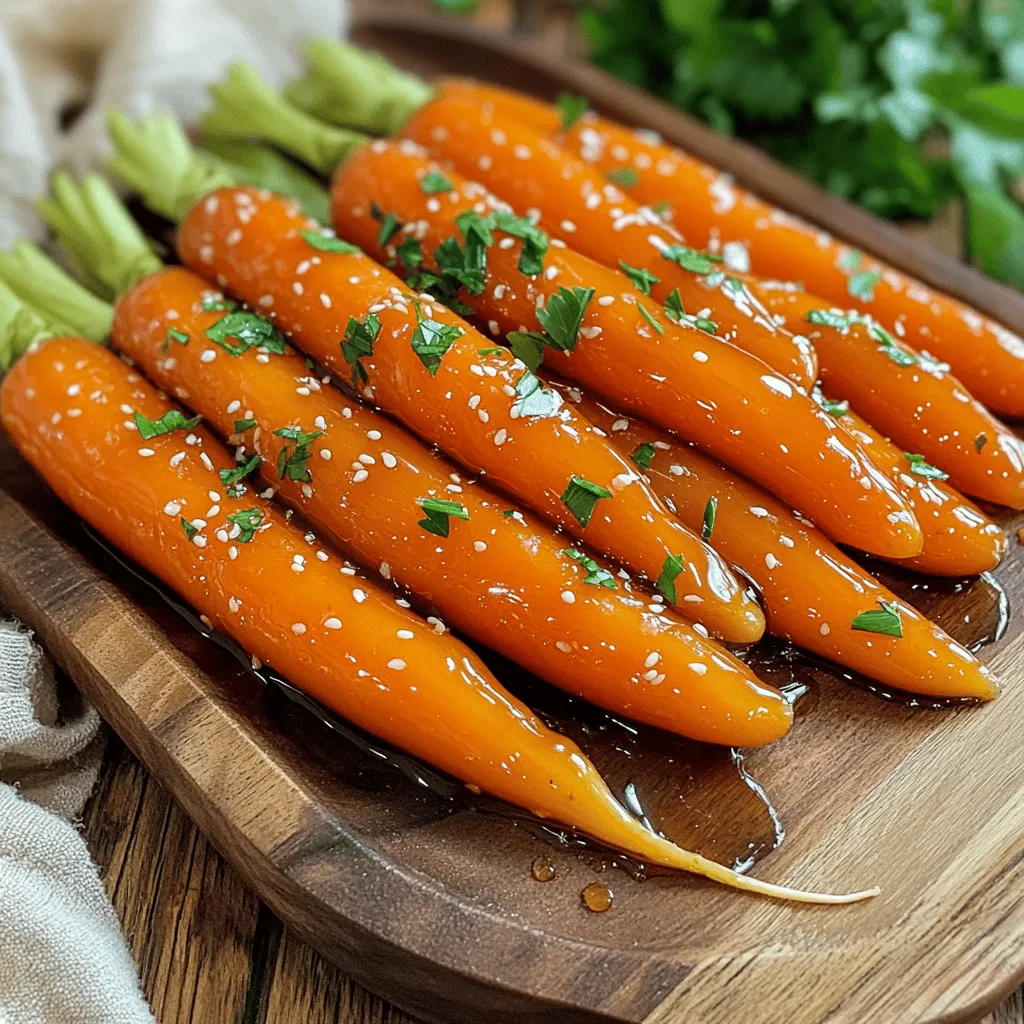
If you’re looking for a simple yet tasty side dish, try my Maple Glazed Carrots. These carrots are sweet, buttery,

Older posts
Newer posts
← Previous Page1 … Page36 Page37 Page38 … Page68 Next →

dsad

© 2025 tastymomrecipes • Built with GeneratePress

Our Policies

  • Copyright Policy
  • Cookie Policy
  • GDPR Policy
  • Privacy Policy
  • Disclaimer
  • Terms Of Use

More Information

  • Home
  • About
  • Contact
  • Appetizers
  • Dessert
  • Dinner
  • Drinks
©2025, tastymomrecipes About Back To Top