Skip to content
DisclaimerTerms Of UseGDPR PolicyCookie Policy

tastymomrecipes

  • Home
  • Drinks
  • Appetizers
  • Dinner
  • Dessert
  • About
  • Contact
  • Privacy Policy
DisclaimerTerms Of UseGDPR PolicyCookie Policy

Olivia

- Fusilli pasta (12 oz) - Fresh basil leaves (1 cup, packed) - Pine nuts (1/4 cup, lightly toasted) - Grated Parmesan cheese (1/2 cup) - Extra virgin olive oil (1/2 cup) - Cherry tomatoes (1 cup, halved) - Yellow bell pepper (1/2 cup, finely diced) - Cucumber (1/2 cup, finely diced) - Feta cheese (3/4 cup, crumbled) - Salt and freshly ground black pepper - Juice of 1 fresh lemon To make a great pesto pasta salad, you need fresh and delicious ingredients. The star of this dish is the fusilli pasta. It holds the pesto and veggies very well. Fresh basil leaves give your salad that bright green flavor. Pine nuts add a nice crunch and nutty taste. Grated Parmesan cheese brings in a savory kick. Extra virgin olive oil makes everything creamy and rich. For the veggies, cherry tomatoes add sweetness. Yellow bell pepper gives a nice color and crunch. Cucumber adds a refreshing bite. Feta cheese brings a tangy flavor that balances everything perfectly. Don’t forget salt and pepper to taste. The juice of one fresh lemon adds a zesty finish. This combination of ingredients creates a tasty and healthy dish. You can find the full recipe to guide you through the process. - Bring salted water to a boil. - Cook fusilli pasta to al dente (8-10 minutes). - Drain and rinse under cold water. Cooking pasta is simple. Start with a large pot. Fill it with water and add salt. The salt makes the pasta taste better. Once the water boils, add the fusilli pasta. Stir it gently, so it doesn’t stick. Cook it for 8 to 10 minutes. You want it to be firm yet soft. After cooking, drain the pasta in a colander. Rinse it under cold water. This stops the cooking and cools the pasta down. - Combine basil, pine nuts, Parmesan, and salt in a food processor. - Gradually add olive oil while blending until smooth. Pesto is the heart of this salad. Grab a food processor. Add fresh basil leaves, pine nuts, and grated Parmesan cheese. Don’t forget a pinch of salt! Pulse these together until finely chopped. Next, while the processor runs, slowly pour in the olive oil. This helps it blend into a smooth paste. Taste the pesto. You might want to add more salt or cheese to make it just right. - Mix cooled pasta with diced vegetables and feta. - Toss with pesto and season with lemon juice, salt, and pepper. Now for the fun part! In a large bowl, add the cooled pasta. Next, toss in diced vegetables like cherry tomatoes, yellow bell pepper, and cucumber. Crumble the feta cheese on top. Now, take the fresh pesto and spoon it over the salad. Use a spatula to mix everything well. This makes sure each bite has lots of flavor. Squeeze juice from a fresh lemon over the salad. Add salt and freshly ground black pepper to taste. This brightens up the dish! For the full recipe, check out the complete instructions above. - Use a large pot for boiling. This helps the pasta cook evenly. - Salt the cooking water adequately. This adds flavor to the pasta. - Try adding garlic or lemon zest for a fresh twist. Garlic gives it a nice kick. - Use high-quality olive oil for better taste. Fresh oil makes all the difference. - Serve in a large shallow dish or individual bowls. This makes it look nice and inviting. - Garnish with fresh basil or extra Parmesan. A little green adds color and flavor. For more ideas on how to make this dish shine, check the Full Recipe! {{image_4}} You can boost your pesto pasta salad with protein. Grilled chicken or shrimp work great. They add flavor and make the dish more filling. If you prefer a vegetarian option, add chickpeas. They are tasty and packed with nutrients. Adding vegetables makes your salad fresh and colorful. Grilled zucchini or asparagus adds a smoky taste. You can also toss in spinach or arugula for extra greens. These leafy veggies give a nice crunch and enhance the health benefits of your salad. Feel free to switch up the pasta style. You can substitute fusilli for penne or rotini. Each type gives a new twist to the dish. If you need a gluten-free option, use gluten-free pasta. This way, everyone can enjoy this delightful meal. Using these variations, you can create a pesto pasta salad that fits your taste and needs. Check out the Full Recipe for more details! You can refrigerate your pesto pasta salad for up to 3 days. To keep it fresh, store it in airtight containers. This way, the flavors stay vibrant, and the salad maintains its texture. If you want to save it for later, you can freeze the salad for up to 1 month. Be sure to use a freezer-safe container. When you're ready to enjoy it, thaw it in the refrigerator before serving. This keeps the taste and quality intact. Leftovers can lose some of their charm. To revive them, add a splash of olive oil or lemon juice. This will brighten the flavors. Toss in some fresh ingredients like extra veggies or herbs to make it feel new. Yes, it tastes even better after chilling for a few hours. I love making this dish a day ahead. The flavors blend well overnight. When you serve it later, it will be even more delicious. Just remember to let it chill in the fridge. This also helps it stay fresh. It can be gluten-free if made with gluten-free pasta. Many brands now offer great gluten-free options. Choose one that you enjoy. Always check the label to be sure. This way, you can enjoy the dish without worry. Replace cheese with nutritional yeast and use vegan pesto. This swap keeps all the great flavors. You can also add more veggies like spinach or avocado. Both add creaminess and taste. This way, your vegan pesto pasta salad remains fresh and fun! For the complete recipe, check out the Full Recipe. This blog post shared a simple pasta salad recipe with fresh flavors and healthy ingredients. You learned how to cook fusilli, make a tasty pesto, and combine everything into a delightful dish. I suggested storage tips and ways to customize the salad to fit your taste. Remember, this salad is versatile and easy to prepare. Try adding proteins or extra veggies for fun twists. Enjoy your cooking, and don’t hesitate to experiment with new flavors. Taste your way to a delicious meal!

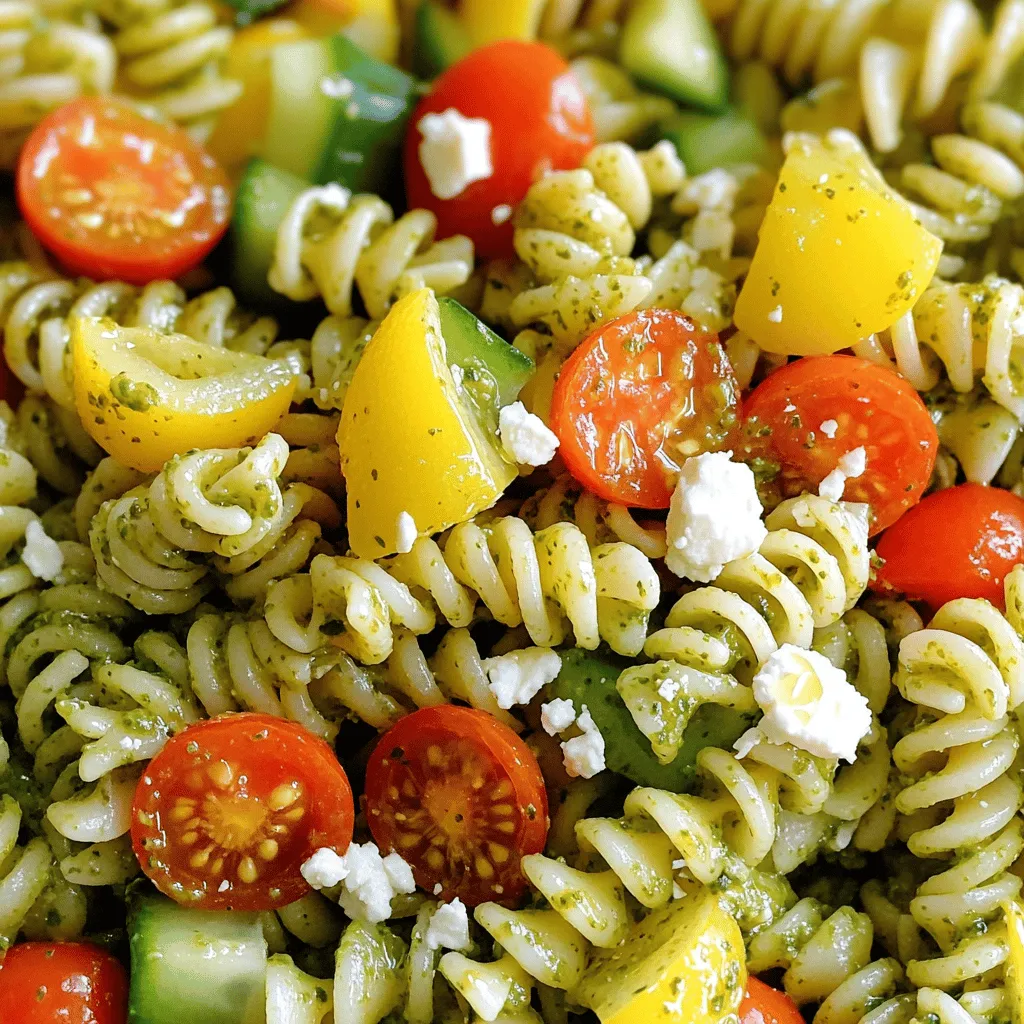
Flavorful Pesto Pasta Salad Fresh and Healthy Dish

Are you ready for a fresh and healthy dish that bursts with flavor? In this blog post, I’ll share my

- 6 large eggs - 1/2 cup milk - 1 cup fresh spinach, finely chopped - 1/2 red bell pepper, diced - 1/2 cup cherry tomatoes, halved - 1/4 cup feta cheese, crumbled - 1 teaspoon garlic powder - 1 teaspoon onion powder - Salt and freshly ground black pepper to taste - Cooking spray or olive oil for greasing Egg muffin cups are simple to make and packed with flavor. Each ingredient plays a key role. The eggs provide protein. Milk adds creaminess. Fresh spinach gives color and nutrients. Red bell pepper adds sweetness. Cherry tomatoes bring a burst of freshness. Feta cheese adds a rich, tangy flavor. Nutritional Information These muffin cups are not just tasty; they are healthy too. Each serving has around 120 calories. You get about 10 grams of protein, 7 grams of fat, and 2 grams of carbs. The fresh spinach is high in iron and vitamins. Red bell peppers are rich in vitamin C. Eggs are a great source of protein and healthy fats. Feta cheese has calcium, which is good for bones. Egg muffin cups are a good choice for breakfast or snack. They are easy to make and offer a great balance of nutrients. For the full recipe, check out the Egg Muffin Cups Delight. 1. Preheat your oven to 350°F (175°C). 2. Grease a muffin tin with cooking spray or olive oil. 3. Crack 6 large eggs into a bowl and whisk them. 4. Add 1/2 cup of milk to the eggs and mix thoroughly. 5. Fold in 1 cup of chopped spinach, 1/2 diced red bell pepper, and 1/2 cup halved cherry tomatoes. 6. Stir in 1/4 cup of crumbled feta cheese gently. 7. Season with 1 teaspoon of garlic powder, 1 teaspoon of onion powder, and salt and pepper. 1. Pour the egg mixture into the muffin cups, filling them about three-quarters full. 2. Place the muffin tin in the oven and bake for 18-20 minutes. 3. Check for doneness by gently touching the tops; they should be firm. - Arrange the muffin cups on a colorful platter for a nice look. - You can garnish with fresh herbs or a dash of hot sauce for flavor. - Serve warm or let them cool; they taste great either way! These steps make it easy to enjoy egg muffin cups at home. For more details, check the Full Recipe. To achieve a fluffy texture in your egg muffin cups, whisk the eggs well. You want to beat in plenty of air. This helps them rise nicely when baked. Adding milk also makes them light and creamy. Use whole milk for best results. To avoid egg overflow, fill each muffin cup just three-quarters full. This leaves space for the eggs to puff up as they cook. If you overfill, you risk a messy oven and uneven cooking. One key error is not greasing the tin enough. If the cups stick, it ruins the presentation. Always use cooking spray or olive oil to coat the tin well. Another common mistake is underbaking. Check for doneness at 18 minutes. The tops should be slightly golden and firm to the touch. If they jiggle, bake a few more minutes. You need a good muffin tin for this recipe. A non-stick tin works best for easy release. Silicone muffin pans are also great for easy cleanup. Make sure you have a whisk for mixing the eggs. A measuring cup helps to pour the egg mixture into the cups. These tools will ensure your egg muffin cups turn out perfect every time. For the full recipe, check out the detailed steps I provided earlier. {{image_4}} You can add many veggies to your egg muffin cups. Try zucchini or mushrooms for new flavors. You can also use other greens like kale or Swiss chard. These options give you extra nutrients and taste. Plus, they make your muffin cups colorful. Mixing veggies allows you to use whatever is in your fridge. Protein helps keep you full longer. You can add meats like ham, bacon, or sausage. These options bring great flavor and texture. If you prefer a meat-free dish, try black beans or chickpeas. Beans add protein and fiber without meat. Choose the protein you like best to suit your taste. Cheese can change the flavor of your muffin cups. Cheddar and mozzarella are classic choices. If you want something different, try goat cheese or feta. You can also use vegan cheeses if you want a dairy-free option. Adding herbs and spices like basil or paprika can give your cheese a fun twist. Explore different cheese options for unique flavors in your cups. Check out the Full Recipe for more ideas on creating your perfect egg muffin cups! To store your egg muffin cups, let them cool completely first. This step helps prevent moisture build-up. After cooling, place them in an airtight container. I recommend using glass or BPA-free plastic containers. These options keep your muffins fresh longer. You can freeze egg muffin cups for later use. First, wrap each muffin cup tightly in plastic wrap. Then, place them in a freezer-safe bag or container. This method helps keep out air and moisture. They can stay in the freezer for up to three months. For the best flavor, eat them within one month. To reheat egg muffin cups, you have two main options: the microwave or the oven. The microwave is quick but may make the muffins soggy. Heat them in 30-second bursts until warm. The oven is a better choice for texture. Preheat it to 350°F (175°C) and warm the muffins for about 10 minutes. This method keeps them fluffy and delicious. Egg muffin cups can last in the fridge for about 4 to 5 days. Store them in an airtight container to keep them fresh. This way, they stay moist and tasty. If you notice any smell or change in color, it's best to toss them out. Yes, you can make egg muffin cups ahead of time! They are perfect for meal prep. Just bake them, cool, and store them in the fridge. When you want to eat them, simply reheat in the microwave for about 30 seconds to 1 minute. You can also warm them in the oven at 350°F for about 10 minutes. Egg muffin cups are naturally gluten-free! The main ingredients, like eggs and vegetables, do not contain gluten. However, if you add any processed ingredients, like certain cheeses or sauces, check the labels for gluten. Stick to fresh veggies and gluten-free cheese to keep your muffins safe for those with gluten concerns. In this post, we covered how to make delicious egg muffin cups. We looked at key ingredients, nutrition facts, and step-by-step baking tips. I shared common mistakes and how to avoid them. You can also customize your muffins with various veggies, proteins, and cheeses. For storage, I explained how to keep them fresh and reheat them for the best taste. Remember, these muffins are simple to make and a great meal prep option. Now, go ahead and enjoy creating your own tasty egg muffins, perfect for any time of the day!

Egg Muffin Cups Perfect for Easy Breakfast Delight

Looking for a quick and tasty breakfast? Egg Muffin Cups are your answer! These bite-sized delights pack flavor and nutrition

To make cheesy corn fritters, you will need these key ingredients: - 1 cup fresh or frozen corn kernels - 1 cup all-purpose flour - ½ cup shredded cheese (cheddar or mozzarella recommended) - 1 large egg - ½ cup milk - 1 teaspoon baking powder - ½ teaspoon garlic powder - ½ teaspoon onion powder - Salt and pepper to taste - Oil for frying These ingredients work together to create a tasty and crispy snack. The corn adds sweetness, while the flour gives structure. The egg and milk bind everything, making each bite soft and chewy. You can enhance your fritters with some optional ingredients: - 2 tablespoons chopped fresh parsley (for garnish) - Chopped jalapeños (for heat) - Diced bell peppers (for color) - Cornmeal (for a crunchier texture) These extras can bring more flavor and fun to your fritters. Adding herbs or veggies can also boost the nutrition. Choosing the right cheese is key for a great taste. Here are some top picks: - Cheddar: Strong flavor and melts well. - Mozzarella: Creamy and stretchy texture. - Pepper Jack: Adds a spicy kick. Using a blend of these cheeses can create a rich and tasty fritter. Mix and match to find your favorite cheesy combo! For the full recipe, check out the details above. To make the batter, you start with a large bowl. First, add 1 cup of all-purpose flour, 1 teaspoon of baking powder, ½ teaspoon garlic powder, ½ teaspoon onion powder, and salt and pepper to taste. Mix these dry ingredients well. In another bowl, crack 1 large egg and whisk it with ½ cup of milk until smooth. Next, fold in 1 cup of corn kernels and ½ cup of shredded cheese. Mix them gently to keep the cheese and corn evenly spread. Then, combine the wet and dry mixtures. Stir until just mixed; some lumps are okay. You want a nice light texture for the fritters. When frying, use a pan with about ½ inch of oil. Heat it over medium heat. It should be hot enough to sizzle when you drop in some batter. To test the oil, add a small bit of the batter. If it sizzles, you’re good to go. Drop spoonfuls of batter into the hot oil, but don’t overcrowd the pan. Cook each fritter for about 3-4 minutes until golden brown. Flip and cook for another 3-4 minutes. Once done, place them on paper towels to drain excess oil. Serve the fritters warm and crispy. For a fun touch, garnish with fresh parsley. You can also add a side of dipping sauce, like spicy aioli or tangy salsa. These fritters are great as a snack or appetizer. Enjoy them fresh for the best taste! For the full recipe, check out the details mentioned earlier. To get the best texture in your cheesy corn fritters, focus on mixing. When you combine the wet and dry ingredients, stir gently. This keeps the fritters light and fluffy. Overmixing will make them dense. Aim for a lumpy batter; it’s a sign of a good fritter. One big mistake is not heating the oil enough. If the oil isn't hot, the fritters will absorb too much oil. They will end up soggy instead of crispy. Another mistake is overcrowding the pan. Fry a few fritters at a time to allow them space to cook evenly. When frying, use a good quality oil with a high smoke point. Canola or vegetable oil works well. Check the oil temperature by dropping in a tiny bit of batter. If it sizzles, you’re good to go! Keep an eye on the fritters as they cook. Flip them when they turn golden brown, about 3-4 minutes on each side. Drain the cooked fritters on paper towels to remove excess oil. For the full recipe, check out the detailed instructions above. {{image_4}} You can spice up your cheesy corn fritters by adding herbs or spices. Try a pinch of smoked paprika for a smoky taste. You can also add cayenne pepper for some heat. Fresh herbs like cilantro or basil bring a bright flavor. Mix in these ingredients directly with the dry ones. Experimenting can make each batch unique and fun! Adding vegetables boosts the nutrition of your fritters. Diced bell peppers or chopped spinach work well. Grated zucchini can add moisture without changing the taste much. Just remember to squeeze out extra water from veggies like zucchini. This keeps the fritters crispy. Blend these veggies into the batter before frying. You can make the fritters gluten-free by using almond flour or a gluten-free blend. For a dairy-free version, replace cheese with a plant-based option. Nutritional yeast can add a cheesy flavor without dairy. Use a flax egg instead of a regular egg to bind the mixture. These swaps ensure everyone can enjoy your tasty fritters. If you're interested in a detailed recipe, check out the Full Recipe. To keep your cheesy corn fritters fresh, let them cool first. Place them in an airtight container. Store the container in the fridge. They stay good for about three days. If you want to keep them longer, freezing is a great option. To freeze the fritters, let them cool fully. Then, arrange them in a single layer on a baking sheet. This step helps prevent them from sticking together. Once frozen, transfer the fritters to a freezer bag. Remove as much air as possible before sealing. They can last up to three months in the freezer. Reheating is simple. You can use the oven or a skillet. For the oven, preheat it to 350°F (175°C). Place the fritters on a baking sheet and heat for about 10 minutes. For a skillet, add a little oil and heat on medium. Cook each side for around 2-3 minutes until crispy. This way, they stay tasty and crunchy, just like when they were fresh. You can find the full recipe for these fritters to whip up another batch anytime! You can serve Cheesy Corn Fritters with a variety of dips. I love pairing them with spicy aioli or tangy salsa. A simple yogurt sauce also works well. Fresh herbs like cilantro or parsley make a nice touch too. These fritters shine as an appetizer or a snack. You can even add a salad for a fun meal. Yes, you can prepare the batter ahead of time. Just mix everything and cover it well. Store it in the fridge for up to 24 hours. When you are ready to fry, just stir it again. You can also cook the fritters ahead and store them. Let them cool completely, then keep them in an airtight container in the fridge. Reheat them in the oven for crispiness. Check the color of your fritters. They should be a deep golden brown on both sides. You can also insert a toothpick into the center. If it comes out clean, the fritters are done. Cooking them for about 3-4 minutes on each side usually works well. Keep an eye on them to avoid burning. Make sure they are crispy on the outside and soft inside for the best taste. Cheesy corn fritters are easy and fun to make. We covered key ingredients, tips for frying, and different variations. Remember to pick the right cheese for the best flavor. Avoid common mistakes to get the perfect texture. Store extras well for later enjoyment. These fritters can be a hit at any meal or snack time. With these tips, you can create delicious bites every time. Enjoy your cooking journey with cheesy corn fritters!

Cheesy Corn Fritters Crispy and Flavorful Snack

Get ready to crunch into something delicious! Cheesy corn fritters are the perfect snack for any time of day. With

To make crispy baked tofu, you need the following main ingredients: - 1 block (14 oz) firm tofu - 2 tablespoons cornstarch - 3 tablespoons soy sauce (or tamari for a gluten-free option) These ingredients create a strong base for flavor and texture. The firm tofu holds its shape well during baking. Cornstarch gives it that desired crunch when cooked. The marinade brings life to the tofu. Here are the key components: - 1 tablespoon sesame oil - 1 tablespoon rice vinegar - 1 teaspoon garlic powder - 1 teaspoon smoked paprika - Salt and pepper, to taste This blend of flavors enhances the tofu. Sesame oil adds a nutty taste. Rice vinegar gives a slight tang, while garlic powder and smoked paprika add depth and warmth. You can elevate your dish with these garnishes: - 2 tablespoons sesame seeds (optional but recommended) - Chopped green onions for garnish Serving suggestions help you create a full meal. Serve with a dipping sauce like spicy mayo or sweet chili sauce. This adds flavor and makes the meal interactive. For a vibrant presentation, use a colorful bowl or a wooden platter. For the full recipe, check the link provided. Start by draining the tofu. Wrap it in paper towels to soak up moisture. Place a heavy object on top. Let it sit for about 15 minutes. This makes the tofu firmer. After pressing, cut the tofu into cubes or rectangles. Choose a size that works best for you. In a large bowl, mix the soy sauce, sesame oil, and rice vinegar. Add garlic powder and smoked paprika. Sprinkle in salt and pepper to taste. Whisk everything together until smooth. This marinade gives the tofu its flavor. Add the tofu pieces to the marinade. Toss gently to coat every piece. Let the tofu sit in the marinade for 10 minutes. This step is key for flavor. Next, sprinkle cornstarch over the tofu. Toss again until coated evenly. Arrange the tofu on a baking sheet in a single layer. Bake at 400°F (200°C) for 25-30 minutes. Remember to flip the tofu halfway through for even browning. If you want extra crunch, add sesame seeds during the last 5 minutes. Once golden and crispy, let the tofu cool. Garnish with chopped green onions and serve it up! For the full recipe, check the section above. To get that perfect crispy texture, start by pressing the tofu. Remove excess water. Use a heavy object for about 15 minutes. This step helps the tofu absorb flavors and gets crispier when baked. Next, coat the tofu in cornstarch. This adds crunch and creates a lovely golden crust. Spread the tofu in a single layer on the baking sheet. Make sure they don’t touch each other. This allows hot air to circulate and crisp each piece evenly. One common mistake is not pressing the tofu enough. If the tofu is too wet, it won’t crisp up. Another mistake is overcrowding the baking sheet. This can lead to steaming instead of baking. Flip the tofu halfway through baking. This ensures even cooking and browning. Lastly, don’t skip the cornstarch. It’s key to achieving that delightful crunch. Want to take your crispy baked tofu to the next level? Try adding fresh herbs like cilantro or basil. These add a bright, fresh taste. You can also experiment with different spices. Try adding chili powder for heat or cumin for warmth. For a sweet twist, drizzle some maple syrup before baking. Lastly, serve with a tasty dipping sauce. Options like spicy mayo or sweet chili sauce really enhance the flavor. For the full recipe, check out the Crispy Baked Tofu Delight section. {{image_4}} You can change the flavor of your crispy baked tofu by using different marinades. Here are some tasty ideas: - Teriyaki Marinade: Use equal parts soy sauce and mirin. Add ginger and garlic for a sweet twist. - Spicy Sriracha Marinade: Mix soy sauce with Sriracha and honey. This adds heat and sweetness. - Herb Marinade: Blend fresh herbs like basil and cilantro with olive oil and lemon juice for a fresh taste. - Curry Marinade: Combine coconut milk with curry powder for a rich, aromatic flavor. Each marinade can make your dish unique and exciting! If you own an air fryer, you can make crispy tofu quickly. Here’s how: 1. Prepare the tofu as usual, pressing it and cutting it into cubes. 2. Toss the tofu with your chosen marinade. 3. Lightly coat the tofu with cornstarch for extra crunch. 4. Place the tofu in the air fryer basket in a single layer. 5. Set the air fryer to 400°F (200°C) and cook for 15-20 minutes. Shake the basket halfway through for even cooking. This method gives you a super crispy texture without much oil. It saves time and is easy! Crispy baked tofu is versatile and fits well in many dishes. Here are some great ways to serve it: - On a Salad: Add crispy tofu to a mixed greens salad with a zesty dressing. - In Wraps: Use the tofu in a wrap with fresh veggies and your favorite sauce. - With Rice or Quinoa: Serve the tofu over rice or quinoa with steamed veggies for a complete meal. - As a Snack: Pair it with dipping sauces like peanut sauce or sweet chili sauce for a fun snack. These ideas will help you enjoy your tofu in various ways. For the full recipe, check out the details above! To keep your leftover crispy baked tofu fresh, place it in an airtight container. Make sure the tofu is completely cool before sealing the container. This helps prevent moisture build-up, which can make the tofu soggy. Store it in the fridge for up to three days. I suggest enjoying it within this time for the best taste and texture. When you're ready to eat your leftover tofu, you can reheat it easily. Preheat your oven to 375°F (190°C). Line a baking sheet with parchment paper. Spread the tofu in a single layer on the sheet. Bake for about 10 to 15 minutes, flipping halfway through. This method helps restore its crispy texture. You can also use a toaster oven for a quicker option. If you want to save tofu for later, freezing is a great option. Start by pressing the tofu to remove excess moisture. Cut it into cubes or slices, then place them in a freezer-safe bag. Remove as much air as possible before sealing. Store it in the freezer for up to three months. When you're ready to use it, thaw the tofu in the fridge overnight. After thawing, you may want to press it again to remove more moisture before cooking. This helps the tofu absorb flavors better. For the full recipe, check out Crispy Baked Tofu Delight. You can make crispy tofu by baking it. Start by pressing the tofu to remove moisture. This step helps it crisp up better. Then, coat the tofu in cornstarch. This adds a crunchy layer when baked. Spread the tofu evenly on a baking sheet. Bake at 400°F (200°C) for about 25-30 minutes. Flip the tofu halfway through for even browning. This method gives you crispy tofu without frying. Soft tofu is not the best choice for this recipe. It may break apart easily during cooking. Firm tofu holds its shape better and creates a nice texture. If you only have soft tofu, try pressing it longer to remove extra moisture. However, I recommend using firm tofu for the best results. It absorbs flavors well and crisps up nicely. Several dips pair great with crispy baked tofu. Here are a few ideas: - Spicy mayo: Mix mayonnaise with sriracha for a creamy kick. - Sweet chili sauce: This sauce adds a sweet and tangy flavor. - Soy sauce: A classic choice that complements the tofu's taste. - Peanut sauce: Creamy and nutty, this dip is a crowd favorite. For more detailed cooking tips, check the Full Recipe. When making crispy baked tofu, the right ingredients make a big difference. Here’s what you need: - 1 block (14 oz) firm tofu - 2 tablespoons cornstarch - 3 tablespoons soy sauce (or tamari for a gluten-free option) - 1 tablespoon sesame oil - 1 tablespoon rice vinegar - 1 teaspoon garlic powder - 1 teaspoon smoked paprika - Salt and pepper, to taste - 2 tablespoons sesame seeds (optional but recommended) - Chopped green onions for garnish Each ingredient adds flavor and texture. Firm tofu holds its shape well. Cornstarch helps the tofu get crispy when baking. Soy sauce gives a nice salty taste. Sesame oil adds a rich, nutty flavor. Rice vinegar brings a bit of brightness. Garlic powder and smoked paprika add depth to the taste. Don't forget salt and pepper to season! You can add sesame seeds for extra crunch. Chopped green onions brighten up the dish. This recipe is simple but packs a lot of flavor. For the full recipe, check out the detailed steps above. Enjoy making your crispy baked tofu! This blog post covered how to make crispy baked tofu. You learned about the key ingredients, including important marinades and garnishes. I shared simple steps to prep, marinate, and bake your tofu. You also found tips for perfecting texture and avoiding common errors. Plus, we explored variations like air fryer methods and storage tips. Enjoy your cooking! Tofu can be a tasty and healthy choice. Experiment with flavors and have fun.

Crispy Baked Tofu Flavorful and Simple Recipe

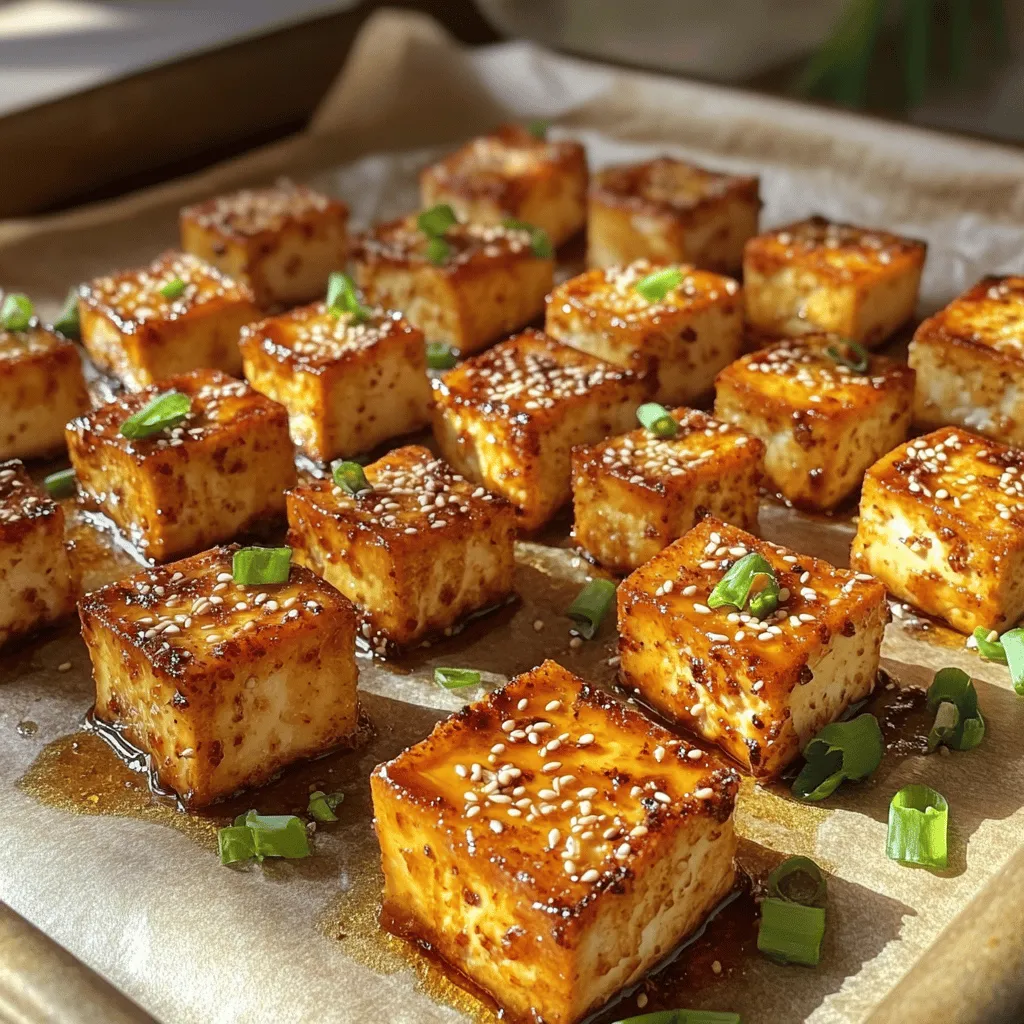
Are you ready to transform tofu into a crispy delight? My Crispy Baked Tofu recipe makes it simple and fun.

- 2 large sweet potatoes - 3 tablespoons olive oil - 1 teaspoon smoked paprika - 1 teaspoon ground cinnamon - 1/2 teaspoon cayenne pepper - 1 teaspoon garlic powder - Salt and freshly cracked black pepper - 2 tablespoons honey or maple syrup - Fresh parsley for garnish - Baking sheet - Parchment paper - Large mixing bowl - Whisk or spatula When making roasted sweet potato wedges, the right ingredients make all the difference. Sweet potatoes are the star here. Their natural sweetness shines when roasted. Olive oil helps achieve that crispy texture we love. Spices add depth and flavor. Smoked paprika gives a warm, smoky note. Ground cinnamon adds sweetness and warmth. Cayenne pepper brings heat, but you can adjust it to your taste. Garlic powder enhances the savory profile. Don’t forget salt and black pepper; they bring all the flavors together. For a sweet touch, honey or maple syrup adds a nice glaze. Finally, fresh parsley not only looks great but also adds freshness. Gather these ingredients and tools to make the perfect roasted sweet potato wedges. You can find the full recipe above to guide you through the cooking process. - Preheat oven to 425°F (220°C). - Line baking sheet with parchment paper. Start by setting your oven to 425°F (220°C). This high heat helps the wedges turn crispy. Next, take a baking sheet and line it with parchment paper. This step makes cleanup easy and stops the wedges from sticking. - Combine olive oil and spices in a bowl. - Whisk until smooth. In a large bowl, combine the olive oil with spices like smoked paprika and cinnamon. I love using smoked paprika for its rich flavor. Add garlic powder, cayenne pepper, salt, and black pepper. Whisk until it forms a smooth paste. This mixture will coat the wedges and give them a fantastic taste. - Toss sweet potato wedges in the spice mixture. - Ensure even coverage for maximum flavor. Now, take your sweet potato wedges and add them to the bowl. Use a spatula or your hands to toss the wedges in the spice mixture. Make sure every wedge gets coated well. This ensures that each bite is full of flavor. - Lay wedges on the prepared baking sheet. - Drizzle with honey or maple syrup. - Roast for 25-30 minutes, flipping halfway. Next, lay the coated wedges on the baking sheet in a single layer. Make sure to space them out. This helps them roast evenly. Now, drizzle some honey or maple syrup over the top for a sweet glaze. Place the baking sheet in your hot oven and roast for 25 to 30 minutes. Flip the wedges halfway through. They should come out golden brown with crispy edges. For the full recipe, check the detailed instructions above. To get crispy sweet potato wedges, space them evenly on the baking sheet. If they touch, they won't crisp up well. Use a high oven temperature, like 425°F (220°C). This helps them cook fast and get that nice crunch. Don't be afraid to experiment with flavors! You can use spices like cumin or chili powder. These add a nice kick. A splash of lime juice gives a bright, zesty flavor. It pairs wonderfully with the sweetness of the potatoes. Check the wedges for a golden brown color and crispy edges. This is your sign they are ready. If your wedges are thicker, you might need a bit more time. For thinner wedges, keep an eye on them, as they will cook faster. Enjoy perfect wedges every time! {{image_4}} You can enhance the flavor of your roasted sweet potato wedges in simple ways. - Add maple syrup for a touch of sweetness. - Incorporate savory herbs like rosemary for a fragrant twist. These additions will make your dish exciting and flavorful. The sweet syrup pairs nicely with the savory herbs. Experiment with these variations to find your favorite blend! If you have dietary needs, you can still enjoy this dish. - Use gluten-free options available in stores. - Make it vegan-friendly by substituting honey with maple syrup. These choices keep the dish tasty while meeting your dietary needs. No one will miss the original ingredients! Roasted sweet potato wedges are fun to serve in many ways. - Pair them with a yogurt dip or spicy salsa for extra flavor. - Serve as a side dish at dinner or enjoy as a snack. These options make the wedges versatile and appealing for any meal. You can even mix and match dips for a fun tasting experience. Store your roasted sweet potato wedges in an airtight container in the refrigerator. This helps keep them fresh and tasty. They are best consumed within 3-5 days. The flavors will still be good, but they may lose some crispiness over time. For maximum crispiness, reheat the wedges in the oven. Preheat your oven to 375°F (190°C) and place the wedges on a baking sheet. Bake until they’re hot and crispy. If you need a quick option, you can use the microwave. Just know that the texture will not be as crunchy. You can freeze sweet potato wedges before or after cooking. If freezing before cooking, cut and coat the wedges, then lay them on a baking sheet. Freeze them until solid, then transfer to a bag. If freezing after cooking, make sure they are cooled completely before placing them in a bag. This helps prevent ice crystals and keeps them tasting fresh later. Yes, you can prepare roasted sweet potato wedges ahead of time. Just store them in an airtight container in the fridge. When you’re ready to eat, simply reheat them in the oven for the best texture. To add some heat, increase the amount of cayenne pepper. You can also sprinkle in some chili flakes. This will give your wedges a nice spicy kick that pairs well with their natural sweetness. Cutting sweet potatoes into uniform wedges is key. Aim for wedges that are similar in size. This helps them cook evenly, ensuring a nice, crispy texture all around. Roasted sweet potato wedges are very versatile. They work well with dips like yogurt or salsa. They also pair great with grilled meats or can be tossed into a fresh salad for added flavor. Sweet potato wedges are done when they are golden brown and fork-tender. This means they should easily break apart when you poke them with a fork. Make sure to check them towards the end of the cooking time for the best results. You now know how to make tasty roasted sweet potato wedges. We covered the key ingredients, tools, and easy steps. I shared tips for the best flavor and texture. You can even try different spices or serve them in various ways. Remember, leftovers can be stored and reheated, so enjoy them later. With these ideas, I hope you feel excited to cook. Your meals can be simple and delicious!

Roasted Sweet Potato Wedges Perfectly Crispy Treat

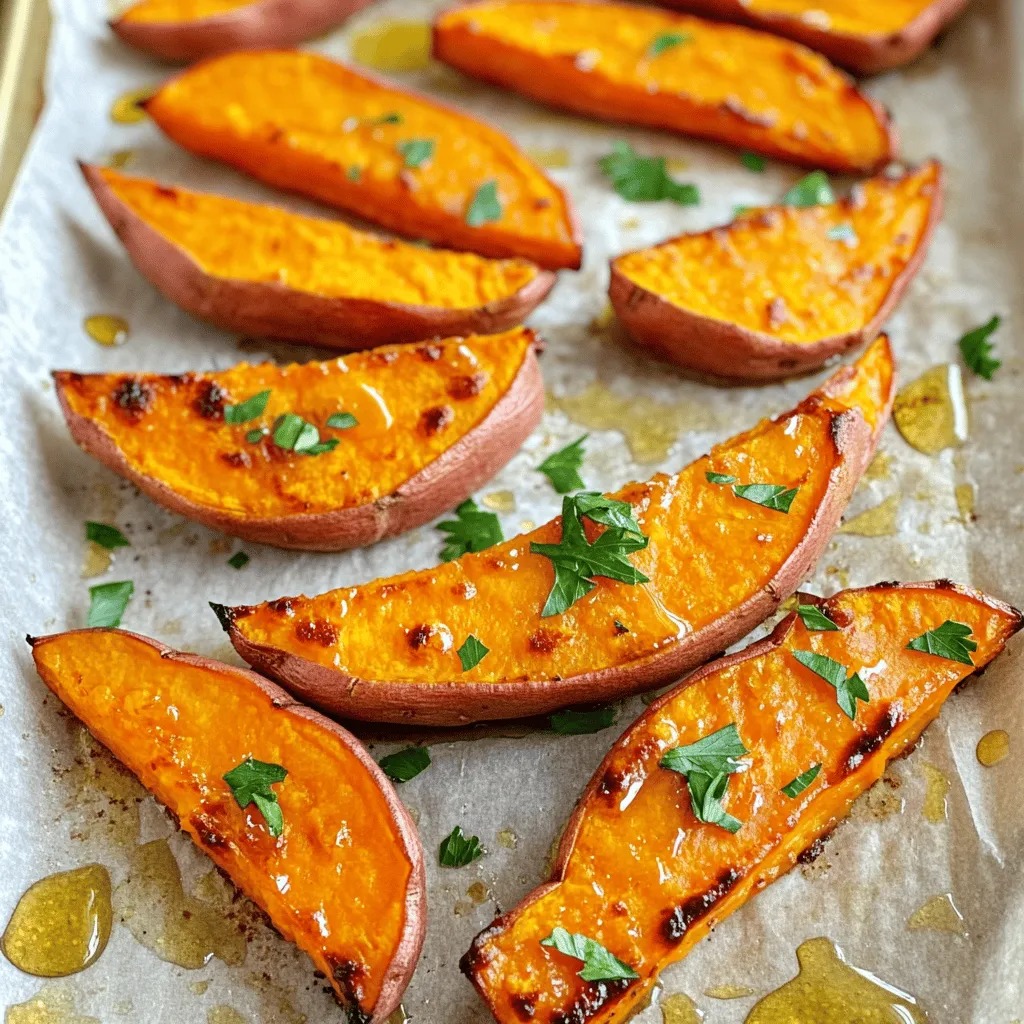
Are you ready to enjoy a deliciously crispy treat? Roasted sweet potato wedges are a game changer! In just a

To make a yummy zucchini lasagna, gather these key ingredients: - 3 medium zucchinis, sliced into thin strips - 1 cup ricotta cheese - 1 cup shredded mozzarella cheese - 1/2 cup grated Parmesan cheese - 1 large egg - 2 cups marinara sauce These ingredients create layers of flavor and texture. Zucchini makes a great substitute for pasta. It is light and adds freshness. Ricotta and mozzarella give the dish creaminess. Parmesan adds a salty, deep flavor that ties it all together. Next, we need some seasonings and garnishes: - 1 teaspoon dried oregano - 1 teaspoon dried basil - Salt and pepper to taste - Fresh basil leaves for garnish (optional) Dried oregano and basil give the lasagna an aromatic boost. Salt and pepper enhance all the flavors. Fresh basil on top adds a pop of color and a fresh taste. These simple seasonings elevate the dish without overpowering it. For the full recipe, check out the "Full Recipe" section. 1. Preheat Oven and Prepare Zucchini Start by preheating your oven to 375°F (190°C). This helps ensure even cooking. Now, grab your zucchinis and slice them lengthwise into thin strips using a knife or mandoline. Aim for 1/4 inch thickness for best results. 2. Rinse and Dry Zucchini Strips Place the zucchini strips on a kitchen towel. Sprinkle them with salt and let them sit for 15-20 minutes. This step draws out extra moisture, which can make your lasagna soggy. After resting, rinse the strips under cold water. Pat them dry with paper towels to remove any moisture. 1. Create the Ricotta Mixture and Sauce Layers In a mixing bowl, combine the ricotta cheese, egg, dried oregano, dried basil, salt, and pepper. Mix until smooth. Next, spread a thin layer of marinara sauce on the bottom of a 9x13 inch baking dish. This adds flavor and keeps the lasagna from sticking. 2. Assemble the Lasagna in a Baking Dish Layer one-third of the zucchini strips over the sauce. Spoon half of the ricotta mixture over the zucchini. Follow this with one-third of the marinara sauce and a sprinkle of mozzarella cheese. Repeat this process with another layer of zucchini, ricotta, sauce, and mozzarella. For the final layer, arrange the last zucchini strips on top. Cover with the rest of the marinara sauce and top with mozzarella and Parmesan cheese. 1. Cover and Bake Cover the baking dish tightly with aluminum foil. Bake in the preheated oven for 30 minutes. This helps steam the zucchini and cook the layers evenly. 2. Browning the Cheese After 30 minutes, remove the foil. Bake for another 15-20 minutes. This step allows the cheese to bubble and turn golden brown. Let the lasagna cool for 10 minutes before slicing. Enjoy your delicious creation! For the complete recipe, check out the Full Recipe. - Choosing Fresh Zucchini When picking zucchini, look for firm, smooth skin. The color should be bright green. Avoid any that have soft spots or wrinkles. Fresh zucchini packs the best flavor and texture. - Preventing Sogginess in the Lasagna To keep your lasagna from getting soggy, salt the zucchini strips. After cutting, place them on a towel and sprinkle with salt. Let them sit for 15-20 minutes. This draws out extra moisture. Rinse the strips and pat them dry to remove salt. This simple step helps keep the layers from turning mushy. - Mixing Ratios for Creaminess The cheese mixture is vital for a creamy texture. I recommend using equal parts ricotta and mozzarella. Add a bit of Parmesan for extra flavor. Mix in one egg for binding. This will keep the cheese layer rich and smooth. - Adding Flavor Enhancements To boost the flavor of your cheese mix, add herbs like oregano and basil. A pinch of salt and pepper will enhance the taste. You can also try adding garlic powder for an extra kick. Simple changes can make a big impact! For the full recipe, check out the [Full Recipe]. {{image_4}} For a veggie twist, add different vegetables. Spinach, mushrooms, or bell peppers work great. You can layer them just like the zucchini. Each vegetable brings its own flavor and texture, making your dish unique. If you want to change the cheese, try goat cheese or cottage cheese. Both give a different taste and texture. Mix them with the ricotta for a creamier feel. For low-carb lovers, swap the marinara sauce for a homemade sauce. Use crushed tomatoes, garlic, and herbs to cut carbs. You can also use less cheese. Try full-fat cream cheese for a rich flavor with fewer carbs. To reduce carbs without losing taste, add herbs like thyme and rosemary. They pack a punch and enhance the flavors. You can still enjoy a great meal that fits your diet. For the full recipe, check out the details above! - Refrigeration Tips: Let the lasagna cool before storing. Cover it tightly with plastic wrap or foil. This keeps it fresh. Store in the fridge for up to 4 days. If you want, you can also place it in an airtight container. - Freezing Instructions and Best Practices: To freeze, let the lasagna cool completely. Cut it into portions for easy serving. Wrap each piece in plastic wrap, then place it in a freezer bag. Squeeze out the air to avoid freezer burn. It will stay good for up to 3 months. When you’re ready to eat, thaw it in the fridge overnight. - Best Methods for Maintaining Texture: The oven is best for reheating. Preheat it to 350°F (175°C). Place the lasagna in an oven-safe dish. Cover it with foil to prevent drying. Heat for about 20-30 minutes. This helps keep the cheese gooey and the zucchini tender. - Tips for Even Heating: If using the microwave, slice the lasagna into smaller pieces. This helps it heat evenly. Cover it with a microwave-safe lid to trap steam. Heat in short bursts, stirring gently between. This keeps it from getting too hot in some spots while cold in others. Yes, you can use other vegetables. Here are some great options: - Eggplant: Slices work well in layers. - Bell Peppers: Cut into thin strips for a sweet taste. - Sweet Potatoes: Thinly sliced, they add a nice sweetness. - Butternut Squash: A great alternative for a different flavor. These veggies can replace zucchini as the main layer. Adjust cooking times as needed. Cooked zucchini lasagna lasts about 3 to 5 days in the fridge. Store it in an airtight container. Make sure it cools down before you seal it. This helps keep it fresh longer. Absolutely! Zucchini lasagna is great for meal prep. Here are some tips: - Cook a larger batch and divide it into portions. - Layer and assemble, then freeze before baking. - Thaw it overnight in the fridge before baking. This makes a quick meal on busy nights. For the full recipe, check out the Zucchini Lasagna Delight! In this post, we covered how to make delicious zucchini lasagna. We discussed the key ingredients, like zucchini and ricotta cheese. I laid out step-by-step instructions for preparing, layering, and baking your dish. We also explored various tips to perfect your lasagna, like choosing the best zucchini and adding extra veggies. Remember, you can customize the recipe to fit your diet. Enjoy experimenting with flavors and textures! Your homemade zucchini lasagna is sure to impress everyone.

Zucchini Lasagna Yummy and Simple Weeknight Meal

If you’re craving a warm, cheesy dish but want to keep it light, zucchini lasagna is for you. This simple

To create a rich One-Pot Taco Soup, gather these key ingredients: - 1 lb ground turkey or beef - 1 medium onion, finely chopped - 2 cloves garlic, minced - 1 red bell pepper, diced - 1 can (15 oz) black beans, thoroughly drained and rinsed - 1 can (15 oz) kidney beans, thoroughly drained and rinsed - 1 can (15 oz) corn, thoroughly drained - 1 can (28 oz) diced tomatoes with green chilies - 2 cups chicken or vegetable broth - 2 tablespoons taco seasoning - 1 teaspoon ground cumin - Salt and freshly ground black pepper to taste These ingredients blend perfectly to give depth and richness to the soup. Each bite brings a burst of flavor. You can enhance your soup with some optional ingredients: - 1 cup shredded cheddar cheese - Fresh cilantro leaves for garnish - Toppings like sour cream, sliced avocado, and tortilla chips These extras can take your soup from good to great. They add creaminess, crunch, and fresh flavors. You can mix and match according to your taste. Don't forget to check the [Full Recipe] for detailed steps! To start, heat some olive oil in a large pot over medium heat. Add the finely chopped onion, minced garlic, and diced red bell pepper. Sauté these for about five minutes. You want the onion to look soft and clear. This mix brings great flavor to your soup. Next, add one pound of ground turkey or beef. Use a spatula to break it up into smaller pieces. Cook the meat for seven to ten minutes. It should turn brown and no longer look pink. Now it's time to make it tasty! Sprinkle in two tablespoons of taco seasoning and one teaspoon of ground cumin. Stir the meat well to coat it in the spices. This step is key for that taco taste. Next, mix in the beans, corn, and tomatoes. Use one can each of black and kidney beans, and corn. Make sure to drain them first. Add one 28-ounce can of diced tomatoes with green chilies along with their juices. Finally, pour in two cups of chicken or vegetable broth. Stir everything together until it blends nicely. Increase the heat to bring the soup to a gentle simmer. Once you see bubbles, lower the heat. Cover the pot and let it cook for about 20 minutes. This allows the flavors to blend well. Remember to stir occasionally to stop anything from sticking to the pot. After 20 minutes, taste the soup. Add salt and freshly ground black pepper as needed. If you want, mix in one cup of shredded cheddar cheese for a creamy finish. Serve the hot soup in bowls, and don’t forget the fun toppings like fresh cilantro, sour cream, avocado slices, and tortilla chips. For the full recipe, check out One-Pot Taco Soup Fiesta. To boost the taste of your One-Pot Taco Soup, consider adding extra spices. A dash of smoked paprika can bring warmth. You might also try a sprinkle of chili powder for more depth. Fresh herbs, like cilantro, enhance the flavor and freshness. For sides, cornbread pairs well with the soup. You could also serve tortilla chips. They add crunch and fun to your meal. A simple side salad can balance the flavors too. You can make this soup on the stovetop or in a slow cooker. The stovetop method is quick and easy. It takes about 35 minutes total. Just stir it occasionally. For a slow cooker, combine all ingredients and cook on low for 6 to 8 hours. This method allows the flavors to deepen. If you want a vegetarian or vegan version, use plant-based meat and vegetable broth. If you love spice, add fresh jalapeños. Chop them finely and mix them in with the onions. This will give your soup a nice kick. You can also swap ingredients. If you don’t have ground turkey, use chicken or beef. Black beans can be replaced with pinto beans if you prefer. Remember, it’s all about what you enjoy. For the complete cooking process, check out the Full Recipe. {{image_4}} You can easily change the ingredients in this soup! If you want to try something new, use ground chicken or a plant-based protein. Both options add great taste. For the beans, swap kidney beans for pinto or white beans. You can also add other veggies like corn, zucchini, or spinach. These swaps keep the soup fresh and exciting! There are many fun ways to serve this soup. You can ladle it into bowls and top it with cheese or cilantro. Serve it with crispy tortilla chips for crunch. For a heartier meal, pair it with warm bread or fluffy rice. These sides make every bite more satisfying and delicious! Want to make this soup fit your diet? It’s easy! To make it gluten-free, use gluten-free broth and taco seasoning. If you need a dairy-free option, skip the cheese and sour cream. You can use avocado or a dairy-free yogurt as a tasty topping. These changes make the soup work for everyone! To keep your leftover One-Pot Taco Soup fresh, store it in an airtight container. Make sure to cool it down first. Place it in the fridge within two hours of cooking. This soup stays good for up to three days. If you plan to keep it longer, freeze it. For freezing, use freezer-safe bags or containers. Leave some space for expansion as it freezes. When reheating your taco soup, do it gently. Use a pot on the stove for the best results. Heat it over medium heat until hot. Stir often to keep it from sticking. You can also use the microwave. Place it in a microwave-safe bowl and cover it. Heat for one minute, stir, then heat again until hot. Adding a bit of broth can help keep it juicy. In the fridge, your taco soup lasts about three days. Look for signs of spoilage, like off smells or mold. If it smells sour or looks strange, toss it out. If frozen, it can last up to three months. Always label your containers with the date. This helps you keep track of how long it's been stored. To add heat, you can use jalapeños or hot sauce. Chop fresh jalapeños and add them when cooking the onions. If you like it extra spicy, add more taco seasoning that has heat. You can also sprinkle in some cayenne pepper or chili powder for an extra kick. These choices will bring warmth without hiding the taco flavor. Yes, using canned beans is simple and saves time. Canned beans are already cooked, so you just need to rinse them. This means you skip the long soaking and cooking time needed for dried beans. Canned beans also have a nice texture and flavor, which blends well in the soup. Plus, they are easy to find in stores. You have many tasty options to serve alongside this soup. Some great choices are: - Cornbread for a sweet touch. - Tortilla chips for crunch. - A fresh salad with lime dressing. - Rice for a filling option. These sides will balance the meal and make it even more enjoyable. You can find the Full Recipe to make this comforting dish and explore your favorite sides! In this article, we covered how to make a tasty One-Pot Taco Soup. We discussed the key ingredients, like ground turkey and beans, and laid out simple steps to prepare the dish. I shared helpful tips for flavoring, cooking methods, and even how to store leftovers effectively. Remember, you can customize the recipe to fit your taste. Enjoy crafting this easy meal that brings warmth and flavor to your table. Cooking can be fun and creative!

One-Pot Taco Soup Flavorful and Easy Comfort Meal

Looking for a warm and tasty meal that’s easy to make? One-Pot Taco Soup is the answer! This dish combines

- 4 cups fresh baby spinach, thoroughly washed and gently dried - 2 cups ripe strawberries, hulled and sliced into thin rounds - 1/4 cup red onion, finely sliced for a subtle crunch - 1/2 cup creamy goat cheese, crumbled for a tangy flavor - 1/4 cup walnuts, coarsely chopped for added texture - 3 tablespoons high-quality balsamic vinegar - 2 tablespoons pure honey for natural sweetness - 1 tablespoon extra virgin olive oil for richness - Freshly ground salt and black pepper to taste - Prep time: 15 minutes - Total time: 15 minutes - Servings: 4 Creating this salad is quick and easy. Start by gathering fresh ingredients. The bright colors and textures create a dish that not only tastes great but also looks beautiful. The fresh spinach serves as a crisp base. The strawberries add sweet juiciness, while the red onion gives a nice bite. Goat cheese brings creaminess, and walnuts add crunch. The dressing is simple yet flavorful. Balsamic vinegar provides a tang, while honey adds sweetness. Olive oil makes the dressing rich. Salt and pepper finish it off. This salad serves four. You can prep everything in just 15 minutes. For the full recipe, check out the details above. Enjoy making this vibrant dish! Start by washing the baby spinach. Rinse it under cold water. Shake off excess water or use a salad spinner. You want the leaves clean and dry. Next, place the spinach in a large salad bowl. This will be the base for your vibrant salad. Now, slice the ripe strawberries. Cut them into thin rounds. Arrange them on top of the spinach. Add the finely sliced red onion for a crisp bite. This mix of colors looks appealing. Then, sprinkle the crumbled goat cheese over the salad. Add the coarsely chopped walnuts for extra crunch. Each bite will be a burst of flavor. In a small bowl, combine the balsamic vinegar, honey, and olive oil. Add a pinch of salt and black pepper for taste. Whisk the mixture until it is well blended. You want a smooth, creamy dressing that will coat the salad nicely. Drizzle the dressing evenly over the salad. Use a large spoon to toss everything together gently. This helps mix the flavors without damaging the strawberries. Make sure all the ingredients are coated in the dressing. Now it’s time to taste your creation. Check if the salad needs more salt or honey. Adjust the seasoning as needed. A little tweak can enhance the flavors. Enjoy this fresh and flavorful salad! For the complete recipe, check out the Full Recipe. To make your strawberry spinach salad shine, serve it in a large, shallow bowl. This style lets the colors pop and shows off the fresh ingredients. For a fun touch, garnish with extra strawberry slices and a few walnuts on top. This adds color and invites everyone to dig in. If you want to mix it up, try different cheeses. Feta or blue cheese can work well in place of goat cheese. For added crunch, swap walnuts for pecans or almonds. These changes keep the dish exciting and let you play with flavors. Looking to boost the taste? Add protein like grilled chicken or tofu for a hearty meal. You can also toss in other fruits, like blueberries or mandarin oranges. These additions make the salad even more delicious and unique. For the full recipe, check out the detailed instructions. {{image_4}} You can switch up the flavor of your Strawberry Spinach Salad with different dressings. A citrus vinaigrette adds a bright, zesty taste. It combines orange juice, lemon juice, olive oil, and a pinch of salt. This dressing is fresh and light, perfect for summer days. If you prefer creamy dressings, try a yogurt-based dressing. Mix plain yogurt with lemon juice and herbs. This will give your salad a rich and smooth texture. Creamy dressings can balance the tartness of strawberries well. Changing the fruits in your salad can make it exciting. In summer, add other berries like blueberries or blackberries. They pair well with spinach and enhance the salad's color. You can also mix in some peaches for a sweet twist. In fall, use crunchy apples instead of berries. Thinly slice them and toss them in with the spinach. Their crispness adds a great texture. You can even sprinkle some cinnamon on top for a warm flavor. To make this salad vegan, simply skip the cheese. You can use avocado slices instead to keep it creamy. Another option is to add nutritional yeast. It gives a cheesy flavor without dairy. For dressings, look for plant-based options. A simple lemon-tahini dressing works great. Mix tahini, lemon juice, and a bit of water for a nutty flavor. This dressing will make your salad rich and tasty. If you'd like the full recipe, check out the Strawberry Spinach Delight. To keep your Strawberry Spinach Salad fresh, store it in an airtight container. This helps maintain crispness and flavor. If you have extra dressing, store it separately. This prevents the salad from getting soggy. In the refrigerator, your salad stays fresh for about 1 to 2 days. Beyond that, the spinach wilts, and the strawberries lose their sweetness. While salads are best enjoyed cold, you can repurpose leftovers. Try adding them to a wrap or a grain bowl. Mix the salad with some cooked quinoa or rice for a hearty meal. You can also toss it with some grilled chicken for extra protein. These options keep your meals exciting and help reduce waste. Freezing this salad is not a good idea. The spinach and strawberries do not freeze well. They lose texture and flavor when thawed. However, you can freeze individual components. For example, freeze extra strawberries for smoothies later. If you want to freeze spinach, blanch it first. This way, you can enjoy it in soups or stews down the line. To make this salad, you need just a few simple steps. Start with fresh baby spinach. Place it in a large bowl. Next, add sliced strawberries and finely sliced red onion. Sprinkle crumbled goat cheese and chopped walnuts on top. Then, mix the dressing in a separate bowl. Combine balsamic vinegar, honey, and olive oil, and season with salt and pepper. Drizzle the dressing over the salad and toss gently. You can find the full recipe for more details. Yes, you can prepare this salad ahead of time. Wash and dry the spinach, then store it in the fridge. Slice the strawberries a few hours before serving. Keep the dressing in a separate container. This way, the salad stays fresh and crisp. Toss everything together just before serving to keep the spinach from wilting. This salad pairs well with many dishes. Serve it alongside grilled chicken or fish for a light meal. It also goes great with sandwiches or wraps. For a picnic, try it with quiche or a cheese platter. The flavors blend well with both light and hearty meals. Yes, this salad is very healthy. Spinach is packed with vitamins A and C. Strawberries are high in antioxidants and fiber. Goat cheese adds protein and calcium. Walnuts provide healthy fats and crunch. This salad is a balanced choice for any meal. Absolutely! You can add other fruits for extra flavor. Try adding blueberries or raspberries for a berry mix. Sliced apples or pears also work well for a crunchy texture. Seasonal fruits bring new tastes and colors to your salad. This article covered how to make a fresh and tasty Strawberry Spinach Salad. We discussed key ingredients like spinach, strawberries, and goat cheese. I provided steps for preparing the salad and tips for great presentation. You can also explore variations and storage tips. Remember, simple salads can be both fun and healthy. Enjoy experimenting with flavors and share your favorite twists on this salad!

Strawberry Spinach Salad Packed with Flavor and Freshness

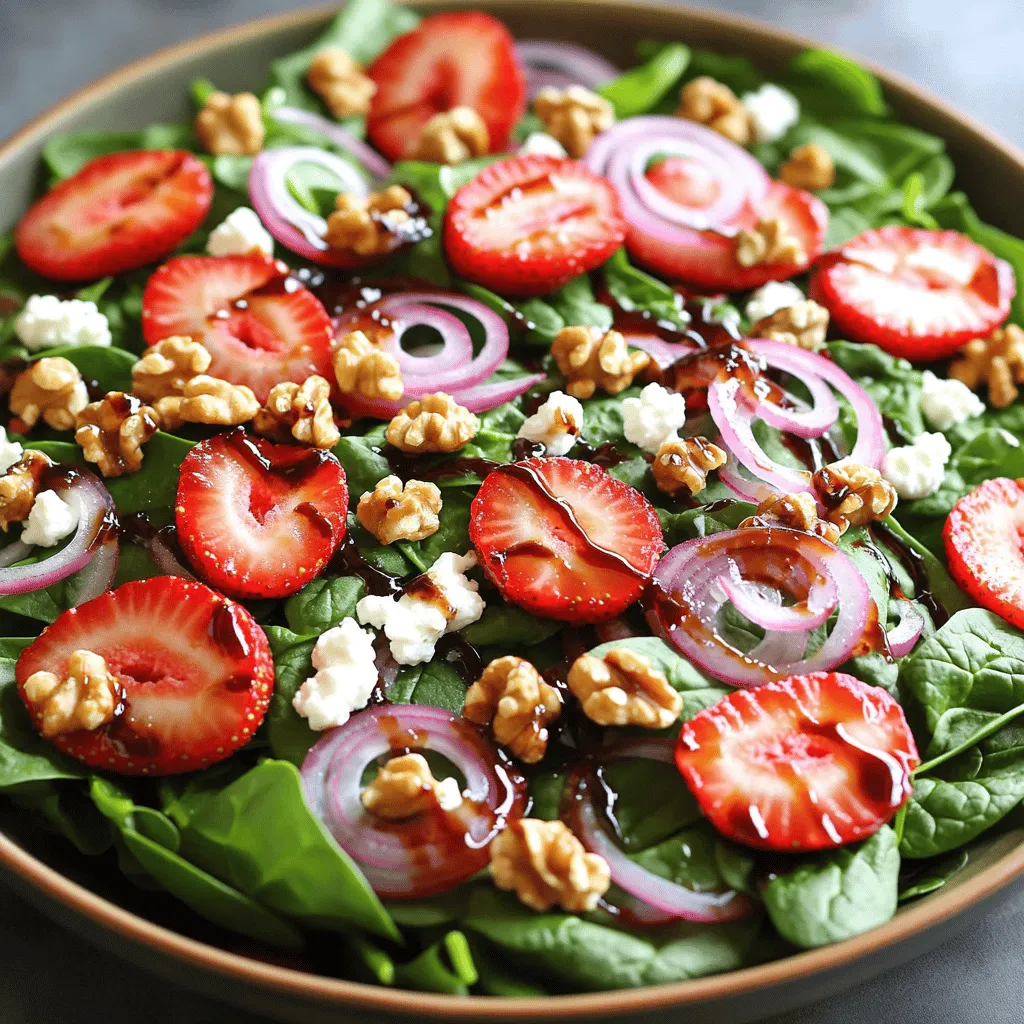
Looking for a fresh and flavorful dish? This Strawberry Spinach Salad is the answer! With juicy strawberries, crisp spinach, tangy

To make this dish, you need just a few key items: - 2 cups cooked jasmine rice - 1 cup cooked chicken, shredded or diced - 1 cup mixed frozen vegetables like peas and carrots - 3 green onions, thinly sliced - 2 large eggs, beaten - 3 tablespoons soy sauce - 1 tablespoon sesame oil - 2 teaspoons minced garlic - 1 teaspoon minced ginger - Salt and freshly ground black pepper These ingredients create a great base for your fried rice. Using day-old rice gives it the best texture. You can add fun extras to make your fried rice special: - Chopped bell peppers for crunch - Cooked shrimp or pork for more protein - Sesame seeds for garnish - A splash of hot sauce for heat Feel free to mix and match these items based on what you like and have at home! Here are some tips to help you make the best chicken fried rice: - Use day-old rice if you can. It’s drier and cooks better. - Fresh garlic and ginger boost flavor. Always opt for fresh when possible. - Cut veggies small to ensure even cooking. - Adjust soy sauce to your taste. Start with less and add more if needed. These tips will help you achieve a tasty and satisfying meal. Don't forget to check the Full Recipe for more details! To start, gather all your ingredients. This makes cooking smooth and fun. Here’s what you need: - 2 cups cooked jasmine rice (day-old is best) - 1 cup cooked chicken, shredded or diced - 1 cup mixed frozen vegetables (peas, carrots, corn) - 3 green onions, sliced - 2 large eggs, beaten - 3 tablespoons soy sauce - 1 tablespoon sesame oil - 2 teaspoons garlic, minced - 1 teaspoon ginger, minced - Salt and black pepper to taste - Fresh cilantro or parsley for garnish (optional) Make sure your rice is cold. This prevents it from sticking. Chop the green onions and mince the garlic and ginger. Now, heat a large skillet or wok over medium-high heat. Once it's hot, pour in the sesame oil. Swirl it to coat the pan. Add the minced garlic and ginger. Sauté for about 30 seconds until you smell the aroma. This step adds great flavor. Next, toss in the mixed frozen vegetables. Cook them for 2 to 3 minutes until they are soft. Stir often to cook them evenly. When the veggies are ready, push them to one side of the skillet. In the empty space, pour in the beaten eggs. Let them sit for a moment to cook, then scramble them. Stir until they are just cooked. Now add the cooked chicken and jasmine rice. Use a spatula to mix everything well. Break up any rice clumps as you go. Drizzle the soy sauce over the mixture. Stir it well so every grain of rice gets flavor. Toss in the sliced green onions and season with salt and pepper. Mix everything together. Keep stir-frying for another 2 to 3 minutes. This helps all the flavors blend together. Once it's hot and ready, take it off the heat. If you want, add fresh cilantro or parsley for a nice touch. Serve your easy chicken fried rice hot. Enjoy! For the full recipe, check the details above. To get great texture in your chicken fried rice, use day-old rice. Freshly cooked rice tends to be too sticky. The grains need space to fry properly. You want them to be fluffy, not clumpy. Break up any clumps before cooking. This makes for better frying and flavor. For this dish, a large skillet or wok works best. A wok gives more surface area for frying. It helps the rice heat evenly. A good spatula is key for stirring the rice without breaking it. Make sure your skillet is hot before adding ingredients. This keeps everything from getting soggy. Serve your chicken fried rice in bowls or on a big platter. Add a sprinkle of green onions on top for color. You can also add fresh herbs like cilantro or parsley for a fresh taste. A side of soy sauce or hot sauce can add extra flavor. This dish is great for lunch or dinner and always a crowd-pleaser! For the full recipe, check out the details above. {{image_4}} You can easily make a vegetarian version of chicken fried rice. Simply swap out the chicken for more veggies or tofu. Use ingredients like mushrooms, bell peppers, and zucchini. You can also add some extra protein with chickpeas or edamame. The eggs can stay, or you can skip them for a vegan meal. This option is just as tasty and satisfying. If you love heat, try spicy chicken fried rice. Add sliced jalapeños or a dash of hot sauce during cooking. For more flavor, toss in some red pepper flakes with the soy sauce. You can also mix in Sriracha sauce right before serving. This version adds a fun kick to your meal. You can mix up the protein in your fried rice. Besides chicken, try shrimp, beef, or pork. These proteins are great for adding flavor and texture. If you’re feeling creative, try using leftover grilled meat or rotisserie chicken. Each choice brings a unique taste to the dish. For more ideas, see the Full Recipe. Store leftover chicken fried rice in an airtight container. Make sure it cools down first. Place it in the fridge. It will stay fresh for up to three days. For best taste, eat it sooner rather than later. Avoid leaving it out at room temperature. When reheating, use a skillet over medium heat. Add a splash of water or oil to keep it moist. Stir often to heat evenly. You can also use a microwave. Cover it with a damp paper towel for moisture. Heat in short bursts to avoid overcooking. To freeze, use a freezer-safe container. Divide it into portions for easy meals later. Make sure to leave some space at the top for expansion. It can last up to three months in the freezer. To use, thaw in the fridge overnight before reheating. Enjoy a quick meal anytime with your frozen chicken fried rice! Yes, you can use brown rice instead of jasmine rice. Brown rice has a nutty flavor and chewy texture. It takes longer to cook, so adjust your time. If you use brown rice, make sure it is cooked first. Day-old brown rice is best for fried rice. It helps avoid mushiness. You can add many vegetables to make your chicken fried rice healthier. Here are some great options: - Bell peppers - Broccoli - Zucchini - Spinach - Snow peas - Mushrooms These veggies add color and nutrients. You can mix and match them based on your taste. To make chicken fried rice without soy sauce, try using alternative flavors. Consider these options: - Coconut aminos for a sweeter taste - Tamari for a gluten-free version - Fish sauce for a salty kick - Lemon or lime juice for brightness These swaps keep your dish flavorful while avoiding soy sauce. In this blog post, we explored how to make easy chicken fried rice. We covered essential and optional ingredients for a tasty meal. You learned step-by-step instructions for a perfect cooking process. Tips and tricks help you get the best texture. We even shared tasty variations and how to store leftovers. For a quick and satisfying dish, chicken fried rice is a great choice. Enjoy experimenting with your own flavors!

Easy Chicken Fried Rice Flavorful and Quick Meal

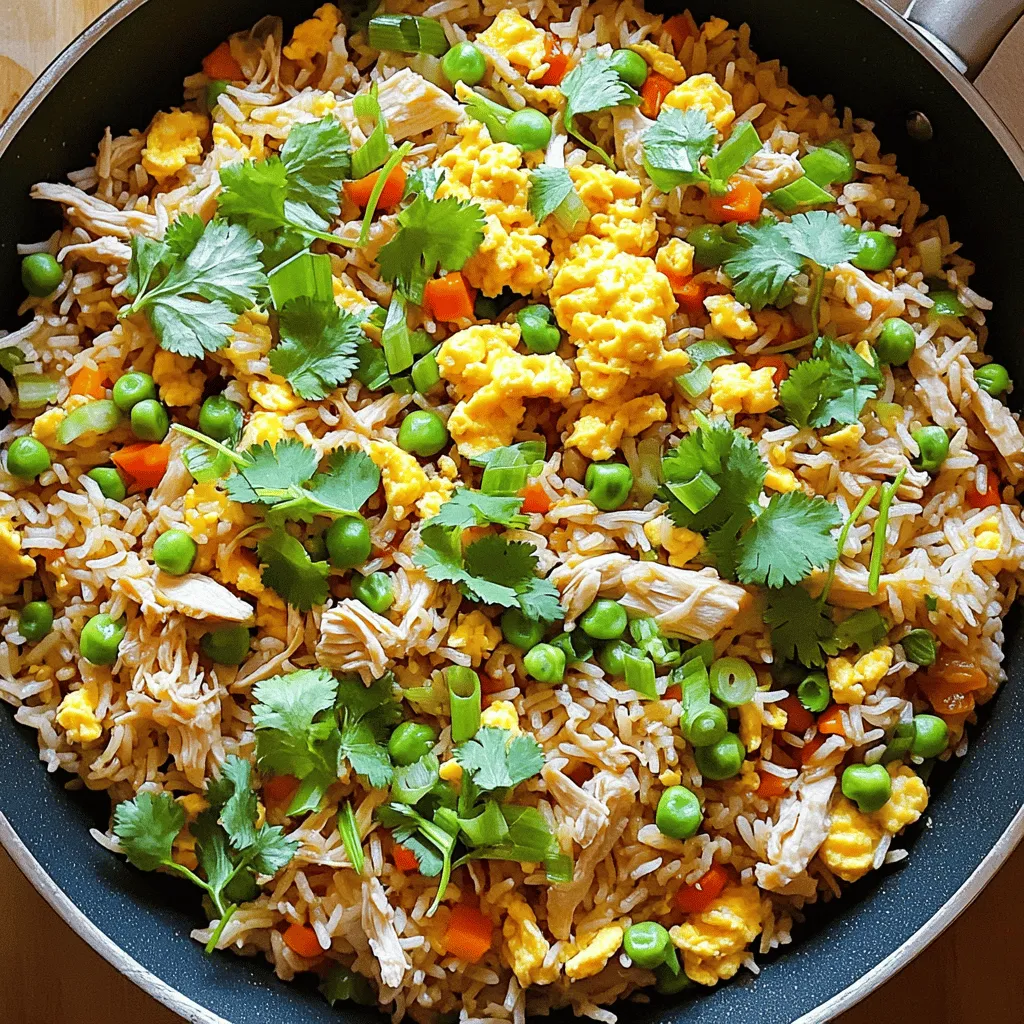
Looking for a quick, tasty meal? Easy Chicken Fried Rice is your answer! This dish comes together fast, making it

To make tasty garlic Parmesan knots, you need some key ingredients. Here’s what you will use: - 1 can (16 oz) refrigerated pizza dough - 4 tablespoons unsalted butter, melted - 4 cloves garlic, finely minced - ½ cup freshly grated Parmesan cheese - 2 tablespoons fresh parsley, finely chopped - 1 teaspoon dried oregano - ½ teaspoon red pepper flakes (optional, for a bit of heat) - Sea salt, to taste These main ingredients provide the base for your knots. The pizza dough gives you the perfect texture. The butter and garlic bring a rich flavor, while the Parmesan adds a nice salty touch. If you want to add more flavor, consider these optional ingredients: - Fresh basil or thyme for added herbal notes - A squeeze of lemon juice for brightness - Other cheeses like mozzarella for a gooey texture These extras can make your knots even more delicious. Feel free to mix and match based on what you like! Sometimes you may not have all the ingredients on hand. Here are some easy swaps: - Use store-bought garlic butter instead of melted butter and minced garlic. - Replace fresh parsley with dried parsley if that's what you have. - If you can’t find red pepper flakes, try a dash of hot sauce instead. These substitutions keep the flavor while making it easier to prepare. You can still enjoy great garlic Parmesan knots! For the full recipe, check the details provided. Start by preheating your oven to 400°F (200°C). This is key for the perfect bake. Next, line a baking sheet with parchment paper. This step prevents sticking and makes cleanup easy. Now, take your pizza dough out of the can. Place it on a clean, lightly floured surface. Roll it out into a rectangle about ¼ inch thick. This thickness helps the knots cook evenly. Once your dough is ready, grab a sharp knife or a pizza cutter. Slice the dough into strips about 1 inch wide and 6 inches long. For each strip, grab the ends and twist them into a knot shape. Tuck the ends under to keep them neat. Place each knot onto the baking sheet, leaving some space between them. They need room to puff up while baking. In a small bowl, mix the melted butter with finely minced garlic, chopped parsley, dried oregano, red pepper flakes, and a pinch of sea salt. Stir this well to blend the flavors. Use a pastry brush to apply the garlic butter mix over each knot. Make sure to get some garlic on each one for that rich taste. Next, sprinkle the freshly grated Parmesan cheese on top. This will stick to the butter and add great flavor. Now, place the baking sheet in the oven. Bake for 12-15 minutes, or until the knots turn golden brown and puffed. Watch them closely towards the end to avoid over-baking. When they’re done, take them out and brush with any leftover garlic butter. Let them cool slightly before serving. For an extra treat, serve warm in a basket or on a platter with marinara sauce for dipping. Enjoy these tasty Garlic Parmesan Knots! For the complete recipe, check out the Full Recipe section. To make the best garlic Parmesan knots, keep your dough cold. When dough is cold, it holds its shape better. Cut your strips evenly. This helps them bake uniformly. Twist each strip carefully. A good twist makes the knots look nice and helps them rise. Brush on that garlic butter generously. This adds great flavor. Use fresh herbs for a bright taste. For extra crunch, add more cheese. One common mistake is overworking the dough. This can make the knots tough. Another mistake is not preheating your oven. If the oven is cold, the knots won’t rise well. Avoid using too much flour while rolling. This can make them dry. Lastly, don't skip the second brush of garlic butter. It adds a burst of flavor and shine. Here are the tools I recommend for this recipe: - Baking sheet - Parchment paper - Sharp knife or pizza cutter - Pastry brush - Mixing bowl - Measuring spoons and cups These tools will help you create perfect garlic Parmesan knots every time. For the full recipe, check out the detailed steps provided earlier. {{image_4}} You can play with the cheese in this recipe. Mozzarella is a great choice. It melts well and gives a nice stretch. You can also try cheddar for a sharper taste. For a gourmet twist, use aged gouda or even feta. Just remember, the cheese should complement the garlic flavor. Mixing in veggies can enhance the knots. Consider adding finely chopped spinach or roasted red peppers. Both add color and flavor. Fresh herbs like basil or thyme can also brighten the taste. Just chop them finely and mix them into the dough or sprinkle them on top. If you like heat, add more red pepper flakes. You can also mix in diced jalapeños for a kick. Another option is to use pepper jack cheese instead of regular cheese. This will give your knots a spicy, cheesy flavor. Adjust the heat level to your taste. These variations keep your Garlic Parmesan Knots exciting. Each twist adds a new layer of flavor. For the full experience, try the Full Recipe. To store your leftover garlic Parmesan knots, let them cool completely. Place them in an airtight container. You can keep them at room temperature for up to two days. If you want them to last longer, store them in the fridge for up to a week. Make sure to separate layers with parchment paper to prevent sticking. Reheating your knots is simple. Preheat your oven to 350°F (175°C). Place the knots on a baking sheet and heat them for about 5-10 minutes. This method keeps them warm and crispy. If you prefer a quick option, pop them in the microwave for 20-30 seconds. However, this might make them a bit chewy. Freezing garlic Parmesan knots is a great way to save some for later. After cooling, arrange the knots on a baking sheet and freeze them for about an hour. Once frozen, transfer them to a freezer bag. They can stay good for up to three months. When you're ready to enjoy, bake them directly from frozen at 350°F (175°C) for about 15-20 minutes. This will give you fresh-tasting knots any time you want! For the full recipe, check out the earlier section. Garlic Parmesan Knots can last up to three days when stored properly. Keep them in an airtight container at room temperature. This way, they stay soft and tasty. If you want them to last longer, you can refrigerate them for up to a week. Just remember, the texture may change a bit when cold. Yes, you can make Garlic Parmesan Knots ahead of time! You can prepare the knots and store them before baking. Place them on a baking sheet and cover with plastic wrap. They can stay in the fridge for one day. When you’re ready, just bake them as usual. This method saves time and still gives you fresh knots! Garlic Parmesan Knots pair well with many dishes. Here are some tasty ideas: - Marinara sauce for dipping - A fresh salad for a side - Soup, like tomato or minestrone - Grilled meats for a hearty meal - Pasta dishes for a complete feast Feel free to mix and match with your favorite meals. Garlic Parmesan Knots make the perfect sidekick! For the complete recipe, check out the [Full Recipe]. Garlic Parmesan knots are easy and fun to make. We covered the main ingredients and some tasty options. I shared simple steps to prep, shape, and bake them perfectly. You learned helpful tips to avoid mistakes and the best tools to use. Variations allow for personal twists, and I explained how to store leftovers or reheat them. Try these knots soon, and enjoy the delicious flavors they bring to your table. You can impress anyone with this simple recipe.

Garlic Parmesan Knots Flavorful Twist on a Classic

Garlic Parmesan Knots are a tasty twist on a classic. Imagine warm, fluffy knots filled with sharp garlic and cheesy

Older posts
Newer posts
← Previous Page1 … Page37 Page38 Page39 … Page68 Next →

dsad

© 2025 tastymomrecipes • Built with GeneratePress

Our Policies

  • Copyright Policy
  • Cookie Policy
  • GDPR Policy
  • Privacy Policy
  • Disclaimer
  • Terms Of Use

More Information

  • Home
  • About
  • Contact
  • Appetizers
  • Dessert
  • Dinner
  • Drinks
©2025, tastymomrecipes About Back To Top