Skip to content
DisclaimerTerms Of UseGDPR PolicyCookie Policy

tastymomrecipes

  • Home
  • Drinks
  • Appetizers
  • Dinner
  • Dessert
  • About
  • Contact
  • Privacy Policy
DisclaimerTerms Of UseGDPR PolicyCookie Policy

Olivia

Gather these key ingredients to make a tasty Thai Peanut Noodle Salad: - 8 oz rice noodles - 1 cup shredded carrots - 1 red bell pepper, thinly sliced - 1 cucumber, julienned - 1 cup red cabbage, thinly sliced - 1/2 cup fresh cilantro, chopped - 1/4 cup chopped green onions - 1/2 cup peanuts, crushed (plus extra for garnish) These vegetables give the salad color and crunch. The rice noodles make it filling and fun to eat. For the peanut dressing, you will need: - 1/4 cup creamy peanut butter - 2 tablespoons soy sauce (or tamari for a gluten-free option) - 1 tablespoon freshly squeezed lime juice - 1 tablespoon maple syrup (or honey) - 1 teaspoon sesame oil - 1 garlic clove, minced - 1 teaspoon freshly grated ginger - 2-3 tablespoons warm water (to adjust thickness) This dressing ties the dish together. The mix of peanut butter, lime, and soy sauce creates a rich flavor. Add these garnishes for extra flair: - Crushed peanuts - Fresh cilantro Garnishes not only look great but also add more taste. The peanuts give a nice crunch, while cilantro adds freshness. For the full recipe, check the detailed instructions provided above. To start, boil water in a large pot. Once boiling, add 8 ounces of rice noodles. Make sure all noodles are submerged. Cook them for about 4 to 5 minutes. Once done, drain the noodles in a colander. Rinse them under cold water to stop cooking. Set them aside to cool. Next, grab a medium-sized mixing bowl. In it, add 1/4 cup of creamy peanut butter, 2 tablespoons of soy sauce, and 1 tablespoon of fresh lime juice. Then, mix in 1 tablespoon of maple syrup, 1 teaspoon of sesame oil, 1 minced garlic clove, and 1 teaspoon of grated ginger. Whisk everything together until it's smooth. If the dressing is too thick, add 2 to 3 tablespoons of warm water. Aim for a pourable consistency. Now, take a large mixing bowl. Combine 1 cup of shredded carrots, 1 thinly sliced red bell pepper, 1 julienned cucumber, and 1 cup of thinly sliced red cabbage. Also, add 1/2 cup of chopped cilantro and 1/4 cup of green onions. Stir gently to mix the vegetables well. Time to bring it all together! Add the cooled rice noodles to the bowl with vegetables. Drizzle the peanut dressing on top. Use tongs or two large forks to toss everything together. Make sure the noodles and vegetables are well-coated in the dressing. Enjoy this vibrant dish! For the full recipe, check out the details above. To make the best peanut dressing, start with creamy peanut butter. It gives a rich taste. Measure out 1/4 cup and put it in a bowl. Then, add 2 tablespoons of soy sauce. This adds salt and umami. Next, squeeze in 1 tablespoon of lime juice for a bright flavor. Add 1 tablespoon of maple syrup for sweetness. Mix in 1 teaspoon of sesame oil for depth. Don’t forget 1 minced garlic clove and 1 teaspoon of grated ginger. These bring warmth and spice. Whisk everything until smooth. If it’s too thick, add 2-3 tablespoons of warm water. This helps get the right consistency. You can serve this salad in many ways. For a light meal, enjoy it cold. It’s great on a hot day. If you want a heartier dish, add grilled chicken or shrimp. Both pair well with the peanut flavors. You can also serve it as a side dish. It pairs nicely with grilled meats. Consider serving it at a picnic or barbecue. This salad is colorful and vibrant, making it a crowd-pleaser. For a stunning presentation, use a clear bowl. This shows off the bright colors of the veggies. Layer the salad neatly. Start with the noodles, then add the veggies. Finish with the crushed peanuts on top. Add lime wedges around the bowl. This not only looks nice but gives guests a zesty option. You can also sprinkle fresh cilantro for a pop of green. This salad is not only tasty but beautiful, too! {{image_4}} You can easily make this salad vegetarian or vegan. The base of rice noodles and fresh veggies is already plant-based. For the dressing, use maple syrup instead of honey. This switch keeps it vegan and just as sweet. Feel free to add more veggies like edamame or snap peas for extra crunch. Adding protein makes the salad heartier. You can use grilled chicken, shrimp, or marinated tofu. If you choose chicken or shrimp, cook them first, then slice them thinly. For tofu, press it to remove extra water, then cube and sauté until golden. Mix your protein right into the salad for a filling meal. If you need a gluten-free option, just use tamari in the dressing instead of soy sauce. Rice noodles are naturally gluten-free, so you’re already set there. You can also try zucchini noodles instead of rice noodles for a fun twist. This keeps the dish light and fresh while still being gluten-free. For the full recipe, check the link above and dive into making this delicious dish! To keep your Thai Peanut Noodle Salad fresh, place leftovers in a container. Seal it tightly to keep air out. Store it in the fridge. It will stay tasty for about 3 days. If you like, keep the dressing separate. This helps prevent the noodles from getting soggy. Rice noodles can be tricky when reheated. If you need to warm them up, add a splash of water to the noodles. Then, microwave them for about 30 seconds. Stir often to heat evenly. You can also sauté them in a pan with a bit of oil. This keeps them from sticking and adds flavor. Choose airtight containers for storage. Glass containers work great because they don't stain. BPA-free plastic containers are good too. Make sure they have a secure lid. This ensures your salad stays fresh and tasty longer. Enjoy your meal later without losing flavor! You can find the full recipe in the earlier sections. Yes, you can make Thai Peanut Noodle Salad ahead of time. It’s a great meal prep option. Store the salad in the fridge for up to one day. Keep the dressing separate. This way, the noodles and veggies stay fresh and crisp. When you are ready to eat, mix in the dressing. This keeps the flavors bright. If you need a peanut butter substitute, try almond butter or sunflower seed butter. Both options give a similar creamy texture. They also add a unique flavor twist. For a nut-free option, sunflower seed butter is a great choice. You can also use tahini. It adds a rich taste and works well in the dressing. The Thai Peanut Noodle Salad lasts for about three days in the fridge. After that, the noodles may get soggy. To keep it fresh, store it in a tightly sealed container. If you see any signs of spoilage, it’s best to toss it. Enjoy this salad while it’s still vibrant and tasty! For the full recipe, check out the earlier section. Thai Peanut Noodle Salad is a simple, delicious dish. You start with key ingredients like rice noodles, fresh veggies, and a tasty peanut dressing. I shared step-by-step instructions for making it easy. Tips helped you perfect the dressing and made it look great. You can also try different proteins and storage methods. In the end, this salad is fun to make and enjoy. Try it today for a tasty meal!

Thai Peanut Noodle Salad Flavorful and Quick Meal

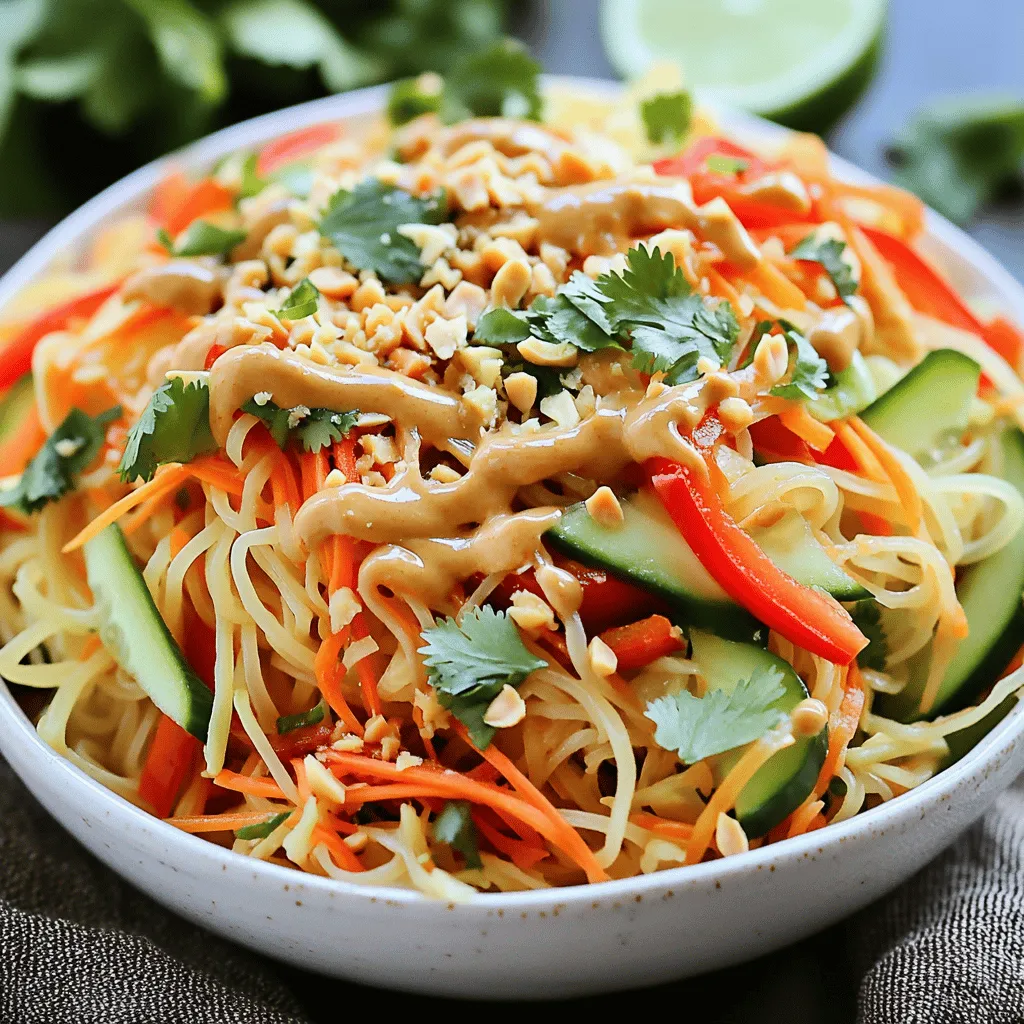
Looking for a quick and tasty meal? You’ve found it! This Thai Peanut Noodle Salad is packed with flavor and

- Fresh Vegetables: - 1 cup fresh broccoli florets - 1 bell pepper (any vibrant color), thinly sliced - 1 large carrot, cut into julienne strips - 1 medium zucchini, sliced into half-moons - 1 cup crisp snap peas These fresh veggies bring color and crunch to your dish. They also provide vitamins and minerals, making this meal healthy. - Key Sauces and Oils: - 1 tablespoon sesame oil - 3 tablespoons soy sauce (low sodium recommended) - 1 tablespoon honey or pure maple syrup (to taste) Sesame oil gives this stir fry a nutty flavor. Soy sauce adds depth, while honey adds a hint of sweetness. - Optional Ingredients for Customization: - 3 cloves of garlic, finely minced - 1 inch piece of ginger, freshly grated - 1 teaspoon chili flakes (optional, adjust for spice preference) - 2 green onions, finely sliced (for garnish) - A sprinkle of toasted sesame seeds (for garnish) Garlic and ginger enhance the aroma and taste. Chili flakes add heat, while green onions and sesame seeds finish off the dish nicely. For the full recipe, check out the complete instructions to make this vibrant vegetable stir fry! 1. Heating the sesame oil: Start by pouring one tablespoon of sesame oil into a large skillet. Heat it over medium-high heat until it shimmers. This oil gives a rich flavor to the dish. 2. Adding garlic and ginger: Next, add three cloves of finely minced garlic and one inch of grated ginger to the hot oil. Sauté them for about 30 seconds. You’ll know it’s ready when you smell that delicious aroma. 1. Stir-frying the broccoli and bell pepper: Now, it’s time to add one cup of fresh broccoli florets and one thinly sliced bell pepper to the skillet. Stir-fry these for about 3 to 4 minutes until they soften a bit but still stay crunchy. 2. Incorporating remaining vegetables: After that, toss in one large julienned carrot, one medium sliced zucchini, and one cup of crisp snap peas. Keep stir-frying for another 3 to 4 minutes. Look for vibrant colors and a nice crunch in the veggies. 1. Preparing the sauce: In a small bowl, whisk together three tablespoons of soy sauce, one tablespoon of honey or pure maple syrup, and one teaspoon of optional chili flakes. This mix adds a sweet and savory taste to your stir-fry. 2. Tossing everything together: Pour the sauce over the veggies in the skillet. Gently toss everything together for about one more minute. This allows the sauce to coat all the colorful vegetables well. Now you have a quick and healthy vegetable stir fry ready to enjoy! For the full recipe, you can refer back to the main section. To keep your veggies crunchy, cook them over high heat. This helps to seal in their natural juices. Start with harder vegetables like broccoli and bell peppers. They take longer to cook. Add softer vegetables like zucchini and snap peas later. This way, they stay bright and crisp. Stir your veggies often to cook them evenly. Sauces add great taste to your stir fry. Soy sauce is a classic choice. You can also try teriyaki, hoisin, or oyster sauce for variety. For a kick, add some chili flakes or fresh chili. Adjust the spice level to match your taste. Sweeten the dish with honey or maple syrup for a balanced flavor. For more tips, check out the Full Recipe for additional insights. {{image_4}} You can add protein to your vegetable stir fry for more flavor. Tofu and tempeh are great plant-based options. They soak up the sauce well and add texture. To prepare, cut tofu or tempeh into cubes and sauté them until golden. This adds a nice crunch. If you prefer meat, chicken or shrimp work well, too. For chicken, slice it thinly. Cook the chicken in the pan first, then add the veggies. Shrimp cooks quickly, so add it just a few minutes before the stir fry is done. Both protein choices make your dish hearty and satisfying. Feel free to swap out vegetables with what you have on hand. Seasonal veggies are best for flavor and freshness. In spring, use asparagus or sugar snap peas. In summer, try bell peppers or zucchini. Autumn is perfect for adding squash or broccoli. Winter brings hearty greens like kale or cabbage. You can also use frozen vegetables. They are quick and easy. They are picked at peak ripeness, so they still taste great. Just remember to thaw them first and drain any excess water. This helps avoid a soggy stir fry. For more ideas, check out the Full Recipe to see how you can mix and match! After making your Easy Vegetable Stir Fry, you might have some leftovers. To store them well, let the stir fry cool completely. Place it in an airtight container. This helps keep it fresh and tasty. You can keep it in the fridge for about 3 to 4 days. If you want to keep it longer, consider freezing it. It can last up to 2 months in the freezer. Just remember to label the container with the date. When it’s time to eat your leftovers, you have two options: stovetop or microwave. 1. Stovetop: This is my favorite method. Heat a little sesame oil in a pan over medium heat. Add your stir fry and cook it for about 5 minutes. This method helps keep the veggies crispy. 2. Microwave: If you’re short on time, use the microwave. Put your stir fry in a microwave-safe dish. Heat it for 1 to 2 minutes. Stir halfway through to heat evenly. To restore crispiness after reheating, try adding a splash of water in the pan if using a stovetop. This helps steam the veggies while keeping them crunchy. For the microwave, let it sit for a minute after cooking. This helps the steam escape and avoids sogginess. Enjoy your stir fry again, just like the first time! Can I use frozen vegetables in the stir fry? Yes, you can use frozen vegetables. They are convenient and still healthy. Just remember that frozen veggies may soften faster than fresh ones. Keep an eye on them while cooking. What’s a good substitute for sesame oil? If you don't have sesame oil, try using olive oil or avocado oil. These oils add a nice flavor but lack the nutty taste of sesame oil. You can also add a sprinkle of sesame seeds for that flavor. How do I make it gluten-free? To make this dish gluten-free, use tamari instead of soy sauce. Tamari tastes similar but has no wheat. Always check labels on sauces to ensure they are gluten-free. For the full recipe, check out the vibrant vegetable stir fry. You can make a quick and easy vegetable stir fry using fresh ingredients. Start with colorful veggies and the right sauces. Preparation is simple with just a few steps. I shared tips to keep your vegetables crispy. You can also mix things up with proteins like tofu or chicken. For storage, remember to refrigerate leftovers and reheat them well. Enjoy your tasty dish knowing it’s easy to make and perfect for any meal. Cook with confidence and create your own variations!

Easy Vegetable Stir Fry Quick and Healthy Recipe

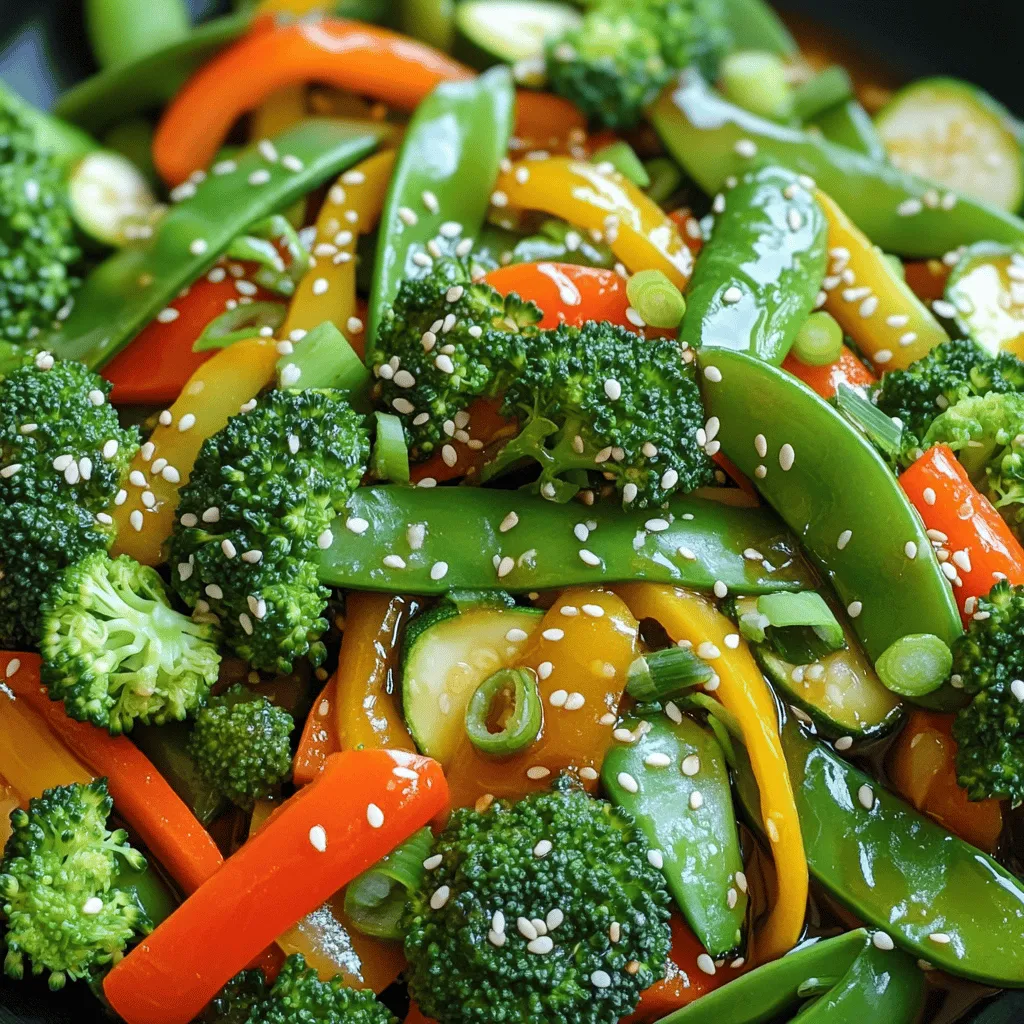
Looking for a quick and healthy meal? This Easy Vegetable Stir Fry recipe gives you fresh flavors in minutes! You

- 4 salmon fillets (approximately 6 ounces each) - 2 tablespoons extra-virgin olive oil - 2 tablespoons freshly squeezed lemon juice - 1 teaspoon lemon zest (finely grated) - 3 cloves fresh garlic, minced - 1 teaspoon dried oregano - 1 teaspoon dried thyme - Salt and freshly ground black pepper, to taste - 1 cup cherry tomatoes, halved - 1 medium zucchini, sliced into half-moons - 1 yellow bell pepper, sliced into thin strips In this dish, salmon shines as the star. You can find it fresh at your local market. It cooks quickly and stays moist. Pair it with colorful vegetables like cherry tomatoes, zucchini, and yellow bell pepper. They bring bright flavors and nutrition. For seasoning, we use simple yet tasty ingredients. Olive oil adds richness. Lemon juice and zest brighten the dish. Garlic, oregano, and thyme bring depth. Salt and pepper enhance the flavors. - Fresh parsley - Lemon slices These garnishes add a pop of color. Fresh parsley gives a nice touch. Lemon slices add flair and can boost flavor. You can sprinkle parsley over the dish just before serving. It makes the meal look fresh and inviting. For the full recipe, check out the complete guide on preparing One Pan Lemon Herb Salmon! 1. Preheat the oven: Start by preheating your oven to 400°F (200°C). This heat is key for even cooking. 2. Prepare the lemon herb seasoning: In a small bowl, mix 2 tablespoons of extra-virgin olive oil, 2 tablespoons of freshly squeezed lemon juice, and 1 teaspoon of lemon zest. Add 3 minced garlic cloves, 1 teaspoon of dried oregano, and 1 teaspoon of dried thyme. Toss in a pinch of salt and pepper to taste. Whisk until it blends well. Set this mix aside. 1. Arrange ingredients on the baking sheet: Grab a large rimmed baking sheet. Place 4 salmon fillets in the center. Surround them with 1 cup of halved cherry tomatoes, 1 medium sliced zucchini, and 1 sliced yellow bell pepper. Spread everything out evenly. 2. Add the lemon herb mixture: Drizzle your prepared lemon herb sauce over the salmon and veggies. Make sure all pieces get coated for great flavor. 3. Bake in the oven: Place the baking sheet in your preheated oven. Bake for 15 to 20 minutes. The salmon should flake easily with a fork, and the veggies should be tender. 1. Garnish and serve: After baking, take the sheet out of the oven and let it rest for a couple of minutes. This helps the flavors meld. 2. Serve: Just before serving, sprinkle chopped fresh parsley over the salmon and vegetables. This adds brightness and color to your dish. You can follow the Full Recipe for more detailed steps and tips. Enjoy your meal! - Checking for doneness To know when your salmon is done, use a fork. Gently poke the salmon. If it flakes easily, it is ready. Look for a light pink color. Undercooked salmon is safe but can taste better when fully cooked. - Adjusting seasoning to taste Taste the lemon herb sauce before adding it to the salmon. If it needs more salt or pepper, add some. You can also add extra lemon juice for more zing. Always season to your liking for the best flavor. - Serving directly from the baking sheet One great way to serve this dish is right from the baking sheet. This gives a homey and casual feel. Just make sure to use a nice baking sheet for a good look. - Plating creatively For a fancier look, use a large platter. Arrange the salmon and veggies nicely. Drizzle the juices from the baking sheet on top. Add a sprinkle of fresh parsley for color. This little touch can wow your guests! For the full recipe, check out the One Pan Lemon Herb Salmon. {{image_4}} You can easily swap the salmon for other fish like trout or cod. Both fish have nice flavors and cook well in the oven. If you want a fun twist, try using a firm white fish. You can also change up the veggies. Instead of cherry tomatoes, zucchini, and yellow bell pepper, try asparagus, broccoli, or bell peppers of different colors. Each option brings a new taste to the dish. To boost the taste, add some spices like paprika or cumin. Paprika adds a sweet kick, while cumin gives a warm, earthy flavor. Sprinkle them on the fish and veggies before baking. Fresh herbs can also add a bright touch. Try adding basil or dill for a fragrant twist. Just chop them and sprinkle on top before serving. These changes will make the dish even more exciting. For the full recipe, check out the One Pan Lemon Herb Salmon section. To keep your One Pan Lemon Herb Salmon fresh, follow these tips. First, let it cool to room temperature. This step helps prevent condensation in your storage container. Next, place the salmon and veggies in an airtight container. You can put a layer of parchment paper between layers to keep it nice. Store the container in the fridge for up to three days. If you want to keep it longer, freeze the leftovers. Just wrap them tightly in plastic wrap and then foil. This way, it can last for up to three months. When it's time to enjoy your leftovers, reheating properly is key. Avoid the microwave if you can, as it tends to dry out salmon. Instead, preheat your oven to 350°F (175°C). Place the salmon and veggies on a baking sheet. Cover them loosely with foil to keep moisture in. Heat for about 10 to 15 minutes or until warmed through. You can also add a splash of lemon juice before reheating for added flavor. Enjoy your meal as if it were freshly made! To check if your salmon is cooked, look for these signs: - The salmon should change from translucent to opaque. - It will flake easily with a fork. - The internal temperature should reach 145°F (63°C). Perfectly cooked salmon feels firm to the touch but is still moist. If it looks dry or overly flaky, it may be overcooked. Yes, you can use frozen salmon. Here are some tips: - Thaw salmon in the fridge overnight for best results. - If you're in a hurry, place the sealed salmon in cold water for quick thawing. - Cook the salmon straight from frozen, but adjust the cooking time. Frozen salmon may need a few extra minutes in the oven. Always check for doneness. Pair your One Pan Lemon Herb Salmon with these great sides: - Steamed green beans for a fresh crunch. - Quinoa or rice for a hearty base. - A simple green salad for lightness. - Roasted asparagus for added flavor. These sides will enhance your meal and bring balance to the dish. You’ll have a colorful and satisfying plate! In this article, I covered how to make One Pan Lemon Herb Salmon. We discussed the key ingredients, including salmon, fresh vegetables, and seasoning. I provided step-by-step instructions for preparing and cooking the dish, along with tips for great results. You can add your own twists with different fish or veggies. Remember to store leftovers properly and consider easy reheating methods. Enjoy creating this tasty meal that fits any occasion!

One Pan Lemon Herb Salmon Flavorful and Easy Dish

Do you want a quick and tasty dinner option? This One Pan Lemon Herb Salmon is packed with fresh flavors

To make a delicious vegan chocolate avocado mousse, you need just a few simple ingredients. Here’s the list: - 2 ripe avocados - 1/2 cup unsweetened cocoa powder - 1/3 cup maple syrup - 1/4 cup almond milk - 1 teaspoon vanilla extract - A pinch of sea salt - Optional toppings: fresh berries, coconut whipped cream, or shaved dark chocolate These ingredients create a creamy, rich dessert. The avocados give a smooth texture, while cocoa powder adds deep chocolate flavor. Maple syrup sweetens the mix, and almond milk helps it blend well. Vanilla extract brightens the taste, and sea salt rounds it out perfectly. Using ripe avocados is key. They provide the best creaminess. You can find ripe avocados by gently pressing them. They should feel soft but not mushy. If they are hard, give them a couple of days to ripen. Feel free to play with optional toppings. Fresh berries add a tart contrast, while coconut whipped cream gives a light finish. Shaved dark chocolate offers an extra touch of elegance. For the full journey to make this delightful treat, check out the Full Recipe. Enjoy crafting this vegan delight! To start, take your ripe avocados and slice them in half. Use a sharp knife to carefully cut around the pit. Once you reach the pit, twist the halves to separate them. Now, use a spoon to scoop out the green, creamy flesh. Make sure to get all of it, as this is the base of your mousse. Next, place the avocado flesh into your food processor. Add the unsweetened cocoa powder, maple syrup, almond milk, vanilla extract, and a pinch of sea salt. These ingredients blend together to create a rich flavor. Secure the lid and blend on high speed. Keep blending until the mixture is completely smooth and creamy. Don’t forget to stop and scrape the sides with a spatula. This ensures everything mixes well. Once your mousse is blended to perfection, it’s time to chill. Transfer the mousse into individual bowls or one large container. Place it in the refrigerator for at least 30 minutes. This cooling time helps the mousse set and enhances the flavors. When you’re ready to serve, take your mousse out and have fun with garnishes. You can top it with fresh berries, a dollop of coconut whipped cream, or some shaved dark chocolate. Each topping adds a special touch. Enjoy the creamy delight! For the complete recipe, check the Full Recipe. To make your mousse smooth, start with ripe avocados. Ripe avocados have a soft and creamy texture, which is key for a great mousse. If your avocados are too firm, the mousse won’t blend well. You want them to yield slightly when you press on them. When blending, use a high-speed blender or food processor. Blend until the mixture is completely smooth. Stop to scrape down the sides as needed. This ensures all the ingredients mix well. The more you blend, the creamier your mousse will be. Sweetness is important for balance. Taste your mousse after blending. You might want to add more maple syrup. This step lets you customize the sweetness to fit your taste. You can also add spices or extracts to enhance the flavor. A dash of cinnamon or a splash of almond extract can add depth. Experiment with flavors to make it your own. Presentation makes a dish shine. Use clear dessert cups to show off the rich color of the mousse. You can layer toppings for a beautiful look. For garnish, consider fresh berries or coconut whipped cream. These add color and texture. Shaved dark chocolate on top adds elegance and a nice crunch. Using fun dishes can elevate the experience. For more detailed steps, check the Full Recipe. {{image_4}} You can easily change some ingredients if needed. For sweeteners, consider using agave syrup instead of maple syrup. Both add sweetness but with different flavors. For plant-based milk, try oat milk or soy milk. Each gives a unique taste and texture to the mousse. Want a twist? Add pureed banana or a spoonful of peanut butter. These options will give your mousse a fun flavor boost. You can also mix in spices like cinnamon or nutmeg for warmth. This mousse can fit many diets. It is already gluten-free, making it safe for those with gluten allergies. If you need a nut-free version, swap almond milk for coconut milk or rice milk. These alternatives keep the mousse creamy without using nuts. Pair your mousse with other desserts for a fun treat. Serve it alongside a warm brownie or a slice of vegan cake. The contrast between warm and cold makes each bite exciting. Have leftovers? Use the mousse as a filling for vegan cupcakes or spread it on toast. You can also layer it in a parfait with granola and fruits for breakfast. The options are endless, and you can get creative! For the full recipe, check out the Vegan Chocolate Avocado Mousse details. Enjoy experimenting with your own variations! To store leftover mousse, place it in an airtight container. This step keeps the mousse fresh longer. Cover the surface with plastic wrap to prevent air contact. This helps avoid oxidation and browning. The ideal conditions for keeping it fresh are cool and dry. Store it in the fridge. Make sure the temperature stays consistent. Avoid placing it near warm foods. The mousse lasts about 3 to 5 days in the fridge. After that, it may start to lose its texture and flavor. Signs of spoilage include a change in color and off smells. If the mousse becomes watery or separates, it's best to throw it out. Always check for freshness before enjoying your creamy treat again. Can I make this mousse ahead of time? Yes, you can make this mousse a day in advance. It stays fresh in the fridge. Just cover it tightly to keep it from drying out. Chilling enhances the taste and texture. Can I use frozen avocados? You can use frozen avocados. Just thaw them first. This will help them blend smoothly. Make sure they are ripe before freezing for the best flavor. What is the nutritional value of this dessert? This dessert is rich in healthy fats, fiber, and antioxidants. One serving has about 150 calories. It contains no dairy or refined sugars, making it a healthy option. What to do if the mousse is too thick? If your mousse is too thick, add a splash of almond milk. Blend again until you reach your desired texture. Start with a little, then add more if needed. How to fix an overly sweet mousse? If the mousse is too sweet, add more cocoa powder. This will balance the sweetness. You can also add a pinch of salt to enhance the flavors. This blog post covered a delicious avocado chocolate mousse. You learned the easy ingredients, like ripe avocados and cocoa powder. We walked through simple steps for preparation, blending, and serving your treat. I shared tips for getting the right texture and flavor. Variations for dietary needs also opened new options. In the end, this mousse is fun to make and share. It’s tasty, healthy, and versatile. You can enjoy this treat in many ways!

Vegan Chocolate Avocado Mousse Creamy Delightful Treat

Ready to indulge in a rich, creamy dessert that’s both healthy and delicious? This vegan chocolate avocado mousse combines simple

- 1 block (14 oz) firm tofu - 1/4 cup cornstarch - 1/4 cup soy sauce - 1/4 cup honey (or maple syrup for a vegan option) - 3 cloves garlic, finely minced - 1 teaspoon fresh ginger, grated - 1 tablespoon sesame oil - 1 tablespoon rice vinegar - 1 tablespoon green onions, finely chopped - Sesame seeds - Vegetable oil (for frying) When choosing your tofu, go for firm. It holds its shape well and gives a nice bite. Pressing the tofu is key. This helps remove excess moisture, making it crispier when cooked. Cornstarch helps create that golden crust. It coats the tofu, giving it a crunch that contrasts with the sweet sauce. For the sauce, I love using soy sauce and honey. They provide a perfect balance of salty and sweet. If you want a vegan option, maple syrup works just as well! Adding garlic and ginger gives the dish depth. Sesame oil adds a rich flavor too. Rice vinegar adds a touch of tang. For garnishing, chopped green onions and sesame seeds add color and crunch. Use vegetable oil for frying. It has a high smoke point, perfect for getting crispy tofu. You can find the full recipe to dive deeper into making this dish. First, cut the firm tofu into bite-sized cubes. Make sure the pieces are even. This helps them cook well. Next, press the tofu to remove extra water. This step is key for crispiness. After pressing, place the tofu cubes in a bowl. Sprinkle the cornstarch over the cubes. Toss gently to coat them well. Each piece should have a nice layer of cornstarch. This helps create a crispy crust when frying. Now it's time to fry the tofu. Heat vegetable oil in a large skillet over medium-high heat. Use enough oil to cover the bottom of the pan. When the oil shimmers, add the coated tofu cubes. Fry them for about 3-4 minutes on each side. Look for a golden brown color to know they are ready. Avoid overcrowding the pan; fry in batches if needed. Once crispy, transfer the tofu to a plate lined with paper towels to absorb extra oil. While the tofu is frying, make the honey garlic sauce. In a small bowl, combine soy sauce, honey (or maple syrup), minced garlic, grated ginger, sesame oil, and rice vinegar. Whisk these ingredients until they blend into a glossy sauce. This sauce is what makes the dish pop with flavor. Once the tofu is fried, return the skillet to medium heat. Pour the honey garlic sauce into the skillet. Let it simmer for 2-3 minutes until it thickens, stirring often. After the sauce thickens, add the crispy tofu back into the skillet. Toss the tofu so every piece gets coated in the sauce. Let it cook for another 2 minutes. This allows the tofu to soak up the delicious flavors. Now your Crispy Honey Garlic Tofu is ready to serve! For the full recipe, check out the detailed instructions above. To make your tofu extra crispy, start by properly pressing the tofu. This means removing as much water as possible. Wrap the tofu in a clean kitchen towel and place something heavy on top. Let it sit for at least 15-30 minutes. This helps to keep the tofu from being soggy during frying. Next, avoid overcrowding the pan. Fry the tofu in batches. If you add too many pieces at once, they will steam instead of fry. This will lead to less crispy tofu. Give each piece space to fry properly. You can boost the flavor of your crispy honey garlic tofu by adding spices or herbs. Consider adding a pinch of chili flakes for some heat. You can also sprinkle in dried herbs like basil or thyme. These will give your dish a unique twist. Adjusting the sweetness is also key. If you like your sauce sweeter, add more honey or maple syrup. If you prefer a less sweet flavor, reduce the amount. Taste the sauce before adding it to the tofu to find your perfect balance. Handling hot oil requires care. Always keep a close eye on the temperature. If the oil gets too hot, it can start to smoke. This is not safe and can ruin your dish. Use safe frying practices. Always use a long utensil to place tofu in hot oil. This keeps your hands away from the heat. If oil splatters, step back and stay calm. Keep a lid nearby to cover the pan if needed. For the full recipe, check [Full Recipe]. {{image_4}} You can easily make this dish vegan by switching honey for maple syrup. Maple syrup adds a sweet, rich taste that pairs well with the garlic. This small swap helps you enjoy the same great flavor while keeping it plant-based. You can make this dish even better by adding veggies. Bell peppers or broccoli work great. Just stir-fry them in the same pan before adding the sauce. You can also serve the crispy tofu over quinoa or rice. Both options soak up the sauce nicely and make your meal more filling. If you need a gluten-free option, look for gluten-free soy sauce. Many brands offer tasty substitutes that still work well in this recipe. For a low-calorie choice, consider using a light soy sauce. This keeps the flavor while cutting some calories. To keep your crispy honey garlic tofu fresh, refrigerate it right away. Place it in an airtight container. This method helps maintain flavor and texture. If you have extra sauce, store it separately. This way, your tofu does not get soggy. I recommend using glass containers for better preservation. They are easy to clean and don’t stain. When reheating, you want to keep that crispy texture. The best way is to use an oven or an air fryer. Preheat the oven to 350°F (175°C). Spread the tofu on a baking sheet and bake for about 10 minutes. Check for crispiness. If using an air fryer, set it to 350°F and heat for around 5-7 minutes. Avoid using a microwave since it makes tofu soggy. You can freeze leftover crispy honey garlic tofu for up to three months. To do this, let the tofu cool completely. Then, place it in a freezer-safe bag. Remove as much air as possible before sealing. When you want to eat it, thaw it in the fridge overnight. Reheat it in the oven or air fryer for the best results. Avoid reheating from frozen to keep the texture nice and crispy. To make tofu crispy, start by pressing it to remove water. This step is vital. Use firm tofu for the best results. After pressing, cut the tofu into even cubes. Coat the cubes in cornstarch. This creates a crunchy layer. Heat oil in a skillet over medium-high heat. Fry the tofu in batches. Avoid overcrowding the pan. Cook until golden brown on each side. This method gives you that perfect crispy texture. Yes, you can use other sweeteners. Maple syrup is a great vegan option. Agave nectar works well too. Brown sugar can add a nice depth of flavor. Experiment with your favorite sweeteners. Just remember to adjust the amount based on sweetness. Crispy Honey Garlic Tofu pairs well with many sides. Serve it with steamed rice for a classic combo. Stir-fried vegetables add color and nutrition. Quinoa is a healthy grain option too. You can also add a fresh salad for crunch. Each of these options complements the sweet and savory sauce. Crispy tofu lasts about 3-4 days in the fridge. Store it in an airtight container. For maximum freshness, keep the sauce separate. Reheat in the oven for best results. This helps maintain the crispy texture. Yes, pre-made sauces can save time. Look for honey garlic or teriyaki sauces. These can add great flavor without extra work. Just check the ingredients for quality. Adjust your cooking time based on the sauce's thickness. This guide covered key steps for making crispy honey garlic tofu. You learned how to prepare ingredients, fry the tofu, and make a tasty sauce. I shared tips for extra crispiness and suggested easy variations. Remember, you can store leftovers well and enjoy them later. Cooking tofu can be simple and fun. With practice, you’ll master this dish and impress others with your skills. Enjoy every bite and keep experimenting with flavors!

Crispy Honey Garlic Tofu Quick and Easy Recipe

Want a tasty dish that’s quick and easy? You’re in the right place! This Crispy Honey Garlic Tofu recipe will

For this tasty dish, you need simple and fresh ingredients. Here’s what you will use: - 1 lb chicken or turkey sausage, sliced into rounds - 1 bell pepper (choose red, yellow, or orange), sliced into strips - 1 medium zucchini, sliced into half-moons - 1 cup cherry tomatoes, halved - 1 red onion, cut into wedges - 3 cloves garlic, minced These main ingredients bring great flavor and color to your meal. The sausage adds a savory taste, while the veggies provide crunch and freshness. Seasonings and oils make this dish shine. Here’s what you will add: - 1 tablespoon olive oil - 1 teaspoon smoked paprika - 1 teaspoon dried oregano - Salt and freshly ground black pepper, to taste Olive oil helps the ingredients roast well. Smoked paprika adds a warm, rich flavor. Dried oregano gives an herby touch. Salt and pepper enhance all the flavors. Garnishes are a great way to finish your dish. You can use: - Fresh parsley or basil, chopped Chopped herbs add a fresh taste and bright color. They make your meal look fancy and inviting. You can find the full recipe in the provided link. Enjoy your cooking! Start by washing all your veggies. I like to use a mix of colors for fun. Slice the chicken or turkey sausage into rounds. You can use any sausage you prefer. Next, take one bell pepper and slice it into strips. Any color works well. Then, slice one medium zucchini into half-moons. Halve one cup of cherry tomatoes and cut a red onion into wedges. Finally, mince three cloves of garlic. This will add a great flavor. In a large mixing bowl, combine all the sliced sausage and veggies. This is where the magic happens! Preheat your oven to 425°F (220°C). Line a big baking sheet with parchment paper. This helps with easy cleanup. Once your oven is ready, drizzle one tablespoon of olive oil over the mixture. Sprinkle one teaspoon of smoked paprika and one teaspoon of dried oregano. Add a pinch of salt and freshly ground black pepper to taste. Toss everything together until coated. Spread the mixture evenly on the baking sheet. Make sure not to crowd the pieces. They need space to roast well. Roast for about 25 to 30 minutes. Stir the mixture halfway through to help it brown evenly. You'll know it’s done when the sausage is cooked and the veggies are tender. After roasting, let the pan cool for a few minutes. Then, transfer the mixture to a serving dish. For a nice touch, garnish with chopped parsley or basil. This adds color and fresh flavor. You can serve this dish alone or with crusty bread. It makes a hearty meal that everyone will love. Enjoy your colorful creation! To get great results, cut the vegetables and sausage into similar sizes. This step helps them cook at the same rate. Spread everything out on the pan. Avoid crowding. If the pan is too full, some pieces won’t roast well. Stir the mixture halfway through cooking. This helps everything brown evenly and adds flavor. Using fresh herbs can boost the taste. Try adding thyme or rosemary for a fresh kick. You can also switch up the spices. For heat, add crushed red pepper flakes. A splash of balsamic vinegar before serving adds a nice tang. Don't forget to season well with salt and pepper. These simple changes make your dish pop! For a stunning look, serve the dish in a colorful bowl. A wooden platter can also work well. Garnish with fresh herbs like parsley or basil. Their bright green color adds a nice touch. You can even sprinkle some lemon zest on top for a bright finish. Remember, we eat with our eyes first! {{image_4}} You can use many types of sausage in this dish. Chicken or turkey sausage is great for a lean option. Pork sausage adds a richer flavor. If you like spice, try Italian sausage. For a unique touch, use smoked sausage for a deeper taste. Each option brings its own flavor and character to the meal. The beauty of this recipe is its flexibility with veggies. You can add carrots, broccoli, or asparagus for more color and taste. Sweet potatoes or butternut squash work well, too. They add a sweet note that pairs nicely with the sausage. Don't be afraid to mix and match your favorite vegetables to make it your own. If you enjoy heat, this dish can easily turn spicy. Add sliced jalapeños or red pepper flakes to bring the heat. You can also use spicy sausage as your base. For a smoky flavor, consider adding chipotle peppers in adobo sauce. These small changes can take your meal to a whole new level of flavor. For the full recipe, check out the main article. After enjoying your meal, store any leftovers in an airtight container. This keeps the sausage and veggies fresh for a few days. I recommend refrigerating them within two hours of cooking. You can safely keep the dish for up to three days. When you're ready to eat, just take it out and enjoy! If you want to save some for later, freezing is a great option. Let the dish cool completely before placing it in a freezer-safe container. Use a layer of plastic wrap followed by a lid to prevent freezer burn. It can last in the freezer for about three months. When you're ready to eat, thaw it in the fridge overnight before reheating. When reheating, you can use the oven or microwave. If using the oven, preheat it to 350°F (175°C). Place the leftovers in an oven-safe dish and cover it with foil. This keeps the moisture in. Heat for about 15-20 minutes. If you are using a microwave, use a microwave-safe bowl. Heat in short bursts, stirring in between, until hot. Enjoy your meal just like the first time! For the full recipe, check the earlier section. Cook your sausage and veggies for about 25 to 30 minutes. Start by preheating your oven to 425°F (220°C). Spread the mixture evenly on your baking sheet and roast. Halfway through, stir the mix to ensure even cooking. Check if the sausage is cooked through and the veggies are tender and slightly caramelized. Yes, you can use frozen vegetables! They are a great time-saver. Just keep in mind that frozen veggies may release more water while cooking. This can make the dish a bit soggy. To prevent this, roast them longer or increase the oven temperature by 25°F. This dish pairs well with many sides. Consider serving it with: - Warm crusty bread - A fresh green salad - Quinoa or rice for a hearty meal - Mashed potatoes for comfort food You can also enjoy it as a filling in wraps or sandwiches. For the full recipe, check out the detailed instructions above. Sheet pan sausage and veggies is simple and fun to make. We’ve covered the key ingredients, cooking steps, and helpful tips. Remember, you can switch up sausages and veggies for variety. Store leftovers for easy meals later. Enjoy this dish with family or friends and impress them with your cooking skills. You’ll find that this recipe is not just a meal, but a delightful way to share. Happy cooking!

Satisfying Sheet Pan Sausage and Veggies Recipe

Are you looking for a quick and tasty meal? This Satisfying Sheet Pan Sausage and Veggies Recipe is an easy

- Store-bought flatbreads or naan - Marinara sauce options (homemade vs. store-bought) - Fresh mozzarella cheese details To make Quick Margherita Flatbread, start with the right base. You can use store-bought flatbreads or naan. They save time and taste great. Choose a good quality marinara sauce. You can use homemade sauce or a high-quality store-bought option. Homemade is always fresh, but store-bought is a quick choice. Next, fresh mozzarella cheese is key. Use mozzarella that is soft and creamy. It melts well and adds flavor. Slicing it thin helps it melt evenly. - Cherry tomatoes - Fresh basil leaves - Olive oil and seasonings For extra flavor, consider adding cherry tomatoes. They bring a sweet, juicy burst to each bite. Fresh basil leaves add a lovely aroma and brightness. Drizzling olive oil enhances the taste and gives a nice finish. You can also sprinkle on salt and pepper to boost the flavors. If you like, add dried oregano for an extra hint of spice. These ingredients create a flatbread that is simple yet tasty. You can find the Full Recipe for detailed steps to bring this dish to life. First, preheat your oven to 450°F (232°C). This step is key to getting a nice, crispy flatbread. A hot oven helps the cheese melt well and the edges turn golden. Next, take a baking sheet and line it with parchment paper. This will stop the flatbreads from sticking, making cleanup easier. Now it's time to build your flatbreads. Use a spoon or spatula to spread marinara sauce evenly on each flatbread. Make sure to leave a small edge for a pretty crust. After that, layer fresh mozzarella slices on top of the sauce. Distribute the cheese evenly so every bite is cheesy. Then, scatter halved cherry tomatoes on the cheese. Season with salt and pepper to brighten the flavors. If you like, sprinkle some dried oregano for an extra kick. Slide the baking sheet into your hot oven. Bake for 10 to 12 minutes. Look for melted cheese that is bubbling and edges that are golden brown. When it's done, carefully take the flatbreads out and let them cool for about a minute. To finish, garnish with fresh basil leaves. This will give your flatbread a lovely aroma and fresh taste. Slice into wedges and enjoy your creation! For more details on the ingredients and steps, you can refer to the Full Recipe. - How to achieve a crispy crust: Start with a hot oven. Preheat it to 450°F (232°C). This high heat helps the flatbread crisp up nicely. Place the flatbread directly on the oven rack for the last few minutes of baking. This ensures even heat and a crunchy base. - Choosing the right mozzarella: Use fresh mozzarella for that creamy texture. It melts beautifully and adds rich flavor. Look for mozzarella packed in water. It has the best taste and moisture level. Avoid shredded mozzarella, as it can dry out in the oven. - Overloading on toppings: It’s tempting to pile on the toppings, but less is more. Too many toppings can lead to a soggy flatbread. Stick to a few key ingredients. You want to enjoy every bite without losing the flatbread's crunch. - Not preheating adequately: Preheating is key to a great flatbread. If you skip this step, your flatbread won't cook evenly. Always give your oven enough time to reach the right temperature before baking. - Pairing your flatbread with sides: Serve your flatbread with a simple salad. A fresh arugula or mixed green salad complements the rich flavors. You can also try a light soup, like tomato basil, for a comforting meal. - Creative presentation ideas: Slice your flatbread into wedges and arrange them on a colorful plate. Add a small bowl of marinara sauce for dipping. You can also sprinkle extra basil on top for a pop of color and flavor. {{image_4}} You can have fun with your flatbread by adding different toppings. Try bright bell peppers for crunch or salty olives for flavor. Both add a nice touch. You can also swap cheeses. Provolone gives a nice sharpness, while goat cheese adds creaminess. Each option brings its own taste to your flatbread. If you're gluten-free, look for flatbreads made from almond or rice flour. These options taste great and keep the spirit of the dish. For a vegan version, switch out the mozzarella for vegan cheese. There are many tasty alternatives made from nuts or soy. This way, everyone can enjoy the flatbread. Use fresh, seasonal ingredients to change your flatbread. In spring, add asparagus or artichokes for a fresh taste. Summer calls for ripe heirloom tomatoes and zucchini. In fall, think about roasted pumpkin or squash. Winter can bring hearty greens like kale or spinach. For festive times, top with cranberries or a drizzle of balsamic glaze. These ideas keep your flatbread exciting all year long. To keep your Quick Margherita Flatbread fresh, use an airtight container. This will prevent moisture from ruining the texture. If you plan to eat the leftovers soon, store them in the fridge. They will stay good for about three days. For longer storage, freeze the flatbread. Wrap it tightly in plastic wrap, then place it in a freezer-safe bag. This method helps keep the flavors intact. When reheating, you want to keep the flatbread crisp. The best way to do this is in the oven. Preheat the oven to 350°F (175°C). Place the flatbread on a baking sheet and heat for about 10 minutes. If you're in a hurry, you can use a microwave. Put a paper towel under the flatbread to absorb moisture. Heat for about 30 seconds to 1 minute. However, this may make it softer. In the fridge, your flatbread will last about three days. If you freeze it, it can last up to three months. Always check for signs of spoilage. Look for mold or a sour smell. If you see or smell anything off, it’s best to throw it away. For more details, check out the Full Recipe. It takes about 22 minutes to make this flatbread. - Prep time: 10 minutes - Cook time: 12 minutes You can whip it up quickly. This makes it a great choice for busy nights. Yes, you can use homemade marinara sauce. - Fresh flavors: Homemade sauce tastes great and is healthier. - Control: You can adjust spices and sweetness. Store-bought sauce can work too, but homemade gives a special touch. You can serve many things with flatbread. Here are some ideas: - Salads: A simple green salad adds freshness. - Dips: Pair with hummus or tzatziki for extra flavor. - Vegetables: Roasted veggies make a nice side. Feel free to mix and match to find your favorites! In this post, we covered all you need for making Quick Margherita Flatbread. You learned about the key ingredients, from flatbreads to mozzarella. We shared steps for baking and tips to avoid common mistakes. You saw various ways to customize your flatbread to fit any diet. Lastly, we discussed how to store leftovers properly. With these insights, you can create a tasty meal that suits your tastes. Enjoy your flatbread, and don't hesitate to experiment with different toppings!

Quick Margherita Flatbread Simple and Tasty Recipe

Are you craving a quick and tasty meal? Let me introduce you to the Quick Margherita Flatbread recipe! This dish

To make the best Chocolate Chip Banana Muffins, you need a few key ingredients. Here’s what you will need: - 2 ripe bananas, thoroughly mashed - 1/3 cup coconut oil, melted - 1/2 cup packed brown sugar - 1 large egg, at room temperature - 1 teaspoon pure vanilla extract - 1 teaspoon baking soda - A pinch of salt - 1 cup all-purpose flour - 1/2 cup semi-sweet chocolate chips These ingredients work together to create a moist and flavorful muffin. The ripe bananas provide natural sweetness and moisture. The coconut oil adds a subtle flavor and helps keep the muffins tender. The chocolate chips bring that classic touch we all love. You can add some optional ingredients to give your muffins extra texture and flavor: - 1/4 cup chopped walnuts (optional, for added texture) Walnuts add a nice crunch and pair well with the soft texture of the muffins. If you want more flavor, you can also try adding shredded coconut or even some dried fruit. If you have allergies or dietary restrictions, there are some easy substitutions you can make: - Egg: Use a flax egg (1 tablespoon ground flaxseed mixed with 2.5 tablespoons water) or unsweetened applesauce (1/4 cup). - Coconut oil: Replace it with unsalted butter or vegetable oil. - All-purpose flour: Use a gluten-free flour blend if needed. These swaps still keep the muffins delicious while catering to your needs. For the full recipe, check out the Choco-Banana Delight Muffins guide. To make these chocolate chip banana muffins, you need to gather your ingredients first. Here’s what you need: - 2 ripe bananas, thoroughly mashed - 1/3 cup coconut oil, melted - 1/2 cup packed brown sugar - 1 large egg, at room temperature - 1 teaspoon pure vanilla extract - 1 teaspoon baking soda - A pinch of salt - 1 cup all-purpose flour - 1/2 cup semi-sweet chocolate chips - 1/4 cup chopped walnuts (optional, for added texture) This will help ensure a smooth cooking process. 1. Preheat the oven to 350°F (175°C). This step is key for even baking. 2. Prepare the muffin tin by lining it with paper liners or greasing it lightly. This helps with easy muffin removal. 3. Mix the wet ingredients: In a large bowl, mash the ripe bananas. Stir in the melted coconut oil until smooth. 4. Add sugar, egg, and vanilla: Gradually mix in the brown sugar. Then, add the egg and vanilla extract. Blend everything together until it’s uniform and creamy. 5. Combine the dry ingredients: In a separate bowl, whisk the baking soda, salt, and flour. This helps distribute the baking soda evenly. 6. Mix dry into wet: Slowly stir the dry mix into the wet ingredients. Be careful not to overmix; this keeps the muffins light and fluffy. 7. Fold in chocolate chips and walnuts: Gently add the chocolate chips and walnuts (if using). Make sure they are evenly spread in the batter. 8. Fill the muffin cups: Using a spoon or ice cream scoop, fill each cup about two-thirds full. This gives the muffins space to rise. 9. Bake: Place the muffin tin in the oven and bake for 18-20 minutes. Use a toothpick to check for doneness; it should come out clean. 10. Cool the muffins: Once baked, let them cool in the tin for 5 minutes. Then, transfer them to a wire rack to cool completely. - Use ripe bananas: The riper the bananas, the sweeter your muffins will be. They should have lots of brown spots. - Don’t overmix: Mixing too much can make the muffins tough. Stir just until combined. - Check for doneness: Ovens can vary. Start checking your muffins a few minutes early. - Cool completely: Allowing them to cool helps maintain the texture. Enjoy them warm, or let them cool for later. You can find the full recipe for these yummy pastries here. To get the best muffin texture, start with ripe bananas. They add sweetness and moisture. Mash them well, but don’t overmix the batter. Mix just until combined. This helps keep your muffins fluffy. Also, make sure your oven is preheated. A hot oven gives your muffins a nice rise and a golden top. If you have leftover muffins, store them in an airtight container. Keep them at room temperature for up to three days. For longer storage, wrap them tightly in plastic wrap and freeze them. When you want to enjoy a muffin, heat it in the microwave for about 15 seconds. This brings back the warmth and softness. Overripe bananas are perfect for this recipe. They have more sugar and flavor. If you have bananas that are too ripe, don’t throw them away! You can freeze them. Just peel and place them in a bag. When you’re ready to bake, thaw them and mash. This will make your muffins even tastier. For the full recipe, check out Choco-Banana Delight Muffins. {{image_4}} You can make these muffins healthier. Use whole wheat flour instead of all-purpose flour. This adds fiber and nutrients. If you want to cut sugar, try using applesauce or a sugar substitute. Both options keep the muffins moist and tasty. You can add fun seasonal flavors to these muffins. In the fall, try pumpkin spice. Just mix in one teaspoon of pumpkin pie spice. In the spring, add a hint of cinnamon or nutmeg. This brings a new twist to the classic recipe. Mix-ins can change the taste of your muffins. Here are some ideas: - Nuts: Walnuts or pecans add crunch. - Fruits: Chopped apples or berries give extra flavor. - Spices: A dash of cinnamon or ginger can warm up the treats. Feel free to get creative! You can find the full recipe in the article to start baking. After you bake the muffins, let them cool. Place the muffins in an airtight container. This helps keep them fresh. You can store them at room temperature for up to three days. If you want them to last longer, place them in the fridge. They can stay good in the fridge for about a week. To freeze muffins, wait until they cool completely. Wrap each muffin in plastic wrap. Then, place them in a freezer bag. Make sure to remove as much air as possible. You can freeze them for up to three months. When you want to eat one, just take it out and let it thaw at room temperature. You can also warm it in the microwave for about 15 seconds. Fresh muffins smell sweet and have a soft texture. Look for a golden brown color on top. If they feel hard or dry, they may be stale. Check for any mold or off smells. If you see mold or smell something funny, it’s best to throw them away. Always trust your senses when deciding if your muffins are still good to eat. You can make muffins without eggs by using simple substitutes. Common options include applesauce, mashed bananas, or yogurt. For this recipe, use 1/4 cup of unsweetened applesauce instead of one egg. This keeps the muffins moist and tasty. You can also use flaxseed meal mixed with water. Mix one tablespoon of flaxseed meal with three tablespoons of water. Let it sit for a few minutes to thicken. This works great and adds nutrition. Yes, you can replace chocolate chips with other tasty options. Try nuts, dried fruits, or seeds. Chopped nuts like walnuts or pecans add crunch. Dried fruits like raisins or cranberries can add sweetness. You can also use white chocolate chips for a different flavor. If you want a healthier option, try dark chocolate chips. Experiment with your favorite flavors to make the recipe yours. To mash bananas, start with ripe bananas. Ripe bananas have more flavor and sweetness. Place them in a bowl and use a fork or potato masher. Mash until they are smooth with few lumps. You can also use a food processor for a quicker option. Just pulse the bananas until they reach a creamy texture. This helps the bananas mix well into the batter. For the best results, use about 2 ripe bananas for this recipe. You can find the full recipe for Chocolate Chip Banana Muffins online for more details. In this post, we explored making chocolate chip banana muffins, focusing on key ingredients, baking steps, and helpful tips. I shared ideas for healthier alternatives and seasonal flavors. Remember, overripe bananas are perfect for this recipe. Store your muffins properly to keep them fresh for longer. With these insights, you can enjoy delicious muffins anytime. Baking should be fun and simple, so get cooking!

Chocolate Chip Banana Muffins Simple and Tasty Treat

Are you ready to bake some delicious Chocolate Chip Banana Muffins? These treats are easy to make, and they taste

- 2 grilled chicken breasts, sliced into strips - 4 large romaine lettuce leaves, thoroughly washed and dried - 1 cup cherry tomatoes, cut in half - ½ cup grated Parmesan cheese, plus extra for garnish - ½ cup Caesar dressing (either store-bought or homemade) - 1 cup whole grain croutons, preferably crispy - 4 whole wheat tortillas, large - Salt and freshly ground black pepper to taste - Optional: ¼ cup sliced black olives or capers for added zing Gather these items for a fun cooking experience. I love using grilled chicken for its flavor. Fresh romaine lettuce adds a nice crunch. Cherry tomatoes bring a sweet and tangy taste. Parmesan cheese gives a rich flavor. The croutons add a delightful crunch to each bite. Whole wheat tortillas are my choice for a healthy wrap. Use salt and pepper to make your flavors pop. You can add olives or capers if you want an extra kick. These ingredients make a great mix for my Crunchy Chicken Caesar Wraps. For the full recipe, check out the detailed steps to create this easy meal. Enjoy the process and the tasty results! - Combine chicken, tomatoes, cheese, and croutons in a bowl. - Drizzle and toss with Caesar dressing. - Season with salt and pepper. Start by cutting your grilled chicken into strips. Then, grab a big bowl and mix it with cherry tomatoes, grated Parmesan cheese, and croutons. Drizzle the Caesar dressing on top. Toss everything until it’s coated. Taste it and add salt and pepper as needed. - Layer romaine lettuce on tortillas. - Distribute chicken Caesar mixture over lettuce. - Add optional black olives or capers. Now, take your whole wheat tortillas and lay them flat. Place a large romaine lettuce leaf on each tortilla. Spread the chicken Caesar mixture over the lettuce. You can sprinkle sliced black olives or capers on top for extra zing if you like. - Fold sides of tortillas inward. - Roll tightly from bottom to top. - Slice in half for serving. To wrap, fold the sides of each tortilla inward. Then, roll them tightly from the bottom up. This keeps all the yummy filling inside. After that, slice each wrap in half for easy eating. Enjoy your crunchy Chicken Caesar Wraps! For the full recipe, check out the earlier section. - Use grilled chicken for flavor and tenderness. The grill adds a nice smoky taste. - Don’t overdress the mixture to avoid sogginess. A little dressing goes a long way. - Adjust seasoning to taste. Start with salt and pepper, then tweak it as you like. - Plate wraps with a sprinkle of Parmesan cheese. It looks great and adds flavor. - Serve with extra Caesar dressing for dipping. This will enhance each bite. - Pair with a side salad for a complete meal. A fresh salad complements the wraps well. These tips will help you create the best Crunchy Chicken Caesar Wraps. Enjoy the process and have fun in the kitchen! For the complete recipe, check out the Full Recipe. {{image_4}} You can easily swap ingredients to change the flavor. Here are some ideas: - Use shrimp or tofu instead of chicken. Both add a unique twist. - Substitute regular lettuce with kale or spinach for a nutrient boost. - Experiment with different dressings like ranch or vinaigrette. Each adds its own flair. Making these wraps fit your diet is simple: - For a gluten-free option, use corn tortillas. They hold the filling well. - Opt for vegan ingredients and dressings for a plant-based meal. - Try a low-carb variation by using lettuce wraps instead of tortillas. This keeps it light and fresh. Each variation allows you to enjoy Crunchy Chicken Caesar Wraps in new ways. You can find the full recipe linked above. To keep your wraps fresh, place them in an airtight container. This helps prevent moisture loss. You can refrigerate them for up to 2 days. Eat them within this time for the best taste and texture. If you want to keep them longer, consider freezing the filling separately. If you need to heat them up, use a microwave for a quick heat-up. Be careful, as this may make the wraps soggy. For a crispy texture, reheat in the oven. Set the oven to 350°F (175°C) and heat for about 10 minutes. This will help restore some crunch. Enjoy your savory wraps again! Can I make Crunchy Chicken Caesar Wraps ahead of time? Yes, you can prepare these wraps ahead. Just keep the filling separate from the tortillas. This keeps everything fresh and crunchy. When ready to eat, assemble the wraps in minutes. What are the best sides to serve with these wraps? Great sides include a fresh salad, sweet potato fries, or a light soup. Each adds a nice balance to the meal. You can also serve extra Caesar dressing for dipping. How can I make a vegetarian version of this recipe? To make it vegetarian, swap the chicken for grilled veggies, chickpeas, or tofu. Use a plant-based Caesar dressing to keep the flavors. This way, you get a tasty, satisfying wrap without meat. How can I add more flavor to my wraps? You can add flavor by using herbs like basil or cilantro. A squeeze of lemon juice can brighten up the taste too. Consider adding spices like paprika or garlic powder for extra zing. Can I freeze these wraps for later? Yes, you can freeze the wraps. Wrap each one tightly in plastic wrap. Store them in a freezer-safe bag. When ready to eat, thaw them in the fridge overnight before enjoying. What are the topping options for extra crunch? For extra crunch, try adding sliced almonds, sunflower seeds, or crispy bacon bits. You can also use crispy fried onions or extra croutons on top. Each option adds a fun texture! For the full recipe, check the section above! This post guided you through making Crunchy Chicken Caesar Wraps. We covered the ingredients, preparation steps, tips for perfect wraps, and suggested variations. You learned how to store leftovers and reheat them for best results. Remember, you can easily customize this recipe to fit your tastes or dietary needs. Now, you can enjoy a fun, delicious meal right at home! Get creative and make it your own!

Crunchy Chicken Caesar Wraps Easy and Flavorful Meal

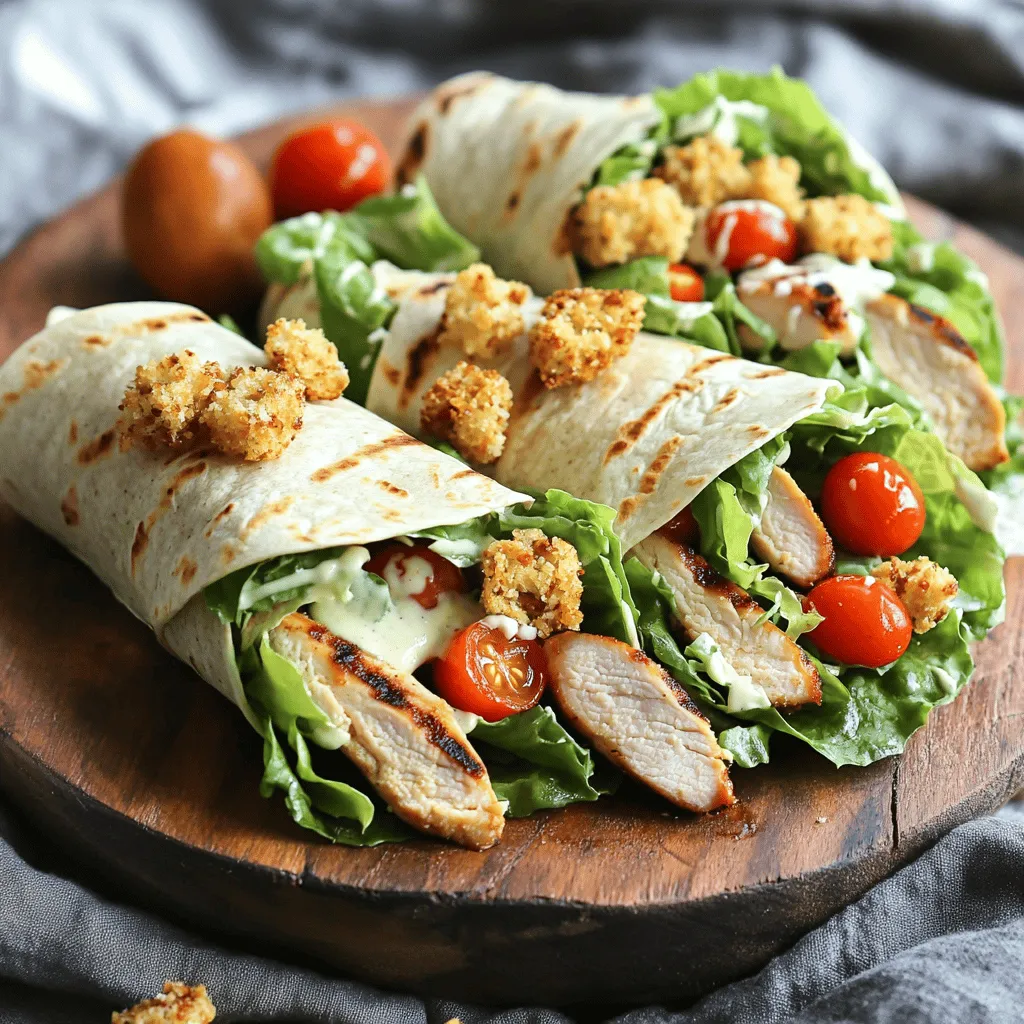
Looking for a quick, tasty meal idea? Crunchy Chicken Caesar Wraps are your answer! This easy recipe is bursting with

To make classic French toast, you need a few key ingredients. Here’s what you will need: - 4 slices of thick brioche or challah bread - 2 large eggs - 1/2 cup milk (your choice: whole, almond, oat, etc.) - 1 teaspoon pure vanilla extract - 1 teaspoon ground cinnamon - 1 tablespoon granulated sugar (optional) - Pinch of salt - 2 tablespoons unsalted butter - Maple syrup, for drizzling - Fresh fruit (such as strawberries, blueberries, or banana slices), for garnish - Powdered sugar, for dusting (optional) These ingredients create a rich and satisfying dish. Use thick bread for the best texture. Brioche and challah work well because they soak up the egg mixture nicely without falling apart. You can easily swap some ingredients if you need to. Here are a few ideas: - Bread: Use any bread you like, such as sourdough or whole grain. - Milk: Replace dairy milk with any plant-based milk like almond or oat milk. - Eggs: For a vegan option, try using flaxseed meal or mashed bananas instead of eggs. - Sugar: If you want to cut sugar, skip it or use a sugar substitute. - Fruit: Use any seasonal fruit for garnish. Apples, peaches, or even a fruit compote work well. These swaps can keep the dish fun and fresh. Don’t be afraid to get creative with what you have. To make French toast, you’ll need a few simple tools: - Large mixing bowl - Whisk or fork - Non-stick skillet or griddle - Measuring cups and spoons - Spatula Having the right equipment makes cooking easier. A non-stick skillet helps prevent the French toast from sticking. This way, you can flip it easily and achieve that lovely golden color. For the full recipe, check out the detailed cooking instructions. Start by gathering your ingredients. You need thick brioche or challah bread, eggs, milk, vanilla extract, ground cinnamon, sugar, and salt. In a large bowl, whisk together the eggs and milk. Add the vanilla, cinnamon, sugar, and a pinch of salt. Mix until it looks smooth and frothy. This step is key for a tasty French toast. Next, heat a non-stick skillet over medium heat. Add a tablespoon of unsalted butter and let it melt. Take a slice of bread and dip it into the egg mixture. Soak it for about 10-15 seconds on each side. Be careful not to make it too soggy. Place the soaked bread on the hot skillet. Cook for about 3-4 minutes until it turns golden brown. Flip it and cook the other side. Repeat this for all slices, adding more butter as needed. Once cooked, stack your French toast on a plate. Drizzle with maple syrup and add fresh fruit like strawberries or bananas. If you want, dust with powdered sugar for a neat touch. This makes it not just tasty but also beautiful. For a fun twist, serve extra syrup on the side for dipping. Enjoy your Golden Bliss French Toast with family or friends. For more details, check the Full Recipe. To get French toast just right, choose thick bread. Brioche or challah works best. Soak the bread slices in the egg mixture for only 10-15 seconds. If you soak too long, the bread may fall apart. Heat your skillet to medium. Use enough butter to coat the pan. Cook each slice for about 3-4 minutes per side. Look for a golden brown color. That’s the sign of a well-cooked piece. To make your French toast shine, think about flavors. Adding vanilla extract gives warmth. Cinnamon adds a nice spice. You can also try nutmeg or cardamom for something different. For sweetness, consider using maple syrup or honey. Fresh fruits like berries or bananas add a bright touch. You can sprinkle powdered sugar on top for a fancy finish. How you serve French toast can make a big difference. Stack the slices high on a plate. Top with fresh fruit and a drizzle of syrup. For fun, place a small bowl of syrup on the side. This way, people can dip their toast. You can also dust it with powdered sugar. A little decoration makes it look special. For more ideas, check out the Full Recipe for a feast for the eyes and the taste buds. {{image_4}} Stuffed French toast adds a fun twist to the classic dish. You can fill it with cream cheese, Nutella, or fresh fruit. For a simple cream cheese filling, mix the cheese with a bit of sugar and vanilla. Spread this mixture between two slices of bread before soaking them in the egg mixture. Cook as usual for a warm, gooey center. For a fruity option, add sliced strawberries or bananas inside the bread. This makes each bite extra special. You can enhance your French toast with spices and extracts. Besides cinnamon, try nutmeg or cardamom for a warm flavor. A splash of almond extract adds a nice touch, too. You can even use cocoa powder for a chocolate twist. Just mix these into the egg mixture for an exciting flavor profile. This lets you customize your dish based on your mood or what you have at home. Toppings can transform your French toast into a masterpiece. Classic maple syrup is always a hit, but consider fresh fruit, whipped cream, or even yogurt. Sprinkle some chopped nuts for crunch or a drizzle of chocolate sauce for sweetness. You can also use flavored syrups, like raspberry or caramel, for a twist. Don’t forget a dusting of powdered sugar for a beautiful finish. These toppings let you create a personalized breakfast that feels gourmet. For a complete recipe, check out the Full Recipe above. To store leftover French toast, let it cool first. Place the slices in an airtight container. You can keep it in the fridge for up to three days. If you want to keep it longer, consider freezing instead. Reheat French toast in several ways. For the best results, use an oven. Preheat it to 350°F (175°C). Place the slices on a baking sheet and heat for about 10 minutes. You can also use a toaster. Just toast each slice until warmed through. A microwave can work too, but it may make the toast soggy. Freezing French toast is easy. After cooling, wrap each slice in plastic wrap. Then, place them in a freezer bag. They can last up to two months in the freezer. When you're ready to eat, just reheat them as mentioned above. This way, you can enjoy your golden bliss French toast whenever you crave it! You can make egg-free French toast using a simple mixture. Combine 1 cup of milk with 1 tablespoon of cornstarch and 1 teaspoon of vanilla extract. Whisk well until smooth. This mixture binds well and gives a nice texture. Use it to soak your bread for tasty results. You may need to adjust the soaking time. Let the bread soak for about 5-10 seconds on each side. This method works great with almond milk, oat milk, or any milk you prefer. Yes, whole grain bread works well for French toast. It adds fiber and a nutty flavor. Whole grain bread absorbs the mixture nicely, giving a hearty bite. Choose a thick slice for best results. The crusty edges add a nice texture, too. If you want a milder taste, consider using a lighter whole grain bread. Just remember to soak it properly without oversaturating. French toast dates back to ancient Rome. They used stale bread soaked in milk and eggs. It was a way to avoid waste. The dish spread through Europe, gaining popularity in France. Today, many cultures have their own versions. In America, we enjoy it as a sweet breakfast. People often top it with syrup, fruit, and powdered sugar. The classic dish has evolved, but its charm remains. For the full recipe to make classic French toast, check the section above. This post covered key ingredients, cooking steps, tips, and variations for French toast. You can now easily make this dish, even without eggs or with whole grain bread. Focus on achieving that perfect cook and enhancing flavors for a delicious twist. Remember to store leftovers properly and enjoy them later. French toast is not just tasty; it has a rich history. With these insights, you're ready to impress at your next breakfast or brunch. Enjoy the process and the delicious results!

Classic French Toast Irresistible Breakfast Delight

Are you ready to whip up the perfect breakfast? Classic French Toast is a delightful treat that anyone can make!

Older posts
Newer posts
← Previous Page1 … Page44 Page45 Page46 … Page68 Next →

dsad

© 2025 tastymomrecipes • Built with GeneratePress

Our Policies

  • Copyright Policy
  • Cookie Policy
  • GDPR Policy
  • Privacy Policy
  • Disclaimer
  • Terms Of Use

More Information

  • Home
  • About
  • Contact
  • Appetizers
  • Dessert
  • Dinner
  • Drinks
©2025, tastymomrecipes About Back To Top