Skip to content
DisclaimerTerms Of UseGDPR PolicyCookie Policy

tastymomrecipes

  • Home
  • Drinks
  • Appetizers
  • Dinner
  • Dessert
  • About
  • Contact
  • Privacy Policy
DisclaimerTerms Of UseGDPR PolicyCookie Policy

Olivia

- 2 cups all-purpose flour - 1 tablespoon baking powder - 1 teaspoon baking soda - 1 teaspoon salt - 1/4 cup unsalted butter, chilled and cubed - 3/4 cup buttermilk (plus a splash for brushing) - 1 tablespoon honey (optional) Using a kitchen scale helps you measure flour accurately. This can make a big difference. It ensures the right texture for your biscuits. Chilling the butter is key. Cold butter creates steam during baking. This steam makes your biscuits fluffy and light. If you don’t have buttermilk, you can use milk mixed with lemon juice or vinegar. Just let it sit for five minutes before using it. For gluten-free options, look for all-purpose gluten-free flour blends. This way, you can enjoy biscuits without gluten. Start by preheating your oven to 450°F (230°C). This hot oven helps the biscuits rise well. Line a baking sheet with parchment paper to stop sticking. In a large mixing bowl, gather your dry ingredients: 2 cups of all-purpose flour, 1 tablespoon of baking powder, 1 teaspoon of baking soda, and 1 teaspoon of salt. Whisk these dry items together until they mix evenly. This step is key for a good biscuit texture. Now, let’s add the butter. You’ll need 1/4 cup of unsalted butter, chilled and cubed. Use a pastry cutter or your fingers to blend the butter into the flour mixture. Aim for a crumbly texture that looks like coarse crumbs. You should see bits of butter the size of peas. This step keeps the biscuits light and fluffy. Next, create a well in the center of your dry mixture. Pour in 3/4 cup of buttermilk gently. Mix with a spatula or wooden spoon until a soft dough starts to form. Be careful not to overmix. Overmixing makes biscuits tough. You want a soft and slightly sticky dough. Transfer the dough to a lightly floured surface. Use your hands to pat it into a rectangle that’s about 1 inch thick. Patting helps keep the dough light. Now, grab a biscuit cutter or glass. Cut out rounds from the dough. If you have scraps, knead them gently and cut more biscuits. Arrange the biscuits on the prepared baking sheet. Place them close together but not touching. For a nice golden top, brush the biscuits with a splash of buttermilk. Bake in the preheated oven for 12-15 minutes. Watch for golden brown tops and a lovely rise. The smell will fill your kitchen, making it hard to wait! For the full recipe, check out the detailed instructions above. Enjoy making these fluffy buttermilk biscuits! To get those light and fluffy layers, cold ingredients are key. Use chilled butter and buttermilk. Cold butter creates pockets of steam, making the biscuits rise beautifully. When you mix in the butter, aim for small pea-sized pieces. This helps build those tender layers. To achieve layers, gently pat the dough rather than rolling it out. This keeps the air in the dough. Fold the dough over itself a couple of times. Each fold adds more layers. When you cut the biscuits, press straight down without twisting the cutter. Twisting seals the edges and prevents rising. One big mistake cooks make is overworking the dough. Mixing too much can make your biscuits tough. Just mix until the dough comes together, then stop. Another mistake is not checking your oven temperature. An oven that is too hot or too cold affects baking. Use an oven thermometer to ensure accurate heat. Baking at the right temperature is crucial for that perfect rise and golden color. For biscuit making, a few tools make the process easier. A mixing bowl, a pastry cutter, and a biscuit cutter are essentials. A spatula helps in combining the ingredients smoothly. When choosing a biscuit cutter, look for one with sharp edges. This helps cut the dough cleanly. Avoid using a dull cutter, as it can seal the edges. A round cutter works best, but you can also try fun shapes! {{image_4}} You can make your fluffy buttermilk biscuits even more exciting. Add herbs like rosemary or thyme for a savory twist. Cheese, such as cheddar, melts perfectly inside. You can also create sweet versions. Mixing in a bit of cinnamon or chocolate chips adds a fun flavor. These options allow you to enjoy biscuits in many ways. If you want to make vegan biscuits, use coconut oil instead of butter. For buttermilk, almond milk with a splash of vinegar works great. You can also explore low-carb options. Almond flour can replace regular flour for a tasty, healthier treat. These changes keep the joy of biscuits while meeting your needs. Warm biscuits taste heavenly with a pat of butter and your favorite jam. They also pair well with soups or stews, adding comfort to your meal. Enjoy them with a cup of hot tea or coffee. You can even serve them alongside fried chicken for a delightful brunch. These biscuits are perfect for any time of the day. For the full recipe, click here. To keep your fluffy buttermilk biscuits fresh, store them at room temperature. Place the biscuits in an airtight container. This method helps maintain their light texture. You can also wrap them in a clean kitchen towel. Avoid plastic wrap, as it can trap moisture and make them soggy. For best results, eat them within two days. If you want to enjoy your biscuits later, freezing is the way to go. First, let them cool completely after baking. Then, wrap each biscuit tightly in plastic wrap. After that, place the wrapped biscuits in a freezer bag. This keeps air out and prevents freezer burn. When you’re ready to eat them, remove the biscuits from the freezer. Let them thaw in the fridge overnight. To reheat, place them in a 350°F (175°C) oven for about 10 minutes. This restores their fluffy texture and warms them through. How long do biscuits last? When stored properly at room temperature, they stay fresh for about 2 days. If frozen, biscuits can last up to 3 months without losing quality. Always check for any off smells or changes in texture before eating. Enjoy your fluffy buttermilk biscuits at their best! For the full recipe, refer to the earlier section. To make your biscuits more tender, use cold butter. Cold butter helps create layers. Avoid overmixing the dough, as this can toughen the biscuits. Gently handle the dough for the best texture. Each step you take matters in the process. Yes, you can make the dough ahead of time! After mixing, wrap the dough tightly in plastic wrap. Store it in the fridge for up to 24 hours. When ready to bake, simply roll it out and cut the biscuits. This saves time and keeps the fresh taste. If your biscuits are not rising, check your baking powder and baking soda. Old or expired leavening agents can cause flat biscuits. Also, ensure your oven is preheated properly. The heat helps the biscuits rise quickly. Lastly, avoid overmixing, as this can affect the rise. Using buttermilk adds a great flavor and tenderness to your biscuits. It reacts with baking soda, creating a nice lift. If you don’t have buttermilk, you can make a substitute. Mix 3/4 cup milk with 1 tablespoon of vinegar or lemon juice. Let it sit for a few minutes. Absolutely! You can double the recipe for more biscuits. Just keep the same ratios for all your ingredients. Make sure your mixing bowl is big enough. This way, you’ll have plenty to share with friends and family. Enjoy a larger batch of fluffy buttermilk biscuits! Making fluffy biscuits is simple with the right steps. We reviewed key ingredients, measurement tips, and substitutions. You learned how to mix and shape the dough effectively. Tips on achieving the perfect texture and avoiding common mistakes will lead you to success. Remember, variations let you get creative while serving suggestions help you enjoy your biscuits even more. Store them properly to keep them fresh. With these insights, you're ready to bake delicious biscuits that impress. Enjoy every bite and share them with others!

Fluffy Buttermilk Biscuits Comforting and Light Treat

If you’re craving something warm and comforting, look no further than fluffy buttermilk biscuits. With just a few simple ingredients,

- 2 boneless, skinless chicken breasts - 1 cup quinoa or brown rice, cooked and fluffy - 1 can black beans, rinsed and drained - 1 cup sweet corn - 1 ripe red bell pepper, diced - 1 ripe avocado, diced - 1 cup cherry tomatoes, halved - Fresh cilantro, for garnish - Lime wedges, for serving - 1 tablespoon extra virgin olive oil - 1 teaspoon chili powder - 1 teaspoon ground cumin - 1 teaspoon garlic powder - Salt and freshly ground black pepper These ingredients make the Easy Chicken Burrito Bowls simple and tasty. Using chicken breasts gives a lean protein. Quinoa or brown rice adds a nice base that fills you up. The black beans and corn bring fiber and sweetness. Fresh veggies like bell pepper, avocado, and tomatoes add flavor and color. Don't forget the lime! It adds a bright zing that makes each bite special. With these tools and ingredients, you can make a meal that looks great and tastes even better. For the full recipe, check the details above. To start, season the chicken breasts with olive oil and spices. I like to use chili powder, ground cumin, and garlic powder. Sprinkle salt and pepper over both sides. Rub the spices into the chicken to enhance the flavor. Next, cook the chicken in a hot skillet. Heat the skillet to medium-high. Add the chicken and sear it for 6-7 minutes per side. Look for a golden brown color. Make sure it reaches an internal temperature of 165°F (75°C). Once cooked, take the chicken out and let it rest for 5 minutes. This step keeps it juicy when you slice it. While the chicken cooks, prepare your grains. You can use quinoa or brown rice. Follow the package instructions to ensure they come out fluffy. Timing is key here. Make sure the grains are ready when the chicken is done. In a large bowl, combine your vegetables. Use one can of black beans, rinsed and drained. Add sweet corn, diced red bell pepper, and halved cherry tomatoes. Mix gently so all ingredients blend well. This colorful mix adds great taste and nutrition. Now it’s time to build your burrito bowls. Start with a scoop of quinoa or rice in each bowl. Next, add the vegetable mixture on top. Then, slice the rested chicken into thin strips and layer it over the veggies. For a finishing touch, add diced avocado. It gives a nice pop of color and creaminess. Sprinkle fresh cilantro over the top for added flavor. Serve your burrito bowls with lime wedges on the side. A squeeze of lime adds a zesty kick. It brightens up all the flavors and makes the meal even more enjoyable. Enjoy your colorful, tasty chicken burrito bowls! For the complete recipe, check out the Full Recipe section. - Always check that chicken reaches 165°F (75°C) for safe eating. - Let chicken rest for a few minutes before slicing. This keeps it juicy. - Try out different spices to find your favorite mix. Add hot sauce if you like heat. - A splash of fresh lime juice gives a bright flavor boost. - Use pre-cooked quinoa or rice to save time on busy days. - Dice your vegetables ahead of time. This makes the cooking process quick and simple. These tips help you create tasty chicken burrito bowls that are easy to make and full of flavor. For the full recipe, feel free to check out the details above. {{image_4}} You can swap chicken for other proteins. Ground turkey or beef works well. Tofu is a great choice for a meatless option. If you love seafood, try adding shrimp or salmon. These swaps keep your meal fresh and exciting. For a vegetarian meal, omit the chicken. You can double the beans for extra protein. Adding more veggies, like zucchini or mushrooms, boosts flavor too. Jackfruit is a fun plant-based protein. It has a great texture and soaks up flavors well. If you want to change the grain, you have options. Brown rice is a classic swap for quinoa. Cauliflower rice is a low-carb alternative. Couscous cooks quickly and adds a nice texture. You can also try farro or barley for something different. These grains make your bowl hearty and satisfying. For the Full Recipe, check the complete guide to make your Easy Chicken Burrito Bowls! Store your leftover chicken burrito bowls in airtight containers. They can last for up to 3-4 days in the fridge. This keeps them fresh and tasty for your next meal. If you want a quick meal later, freeze individual portions. Wrap them tightly in plastic wrap or use freezer bags. This makes it easy to grab a meal when you’re busy. When you’re ready to eat, you can reheat the bowls in the microwave. Alternatively, use a skillet on the stovetop. Heat until everything is warm. Enjoy your easy chicken burrito bowls just like the first time! You can make your burrito bowls gluten-free by swapping out grains. Use quinoa or rice instead of traditional grains. These options will keep your dish safe while still being tasty. You have a lot of fun options for toppings. Try adding jalapeños for spice, sour cream for creaminess, or cheese for richness. These add-ons can elevate your meal. Yes, you can prep your burrito bowls in advance. Cook the chicken, grains, and veggies beforehand. Just assemble them before serving to keep everything fresh and tasty. Adjusting the serving size is easy. Scale your ingredients up or down based on how many people you serve. Just make sure to keep the same ratios for a balanced dish. Absolutely! This recipe is perfect for meal prep. Store each component separately to keep them fresh. When ready to eat, just assemble your bowls for a quick and yummy meal. You learned how to make tasty, easy chicken burrito bowls. We covered key ingredients like chicken, quinoa, and beans. Cooking steps showed how to prepare each part simply. I gave tips to make dishes more flavorful and ideas for variations too. This meal can fit your needs and schedule. Enjoy the mix of flavors and textures. You can customize it and prepare it ahead. This way, meal time becomes stress-free and fun. Get creative and have a blast in the kitchen!

Easy Chicken Burrito Bowls Simple and Tasty Meal

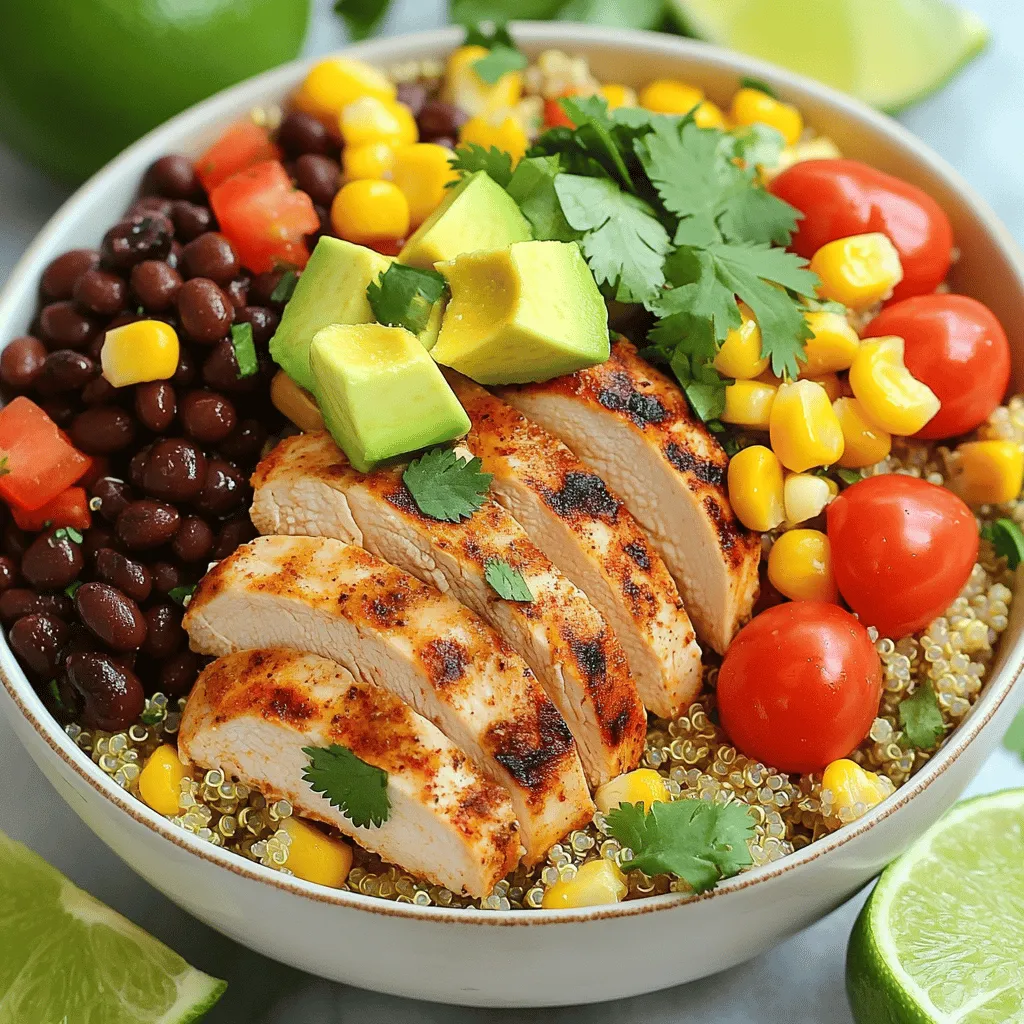
Looking for a quick and tasty dinner idea? Easy Chicken Burrito Bowls are your answer! This dish combines juicy chicken,

- 2 cups frozen corn kernels - 1 cup cream cheese - 1 cup shredded Monterey Jack cheese - 1/2 cup grated cotija cheese - 1/2 cup sour cream - 1/4 cup mayonnaise - 2 tablespoons fresh lime juice - Spices and seasonings - 1/4 teaspoon cayenne pepper - Fresh cilantro for garnish - Tortilla chips for serving Creating the perfect Cheesy Mexican Street Corn Dip starts with the right ingredients. I love using frozen corn kernels for ease and taste. They offer that sweet corn flavor without the fuss of fresh corn prep. The cream cheese forms a rich base, making the dip creamy and smooth. Next, I add shredded Monterey Jack cheese for a melty, gooey texture. Cotija cheese gives a salty punch and a bit of crunch. This mix results in a flavor burst that’s hard to resist. In addition to the main ingredients, I fold in sour cream and mayonnaise. This combination adds tang and creaminess. Fresh lime juice brightens the dip, bringing out the flavors. I also use spices like chili powder and garlic powder. These add warmth and depth. For those who crave heat, cayenne pepper is a great optional add-in. It gives a nice kick without overpowering the dish. Fresh cilantro not only adds flavor but also looks beautiful on top. Tortilla chips are a must for serving. They make dipping fun and easy. If you want to create this delicious dip, check out the Full Recipe for step-by-step guidance. Enjoy the vibrant flavors and textures as you share this tasty treat with friends and family! - Preheat the oven to 350°F (175°C). - In a large bowl, combine 2 cups of thawed corn kernels, 1 cup of cream cheese, 1 cup of shredded Monterey Jack cheese, 1/2 cup of grated cotija cheese, 1/2 cup of sour cream, and 1/4 cup of mayonnaise. Stir until smooth and creamy. - Add 2 tablespoons of fresh lime juice, 1 teaspoon of chili powder, 1 teaspoon of garlic powder, and 1/2 teaspoon of smoked paprika. If you like heat, add 1/4 teaspoon of cayenne pepper. Mix well to blend the flavors. - Gently fold in 1/4 cup of finely chopped fresh cilantro. Season with salt and pepper to taste, adjusting it to your liking. - Transfer the dip mixture to a baking dish, smoothing it out evenly. - Bake in the preheated oven for 20-25 minutes, until the dip is hot and bubbly. Look for a golden top. - Once done, cool slightly before serving. Enjoy your Cheesy Mexican Street Corn Dip with tortilla chips! For the complete recipe, check out the Full Recipe. - Use room temperature cream cheese for easier mixing. - Adjust spices based on heat preference. When you use room temperature cream cheese, it blends better. You won’t have clumps in your dip. If you like a mild dip, go easy on the spices. For heat lovers, add more chili powder or cayenne. Finding the right balance is key. - Garnish with additional cilantro and cotija cheese. - Serve in a colorful bowl to enhance visual appeal. To make your dip look great, add fresh cilantro on top. A sprinkle of cotija cheese adds a nice touch too. Use a bright bowl to serve. A colorful dish catches the eye and makes the dip more inviting. - Recommended sides to serve with the dip. - Suitable beverages to complement the appetizer. Serve the dip with crispy tortilla chips. They are perfect for scooping. You can also add veggies like bell peppers or carrots for a crunch. For drinks, try a light beer or a refreshing soda. They pair well with the rich flavors of the dip. Try out these tips to elevate your Cheesy Mexican Street Corn Dip experience. For a complete guide, check the Full Recipe. {{image_4}} You can change up the cheeses in this dip. Try using pepper jack cheese for a spicy kick. You can also swap in sharp cheddar for a bold taste. Adding cooked jalapeños gives the dip more heat. Just chop them finely and mix them in. This twist adds a layer of smokiness that is hard to resist. If you want a vegetarian dip, skip the meat and focus on the veggies. You can add black beans or diced bell peppers for extra flavor. For gluten-free options, choose gluten-free chips to serve with your dip. You can also use gluten-free bread or fresh veggies as dippers. This way, everyone can enjoy it without worry. You can serve this dip in two ways: warm or cold. The warm dip is gooey and comforting, perfect for chilly nights. The cold version feels fresh and bright, great for hot days. You can also integrate this dip into a larger appetizer spread. Add it to a platter with other dips, chips, and veggies. This makes for a fun and festive gathering. For the full recipe, check out the complete instructions above! To keep your Cheesy Mexican Street Corn Dip fresh, store leftovers in the fridge. Use an airtight container to prevent moisture loss and keep odors out. Glass or plastic containers with secure lids work great. If you plan to eat it soon, let it cool before sealing it up. You can freeze the dip for later use. Place it in a freezer-safe container, leaving some space for expansion. When you crave it again, thaw it overnight in the fridge. Reheat in the oven at 350°F (175°C) until hot. Stir in a bit of fresh cheese for that creamy texture. In the fridge, the dip stays fresh for about 3-5 days. Check for signs of spoilage, like off smells or mold. If it looks or smells strange, it's best to toss it. Enjoy the flavors of this dip while it's fresh for the best taste! To add heat, you can use cayenne pepper. Just add a little at first. You can also mix in diced jalapeños or hot sauce. These choices will spice up your dip quickly. Adjust to your taste for the right kick. Yes, fresh corn works great too! Fresh corn adds a sweet crunch. To use it, just cut the kernels from the cob. Cook them slightly in a pan for extra flavor. Then, mix them into your dip like you would with frozen corn. Serve with crispy tortilla chips for a classic pairing. You can also use veggies like bell peppers or carrots. They add a nice crunch. For extra fun, try serving it with toasted bread or pita chips. Yes, this dip is perfect for meal prep! You can make it a day ahead. Just store it in the fridge. When ready to serve, heat it in the oven until warm. It tastes just as yummy! For the full recipe, check here: [Full Recipe]. This blog post explored how to make a tasty Cheesy Mexican Street Corn Dip. We discussed the main and optional ingredients, followed by simple steps for preparation and baking. You learned useful tips for mixing, serving, and storing your dip. Variations and dietary modifications cater to different preferences. In summary, this dip is fun and easy to make. Enjoy it warm or cold with your favorite chips. Try it at your next gathering to impress friends and family.

Cheesy Mexican Street Corn Dip Flavorful Party Delight

Are you ready to spice up your next gathering? This Cheesy Mexican Street Corn Dip is not just a dip—it’s

- 10 chicken drumsticks - 1/2 cup soy sauce - 1/4 cup honey - 1/4 cup rice vinegar - 2 tablespoons sesame oil - 3 cloves garlic, minced - 1 inch fresh ginger, grated - 1 tablespoon cornstarch (optional for thickening) - 1 tablespoon sesame seeds (for garnish) - 2 green onions, thinly sliced (for garnish) To create the best Baked Teriyaki Chicken Drumsticks, you need simple ingredients. Each element plays a key role in the taste. Chicken drumsticks are the star of this dish. They are juicy and full of flavor. Soy sauce adds saltiness and depth. Honey brings sweetness that balances the salt. Rice vinegar gives a tangy note that cuts through the richness. Sesame oil adds a nutty aroma that ties it all together. To enhance the flavor, add garlic and ginger. These two ingredients bring warmth and spice. If you want a thicker sauce, use cornstarch. Just mix it with water to create a slurry. This step is optional but helps if you prefer a hearty glaze. For garnishing, sprinkle sesame seeds on top. They add crunch and visual appeal. Thinly sliced green onions also add freshness. Together, they make your dish look and taste amazing. You can find the full recipe to prepare this delicious meal easily. Follow the ingredients closely for the best results! - Preheat the oven to 400°F (200°C). - Line a baking sheet with parchment paper. Getting the oven ready is key. It helps cook the chicken evenly. The parchment paper keeps the drumsticks from sticking. Plus, it makes cleanup easy. - Combine soy sauce, honey, rice vinegar, sesame oil, garlic, and ginger. - Optional: Thicken with cornstarch slurry. To make the teriyaki sauce, mix soy sauce and honey. Add rice vinegar and sesame oil for depth. Minced garlic and grated ginger bring in flavor. If you want a thicker sauce, use cornstarch. Just mix it with a bit of water before stirring it in. - Coat chicken drumsticks in teriyaki sauce. - Marinate for at least 30 minutes (up to 2 hours). Place the drumsticks in a bowl or bag. Pour half the teriyaki sauce over them. Make sure they are fully coated. Let them marinate in the fridge. This step helps the chicken absorb the flavors. - Arrange drumsticks on the baking sheet. - Bake for 35-40 minutes, basting halfway through. Now, lay the drumsticks on the baking sheet. Make sure they are in a single layer. Bake them for 35 to 40 minutes. Halfway through, baste with more sauce for extra moisture and flavor. - Use the broiler for a crispier finish. - Rest the drumsticks before serving. If you like crispy skin, turn on the broiler for 2-3 minutes. Keep an eye on them to avoid burning. After baking, let the drumsticks sit for a few minutes. This allows the juices to settle. Then, they are ready to serve. For the full recipe, check the details above. For the best flavor, marinate your chicken drumsticks for at least 30 minutes. If you have time, let them soak for up to 2 hours. This helps the chicken absorb all the delicious teriyaki flavors. To coat the drumsticks evenly, I recommend placing them in a resealable bag. Pour in half the marinade, seal the bag, and shake it gently. This method ensures every piece gets a good coating. Check for doneness with a meat thermometer. Your chicken should reach 165°F (75°C) to be safe to eat. For crispy skin, bake the drumsticks at 400°F (200°C). Halfway through, baste them with leftover marinade. If you want extra crispiness, turn on the broiler for the last few minutes. Just keep an eye on them so they don’t burn. Pair your teriyaki chicken with steamed jasmine rice. Add a side of stir-fried vegetables for a colorful plate. For a nice touch, sprinkle sesame seeds and sliced green onions on top. These garnishes add flavor and make your dish look great. Enjoy the burst of flavors that come together! {{image_4}} You can switch up the teriyaki sauce for different flavors. Here are some ideas: - Homemade Sauces: You can make a spicy teriyaki sauce by adding sriracha. Mix it with honey and soy sauce for a kick. - Store-Bought Options: Many brands sell teriyaki sauce. Look for ones that have low sodium or no added sugar. They can save you time and still taste good. Feel free to get creative with your ingredients. Here are some swaps you can consider: - Different Proteins: Instead of chicken drumsticks, try this recipe with thighs or wings. You can even use tofu for a vegetarian option. - Gluten-Free Soy Sauce: If you need a gluten-free option, look for tamari or coconut aminos. They work well in this teriyaki recipe. You have choices for how to cook your teriyaki chicken: - Air Fryer Instructions: Preheat your air fryer to 380°F (193°C). Cook the marinated drumsticks for about 25 minutes, flipping halfway for even cooking. - Grilling vs. Baking: Grilling adds a smoky flavor. Cook the drumsticks on medium heat for 25-30 minutes, turning often. Baking gives you crispy skin and is easy to do in the oven. Try both methods to see what you like best! For the full recipe, check out the detailed instructions above. To store leftover drumsticks, let them cool first. This step helps prevent moisture buildup. Place the cooled drumsticks in an airtight container. You can also wrap them tightly in plastic wrap. In the fridge, they last about 3 to 4 days. Always check for any signs of spoilage before eating. If you want to keep drumsticks longer, freezing is a great option. Wrap each drumstick in foil or freezer-safe bags. This method helps prevent freezer burn. Label your bags with the date and type of dish. Drumsticks can stay fresh for about 3 months in the freezer. When ready to eat, thaw them in the fridge overnight. For a quick option, use the microwave on the defrost setting. Reheat in the oven to get that crispy skin back. Enjoy your delicious teriyaki chicken drumsticks anytime! To make the drumsticks less salty, use low-sodium soy sauce. You can also add more honey and rice vinegar to balance the saltiness. Another tip is to dilute the soy sauce with water. This keeps the flavor while making it milder. Yes, you can use other chicken cuts. Thighs or breasts work well, but adjust cooking times. Thighs take longer to cook than drumsticks, while breasts may cook faster. Ensure all cuts reach 165°F (75°C) for safety. If you want a substitute for honey, try maple syrup or agave nectar. Both will provide sweetness without altering the flavor too much. For a low-calorie option, use a sugar substitute like stevia. To get crispy drumsticks, pat them dry before adding sauce. Bake them at a high temperature, and consider broiling them at the end. Basting with sauce halfway through also helps keep them moist while adding flavor. Marinating is not strictly necessary, but it helps enhance the flavor. If you're short on time, you can skip it. However, marinating for at least 30 minutes will give you a tastier dish. Yes, you can cook these drumsticks in a slow cooker. Place the drumsticks and sauce in the cooker and cook on low for 4 to 6 hours. This method will make the chicken tender, but it won't be crispy. For crispy skin, apply the broiler briefly after cooking. For the full recipe, check out the previous sections! Baked Teriyaki Chicken Drumsticks are simple and tasty. You saw the main ingredients, like soy sauce and honey, which make a great glaze. Marinating makes the chicken full of flavor, while baking gives it the perfect texture. Remember, you can switch up flavors or try new cooking methods. Use leftovers for quick meals. I hope you find joy in making this dish and impress your family or friends. Enjoy your cooking adventures!

Baked Teriyaki Chicken Drumsticks Easy and Tasty Recipe

Looking for a quick and tasty dinner idea? My Baked Teriyaki Chicken Drumsticks are simple to make and packed with

Cooking a tasty Chicken Alfredo Pizza is simple when you have the right ingredients. Here’s what you need: - Pre-made pizza dough - Cooked chicken breast - Alfredo sauce - Mozzarella cheese - Parmesan cheese - Fresh spinach leaves - Garlic powder - Black pepper - Salt - Fresh parsley (optional) Each ingredient adds a unique flavor. The pre-made pizza dough saves time. You can buy it or make your own. Cooked chicken breast adds protein and keeps the dish filling. Alfredo sauce gives a creamy base. You can use store-bought or make it fresh. Mozzarella cheese melts beautifully and adds that gooey texture we all love. Parmesan cheese brings a sharp taste that balances the creaminess. Fresh spinach leaves add color and nutrients. Garlic powder enhances the savory flavor, while black pepper and salt bring out the best in the other ingredients. Finally, fresh parsley is optional, but it adds a nice touch on top. With these ingredients, you can create a delicious meal that’s sure to please. For step-by-step guidance, check out the Full Recipe. - Preheat the oven to 475°F (245°C). - On a floured surface, roll out the pizza dough. - Carefully transfer the dough to a baking sheet or pizza stone. - Spread the rich Alfredo sauce evenly over the dough. - Season with garlic powder, black pepper, and salt. - Layer the diced chicken and chopped spinach on top. - Sprinkle mozzarella and Parmesan cheese over the toppings. - Bake the pizza until golden brown, about 12-15 minutes. - Cool for a minute, garnish with parsley, slice, and serve. For detailed steps and the complete recipe, you can refer to the Full Recipe. To get a crispy crust, you need a hot oven. Preheat your oven to 475°F (245°C). If you use a pizza stone, place it in the oven while it heats. This step helps the crust bake evenly and stay crispy. A cold stone won’t give you that nice crunch. You can switch up the Alfredo sauce if you want. Try adding some herbs like basil or oregano. You can even use a white sauce or garlic sauce for a twist. When it comes to spinach, fresh is best. However, frozen spinach works too. Just make sure to squeeze out extra water before using it. This pizza pairs well with a fresh salad. A simple green salad adds color and crunch. For dipping, try garlic butter or a tangy marinara sauce. These options add flavor and make each bite more fun. Use these tips to make your meal even better! {{image_4}} You can make your pizza even better by adding veggies. Try bell peppers or mushrooms. These add color and crunch. You can also use zucchini or cherry tomatoes for more flavor. If you want a vegetarian Alfredo pizza, just skip the chicken. Load it with your favorite veggies instead. This way, you still get a tasty meal without meat. If you have leftover chicken, use it! Rotisserie chicken works great and saves time. Just shred it and sprinkle it on the pizza. If you prefer turkey or ham, those are good choices too. Both add a nice twist to the classic recipe. Remember, you can mix and match any protein that you like. For those who need gluten-free, you can easily swap the dough. Use a gluten-free pizza crust from the store. If you want to make your own, use gluten-free flour. Just be sure to check the packaging for the right ratios. This way, you keep the same great taste and texture. Enjoy your pizza without worry! For the full recipe, check out the [Full Recipe]. To store leftover pizza, let it cool first. Place slices in an airtight container. You can also wrap them in plastic wrap or foil. This keeps the pizza fresh for up to three days. When reheating, use the oven for the best results. Preheat your oven to 375°F (190°C). Place the slices on a baking sheet and bake for about 10 minutes. This method keeps the crust crispy and the cheese melty. You can also use a microwave, but this may make the crust soft. You can freeze both unbaked and baked pizza. For unbaked pizza, wrap it tightly in plastic wrap, then foil. This helps prevent freezer burn. You can freeze it for up to two months. For baked pizza, allow it to cool completely first. Then, wrap it in foil and place it in a freezer bag. This way, you can store it for up to two months as well. To thaw, move the pizza to the fridge overnight. For baked pizza, reheat it in a preheated oven at 375°F (190°C) for about 15-20 minutes. For unbaked pizza, bake it directly from frozen for about 20-25 minutes. Enjoy your delicious pizza anytime with these storage tips! To make this pizza from scratch, start with the dough. If you want, you can make your own dough. Roll it out and place it on a baking sheet or pizza stone. Next, spread your Alfredo sauce over the dough. Sprinkle garlic powder, salt, and black pepper for flavor. Then, add your diced cooked chicken and chopped spinach. Top it off with mozzarella and Parmesan cheese. Bake it in a preheated oven at 475°F for 12-15 minutes. Enjoy the delicious, cheesy goodness! Yes, you can use store-bought Alfredo sauce. It saves time and can be tasty. However, homemade sauce usually tastes richer and fresher. Store-bought sauces can lack depth of flavor. If you choose to make your own, you can adjust the seasoning to your liking. Consider your time and taste when deciding. Some popular toppings for Chicken Alfredo Pizza are: - Sliced mushrooms - Bell peppers - Red onions - Fresh basil - Sun-dried tomatoes Feel free to get creative! You can add any toppings you love. Mixing flavors makes your pizza unique. Yes, you can make this pizza ahead of time. Prepare the dough and toppings in advance. Store them separately in the fridge. When ready to bake, assemble the pizza and pop it in the oven. You can also make a few pizzas and freeze them. Just remember to let them cool before wrapping. Each serving of Homemade Chicken Alfredo Pizza has about: - 350-450 calories - 20-25 grams of protein - 15-20 grams of fat - 30-40 grams of carbs These values can change based on your ingredients. For the most accurate info, calculate with your specific brands. Enjoy your meal knowing it can fit into your diet! This guide covered creating a delicious Chicken Alfredo pizza. We discussed ingredients, step-by-step instructions, and tips for a perfect crust. You learned how to vary the recipe with different toppings and how to store leftovers. In the end, this pizza is easy and fun to make. Enjoy customizing it to suit your taste. Whether feeding a crowd or enjoying time alone, this recipe is a great choice. Happy cooking!

Homemade Chicken Alfredo Pizza Easy and Flavorful Meal

Craving a quick, tasty meal? Look no further than this Homemade Chicken Alfredo Pizza! This recipe is simple and perfect

- 4 salmon fillets (6 oz each) - 4 tablespoons unsalted butter - 4 cloves garlic, finely minced - 1 large lemon, both juiced and zested - 1 teaspoon dried thyme - 1 teaspoon dried oregano - Salt and freshly ground black pepper, to taste - Fresh parsley, finely chopped (for garnish) - Lemon slices, for garnish These ingredients make this dish shine. Salmon provides a rich flavor. Garlic adds depth with its strong aroma. Butter adds richness, while lemon brings a bright, zesty punch. Thyme and oregano give a hint of earthiness. Don’t forget to season well with salt and pepper for balance. - 1 teaspoon red pepper flakes (for heat) - 1 tablespoon honey (for sweetness) - Fresh dill or basil (for a fresh twist) If you want to spice it up, add red pepper flakes. Honey can add a nice touch of sweetness to balance the lemon. Fresh herbs like dill or basil can enhance the flavor profile too. Feel free to experiment! - Large non-stick skillet - Spatula - Knife and cutting board - Measuring spoons - Zester or grater Using a non-stick skillet helps prevent sticking and makes cooking easier. A spatula is key for flipping the salmon without breaking it. A good knife and cutting board are essential for prepping garlic and lemon. Having measuring spoons on hand ensures your flavors are spot on. A zester or grater is great for getting the lemon zest just right. For the complete method, check the Full Recipe. Start by patting the salmon fillets dry with a paper towel. This step helps the fish sear well. Next, season both sides of each fillet with salt, black pepper, dried thyme, and dried oregano. Let them sit for a few minutes so the flavors can soak in. In a large, non-stick skillet, heat 4 tablespoons of unsalted butter over medium heat. Watch as the butter melts and bubbles. Make sure it doesn’t brown, as this can change the flavor. Once bubbling, add 4 cloves of finely minced garlic. Sauté it for about 1 minute, stirring often. Your kitchen will smell amazing! Gently lay the salmon fillets in the skillet, skin-side down. Let them cook undisturbed for about 4 to 5 minutes. This helps the skin crisp nicely. After this time, carefully flip each fillet over using a spatula. Pour the lemon juice and sprinkle the lemon zest over the top. Cook for another 4 to 5 minutes until the salmon turns opaque and flakes easily with a fork. While the salmon cooks, use a spoon to baste the fillets with the garlic butter sauce. This will add more flavor and keep the fish nice and moist. The basting step is key to a juicy salmon! When the salmon is done, take the skillet off the heat. Sprinkle the fillets with chopped fresh parsley and add lemon slices on the side. To serve, place the salmon on plates and drizzle with any remaining garlic butter sauce from the skillet. You can find the full recipe for more details on how to make this dish. For a beautiful presentation, serve the salmon on a bed of steamed asparagus or next to a fresh salad. Enjoy your delicious Garlic Butter Lemon Salmon! Use a non-stick skillet for easy cooking. Heat your skillet over medium heat before adding butter. This keeps the salmon from sticking. Start with the skin-side down to get a nice crisp. Cook without moving the fish for the best results. Keep an eye on the salmon as it cooks. Salmon cooks fast, about 4-5 minutes per side. You want it to be opaque and flake easily with a fork. If it looks too dry or hard, it’s overcooked. Basting with garlic butter helps keep it moist and flavorful. You can add extra flavor with herbs and spices. Try using fresh dill or parsley for a fresh taste. A pinch of red pepper flakes can give a nice kick. For a fun twist, add a splash of white wine when cooking. This adds depth and complements the lemon well. For the full recipe, check out the detailed instructions on Garlic Butter Lemon Salmon Delight. {{image_4}} You can swap salmon for other fish like tilapia or trout. These options cook fast and absorb flavors well. If you prefer seafood, shrimp works great too. Just adjust the cooking time to ensure they are perfectly done. For a meaty twist, try chicken breasts. They pair well with garlic butter and lemon too! Boost your dish with different spices. Try paprika for a smoky kick or chili flakes for heat. Fresh herbs like dill or basil add a bright touch. You might also marinate the protein in lemon juice and olive oil for an hour before cooking. This adds depth and makes it extra tasty. For a casual dinner, serve the salmon with rice and a simple salad. If you're hosting, add roasted veggies for a colorful plate. For a special occasion, present the dish on a bed of couscous and drizzle with extra garlic butter. This makes it look fancy and tastes amazing! Check out the Full Recipe for more details on cooking and serving. To keep leftover salmon fresh, place it in an airtight container. Make sure the salmon is cool before sealing it. Store it in the fridge for up to three days. If you want to keep it longer, freezing is a great option. When you're ready to eat your leftover salmon, gentle reheating is best. I recommend using the oven. Preheat it to 275°F (135°C). Place the salmon on a baking sheet and cover it with foil. Heat for about 15 minutes. This method keeps the salmon moist and tasty. Avoid the microwave, as it can make the fish dry. If you want to freeze your salmon, wrap it tightly in plastic wrap. Then, place it in a freezer bag to prevent freezer burn. It can last up to three months in the freezer. To thaw, move it to the fridge overnight before reheating. This keeps the flavor and texture just right. For more detailed instructions, check the Full Recipe. Yes, you can use frozen salmon. Just thaw it first. This helps the fish cook evenly. To thaw, place the salmon in the fridge overnight or use cold water. Great sides for this dish include: - Steamed asparagus - Garlic mashed potatoes - Fresh garden salad - Quinoa with herbs These sides balance the rich flavors of the salmon. Salmon is done when it turns opaque and flakes easily. Use a fork to check. The ideal internal temperature is 145°F. To check, insert an instant-read thermometer into the thickest part. Yes, you can! Try this with trout, cod, or halibut. Just adjust the cooking time based on the thickness of the fish. Each type has its unique flavor that pairs well with garlic and lemon. While fresh garlic gives the best flavor, you can use garlic powder if needed. Fresh garlic offers a strong aroma and taste that enhances the dish. For a milder flavor, try roasted garlic instead. For the full recipe, check out the detailed section above. Garlic Butter Lemon Salmon Delight is a simple yet tasty dish. This recipe is perfect for a quick weeknight dinner that feels special. Here’s what you need and how to make it. - 4 salmon fillets (6 oz each) - 4 tablespoons unsalted butter - 4 cloves garlic, finely minced - 1 large lemon, both juiced and zested - 1 teaspoon dried thyme - 1 teaspoon dried oregano - Salt and freshly ground black pepper, to taste - Fresh parsley, finely chopped (for garnish) - Lemon slices, for garnish 1. Prepare the Salmon: First, pat your salmon fillets dry with a paper towel. This helps them cook well. Season both sides with salt, pepper, thyme, and oregano. Let them sit for a few minutes to soak up the flavors. 2. Melt the Butter: In a large skillet, heat the unsalted butter over medium heat. Wait for it to melt and bubble. Don’t let it brown. 3. Sauté Garlic: When the butter bubbles, add the minced garlic. Cook for about 1 minute. Stir it often so it doesn't brown. 4. Cook the Salmon: Place the salmon fillets in the skillet, skin-side down. Cook them for 4-5 minutes without touching them. This helps the skin get crispy. 5. Add Lemon Flavor: Flip each fillet carefully with a spatula. Pour the lemon juice and sprinkle the zest over them. Cook for another 4-5 minutes until the salmon is opaque and flakes easily. 6. Baste for Extra Flavor: While the salmon cooks, use a spoon to baste it with the garlic butter. This adds flavor and keeps it moist. 7. Garnish: Once cooked, take the skillet off the heat. Sprinkle fresh parsley on top and add lemon slices for color. 8. Serve: Place the salmon on plates and drizzle with any leftover garlic butter sauce. This dish takes just 20 minutes to make and serves four. You can serve it on a bed of steamed asparagus or a fresh salad. The garlic butter sauce adds a rich flavor that pairs well with the lemon. Enjoy your flavor-packed delight! This blog post covered garlic butter lemon salmon from start to finish. I shared essential and optional ingredients, tools, and step-by-step cooking methods. You learned tips to avoid overcooking and enhance flavors. I also explained variations using different proteins and how to store leftovers. Simple answers to common questions rounded out the guide. Now, you're ready to cook this dish with confidence. Enjoy your flavorful salmon creation!

Garlic Butter Lemon Salmon Flavor-Packed Delight

If you’re craving a quick and tasty dish, Garlic Butter Lemon Salmon is here to impress. This recipe packs flavor

- 4 boneless, skinless chicken breasts - 2 ripe mangoes, peeled and diced into small cubes - 1 red bell pepper, finely chopped - 1 small red onion, finely diced - 1 jalapeño pepper, deseeded and finely minced - 2 tablespoons fresh cilantro leaves, chopped - 2 tablespoons freshly squeezed lime juice - 1 tablespoon extra virgin olive oil - 1 teaspoon ground cumin - 1 teaspoon smoked paprika - Salt and freshly ground black pepper to taste - Chicken: 4 pieces (about 1 pound total) - Mangoes: 2 medium-sized - Red bell pepper: 1 medium-sized - Red onion: 1 small - Jalapeño: 1 small - Cilantro: 2 tablespoons - Lime juice: 2 tablespoons - Olive oil: 1 tablespoon - Ground cumin: 1 teaspoon - Smoked paprika: 1 teaspoon - Salt: to taste - Black pepper: to taste - Grill or grill pan - Medium mixing bowl - Knife and cutting board - Measuring spoons - Tongs - Meat thermometer Gather these ingredients and tools before you start. This will make cooking more fun and smooth. The vibrant flavors of the mango salsa will bring joy to your plate. Don't forget the full recipe for guidance! First, get your grill or grill pan ready. Heat it on medium-high. Take your chicken breasts and place them in a bowl. Drizzle with olive oil. Add ground cumin, smoked paprika, salt, and black pepper. Use your hands to rub the spices all over the chicken. This helps the flavors stick. Now, let’s make the salsa. Grab a medium bowl. Add diced mango, chopped red bell pepper, and diced red onion. Next, add minced jalapeño, chopped cilantro, and lime juice. Mix everything well. Taste it and adjust the salt if needed. This salsa brings a fresh kick to your chicken! It’s time to cook the chicken. Place the seasoned chicken on the hot grill. Cook for about 6-7 minutes on each side. Use a meat thermometer to check the center. It should read 165°F (75°C). Once done, take the chicken off the grill. Let it rest for 5 minutes. This keeps the juices inside. Just before serving, top the chicken with your spicy mango salsa. Enjoy this tasty and colorful dish! You can find the full recipe for more details. To grill chicken well, start with a clean grill. This keeps the chicken from sticking. Heat your grill to medium-high. This temperature helps the chicken cook evenly. Use a meat thermometer to check doneness. The chicken should reach 165°F (75°C). Let it rest after grilling. This step makes the meat juicy and tender. You can change the salsa to fit your taste. Add diced avocado for creaminess. Try mango with pineapple for a tropical twist. If you like heat, add more jalapeño. For a sweeter taste, include a drizzle of honey. Experiment with fresh herbs like mint or basil for a new flavor. Marinating chicken adds delicious flavor. Mix lime juice, olive oil, and spices for a quick marinade. Let the chicken soak for at least 30 minutes. For a deeper taste, marinate for up to 4 hours. Try adding yogurt for a tenderizing boost. This will make your chicken even more tasty. For the full recipe, check out the Spicy Mango Salsa Chicken section above. {{image_4}} You can swap chicken for other proteins. Try shrimp or fish for a fresh twist. They cook quickly and absorb the salsa's flavor well. If you like pork, use tenderloin for a hearty option. Each protein brings its unique taste to the dish. For a vegetarian dish, use cauliflower or tofu. For cauliflower, chop it into florets. Toss them in olive oil and spices before grilling. For tofu, press it to remove water, then cut it into cubes. Marinate it in the same spices as the chicken. Both options cook well and soak up the salsa's bright flavors. To change the spice level, adjust the jalapeño amount. Add more for heat or leave it out for a milder flavor. You can also use a milder pepper, like a banana pepper. If you love heat, try adding diced habanero or a pinch of cayenne. Taste as you go to find your perfect balance. You can keep Spicy Mango Salsa Chicken in the fridge for up to 3 days. Store it in an airtight container. This will help keep the chicken moist and the salsa fresh. Always let the chicken cool to room temperature before sealing it up. This step prevents moisture buildup which can spoil the dish faster. If you want to save the chicken for later, freezing is a great option. Wrap each chicken breast tightly in plastic wrap. Then, place them in a freezer-safe bag or container. You can freeze the mango salsa too. Put it in a separate airtight container. This way, you can keep both parts fresh for up to 3 months. To reheat the chicken, you can use the oven or microwave. If using the oven, preheat it to 350°F (175°C). Place the chicken on a baking sheet and cover it with foil. Heat for about 15-20 minutes until warm. In the microwave, place the chicken on a microwave-safe plate. Heat in short bursts of 1 minute, checking often. Always add fresh salsa just before serving to keep it vibrant and tasty. For the full recipe, check out the Spicy Mango Salsa Chicken section above. Yes, you can use frozen mango for the salsa. Just thaw it first. Fresh mango adds a bright taste and texture, but frozen works too. It may be softer, but that won't ruin the flavor. Make sure to drain any extra liquid before mixing it in. Several side dishes go great with Spicy Mango Salsa Chicken. Here are some tasty options: - Cilantro lime rice - Black beans - Grilled vegetables - Corn on the cob - Simple green salad These sides complement the spicy and sweet flavors of the dish. They add freshness and balance to the meal. Making this recipe gluten-free is easy! All the ingredients are already gluten-free. Just ensure that any added sauces or spices are gluten-free too. Check labels for any hidden gluten. Enjoy your meal without worry! For the full recipe, you can look back at the main sections. This blog post shared the key steps for making Spicy Mango Salsa Chicken. You learned how to gather ingredients, prepare the chicken, and make salsa. I also offered tips for grilling, customizing flavors, and storing leftovers. In the end, this dish is easy and fun to make. Experiment with ingredients to fit your taste. Enjoy your cooking and the delicious results!

Spicy Mango Salsa Chicken Tasty and Simple Recipe

If you’re craving a dish that combines sweet and spicy, you’ll love this Spicy Mango Salsa Chicken recipe. It’s not

What is Egg Roll in a Bowl? It is a quick and tasty meal that captures the flavors of a classic egg roll, but without the wrapper. You get all the good stuff in a bowl. It's easy to make and fun to eat. To start, gather your ingredients. You will need: - 1 pound ground chicken (or turkey) - 4 cups coleslaw mix (a blend of shredded cabbage and carrots) - 1 tablespoon sesame oil - 2 cloves garlic, finely minced - 1 tablespoon fresh ginger, finely grated - 1/4 cup soy sauce (or tamari for a gluten-free option) - 1 tablespoon rice vinegar - 1 teaspoon honey (or maple syrup for a vegan-friendly alternative) - 2 green onions, thinly sliced - 1 tablespoon sesame seeds - Salt and pepper to taste The first step is to heat the sesame oil in a large skillet over medium-high heat. Once the oil is hot, add the garlic and ginger. Cook them for about 30 seconds. You want them to smell great and turn a little golden. Next, add your ground chicken. Break it apart with a wooden spoon. Cook this for 5 to 7 minutes. You want it to brown and cook all the way through. Now, it's time to add the coleslaw mix. Stir it in and cook for another 3 to 4 minutes. The cabbage will soften but still stay a bit crunchy. While that cooks, mix the soy sauce, rice vinegar, and honey in a small bowl. When the chicken and cabbage are ready, pour this sauce over them. Stir well to coat everything evenly. Season with salt and pepper to your taste. Let it cook for another minute or two so the flavors blend. Finally, take the skillet off the heat and fold in the green onions and sesame seeds. These add great flavor and a nice crunch. You can serve this warm in bowls. For a fun touch, add crispy wonton strips on top. This dish is not only quick but also a great way to enjoy the taste of egg rolls in a fun, new form. For the full recipe, check out the detailed steps I provided earlier. This blog post covered key points about error code 500. We discussed what this error means and its common causes. I shared tips for fixing it, like checking server settings. Remember, server errors can disrupt your work. Staying calm and following steps can help you solve it. By understanding this error, you can prevent future issues and keep your site running smoothly. Keep these tips in mind the next time you see error code 500.

Egg Roll in a Bowl Flavorful and Easy Dinner Idea

Looking for a quick and tasty dinner? I’ve got just the recipe for you! This Egg Roll in a Bowl

To make No Bake Cookie Dough Bites, you need a few key ingredients. Here’s what you will need: - 1 cup almond flour - 1/2 cup natural peanut butter (or any nut butter of your choice) - 1/4 cup maple syrup (or honey for sweetness) - 1 teaspoon pure vanilla extract - 1/4 teaspoon fine sea salt - 1/2 cup mini chocolate chips - 1/4 cup chopped nuts (optional; walnuts or pecans work beautifully) - 2 tablespoons chia seeds (for an added nutritional boost) These ingredients work together to create a tasty, chewy treat. Almond flour gives a nice texture, and peanut butter adds creaminess. Maple syrup or honey provides the right sweetness. You can customize your cookie dough bites easily. Here are some fun add-ins and variations: - Swap almond flour for oat flour for a different flavor. - Use almond butter instead of peanut butter for a nutty twist. - Add dried fruits like raisins or cranberries for a fruity touch. - Toss in some shredded coconut for a tropical flair. Feel free to mix and match these options to suit your taste. If you lack any main ingredients, here are some substitutions: - Use sunflower seed butter if you need a nut-free option. - Agave syrup can replace maple syrup for a vegan choice. - For a gluten-free version, ensure your almond flour is certified gluten-free. These substitutions help you adapt the recipe to your needs while still enjoying the great flavor. If you want the complete recipe, check out the Full Recipe. To start, gather your ingredients. You will need almond flour, peanut butter, maple syrup, and more. In a large mixing bowl, combine these key ingredients. Use a spatula to mix until smooth. This dough should feel sticky and hold together well. Next, gently fold in the mini chocolate chips and any optional nuts or chia seeds. Mix carefully to ensure they spread evenly. Once your mixture is ready, it's time to shape the bites. With clean hands, scoop out tablespoon-sized portions of the dough. Roll each piece into a small ball. Place them on a parchment-lined baking sheet. Make sure to leave space between each ball. This helps them stay round and not stick together. Now, let’s chill the bites. Transfer the baking sheet to the refrigerator. Allow them to chill for about 30 minutes. This step firms them up nicely. After chilling, they are ready to eat! Enjoy these tasty bites as a snack or dessert. Store any leftovers in an airtight container in the fridge. They will stay fresh and delicious for days. For a special touch, try drizzling melted dark chocolate over them before serving. To start, use a dry measuring cup for the almond flour. This ensures you get the right texture. Mix the almond flour and peanut butter well. You want a smooth and sticky dough. If it feels too dry, add a splash of maple syrup. If it’s too wet, sprinkle in a bit more almond flour. When rolling into balls, keep your hands slightly damp. This helps prevent sticking. Aim for roughly the same size for even bites. You’ll get about 12 to 16 bites from this recipe. Add a pinch of cinnamon for warmth. You can also swap in different nut butters. Each type adds a unique taste. For extra crunch, try adding toasted coconut flakes. They pair well with the chocolate chips. Also, consider using dark chocolate chips. They bring a richer flavor than milk chocolate. Drizzling melted chocolate over the bites adds a nice touch. It makes them look fancy and taste even better. One big mistake is not measuring the almond flour correctly. Too much flour can make the dough dry. Another error is skipping the chilling step. Chilling helps the bites firm up and taste better. Don’t forget to fold in the chocolate chips gently. You want them evenly spread. If you overmix, your bites may lose their shape. Lastly, avoid leaving them out of the fridge for too long. They taste best when chilled! {{image_4}} You can mix up the flavors of your no bake cookie dough bites. Try using different nut butters, like almond or cashew. Each nut butter adds its unique taste. You can also swap maple syrup for agave nectar for a twist. For a fun touch, add a teaspoon of cocoa powder. This will give your bites a chocolatey flavor without adding chocolate chips. Another great idea is adding spices like cinnamon or nutmeg. These spices can give your bites a warm, cozy taste. Making these bites fit your diet is easy. To make them vegan, simply use maple syrup instead of honey. Almond flour is already gluten-free, making this recipe great for those with gluten issues. If you're nut-free, you can use sunflower seed butter. This will help you avoid allergens while still enjoying the treat. Just make sure to check labels on all ingredients to avoid hidden gluten or dairy. Kids love these bites, and you can make them even more fun! Let your kids help mix the dough. They can also choose their favorite add-ins. Some great options are mini marshmallows, dried fruit, or colorful sprinkles. You can also shape the bites into fun forms. Instead of balls, try making them into bars or shapes using cookie cutters. These fun adaptations will keep kids excited about healthy snacks! For the full recipe, check out the detailed instructions and measurements above. I like to store my cookie dough bites in an airtight container. This keeps them fresh. You can place them in the fridge for up to one week. Make sure they are cool before sealing the container. If you want them to last longer, freezing is a great option. To freeze your cookie dough bites, first, place them on a baking sheet. Make sure they are not touching. Once they are frozen solid, transfer them to a freezer-safe bag. They can last for about three months in the freezer. When you're ready to eat them, simply let them thaw in the fridge. You don't need to reheat these bites. They taste great cold or at room temperature. If you prefer a warm treat, pop them in the microwave for about 10 seconds. Keep an eye on them to avoid melting. Enjoy your cookie dough bites fresh and tasty! For a full recipe, check the details above. Yes, you can use any nut butter you like. Almond butter, cashew butter, or sunflower seed butter all work well. Each one adds its own unique taste. If you want a nut-free option, try sunflower seed butter. It has a rich flavor and is safe for schools. These bites last about one week in the fridge. Store them in an airtight container to keep them fresh. If you want them to last longer, you can freeze them. They stay tasty in the freezer for up to three months. Absolutely! You can skip the chocolate chips if you prefer. You might try dried fruit or seeds for extra flavor. Raisins, cranberries, or even coconut flakes can be great substitutes. This option makes your bites a bit different but still yummy! For the full recipe, check out the details above. No Bake Cookie Dough Bites are simple and fun to make. This blog covered key ingredients, step-by-step instructions, and tips to perfect them. I shared options for different flavors and dietary needs. Remember to store them right for the best taste. Enjoy creating your own tasty bites. With practice, you’ll find your favorite versions. Keep experimenting, and soon you'll have a go-to treat everyone loves. Try new ideas and share them with friends!

No Bake Cookie Dough Bites Tasty and Simple Treat

Are you craving a sweet treat but short on time? My No Bake Cookie Dough Bites are the perfect answer!

- 16 large cremini or button mushrooms, stems carefully removed - 1 cup fresh spinach, finely chopped - 1 cup cream cheese, softened to room temperature - 1/2 cup grated Parmesan cheese - 1/2 cup shredded mozzarella cheese - 2 cloves garlic, minced - 1/4 teaspoon red pepper flakes (optional, for a touch of heat) - Salt and freshly cracked black pepper to taste - 2 tablespoons extra-virgin olive oil - Fresh parsley, chopped, for garnishing These ingredients come together to create a delicious blend of flavors. The mushrooms serve as a perfect vessel for the creamy filling. Spinach adds a fresh touch, while the cheeses provide richness. To make these stuffed mushrooms, you need a few key tools: - A baking sheet lined with parchment paper - A medium skillet for cooking the spinach - A mixing bowl for combining the filling - A spoon for stuffing the mushrooms Having the right tools makes the process smoother, letting you focus on the fun part—cooking! Feel free to mix in other ingredients to enhance your dish: - Chopped sun-dried tomatoes for a tangy twist - Cooked and crumbled bacon for a savory crunch - Different cheese types like feta or goat cheese for unique flavors These optional ingredients can change how the mushrooms taste, making each batch special. You can try new combinations to find your favorite! For the full recipe, be sure to check out the details on how to prepare this delightful dish. Start by rinsing your mushrooms gently under cold water. This helps to clean them without making them soggy. Then, remove the stems carefully. You want to keep the caps intact. Set the caps on a paper towel to dry while you prepare the filling. In a skillet, heat one tablespoon of olive oil over medium heat. Add two cloves of minced garlic and sauté for about a minute. You want the garlic to smell good but not burn. Next, toss in one cup of finely chopped fresh spinach. Cook it for two to three minutes until it wilts. Remove it from heat and let it cool slightly. In a bowl, mix one cup of softened cream cheese, half a cup of grated Parmesan, and half a cup of shredded mozzarella. Add the cooled spinach mixture into this bowl. Stir well, then season with salt, pepper, and optional red pepper flakes for a little heat. Stuff each mushroom cap with this cheesy filling. Heap it slightly above the edges for a nice look. Place the stuffed mushrooms on a baking sheet lined with parchment paper. Drizzle the remaining tablespoon of olive oil over them for extra flavor. Bake at 375°F (190°C) for 20 to 25 minutes. They are done when the mushrooms are tender and the filling is golden brown. - Cooling and Serving Tips: Once out of the oven, let the mushrooms cool for a few minutes. Garnish with chopped parsley for color. Serve them hot on a wooden board or a nice platter. You can drizzle balsamic reduction over them for added taste. Enjoy your cheesy spinach stuffed mushrooms! To make your cheesy spinach stuffed mushrooms shine, start by choosing large mushrooms. They hold more filling and look great on a plate. Clean them gently with a damp cloth to remove dirt. Avoid washing them under water, as mushrooms soak it up. For the stuffing, let your cream cheese sit out to soften. This makes mixing easier and smoother. Pack the filling high in each cap for a nice presentation. Drizzle with olive oil before baking to help them brown. One common mistake is overcooking the mushrooms. They should be tender but not mushy. Watch the time closely while baking. Another mistake is not seasoning the filling. Salt and pepper enhance the flavors. Don’t skip the garlic; it adds depth. Also, avoid overstuffing the mushrooms. If the filling spills over, it can burn and dry out. Lastly, ensure you let them cool a bit after baking. This helps the filling set and makes them easier to eat. Serve these stuffed mushrooms hot, right from the oven. They make a great appetizer for parties. Pair them with a light salad for a full meal. A simple green salad with a lemon vinaigrette works well. You can also serve them with a glass of white wine. A crisp Sauvignon Blanc complements the flavors nicely. For a fun twist, try them with a balsamic reduction drizzle. This adds a sweet and tangy flavor that pairs well with the cheese. For the full recipe, check out the earlier section. {{image_4}} You can easily make Cheesy Spinach Stuffed Mushrooms fit your diet. If you're lactose-free, use a dairy-free cream cheese. You can also swap out the cheese for a nut-based alternative. For a gluten-free option, just ensure your cheese is gluten-free. If you're vegan, use tofu instead of cream cheese and skip the cheese. This way, you keep the dish tasty for everyone. You can change the flavor of your stuffed mushrooms with simple add-ins. Try adding cooked sausage or bacon for a meaty version. For a bolder taste, mix in sun-dried tomatoes or artichoke hearts. You can even add herbs like thyme or basil for freshness. If you enjoy a kick, toss in more red pepper flakes or a dash of hot sauce. These tweaks will make each batch unique and exciting. You can make these stuffed mushrooms in different ways. An air fryer is a great choice if you want a crispier texture. Cook them at 375°F (190°C) for about 12-15 minutes. If you prefer grilling, you can use skewers to hold the mushrooms. Grill them over medium heat until they soften and the filling bubbles. Each method gives the mushrooms a different character, so try them all! Check the Full Recipe for the traditional oven method. To keep your cheesy spinach stuffed mushrooms fresh, let them cool down. Place them in an airtight container. Make sure to store them in the fridge. They will last for about 3 to 5 days. If you want to enjoy them later, consider freezing them. To reheat, take the mushrooms out of the fridge. You can use an oven or a microwave. If using the oven, preheat it to 350°F (175°C). Place the mushrooms on a baking sheet and heat for about 10-15 minutes. If using a microwave, heat them for about 1-2 minutes. Check to make sure they are warmed through. To freeze, first, cool the mushrooms completely. Wrap each mushroom in plastic wrap and place them in a freezer bag. You can also use a freezer-safe container. They will stay good for up to 3 months in the freezer. When ready to eat, simply thaw them overnight in the fridge, then reheat them using the instructions above. Enjoy your cheesy spinach stuffed mushrooms any time! For the full recipe, check out the earlier section. You can use ricotta cheese or cottage cheese. Both give a creamy texture. If you want a dairy-free option, try cashew cream or tofu. These alternatives work well and still taste great. Just mix them in the same way as you would with cream cheese. Yes, you can prepare the filling ahead of time. Just store it in the fridge for up to two days. When ready, stuff the mushrooms and bake them. You can also assemble the mushrooms and chill them. Just add a few extra minutes to the baking time if they are cold from the fridge. Look for a golden top and bubbling filling. The mushrooms should be soft but not mushy. You can also check with a fork. If it goes in easily, they are ready! - Other common questions about stuffed mushrooms include how to keep them from getting soggy and what dips pair well. For soggy mushrooms, make sure to dry them after washing. Serve with a light dip, like a garlic aioli, for added flavor. For the full recipe, check the section above. Cheesy spinach stuffed mushrooms are simple yet flavorful. We covered key ingredients and tools to help you. The step-by-step guide makes cooking easy. Remember the tips to avoid common mistakes. Variations let you customize for any diet. Proper storage keeps leftovers fresh for later. With these insights, you're ready to impress with your cooking. Enjoy every bite of this tasty dish!

Cheesy Spinach Stuffed Mushrooms Flavorful and Easy Dish

If you’re craving a tasty snack that’s quick and easy, try my Cheesy Spinach Stuffed Mushrooms. This dish combines fresh

Older posts
Newer posts
← Previous Page1 … Page45 Page46 Page47 … Page68 Next →

dsad

© 2025 tastymomrecipes • Built with GeneratePress

Our Policies

  • Copyright Policy
  • Cookie Policy
  • GDPR Policy
  • Privacy Policy
  • Disclaimer
  • Terms Of Use

More Information

  • Home
  • About
  • Contact
  • Appetizers
  • Dessert
  • Dinner
  • Drinks
©2025, tastymomrecipes About Back To Top