Skip to content
DisclaimerTerms Of UseGDPR PolicyCookie Policy

tastymomrecipes

  • Home
  • Drinks
  • Appetizers
  • Dinner
  • Dessert
  • About
  • Contact
  • Privacy Policy
DisclaimerTerms Of UseGDPR PolicyCookie Policy

Olivia

- 2 boneless, skinless chicken breasts - 1 cup buttermilk - 1 cup panko breadcrumbs - 1/2 cup all-purpose flour - 1 teaspoon garlic powder - 1 teaspoon smoked paprika - Salt and pepper to taste - 6 cups mixed salad greens - 1 cup cherry tomatoes, halved - 1/2 medium red onion, thinly sliced - 1/2 cucumber, sliced into rounds - 1/4 cup crumbled feta cheese - 1/4 cup balsamic vinaigrette dressing - Fresh vegetables for garnish - For buttermilk, use milk mixed with lemon juice. - For a gluten-free option, swap panko with crushed cornflakes. When I create crispy chicken salad, I focus on fresh and flavorful ingredients. The chicken breasts stay juicy after marinating in buttermilk. Then, I coat them in seasoned flour and panko breadcrumbs. This gives them that perfect crunch. For the salad, I love mixing greens like arugula, spinach, and romaine. They add a nice texture and color. Cherry tomatoes bring sweetness, while cucumbers add a refreshing crunch. Feel free to add feta cheese for a creamy touch and balsamic vinaigrette for a tangy kick. Remember, you can always change a few ingredients to fit your taste. Enjoy the full recipe for crispy chicken salad! First, we need to marinate the chicken. This step adds flavor and keeps the chicken juicy. Place the chicken breasts in a large bowl. Pour in enough buttermilk to cover the chicken. Cover the bowl and refrigerate it for at least 30 minutes. If you have more time, let it marinate for up to 2 hours. This will help the chicken soak up the flavors. Next, set up your breading station. Use three bowls for this process. In the first bowl, mix the flour with garlic powder, smoked paprika, salt, and pepper. In the second bowl, pour the buttermilk you used for marinating. If needed, add a bit more buttermilk. In the third bowl, place the panko breadcrumbs. This setup makes it easy to coat the chicken evenly. Now, it’s time to cook the chicken. Heat about 1/4 cup of vegetable oil in a large non-stick skillet over medium-high heat. You want the oil to shimmer but not smoke. Carefully add the breaded chicken breasts to the hot oil. Cook them for about 6-7 minutes on each side. You want them to turn a nice golden brown and reach an internal temperature of 165°F. Once done, place the chicken on a paper towel to absorb any extra oil. You can find the full recipe [here]. To get that perfect crunch, follow these steps. First, marinate your chicken in buttermilk. This step makes the meat juicy. It also helps the coating stick. Make sure to let it sit for at least 30 minutes. Next, set up a breading station. Use three bowls: one for seasoned flour, one for buttermilk, and one for panko breadcrumbs. Coat the chicken first in flour, then dip it in buttermilk. Finally, press it into the panko. This layering gives your chicken that nice, crispy texture. When frying, use a large skillet. Heat enough oil so the chicken can float a bit. This helps it cook evenly. Keep the heat medium-high. If it’s too low, your chicken will soak up oil. Cook for 6-7 minutes on each side. Aim for golden brown and an internal temp of 165°F. For a stunning salad, layer your ingredients. Start with the mixed greens. Then, add cherry tomatoes, red onion, and cucumber. This not only looks good but also keeps flavors fresh. Slice your crispy chicken into strips. Place them on top. This way, everyone sees the star of the show! Drizzle balsamic vinaigrette just before serving. It adds a nice shine and burst of flavor. Balsamic vinaigrette is key for balancing flavors. It adds sweetness and tang. This contrast works well with the crispy chicken and fresh greens. Use it sparingly at first. You can always add more if needed. Toss the salad gently to coat all the ingredients. This ensures every bite is flavorful. Enjoy your fresh and flavorful crispy chicken salad! For a detailed guide, check the Full Recipe. {{image_4}} To give your salad an Asian twist, change some ingredients. Use sesame oil in place of vegetable oil for cooking the chicken. Swap the balsamic vinaigrette for a soy sauce-based dressing. Add some sliced almonds for crunch and mandarin oranges for sweetness. You can also mix in shredded cabbage and carrots for extra color and texture. This blend will create a bright and tasty dish! For a classic Caesar twist, use a creamy Caesar dressing instead of balsamic vinaigrette. Top the salad with fresh parmesan cheese and croutons for added flavor and crunch. You can also add anchovies for a bold taste. This variation brings a rich and savory profile that pairs well with the crispy chicken. Feel free to adjust the greens and toppings based on what’s in season. In spring, try using tender baby greens or pea shoots. In summer, mix in fresh corn and diced bell peppers. In fall, add roasted pumpkin or butternut squash for warmth. In winter, hearty greens like kale or Swiss chard work well. Experimenting with seasonal ingredients makes each salad unique and fresh. For a detailed guide on making the perfect crispy chicken salad, check out the [Full Recipe]. To keep your crispy chicken salad fresh, cool it down quickly. Place the salad in a shallow container. This helps the heat escape faster. Cover it tightly with a lid or plastic wrap. Store it in the fridge for up to three days. Remember, the longer it sits, the less crispy the chicken will become. If you want to freeze the chicken, do it right. First, let the chicken cool completely. Wrap each piece tightly in plastic wrap. Then, place the wrapped chicken in a freezer bag. Squeeze out all the air before sealing. This keeps the chicken fresh for up to three months. Just remember, freezing the salad greens can change their texture. To reheat the chicken and keep it crispy, use the oven. Preheat your oven to 375°F. Place the chicken on a baking sheet. Heat for about 10-15 minutes, checking until it’s warm. You can also use an air fryer if you have one. This method will revive the crispiness. Avoid the microwave, as it can make the chicken soggy. Enjoy your meal again with that crispy texture! To make the chicken super crispy, follow these tips: - Use Panko Breadcrumbs: They create a light and crunchy texture. - Double Dredge: Coat the chicken in flour, dip in buttermilk, then coat again in breadcrumbs. - Hot Oil: Make sure the oil is hot before adding the chicken. This helps lock in the crunch. - Avoid Overcrowding: Fry in batches to keep the oil temperature steady. These techniques ensure a crispy chicken every time. Yes, you can use a variety of greens in your salad. Here are some tasty options: - Spinach: Soft and mild, it pairs well with many flavors. - Arugula: Adds a peppery kick to your salad. - Romaine: Crunchy and fresh, perfect for a hearty base. - Kale: For a robust texture, massage it with dressing to soften. Mixing these greens can create a colorful and flavorful salad. Balsamic vinaigrette is a great choice for this salad. Here’s why: - Balance: Its sweet and tangy notes balance the savory chicken. - Lightness: It keeps the salad fresh without being heavy. - Flavor: The depth of balsamic enhances the overall taste. You can also try ranch or honey mustard for a different twist. This blog post covered how to make a tasty crispy chicken salad. We discussed main and optional ingredients for great flavor. I shared step-by-step instructions for marinating, coating, and cooking the chicken. You learned tips to keep your chicken crispy and how to assemble a beautiful salad. Variations like Asian-inspired and Caesar salad keep things fresh. Finally, I provided storage tips to keep leftovers tasty. Enjoy making this dish your own!

Crispy Chicken Salad Fresh and Flavorful Delight

Are you craving a meal that’s both fresh and delicious? Look no further! My Crispy Chicken Salad is here to

To make this simple dish, you need: - 200g pasta of your choice (penne or fusilli are excellent options) - 200g block of feta cheese - 2 cups cherry tomatoes, halved - 4 cloves garlic, minced - 1 teaspoon dried oregano - 1 teaspoon red pepper flakes (optional, for a kick of heat) - 1/4 cup extra virgin olive oil - Salt and pepper to taste - Fresh basil leaves for garnish - Zest of 1 lemon These ingredients work together to create a creamy and tasty dish. The feta cheese melts beautifully, making a rich sauce. The tomatoes add sweetness and color. Garlic gives a nice aroma, while herbs bring out the flavors. If you want to add more depth to your dish, consider these options: - A splash of balsamic vinegar for tanginess - Sliced olives for a briny kick - Spinach or arugula for extra greens - Chopped nuts for crunch These ingredients can elevate your Baked Feta Pasta. They add different tastes and textures. Feel free to mix and match based on your preferences. To make this dish, you'll need a few basic tools: - A large baking dish for roasting - A pot for cooking pasta - A cutting board and knife for chopping - A fork for mixing Having the right tools makes cooking easier and more fun. These items help you prepare and combine the ingredients smoothly. Enjoy the process and get ready for a delicious meal from the full recipe! Start by preheating your oven to 400°F (200°C). This heat helps the feta and tomatoes cook perfectly. In a large baking dish, mix these ingredients: - 2 cups cherry tomatoes, halved - 4 cloves garlic, minced - 1 teaspoon dried oregano - 1 teaspoon red pepper flakes (optional) - 1/4 cup extra virgin olive oil - Salt and pepper to taste Make sure the tomatoes are well coated with the oil and spices. Create a small space in the center of the tomatoes. Place a 200g block of feta cheese there. Gently press it down and drizzle some olive oil on top. Add a pinch of salt to enhance its flavor. Bake this in the oven for about 25 minutes. The tomatoes should blister and the feta should turn golden and soft. While the feta and tomatoes bake, cook 200g of pasta. You can use penne or fusilli. Follow the package instructions until the pasta is al dente. Remember to save 1/2 cup of the pasta water before draining. After 25 minutes, take the baking dish out of the oven. Use a fork to mash the softened feta and blistered tomatoes together. This forms a creamy sauce. Don't hesitate to break up the feta well. Add the drained pasta to the baking dish. Toss everything together until the pasta is coated in the creamy sauce. If the mixture is too dry, add some reserved pasta water. Finally, stir in the zest of 1 lemon for brightness. Taste and adjust the seasoning with salt and pepper if needed. Serve hot with fresh basil leaves on top for a delicious finish. You can find the Full Recipe above. To get a creamy sauce, use a block of feta cheese. Bake it with the tomatoes and garlic. The heat makes the feta soft and easy to mix. Once you pull it from the oven, mash the feta into the tomatoes with a fork. This creates a rich, smooth sauce. If it's too thick, add some pasta water to loosen it up. You can use penne or fusilli for this dish. Both types hold the sauce well. They let the creamy feta flavor cling to each bite. Cook the pasta until it is just firm. This keeps it from becoming mushy when mixed with the sauce. Herbs add extra depth to the dish. I like to use dried oregano, but fresh basil is a must at the end. The basil gives a fresh taste and bright color. You can also try adding a squeeze of lemon juice for a zesty kick. This will elevate the flavors in your baked feta pasta even more. For more tips and the full recipe, check the recipe section. {{image_4}} You can easily add veggies to your baked feta pasta. Choose colorful options. Bell peppers, zucchini, and spinach work well. Just chop them up and mix them in with the tomatoes. They will add texture and nutrients. Roasting the veggies brings out their natural flavors, making your dish even better. Want to make your meal heartier? Add protein to your baked feta pasta. Grilled chicken or shrimp are great choices. You can also use chickpeas for a plant-based option. Simply cook the protein separately and mix it in after baking. This will give you a filling meal that satisfies your hunger. If you need a gluten-free dish, swap your pasta. Use gluten-free pasta made from rice or lentils. You can also use spiralized veggies like zucchini or carrots. They add unique flavors and are fun to eat. Just make sure to adjust cooking times as needed. Enjoy a delicious meal that meets your dietary needs. To store your baked feta pasta, let it cool down first. Then, place it in an airtight container. This helps keep the flavors fresh. You can store it in the fridge for up to three days. Make sure to label the container with the date. This way, you know when to eat it. When you're ready to enjoy leftovers, reheating is easy. You can use the microwave or the oven. If you use the microwave, place the pasta in a bowl. Heat it for one to two minutes, stirring halfway through. For the oven, preheat it to 350°F (175°C). Place the pasta in an oven-safe dish, cover it with foil, and heat for about 15 minutes. Adding a splash of water can help keep it moist. If you want to save baked feta pasta for later, freezing is a great option. Let it cool completely before you freeze it. Transfer the pasta to a freezer-safe container or bag. Make sure to remove as much air as possible. You can freeze it for up to two months. When you're ready to eat it, thaw it overnight in the fridge before reheating. This keeps the flavor and texture nice. You can use any pasta you like. Penne and fusilli work great. These shapes hold sauce well. They also mix nicely with the creamy feta. Short pasta is easier to serve and eat. You can even use whole wheat or gluten-free pasta. Choose what fits your taste. Yes, you can try other cheeses. Goat cheese adds a tangy flavor. Cream cheese makes it extra creamy. Mozzarella gives a nice melt, while ricotta makes it rich. Just remember, each cheese will change the taste. Feta gives a unique salty flavor that's hard to replace. To add heat, use red pepper flakes. A teaspoon adds a nice kick. You can also add sliced fresh chilies or jalapeños. For a smoky touch, try smoked paprika. Adjust the heat based on your taste. Just be careful not to overwhelm the dish. Absolutely! Baked Feta Pasta stores well. It keeps in the fridge for up to three days. Just make sure to cool it before storing. Reheat it in the oven or microwave. You might need to add a splash of water for moisture. This dish is perfect for quick lunches or dinners. For the full recipe, check out the method I provided earlier. Baked Feta Pasta is simple and fun to make. We covered the main and optional ingredients that add flavor. You learned step-by-step instructions to bake the dish perfectly. Tips like choosing the right pasta and using herbs can make it better. Explore variations to suit your taste and learn how to store leftovers well. Baked Feta Pasta is great for meal prep, too! Enjoy experimenting with this recipe to make it your own.

Baked Feta Pasta Simple and Flavorful Delight

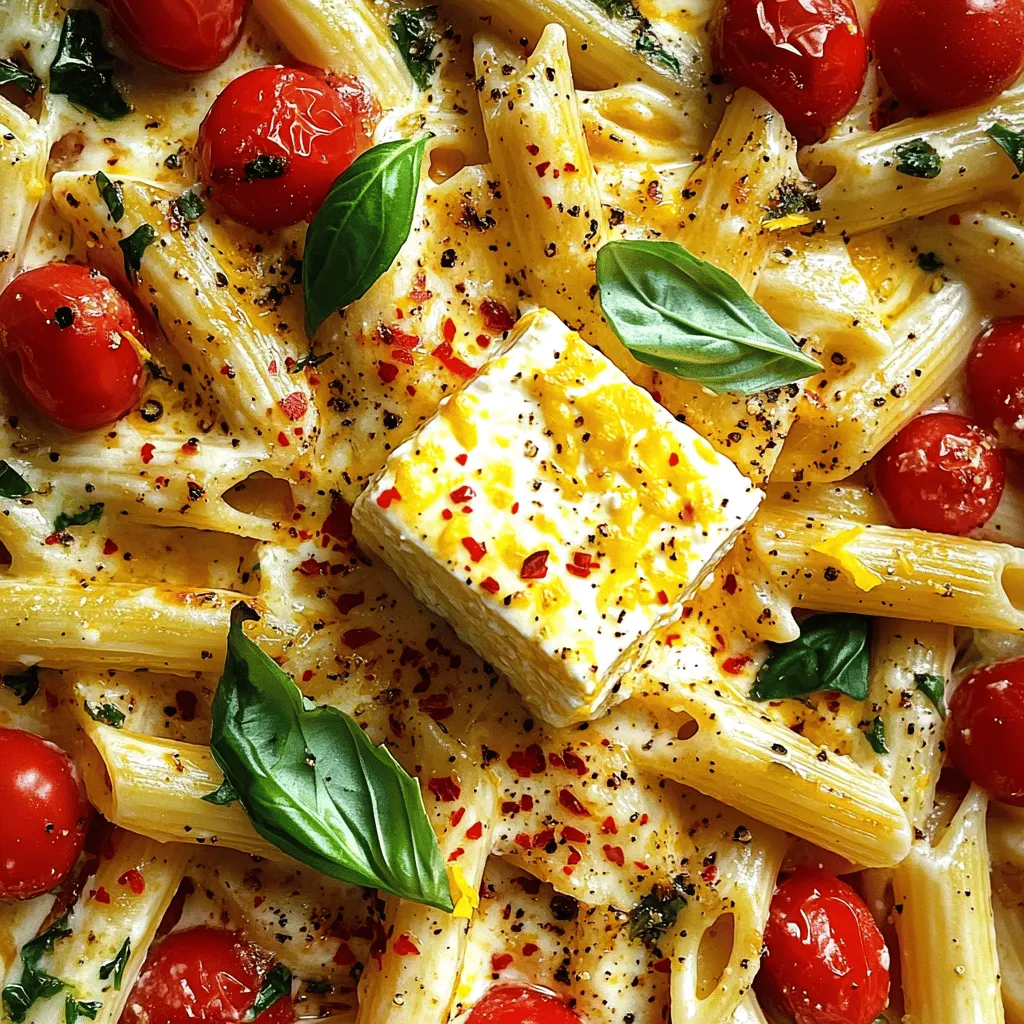
If you love easy and tasty meals, you’ll adore baked feta pasta! This dish combines creamy feta and fresh tomatoes

To make a tasty chickpea salad sandwich, gather these key items: - 1 can (15 oz) chickpeas, thoroughly drained and rinsed - 1/4 cup creamy plain Greek yogurt - 2 tablespoons rich tahini paste - 1 tablespoon freshly squeezed lemon juice - 1 celery stalk, finely diced - 1/4 red onion, finely diced - 1 medium carrot, grated - 1/4 teaspoon garlic powder - 1/4 teaspoon ground cumin - Sea salt and freshly cracked black pepper, to taste - 4 slices of hearty whole grain bread - Crisp, fresh lettuce leaves - Slices of ripe tomato (optional) These ingredients create a balanced and flavorful base for your sandwich. You can enhance your chickpea salad with these tasty add-ins: - Chopped fresh herbs like parsley or cilantro - Diced bell peppers for a crunch - Avocado for creaminess - A dash of hot sauce for some heat These options let you customize your sandwich to fit your taste. Chickpeas pack a punch of nutrition. They are rich in protein and fiber. This helps keep you full and satisfied. Plus, they are low in fat, making them a healthy choice. Chickpeas also provide essential vitamins and minerals, such as: - Folate, which supports cell health - Iron, important for energy - Magnesium, which helps with muscle function Including chickpeas in your diet can boost your health in many ways. For the full recipe, check the [Full Recipe]. To start, grab a mixing bowl. Place the drained chickpeas in it. Use a fork or potato masher. Mash the chickpeas until they break down well, but leave some chunks for texture. Next, add creamy Greek yogurt, tahini, and lemon juice. Mix until smooth and well blended. Then, fold in diced celery, red onion, and grated carrot. This will add color and crunch to your mix. Finally, season with garlic powder, cumin, salt, and pepper. Taste it and adjust the seasonings as needed. Now, it’s time to toast the bread. Heat a toaster or a pan over medium heat. Toast your whole grain bread until it turns golden brown. This will give the bread a nice crunch. The warm, toasted bread will hold up well against the chickpea mixture. This step is key for making your sandwich satisfying and delightful. To assemble, take two slices of your toasted bread. Place fresh lettuce leaves on each slice. This creates a nice crunch and keeps the bread from getting soggy. Next, spoon the chickpea mixture on top of the lettuce. Use a spatula to spread it evenly. If you want, add slices of ripe tomato for extra flavor. Finally, place the other slices of bread on top. Gently press down to hold it all together. Slice each sandwich in half for easy eating. Enjoy your tasty and healthy chickpea salad sandwich! For the full recipe, check out the detailed instructions above. To mash chickpeas well, start with a can of rinsed chickpeas. Use a fork or potato masher. You want a mix of smooth and chunky bits. This gives your chickpea salad good texture. Don't over-mash them; some pieces should stay whole for a nice bite. You can make this sandwich your own! Try adding different vegetables like bell peppers or cucumbers. Fresh herbs, like cilantro or parsley, can brighten the flavor. Want a kick? Add a pinch of cayenne pepper. For more creaminess, swap Greek yogurt for avocado. Each change can make your sandwich unique and tasty. Serve your sandwich on a bright plate. A white plate makes the colors pop. Add a sprig of parsley for a fresh touch. You can also place cherry tomatoes around the sandwich. For a fun side, serve with sweet potato fries. This adds crunch and color to your meal. For the full recipe, check out the Chickpea Delight Salad Sandwich. {{image_4}} To make a vegan chickpea salad sandwich, swap Greek yogurt for a plant-based yogurt. You can use coconut or almond yogurt for great taste. Instead of tahini, try sunflower seed butter for a nut-free option. These swaps keep your sandwich creamy and rich, without using any animal products. You can choose many types of bread for your chickpea salad sandwich. Whole grain bread is a classic choice, but here are some great options: - Sourdough - Rye - Pita bread - Gluten-free bread Each type adds a unique flavor and texture to your sandwich. Choose what you like best! To change the taste of your chickpea salad, you can use different herbs and spices. Here are some ideas: - Fresh dill for a bright flavor - Chopped parsley for freshness - Curry powder for a warm twist - Smoked paprika for a smoky taste Feel free to mix and match to create your perfect flavor! After making your chickpea salad, you may have some left. To store it, place the salad in an airtight container. Keep it in the fridge. It stays fresh for up to three days. Make sure to cover it tightly. This helps to keep out air and moisture. If you want to save some for later, you can freeze the chickpea salad. Use a freezer-safe container or bag. Remove as much air as possible to prevent freezer burn. When you want to eat it, thaw it overnight in the fridge. Use it within a month for the best taste and quality. When making sandwiches, keep them fresh by wrapping them well. Use plastic wrap or parchment paper. This will help to keep the bread from getting soggy. If you plan to eat them later, store the filling and bread separately. Assemble them just before eating. This keeps the bread crispy and the filling fresh. For more ideas, check out the Full Recipe for extra tips. Yes, you can make this sandwich ahead of time. Prepare the chickpea salad and store it in an airtight container. Keep it in the fridge for up to three days. When you are ready to eat, toast your bread. Then, assemble the sandwich just before serving. This keeps your bread nice and crunchy. Chickpea salad sandwiches pair well with many sides. Here are a few tasty ideas: - Crispy baked sweet potato fries - Fresh vegetable sticks with hummus - A simple green salad with lemon dressing - Fruit salad with seasonal fruits These sides brighten up your meal and add extra nutrition. To make a gluten-free chickpea salad sandwich, switch to gluten-free bread. Many stores offer great options. You can also use lettuce wraps instead of bread. This option is fresh and crunchy. Just scoop the chickpea salad into the wrap and enjoy! This blog post covered all you need to know for a chickpea salad sandwich. We explored essential and optional ingredients, and the many ways to spice it up. You learned how to prepare the chickpea mixture, get the bread just right, and assemble a tasty sandwich. We also shared tips on storage and made customizing easy. In short, this sandwich is simple, healthy, and very tasty. Get creative, enjoy your meals, and share with friends!

Chickpea Salad Sandwich Tasty and Healthy Delight

Looking for a quick, tasty, and healthy lunch? The Chickpea Salad Sandwich is your answer! Packed with protein and flavor,

- Chicken and Marinade Components - 1 lb boneless, skinless chicken breasts, cut into 1-inch cubes - 2 tablespoons extra virgin olive oil - 1 teaspoon garlic powder - Zest of 1 large lemon (2 teaspoons) - Juice of 1 large lemon (3 tablespoons) - 1/4 cup fresh basil leaves, chopped - Salt and pepper to taste - 1/2 teaspoon red pepper flakes (optional) - Optional Ingredients for Extra Flavor - Add a pinch of smoked paprika for depth. - Toss in some chopped sun-dried tomatoes for sweetness. - Equipment Needed - Bamboo or metal skewers (remember to soak bamboo skewers for 30 minutes) - Grill or grill pan for cooking - Mixing bowl and whisk for the marinade When I make Lemon Basil Chicken Skewers, I focus on fresh and simple ingredients. The fresh basil and zesty lemon make the chicken taste great. You can also play with flavors by adding a few extra items. Using the right tools makes cooking easier and more fun. Enjoy crafting these tasty skewers! For the full recipe, check out the recipe in the article. To make the marinade, start with a large bowl. Add the extra virgin olive oil, garlic powder, lemon zest, lemon juice, and chopped basil. Whisk these ingredients together until they mix well. This step helps each flavor blend into the chicken. Marinating time is key. Place the chicken pieces in the marinade. Toss them to coat each piece well. Cover the bowl with plastic wrap or a lid and put it in the fridge. Let it marinate for at least 30 minutes. For the best flavor, you can leave it for up to 2 hours. The longer it sits, the more it soaks in that tasty lemon and basil flavor. Once marinated, it's time to assemble the skewers. Grab your bamboo or metal skewers. If you use bamboo, soak them in water for 30 minutes first. This helps prevent burning on the grill. Now, carefully thread the chicken onto the skewers. Leave a little space between each piece. This space helps the chicken cook evenly. It also gives nice grill marks, which look and taste great! Before grilling, preheat your grill or grill pan to medium-high heat. A hot grill ensures that the chicken cooks well and gets that nice char. Place the skewers on the grill. Grill them for about 10 to 12 minutes. Turn them occasionally. This helps them cook evenly and get that golden color. To check if they are done, ensure the chicken reaches an internal temperature of 165°F (74°C). After grilling, take the skewers off the heat. Let them rest for a few minutes. This resting time helps keep the chicken juicy and tender. Enjoy your Lemon Basil Chicken Skewers! For full details, check the Full Recipe. To make the best marinade, mix all ingredients well. This ensures every piece of chicken gets flavor. Use fresh ingredients like basil for a bright taste. Marinate chicken for at least 30 minutes. If time allows, go for 2 hours. This deepens the flavor. For spice, adjust red pepper flakes to your liking. Start with less if you prefer mild. You can always add more later. To get great grill marks, preheat your grill to medium-high heat. Avoid crowding the skewers on the grill. This lets the heat circulate and gives even cooking. Cook the chicken for about 10-12 minutes. Turn them often for even browning. Use a meat thermometer to check the temperature. Chicken is done when it reaches 165°F (74°C). This keeps it safe and juicy. Pair your Lemon Basil Chicken Skewers with fresh sides. A simple salad or grilled veggies works well. For a bright touch, serve with lemon wedges. They add color and flavor. When plating, arrange the skewers neatly on a platter. Add fresh basil sprigs for a nice look. This makes the dish more appealing. For the full recipe, check the details above. {{image_4}} You can switch things up by using shrimp, tofu, or beef. Shrimp cooks fast and adds a nice touch. Just marinate it like chicken. Tofu absorbs flavors well. Use firm or extra-firm tofu for best results. Cut it into cubes, and marinate as you would chicken. For beef, tender cuts like sirloin work great. Adjust cooking times for each protein to ensure they are cooked well. Feel free to play with flavors! Try different herbs like cilantro or parsley for a fresh twist. Mint can also pair well with lemon. You can add spices too, like cumin or paprika, for depth. For a kick, add more red pepper flakes or a dash of cayenne. These changes keep the dish exciting and new. You don’t have to grill. You can bake or broil the skewers. For baking, preheat your oven to 400°F (200°C). Place the skewers on a baking sheet lined with parchment paper. Bake for 15-20 minutes, turning halfway through. Broiling gives you a nice char. Place skewers on a broiler pan and broil for 8-10 minutes, flipping once. Each method gives you tasty Lemon Basil Chicken Skewers. Check out the Full Recipe for more cooking tips! After you enjoy your Lemon Basil Chicken Skewers, store any leftovers quickly. Place the skewers in an airtight container. This helps keep them fresh. Store them in the fridge for up to 3 days. If you want to keep them longer, consider freezing. To reheat your chicken skewers, use the oven or stovetop. Preheat your oven to 350°F (175°C). Place the skewers on a baking tray. Cover them with foil to keep moisture in. Heat for about 10-15 minutes. On the stovetop, use a skillet over medium heat. Add a splash of water and cover. This method helps keep the chicken moist. To freeze your chicken skewers, first wrap them well. Use plastic wrap or aluminum foil. Place the wrapped skewers in a freezer bag. Squeeze out the air before sealing. They can last up to 3 months in the freezer. When you're ready to eat, thaw them in the fridge overnight. Reheat as mentioned above for best results. Enjoy your tasty meal again! For the full recipe, check out the detailed instructions above. You can check if the chicken is cooked by using a meat thermometer. The safe internal temperature is 165°F (74°C). If you don’t have a thermometer, cut into a piece of chicken. It should be white all the way through, with no pink parts. Juices should run clear. Yes, you can prepare the marinade a day ahead. It will save you time on cooking day. Storing it overnight in the fridge helps the flavors blend well. Just remember to add the chicken when you are ready to cook. These skewers pair well with many sides. You can serve them with: - Rice or quinoa - Grilled vegetables - A fresh salad - Garlic bread - Pasta with olive oil and herbs If you use bamboo skewers, soaking them is important. Soak them in water for at least 30 minutes. This prevents them from burning on the grill. Metal skewers do not need soaking. Yes, you can use a store-bought lemon basil marinade. It can save you time. Just make sure to check the ingredients for quality. Fresh flavors are always best, but store-bought is a good shortcut if you are in a hurry. For the complete recipe, check out the Full Recipe section. To make tasty lemon basil chicken skewers, follow each step closely. Start with fresh ingredients and let the chicken soak in the marinade for great flavor. Skewering and grilling bring out the best taste and texture. If you want variety, try different proteins or spices. Save any leftovers correctly, and you can enjoy them later. With practice, you’ll impress friends and family with your grilling skills. Enjoy this fun cooking adventure!

Lemon Basil Chicken Skewers Tasty and Simple Recipe

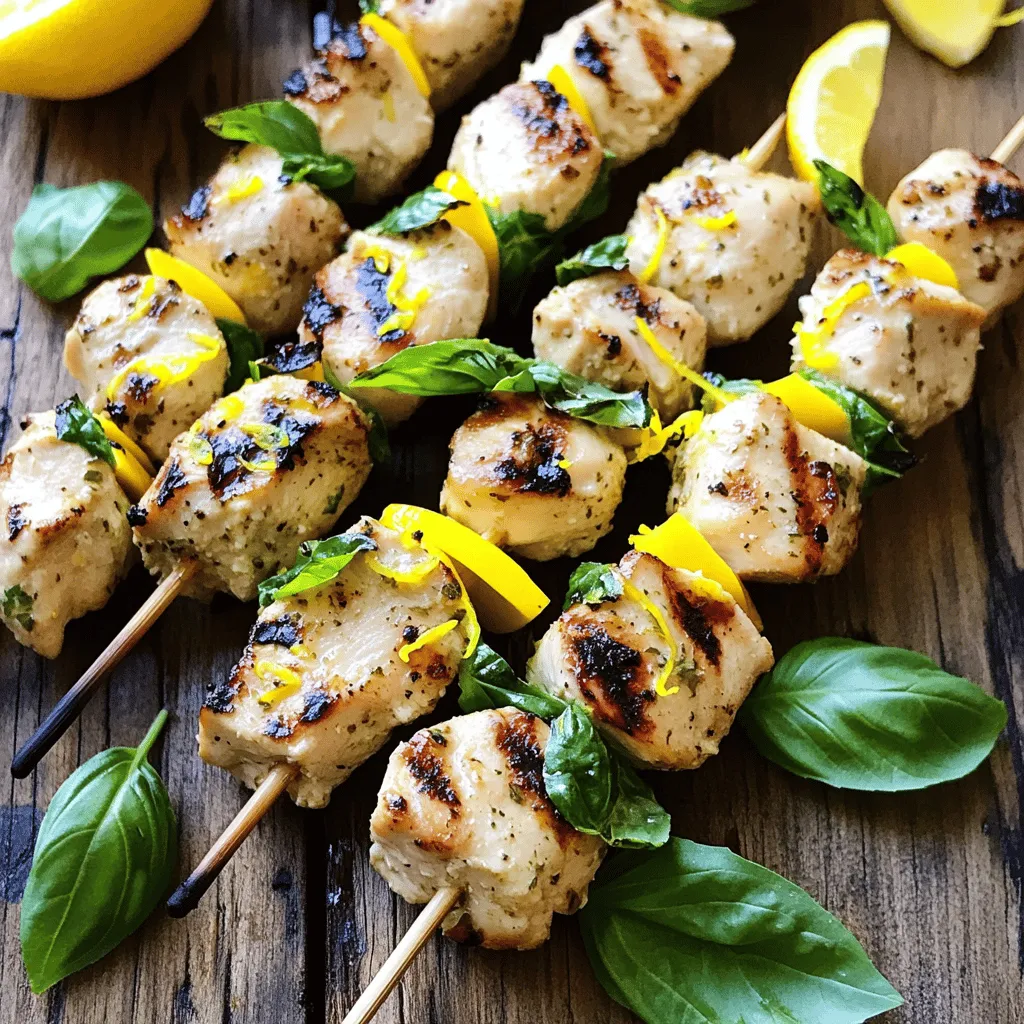
Ready to fire up the grill? My Lemon Basil Chicken Skewers are a tasty, simple delight that will impress everyone

- 1 pound Brussels sprouts - 3 tablespoons balsamic vinegar - 2 tablespoons honey - 3 tablespoons extra virgin olive oil - 2 cloves garlic, minced I love using fresh Brussels sprouts for this dish. They add a crisp texture and earthy flavor. Look for bright green sprouts that feel firm to the touch. Trim off the tough ends and cut them in half to help them cook evenly. The balsamic vinegar gives a sweet and tangy taste that pairs well with the sprouts. I prefer to use a high-quality, aged balsamic vinegar. It has a richer flavor and thicker consistency. Mixing in honey balances the acidity and adds a touch of sweetness. Extra virgin olive oil is key for roasting. It helps the Brussels sprouts caramelize beautifully while adding depth. Fresh garlic brings a nice kick and enhances all the flavors. - 1/4 cup crumbled feta cheese - 2 tablespoons chopped fresh parsley While the Brussels sprouts are fantastic on their own, adding garnishes makes them special. Crumbled feta cheese adds creaminess and a salty bite. Fresh parsley adds a pop of color and freshness, brightening the dish. - Choosing fresh Brussels sprouts - Selecting high-quality balsamic vinegar To choose fresh Brussels sprouts, look for small, compact heads. They should be dark green, with no yellow leaves. Avoid any that feel soft or have dark spots. For balsamic vinegar, buy from a trusted brand. Aged balsamic vinegar often has a richer flavor and a thicker texture. It can elevate your dish and make it truly gourmet. For the full recipe, check out the detailed steps to create this tasty side! - Preheat the oven to 400°F (200°C). This step sets the stage for roasting. - In a large mixing bowl, combine 3 tablespoons of balsamic vinegar, 2 tablespoons of honey, and 3 tablespoons of olive oil. Add 2 minced garlic cloves, a pinch of salt, and some black pepper. Whisk until smooth. - Add 1 pound of halved Brussels sprouts to the bowl. Toss them well in the dressing. Make sure each piece gets coated. - Line a baking sheet with parchment paper. This makes cleanup easy and helps with roasting. Spread the coated Brussels sprouts in a single layer on the sheet. - Place the baking sheet in the oven. Roast the Brussels sprouts for 25 to 30 minutes. Halfway through, stir them around to ensure even cooking. Look for nice caramelization on the edges. - Once they are tender and golden, take the baking sheet out. Allow them to cool for about 5 minutes. - If you want, sprinkle 1/4 cup of crumbled feta cheese and 2 tablespoons of chopped parsley over the warm sprouts. This adds color and flavor. Serve them right away for the best taste experience. Enjoy this simple yet tasty dish! For more details, check out the Full Recipe. To get the best glaze, balance sweetness and acidity. You want a rich flavor. If your glaze is too sweet, add a bit more balsamic vinegar. If it’s too tangy, a touch more honey will help. Taste as you go. This keeps the flavor just right. For even cooking, spread the Brussels sprouts out on the baking sheet. Leave space between them. This helps them roast well and get crispy edges. Remember to stir them halfway through. It makes sure all sides cook evenly. Balsamic glazed Brussels sprouts pair well with many main dishes. Try them with grilled chicken or roasted salmon for a tasty meal. You can also serve them with grains like quinoa or brown rice. They add a nice crunch and flavor. For a creative touch, serve the sprouts in a colorful bowl. Drizzle extra balsamic vinegar over the top. This adds shine and flavor, making your dish look even better. You can also sprinkle some feta cheese and fresh parsley on top for an elegant presentation. Brussels sprouts are packed with nutrients. They have vitamins C and K, and they are high in fiber. This makes them a great choice for a healthy side. Plus, they add a nice crunch to your meal. The flavor of balsamic glazed Brussels sprouts is a balance of sweet and tangy. The balsamic vinegar and honey work together well. The garlic adds depth, while the optional feta gives a creamy touch. This mix creates a dish that is both tasty and satisfying. For the full recipe, check out the Balsamic Bliss Brussels Sprouts. Enjoy making this easy and tasty side! {{image_4}} You can easily adapt this recipe to fit your diet. For a vegan option, replace honey with maple syrup or agave nectar. Both add sweetness without using animal products. If you want a low-carb version, skip the sweeteners altogether. The balsamic vinegar has enough tangy flavor to stand alone. You can reduce the vinegar for less sweetness too. You can switch up the glaze with different sweeteners. Try brown sugar or coconut sugar for a unique taste. If you want to avoid sugar, use a sugar-free sweetener. You can also use other veggies instead of Brussels sprouts. Cauliflower or green beans work great. They will still soak up the balsamic glaze well. Seasonal flavors can make this dish even better. In fall, add roasted chestnuts or cranberries for a festive touch. In summer, toss in fresh herbs like basil or mint. You can add nuts like walnuts or pecans for crunch. Dried fruits like raisins or apricots can add sweetness and texture. These simple changes keep your dish fresh and fun. For the full recipe, check the section above. To store your leftover Balsamic Glazed Brussels Sprouts, let them cool first. Place them in an airtight container. This helps keep them fresh longer. I recommend using glass containers as they do not retain odors like plastic. When reheating, the oven is best for flavor. Preheat the oven to 350°F (175°C). Spread the sprouts on a baking sheet in a single layer. Heat for about 10-15 minutes until warm. If you're in a rush, you can use the microwave. Just remember to cover them to avoid drying out. In the fridge, your Brussels sprouts will last about 3-5 days. Always check for signs of spoilage. If they smell sour or look slimy, it’s time to toss them. Fresh sprouts should look vibrant and feel firm. This way, you can enjoy your tasty side dish without worry. Yes, you can make these Brussels sprouts ahead of time. Just roast them, let them cool, and store them in the fridge. Reheat them in the oven before serving. This keeps them tasty and warm. Trim the base of each Brussels sprout first. Then, cut them in half lengthwise. This helps them roast evenly and absorb the balsamic glaze well. Brussels sprouts are very healthy! They are rich in vitamins C and K. They also have fiber, which is good for digestion. Plus, they have antioxidants that help fight disease. Brussels sprouts are done when they are tender and caramelized. You should see brown edges and feel a slight softness when pierced with a fork. This usually takes about 25-30 minutes at 400°F. Yes, you can use frozen Brussels sprouts. However, thaw them first and pat them dry. This helps them roast better and not become soggy. These Brussels sprouts go well with many dishes! Try serving them with grilled chicken, steak, or fish. They also pair nicely with quinoa or a fresh salad. For an extra touch, add some nuts or seeds for crunch. For the full recipe, check out the section above. Balsamic glazed Brussels sprouts are simple and tasty. We covered key ingredients, like fresh sprouts and balsamic vinegar, to ensure flavor. I shared step-by-step instructions to guide you through roasting. Tips helped fine-tune the glaze and serving ideas to impress. In the end, enjoy creating your own version. Feel free to adapt it to your taste and needs. With these tips, you'll serve a dish that's both healthy and delicious.

Balsamic Glazed Brussels Sprouts Easy and Tasty Side

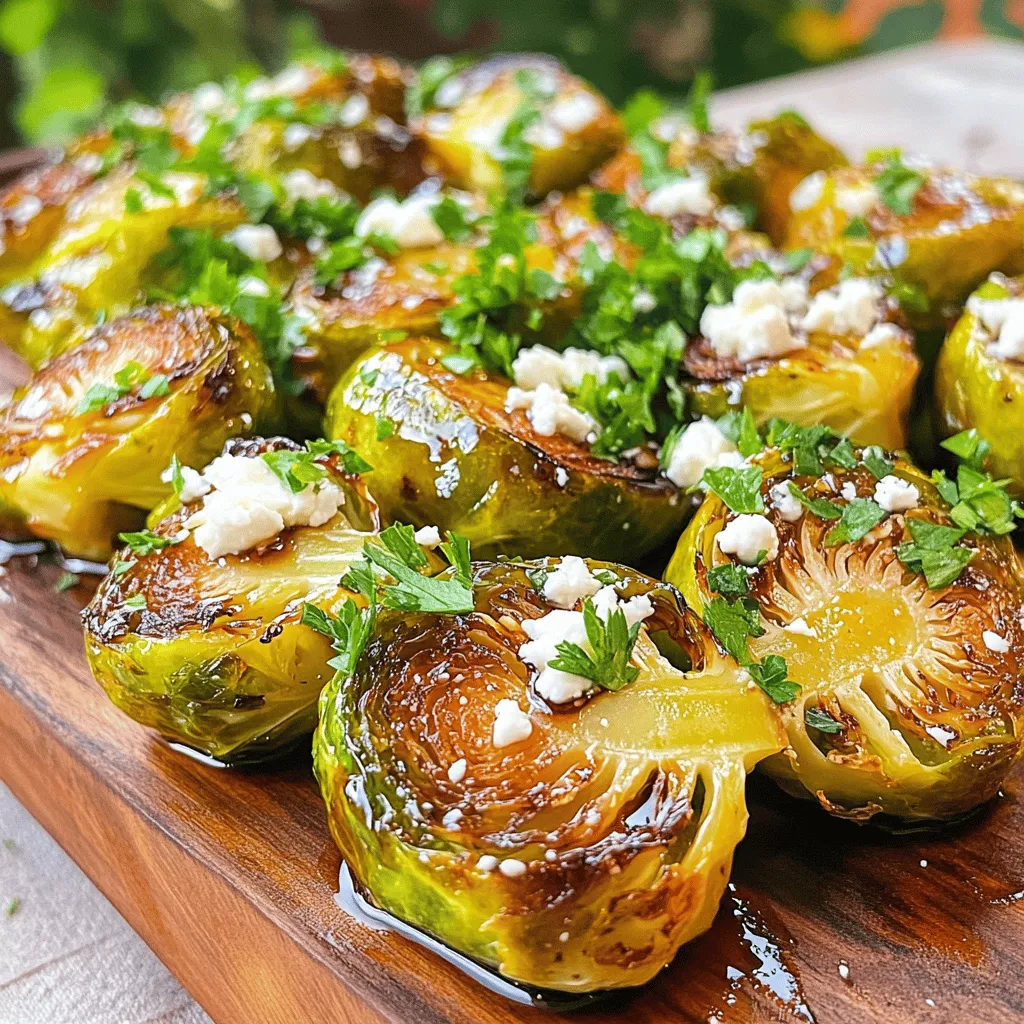
Looking for an easy, tasty side dish that will impress everyone? Balsamic Glazed Brussels Sprouts are the answer! With just

- Whole chicken (4-5 lbs) - Fresh thyme (approximately 10-12 sprigs) - Lemons (2 total - one juiced, one cut into wedges) - Minced garlic (4 cloves) - Olive oil (4 tablespoons) - Salt, pepper, and paprika - Quartered onion (1 large) - Baby potatoes (2 cups, halved) - Carrot sticks (1 cup) When I make Lemon Thyme Roasted Chicken, I focus on fresh and simple ingredients. A whole chicken forms the base of this dish. I pick one that weighs around 4-5 pounds. It’s big enough to feed a family and juicy when cooked right. Fresh thyme adds a nice herbal note. I use about 10-12 sprigs to infuse flavor throughout the chicken. Lemons brighten the dish. I juice one lemon and cut the other into wedges. The juice goes into the marinade, while the wedges go inside the chicken. This adds a burst of citrus flavor. The marinade is key. I mix minced garlic, olive oil, salt, pepper, and paprika. This mix creates a flavorful base that soaks into the chicken. It helps to keep the meat moist and adds depth. I also like to include vegetables. A large onion, baby potatoes, and carrot sticks round out the meal. The onion adds sweetness, while the potatoes and carrots become tender and delicious. They roast alongside the chicken, soaking up all the tasty juices. You can find the full recipe for Lemon Thyme Roasted Chicken in this article. It includes all the steps to bring these ingredients together for a perfect dinner. - Preheat the oven to 425°F (220°C). - Rinse and dry the chicken thoroughly. Start by preheating your oven. This high heat will help crisp the chicken skin. Next, rinse the whole chicken under cold water. Make sure to clean both the inside and outside. After rinsing, dry the chicken with paper towels. Drying is key for crispy skin. - Prepare the marinade and apply it under the chicken skin and on the exterior. - Stuff chicken cavity with onion, lemon, and thyme. In a bowl, mix garlic, juice from one lemon, and olive oil. Add salt, pepper, and paprika for flavor. Lift the skin on the chicken gently. Use your fingers to spread some of the marinade under the skin. Rub the remaining marinade all over the chicken. This adds flavor everywhere. Now, stuff the cavity with the quartered onion, lemon wedges, and some thyme. This adds great aroma while it cooks. - Arrange vegetables and place the chicken in the roasting pan. - Roast and baste the chicken until it reaches the correct temperature. In a large roasting pan, toss halved baby potatoes and carrot sticks with olive oil, salt, and pepper. Place the vegetables around the chicken in the pan. Place the pan in the preheated oven. Roast the chicken for about 1 hour and 15 minutes. Check the chicken's internal temperature in the thickest part of the thigh. It should reach 165°F (75°C). Halfway through the cooking time, use a baster or spoon to drizzle the pan juices over the chicken. This helps create a golden and crispy skin. Once done, take the chicken out and let it rest for 10 minutes. Resting lets the juices settle, giving you a juicy chicken. For more details, check the Full Recipe. To get that perfect crispy skin, drying the chicken is key. After rinsing, use paper towels to pat the chicken dry inside and out. Moisture can ruin your crispiness. When it comes to basting, I recommend using the pan juices. Halfway through roasting, drizzle these juices over the chicken. This step adds flavor and helps create a golden color. For deeper flavor, you can add more herbs and spices. Consider rosemary, oregano, or even a pinch of cayenne for some heat. You can also play with citrus. Try using oranges or limes instead of lemons for a unique twist. Each option gives a different taste that can make the dish feel fresh and exciting. When serving Lemon Thyme Roasted Chicken, think about sides that complement it well. Roasted vegetables like carrots and potatoes pair perfectly. A simple green salad with vinaigrette also works great. For drinks, a chilled white wine like Sauvignon Blanc enhances the meal. It balances the herbs and lemon in the dish beautifully. Check out the Full Recipe for more details. {{image_4}} You can cook Lemon Thyme Roasted Chicken in different ways. Grilling adds a smoky flavor. To grill, marinate the chicken as you would for roasting. Preheat the grill to medium heat. Cook the chicken for about 1 hour, turning often to avoid burning. A slow-cooker version is great for busy days. Simply place the marinated chicken in a slow cooker. Add your veggies around it. Set it on low for 6-8 hours. This method keeps the chicken juicy and tender. You can change some ingredients to suit your taste. For herbs, try rosemary or oregano. These add a unique twist while keeping the dish fresh. If you prefer another type of poultry, use a whole turkey or Cornish hen. Just adjust cooking times as needed. For veggies, mix it up with bell peppers, zucchini, or Brussels sprouts. These add color and flavor. You can also toss in some mushrooms for an earthy taste. Add spices from around the world to create new tastes. For an Asian twist, use ginger and soy sauce. Add sesame oil for a rich flavor. You can also sprinkle in some five-spice powder for an extra kick. For a Mediterranean flair, mix in olives and feta cheese. Use lemon zest and oregano to brighten the dish. These variations let you explore new flavors while enjoying the main recipe. You can find the full recipe to get started! Store leftover Lemon Thyme Roasted Chicken in the fridge. Use airtight containers to keep it fresh. Place the chicken pieces in a single layer. This helps maintain texture. If you have vegetables left over, store them separately. They can get soggy if mixed with the chicken. When reheating, use low heat to keep the chicken juicy. You can use an oven or a microwave. If using an oven, set it to 350°F (175°C). Cover the chicken with foil to keep moisture in. For the microwave, heat in short bursts. Check every minute to avoid drying it out. You can also use leftover chicken in other dishes. Shred the chicken for salads or wraps. Add it to soups or stews for extra flavor. You can even toss it in pasta for a quick meal. This way, you minimize waste and enjoy new meals! The safe internal temperature for chicken is 165°F (75°C). This ensures your chicken is safe to eat. Use a meat thermometer to check the thickest part of the thigh. Avoid touching the bone, as it can give a false reading. Cooking at this temperature keeps the meat juicy and tender. You can check if the chicken is done without cutting into it. Look for clear juices running from the chicken when you poke it. If the juices run clear, the chicken is likely done. The skin should also be golden brown and crispy. You can wiggle the leg; if it moves easily, it’s a good sign. Yes, you can use dried thyme. However, dried herbs are stronger than fresh ones. Use one-third the amount of dried thyme compared to fresh. This means if the recipe calls for 10 sprigs of fresh thyme, use about 1-2 teaspoons of dried thyme. While the flavor will be different, it can still be tasty. This blog post covered all you need for Lemon Thyme Roasted Chicken. We explored key ingredients, from a whole chicken to fresh thyme and lemons. I shared step-by-step instructions for prepping, marinating, and roasting. Tips for crispy skin and flavor enhancement helped elevate your dish. We also discussed variations, storage, and reheating to keep your meals fresh. With these insights, you can create a delicious meal sure to impress. Enjoy your cooking adventure!

Lemon Thyme Roasted Chicken Flavorful Dinner Recipe

If you’re searching for a dinner that bursts with flavor, look no further! This Lemon Thyme Roasted Chicken recipe transforms

To create a perfect Chocolate Peanut Butter Cheesecake, gather these simple ingredients: - 1 ½ cups graham cracker crumbs - ½ cup unsalted butter, melted - 1 tablespoon granulated sugar - 16 oz cream cheese, softened at room temperature - 1 cup powdered sugar - 1 cup creamy peanut butter - 1 teaspoon vanilla extract - ½ cup heavy cream - 4 oz semi-sweet chocolate, melted and allowed to cool slightly - ½ cup chocolate chips (for topping) - ¼ cup mini peanut butter cups (for optional garnish) Each ingredient plays a key role in making this dessert rich and flavorful. For the crust, graham cracker crumbs give a nice crunch. The melted butter helps bind the crumbs together. Granulated sugar adds sweetness, balancing the flavors. The filling starts with cream cheese, which brings a creamy texture. Powdered sugar makes it sweeter, while peanut butter adds that rich, nutty taste. Vanilla extract gives a warm note, enhancing all the flavors. Heavy cream is whipped to create a light texture in the filling. Semi-sweet chocolate adds depth and richness. The chocolate chips and mini peanut butter cups on top provide a delightful finish. For the full recipe, follow the instructions to combine these ingredients into a delicious treat! 1. In a medium bowl, combine the graham cracker crumbs, melted butter, and sugar. Stir until it looks like wet sand. 2. Press this mixture firmly into the bottom of a 9-inch springform pan. Make sure it is packed tight. 3. Place the crust in the fridge for about 30 minutes. This will help it firm up nicely. 1. In a large bowl, use an electric mixer to beat the softened cream cheese and powdered sugar. Mix until it is smooth with no lumps. 2. Next, add the creamy peanut butter and vanilla extract. Keep mixing until everything is combined and creamy. 3. Gradually pour in the slightly cooled melted chocolate while mixing on low speed. This will help avoid lumps and keep it smooth. 1. In a clean bowl, pour the heavy cream. Use an electric mixer to whip it until soft peaks form. This makes the filling light and airy. 2. Gently fold the whipped cream into the chocolate and peanut butter mixture with a spatula. Be careful to keep it fluffy. 3. Pour the cheesecake filling over the chilled crust. Spread it evenly with a spatula. Tap the pan on the counter to release any air bubbles. 4. Cover the pan with plastic wrap and refrigerate for at least 4 hours, or overnight for the best results. This full recipe will guide you through creating a dessert that balances rich chocolate with creamy peanut butter. To get that creamy texture, always use room temperature ingredients. Cold cream cheese can lead to lumps. Let it sit out for about 30 minutes before mixing. When whipping heavy cream, start at a low speed. Gradually increase the speed to avoid splatters. Look for soft peaks; this adds lightness to the cheesecake. To avoid lumps in your filling, mix slowly when adding melted chocolate. This helps blend it smoothly without clumps. For a beautiful presentation, serve each slice on a nice plate. Drizzle with melted chocolate or add a dollop of whipped cream. You can sprinkle crushed graham crackers on the side for a fun crunch. Pair this cheesecake with coffee or a dessert wine. Both options enhance the rich flavors. If you have leftovers, store them in an airtight container in the fridge. This keeps the cheesecake fresh and delicious. One common mistake is overmixing the filling. This can make your cheesecake dense and heavy. Mix just until ingredients are combined. Also, don’t skip the chilling time. Cheesecake needs to cool fully for the best texture. Finally, refrigerate the crust before adding the filling. This helps it hold its shape and prevents it from becoming soggy. Following these tips will help you create a perfect Chocolate Peanut Butter Cheesecake. For the full recipe, check out the section above. {{image_4}} To make a swirl effect, you need to layer the filling. First, prepare the cheesecake filling as usual. Then, take some of the chocolate mixture and set it aside. Pour the plain peanut butter filling into the crust. Next, drop spoonfuls of the chocolate mixture on top. Use a knife to gently swirl the chocolate into the filling. This creates a beautiful marbled look. When adjusting ingredients for swirling, keep the chocolate filling smaller than the peanut butter. A good ratio is one part chocolate to four parts peanut butter. This keeps the flavor balance right while allowing the swirl to shine. For a gluten-free option, swap the graham crackers with gluten-free crumbs. You can use almond flour or gluten-free cookies. This change will give your crust a different taste but still hold up well. Adjusting the recipe means looking at the texture of the crust. You may need to add a bit more butter or a dash of sugar. This keeps the crust from being too crumbly. Just make sure to pack the crust tightly in the pan. You can change the toppings to suit your taste. Instead of just chocolate chips, try dark chocolate or white chocolate chips. Each type adds a new flavor twist to your cheesecake. For nut toppings, consider using chopped almonds or walnuts. These add a nice crunch. You can also sprinkle some crushed nuts on top for extra flair. This will give your cheesecake a unique look and taste. Feel free to explore these variations while making the Full Recipe! To keep your chocolate peanut butter cheesecake fresh, store it in the fridge. Wrap it well in plastic wrap or use an airtight container. This way, it will stay moist and delicious. You can also freeze the cheesecake if you need to store it longer. Use a freezer-safe container, and it can last up to three months. Just remember to let it cool completely before wrapping. When you want to enjoy frozen cheesecake, the best method is to move it to the fridge. Let it thaw overnight for the best results. This keeps the texture smooth and creamy. If you’re in a hurry, you can leave it out at room temperature for about 2 hours. Just avoid using the microwave, as it can change the texture. If you want to warm a slice, use the oven. Preheat it to 250°F (120°C). Place the slice on a baking sheet and heat for about 10 minutes. This method helps keep the cheesecake creamy without drying it out. Enjoy your slice warm with a drizzle of melted chocolate for an extra treat. The prep time for this cheesecake is 30 minutes. The total time, including chilling, is about 4 hours and 30 minutes. This makes it a great dessert for any occasion! Yes, you can make this cheesecake one day ahead. Just cover it well and store it in the fridge. This helps the flavors meld and improves the taste! To make a firmer cheesecake, chill it longer. Aim for at least 6 hours or overnight. You can also use less cream or add a bit more cream cheese. This helps create a denser texture. Yes, you can use dairy-free cream cheese and coconut cream. Also, choose a plant-based butter for the crust. These swaps keep the flavor while making it dairy-free. Absolutely! Using crunchy peanut butter adds texture and a nice crunch. It also gives a different taste, making each bite more interesting. Just keep in mind that the filling may not be as smooth. This blog post walks you through making a delicious Chocolate Peanut Butter Cheesecake. We covered the key ingredients needed, from graham cracker crumbs to mini peanut butter cups. The step-by-step guide ensures a smooth process, helping you avoid common mistakes. Remember to chill your cheesecake well for the best texture. In conclusion, this cheesecake is easy to customize. Whether you try a swirl or gluten-free option, you can enjoy a tasty treat. So gather your ingredients and start baking today!

Delicious Chocolate Peanut Butter Cheesecake Recipe

Get ready to indulge in a rich, creamy delight with my delicious chocolate peanut butter cheesecake recipe! This dessert combines

- 1 cup cherry tomatoes, halved - 1 bell pepper, chopped into bite-sized pieces - 1 medium zucchini, sliced into half-moons - 1 medium yellow squash, sliced into half-moons - 1 red onion, roughly chopped into wedges - 2 cups fresh broccoli florets - 3 tablespoons extra virgin olive oil - 1 teaspoon garlic powder - 1 teaspoon onion powder - 1 teaspoon smoked paprika - Salt and freshly ground black pepper, to taste - Fresh basil leaves, for garnish To make oven roasted vegetables, you need these ingredients. Each one brings a unique flavor. Cherry tomatoes add sweetness. Bell peppers give crunch. Zucchini and yellow squash provide a soft texture. The red onion adds a touch of sharpness. Broccoli gives a nice bite. - Suggested seasonings and herbs: You can try thyme, rosemary, or Italian seasoning. - Alternate vegetable options: Carrots, Brussels sprouts, or cauliflower work well too. - Flavor enhancers such as balsamic vinegar or lemon juice: A drizzle can brighten up your dish. Feel free to change the vegetables based on what you have. Using different herbs or seasonings can make it fun. You can also add a splash of balsamic vinegar or lemon juice for extra zing. This way, you can create your own twist on the recipe. For the full recipe, check the section above! 1. First, preheat your oven to 425°F (220°C). This helps the veggies roast well. 2. Grab a large bowl. Chop your vegetables and add them in. Use: - 1 cup cherry tomatoes, halved - 1 bell pepper, chopped - 1 medium zucchini, sliced - 1 medium yellow squash, sliced - 1 red onion, roughly chopped - 2 cups broccoli florets 3. Drizzle 3 tablespoons of extra virgin olive oil over the veggies. 4. Sprinkle in 1 teaspoon garlic powder, 1 teaspoon onion powder, and 1 teaspoon smoked paprika. Add salt and pepper to taste. 5. Toss the mixture with a spoon or your hands. Make sure every piece is coated. 1. Line a baking sheet with parchment paper. Transfer the veggies onto it. Spread them out in a single layer. 2. Put the baking sheet in the oven. Roast for 25-30 minutes. 3. Halfway through, stir the vegetables. This helps them cook evenly. 4. Check for doneness. The veggies should be tender and slightly caramelized. 5. Remove the baking sheet from the oven. Let the vegetables cool for a few minutes before serving. For the full recipe, check the recipe section. To get the best oven roasted vegetables, follow these tips: - Ensure Even Cooking: Cut your veggies into uniform sizes. This helps them cook at the same rate. Smaller pieces will roast faster, while larger ones may need more time. - Use High-Quality Olive Oil and Spices: Choose extra virgin olive oil for better flavor. Fresh herbs and spices bring out the best taste. Garlic powder and smoked paprika add a wonderful kick. - Importance of Space on the Baking Sheet: Spread the vegetables out in a single layer. If they are too crowded, they will steam instead of roast. This means less flavor and a soggier texture. Now that your vegetables are roasted, here are some tasty ways to enjoy them: - Ideal Pairings with Proteins or Grains: Serve them alongside grilled chicken, fish, or quinoa. They can also enhance a salad or bowl dish. The mix of textures and flavors is delightful. - Garnishing Ideas for Presentation: Fresh herbs like basil or parsley add color and aroma. A sprinkle of feta cheese or goat cheese can add creaminess. - Suggestions for Dipping Sauces or Dressings: Pair your vegetables with hummus, tzatziki, or a balsamic reduction. These dips can add even more flavor and excitement to your dish. For a complete recipe, check out the Full Recipe. {{image_4}} You can mix and match vegetables based on what’s fresh and in season. Try using: - Carrots - Sweet potatoes - Brussels sprouts - Eggplants Each mix offers a new flavor experience. You can also explore global flavors. For a Mediterranean twist, add olives and feta cheese. To capture Asian tastes, try sesame oil and soy sauce. Using seasonal herbs enhances the taste. Fresh thyme or rosemary works well. Basil adds a nice touch too. Just chop them up and sprinkle before roasting. These roasted veggies fit many diets. They are naturally vegan and gluten-free. To add protein, toss in chickpeas or tofu. This makes the dish heartier. If you want sugar-free or low-carb options, focus on non-starchy veggies. Zucchini and bell peppers are great choices. They keep the dish light and healthy. You can find even more ideas in the [Full Recipe]. To keep your oven roasted vegetables fresh, use airtight containers. Glass or plastic containers work great. They keep moisture in and prevent odors from mixing. Once your veggies cool, store them in these containers. For fresh, uncooked vegetables, refrigerate them in a crisper drawer. Keep them in breathable bags or containers. This helps them stay crisp for longer. When reheating, aim for the oven or stovetop. These methods keep the texture nice. Try heating at 350°F (175°C) for about 10 minutes. This way, they warm evenly and stay tasty. You can also use your air fryer for a quick reheat. Just a few minutes can bring back that roasted crunch. For leftover veggies, be creative! Toss them in salads, stir-fries, or omelets. They add great flavor and color to many dishes. This way, you reduce waste and enjoy your food again. How long do you roast vegetables in the oven? You should roast vegetables for about 25-30 minutes at 425°F (220°C). Stir them halfway through. This helps them cook evenly and get that nice caramelized look. What vegetables are best for roasting? Great choices for roasting include: - Cherry tomatoes - Bell peppers - Zucchini - Yellow squash - Red onion - Broccoli These vegetables roast well and taste fantastic when cooked. Can you roast frozen vegetables and how? Yes, you can roast frozen vegetables. Just spread them out on the baking sheet. Add a little extra oil and adjust the cooking time. They may need a few more minutes to get tender. Why is my roasted vegetables burning? Burning can happen if your oven is too hot or if the veggies are too crowded. Make sure to spread them out evenly and check your oven temperature. Can I use a convection oven for roasting? Absolutely! A convection oven can help cook your vegetables faster and more evenly. Just reduce the temperature by about 25°F (14°C). How can I get a crispy texture? To achieve crispy texture, use a hot oven and space out the veggies. A little extra olive oil can also help them crisp up nicely. For extra crunch, you can broil them for the last few minutes. For a full recipe and to explore more cooking ideas, check out the Full Recipe. Oven-roasted vegetables are simple and delicious. We covered essential and optional ingredients, step-by-step prep, and roasting tips. You can customize flavors with herbs or sauces. Remember to store leftovers well for future meals. Roasted veggies pair perfectly with proteins or grains. Explore different vegetable mixes and try global flavors for variety. With these tips, you can enjoy flavorful, perfectly roasted vegetables any time. Enjoy being creative in your kitchen!

Oven Roasted Vegetables Flavorful and Easy Recipe

Are you ready to elevate your veggie game? In this post, I’ll share my best tips for making oven-roasted vegetables

- Ripe mangoes - Red bell pepper - Red onion - Jalapeño pepper - Fresh cilantro - Limes - Salt - Ground cumin Mango salsa bursts with flavor and color. The first star of the show is ripe mangoes. They should be sweet and juicy. Look for mangoes that give slightly when pressed. Next, we have red bell pepper. It adds a nice crunch and sweetness. Red onion follows, bringing a sharp bite that balances the dish. Jalapeño pepper adds heat. You can adjust the amount to suit your taste. I recommend removing the seeds for less spice. Fresh cilantro gives a bright, herbal note. Lime juice brings acidity and freshness. Lastly, salt and ground cumin enhance all the flavors. Cumin adds warmth, making the salsa taste more complex. - Avocado - Garlic - Corn For extra creaminess, add avocado. It pairs well with mango. If you like a bit of garlic, minced garlic adds great depth. Corn can add sweetness and texture, making the salsa even heartier. Each optional add-in gives you a chance to customize the salsa to your taste. You can mix and match as you please! For the full recipe, check out the Tropical Mango Salsa 🥭 section. - Begin by preparing a large mixing bowl. - Peel and dice the ripe mangoes into small cubes. Aim for a sweet and juicy texture. - Next, finely chop the red bell pepper and red onion. This adds color and crunch to the salsa. - Now, mix everything in the bowl. Start with the diced mangoes, then add the chopped vegetables. - Carefully fold in the minced jalapeño. Adjust the amount for your preferred spice level. - Add the fresh cilantro leaves for a burst of flavor. - Squeeze the juice of two limes over the mix. Sprinkle in some ground cumin for warmth. - Gently combine all the ingredients using a spatula. Make sure not to smash the mangoes. - Season with salt to taste. - Letting the salsa rest is key. This helps flavors mingle and develop. - I recommend a minimum resting duration of 10 minutes at room temperature. - During this time, the salsa will deepen in flavor, making each bite even better. This step-by-step guide will help you create a vibrant and delicious mango salsa. For the full recipe, refer to the earlier section. Enjoy your cooking! Choosing the right mangoes is key for great salsa. Look for mangoes that feel slightly soft when you squeeze them. This means they are ripe and ready to eat. The skin should show some wrinkles and have a golden hue. Avoid hard mangoes; they won’t be sweet. When it comes to herbs, I prefer fresh cilantro for this recipe. Fresh herbs add bright flavor and aroma. Dried herbs can taste flat and stale. If fresh cilantro isn't available, you can try fresh parsley but it won't give the same taste. To mix the salsa without smashing the mangoes, use a gentle folding method. Start by placing the diced mangoes in a large bowl. Add the other chopped ingredients on top. Use a spatula to lift and fold the mix carefully. This way, you keep the chunks intact and the salsa looks beautiful. For the best flavor, serve the salsa chilled. Place it in the fridge for a while before serving. You can also add lime wedges on the side for a fresh touch. Enjoy it with crispy tortilla chips or as a topping for grilled meats. If you want more heat, add extra jalapeño. Start with a small amount and taste as you go. You can also remove the seeds for less spice. If it gets too hot, balance it with a bit more mango or some diced avocado. For sweetness balancing, lime juice works wonders. If the salsa tastes too tart, add a pinch of sugar or a bit more mango. This will help even out the flavors, making every bite a delight! For the full recipe, check the Tropical Mango Salsa section above. {{image_4}} You can change the flavors in your mango salsa with easy swaps. Try different peppers, like poblano or serrano, to adjust the spice level. Poblano adds a mild heat, while serrano gives a good kick. If you want a fruity twist, toss in pineapple or kiwi. Both fruits add sweetness and complement mango well. You can choose between spicy or mild mango salsa. For spicy salsa, increase the jalapeño or add hot sauce. If you prefer mild, reduce the jalapeño. You can also play with spices. Adding a pinch of chili powder or smoked paprika will give your salsa a unique flair. Tropical spices like ginger or cardamom can also enhance the flavor. Mango salsa can take on many styles. A Caribbean-inspired salsa includes ingredients like coconut and lime for a tropical vibe. You might also try a Mexican street food style, adding corn and lime for a fresh taste. Each variation brings its own charm, so feel free to explore! For the full recipe, check here: [Full Recipe]. To keep your mango salsa fresh, store it in an airtight container. This helps lock in the flavors. Place the container in the fridge right after making it. Mango salsa stays fresh for about 3 days. After that, the mango can become mushy, and the flavors may fade. You can freeze mango salsa if you want to save it for later. Use freezer-safe bags or containers. Make sure to remove as much air as possible to avoid freezer burn. It can last up to 3 months in the freezer. When you’re ready to use it, let it thaw in the fridge overnight. This keeps the flavors intact and maintains the texture. When you take the salsa out of storage, check its texture. If it looks a bit watery, give it a gentle stir. You can add fresh lime juice or a pinch of salt to boost the flavor. Serve it chilled for the best taste. Use it as a dip or a topping to brighten up your dishes. For the full recipe, check out Tropical Mango Salsa! Mango salsa is not just tasty; it’s healthy too. Here are some benefits: - Mangoes: Rich in vitamins A and C, they boost your immune system. - Red bell peppers: High in antioxidants, they help fight free radicals. - Red onions: Great for heart health and packed with vitamins. - Jalapeños: They add spice and may help with metabolism. - Cilantro: Full of vitamins K and C, it aids digestion. - Limes: High in vitamin C, they help with skin health. This dip is low in calories, making it a perfect choice for snacking. You can enjoy it without guilt! Yes, you can make mango salsa ahead of time! Here’s how: - Pre-making: Chop all your ingredients and mix them in a bowl. - Storing: Cover the bowl with plastic wrap or a lid. - Refrigeration: Keep it in the fridge for up to two days. When you make it early, the flavors get better. As it sits, the ingredients blend well. Just give it a good stir before serving. Mango salsa is very versatile. Here’s what you can pair it with: - Tortilla chips: A classic snack for dipping. - Grilled chicken: Adds color and flavor to your meal. - Fish tacos: A fresh topping that enhances taste. - Salads: Use it as a dressing for a fruity twist. - Burritos: A great way to add some zing. Get creative! This salsa can even top burgers or be mixed into rice dishes. Enjoy the bold and fruity flavors in many ways. Mango salsa is a bright, flavorful dish you can easily make at home. We covered the key ingredients like mangoes, peppers, and onions, plus optional add-ins for extra flavor. I shared steps for preparing, mixing, and resting to enhance your salsa. Remember, you can adjust spices and try new fruits for variety. Store it properly to keep it fresh. With these tips, your mango salsa can impress anyone at the table. Enjoy making it as much as you enjoy eating it!

Mango Salsa Bold and Flavorful Fresh Dip

Are you ready to add a burst of flavor to your party? Mango salsa is the perfect fresh dip that

To make tasty oven-baked BBQ ribs, you need the following main ingredients: - 2 racks of baby back ribs - 1 cup brown sugar - 1 tablespoon smoked paprika - 1 tablespoon chili powder - 1 tablespoon garlic powder - 1 tablespoon onion powder - 1 teaspoon ground cumin - 1 teaspoon cayenne pepper (optional for added heat) - Salt and pepper to taste - 1 cup barbecue sauce (your preferred brand or homemade) These ingredients work together to create a sweet and spicy flavor. The brown sugar adds sweetness, while the spices bring depth. Feel free to customize your ribs with these optional ingredients: - 1 tablespoon mustard (for tang) - 1 tablespoon apple cider vinegar (for brightness) - Fresh herbs like thyme or rosemary (for aroma) Adding these can give your ribs a unique twist. Try different combinations to find what you love best! For the best results, I suggest using baby back ribs. They cook up tender and juicy. Spare ribs are another option; they have more fat and can be very flavorful. Whichever type you choose, make sure they are fresh and high quality to ensure a great meal. For the complete cooking process, refer to the Full Recipe. Enjoy creating this delicious dish! First, preheat your oven to 300°F (150°C). This low heat helps the ribs cook slowly. It makes them very tender and juicy. Next, check your ribs. Remove the silver skin from the back. This helps the flavors soak in better. If it's hard to grip, use a paper towel. Now, dry the ribs with paper towels. This step is key for the rub to stick well. In a bowl, mix the following spices: - 1 cup brown sugar - 1 tablespoon smoked paprika - 1 tablespoon chili powder - 1 tablespoon garlic powder - 1 tablespoon onion powder - 1 teaspoon ground cumin - 1 teaspoon cayenne pepper (optional) - Salt and pepper to taste Stir everything together. This rub adds great flavor to your ribs. Sprinkle it all over the ribs. Make sure to cover every side. Take your time here, as this is where the magic starts. Grab a large piece of aluminum foil. Place the seasoned ribs bone side down in the center. Wrap the foil tightly around the ribs. This creates a steam pouch that keeps moisture in. Place the wrapped ribs on a baking sheet. Now, slide them into the oven. Bake for 2.5 to 3 hours. The meat should be tender and easy to pull away from the bone. When the ribs are done, carefully unwrap them. Watch out for steam! Brush your favorite barbecue sauce on top. Make sure to use a thick layer for that sticky finish. Next, set your oven to broil. Broil the ribs for 5-7 minutes. Keep an eye on them so they don’t burn. You want a nice caramelized glaze. After broiling, let the ribs rest for about 10 minutes. This lets the juices settle. Finally, slice the ribs and serve with extra sauce on the side. Enjoy your tasty creation! For detailed steps, check the Full Recipe. When picking ribs, look for baby back ribs. They are tender and flavorful. Choose ribs with good marbling. This means the meat has small flecks of fat. This fat adds taste and moisture. Avoid ribs with too much fat on the outside. A clean, pink color is best. Fresh ribs should feel firm when you press on them. To boost flavor, always remove the silver membrane from the back of the ribs. This thin layer can block seasonings. Use a paper towel for a better grip. After that, pat the ribs dry. This helps the rub stick well. For the spice rub, mix brown sugar, smoked paprika, garlic powder, and more. The right mix makes a big taste difference. Let the ribs sit with the rub for at least 30 minutes. This gives time for the flavors to soak in. Bake the ribs at 300°F (150°C) for tenderness. Cooking low and slow is key. Aim for 2.5 to 3 hours in the oven. Check if they are done by pulling at the bones. If the meat pulls away easily, they are ready. Broil the ribs for 5-7 minutes to caramelize the sauce. Keep an eye on them to avoid burning. The perfect cook time makes your ribs juicy and flavorful. For a full recipe, see the Sweet & Spicy Oven-Baked BBQ Ribs recipe above. {{image_4}} You can change the spice rub to fit your taste. Here are a few ideas: - Asian-Inspired: Use five-spice powder, sesame seeds, and ginger. - Herb Blend: Add dried thyme, oregano, and rosemary for a fresh twist. - Sweet and Smoky: Mix in some brown sugar, smoked paprika, and cayenne for heat. Experimenting with spices can lead to new favorites. Each mix offers unique flavor profiles that can surprise your guests. Choosing the right BBQ sauce is key. You can go for store-bought or make your own. - Store-bought: Pick a sauce that you love. Look for options with rich flavors and good ingredients. - Homemade: Making your own sauce is fun! You can control the sweetness and heat. A simple mix of ketchup, vinegar, and spices can be a winner. Feel free to try different brands or recipes. Each sauce adds its own character to the ribs. Pair your ribs with tasty sides for a great meal. Here are some ideas: - Coleslaw: This crunchy salad adds freshness. - Cornbread: Soft, warm cornbread balances the flavors. - Baked Beans: Sweet beans complement the savory ribs well. You can get creative with your plate. Mixing and matching sides can make your meal exciting and delicious. Check out the Full Recipe for more tips and serving ideas! To store leftover ribs, first let them cool down. This helps keep the meat juicy. Wrap the ribs tightly in plastic wrap or aluminum foil. You can also place them in an airtight container. Store them in the fridge if you plan to eat them within three days. When reheating ribs, you want to keep them moist. One great way is to preheat your oven to 250°F (120°C). Place the ribs on a baking sheet and add a splash of water or extra barbecue sauce. Cover them with foil to trap steam. Bake for about 20-30 minutes. This method warms them up without drying them out. If you have more ribs than you can eat, freezing is a smart choice. Wrap the ribs in plastic wrap then in foil, or use a freezer bag. Remove as much air as you can. Label the bag with the date. Ribs can stay fresh in the freezer for up to three months. When you're ready, thaw them in the fridge overnight before reheating. For the complete recipe, check out the Full Recipe. Bake the ribs for 2.5 to 3 hours at 300°F (150°C). This low heat makes the ribs tender. You want the meat to pull away from the bone easily. Yes, you can grill the ribs. Start by baking them for 2 hours. Then, grill them for about 15 minutes. This gives a nice char and smoky flavor. Great sides for ribs include coleslaw, corn on the cob, or baked beans. You can also serve potato salad or garlic bread. These sides add balance to the meal. Check if the meat pulls away from the bone easily. You can also use a meat thermometer. The internal temperature should reach 190°F (88°C) for perfect tenderness. Enjoy your ribs with confidence! Oven-baked BBQ ribs are a treat you can master at home. We discussed key ingredients and how to make a great spice rub. Prepping the oven and ribs sets you up for success. Using wrapping and baking techniques helps lock in flavors. I shared tips for rib selection and cooking times. Don't forget fun variations and serving ideas to keep it fresh. Finally, proper storage helps you enjoy leftovers later. Now it's time to gather your ingredients and get cooking! You’ll impress everyone with your tasty ribs.

Oven-Baked BBQ Ribs Flavorful and Simple Recipe

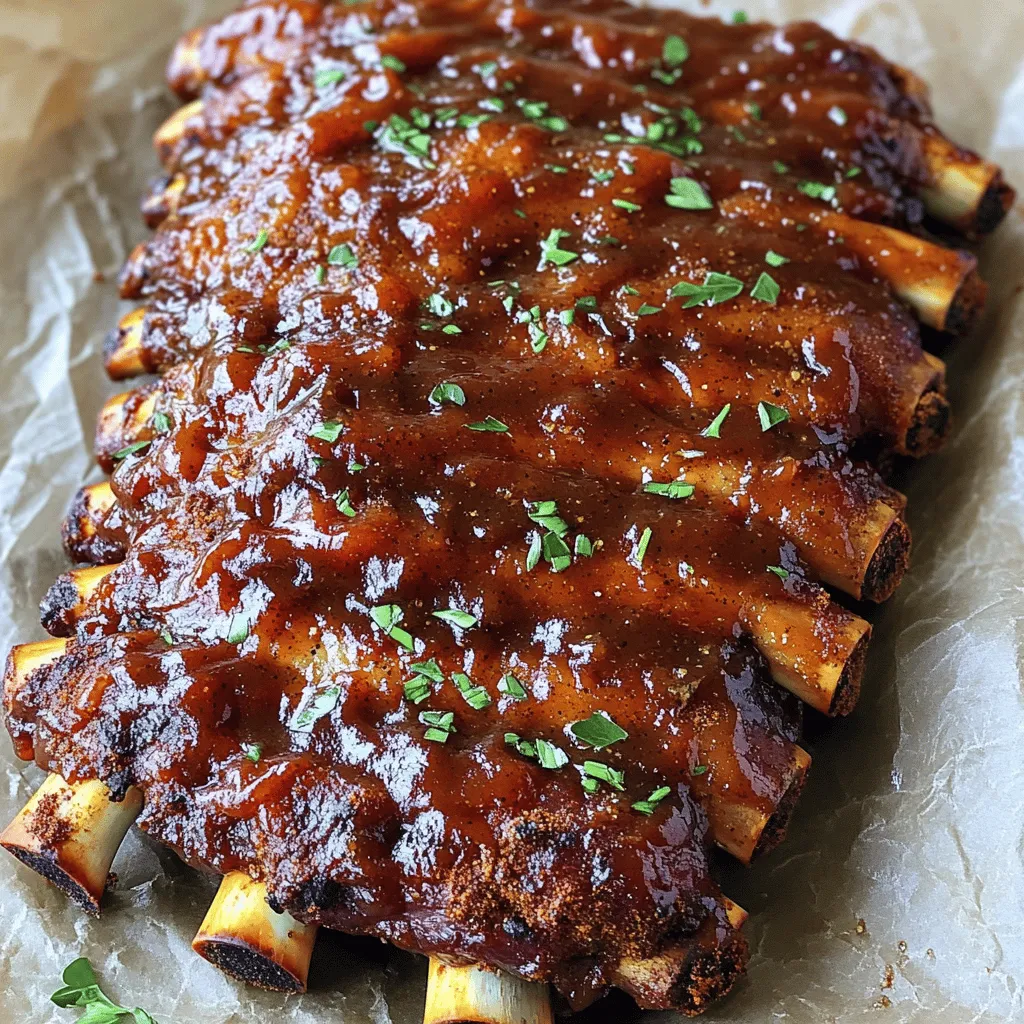
Are you ready to master the art of delicious Oven-Baked BBQ Ribs? This simple recipe delivers tender, flavorful ribs without

Older posts
Newer posts
← Previous Page1 … Page48 Page49 Page50 … Page68 Next →

dsad

© 2025 tastymomrecipes • Built with GeneratePress

Our Policies

  • Copyright Policy
  • Cookie Policy
  • GDPR Policy
  • Privacy Policy
  • Disclaimer
  • Terms Of Use

More Information

  • Home
  • About
  • Contact
  • Appetizers
  • Dessert
  • Dinner
  • Drinks
©2025, tastymomrecipes About Back To Top