
Garlic Chili Chicken Noodles in 15 Minutes Delight
Craving a quick and delicious meal? Look no further than Garlic Chili Chicken Noodles! In just 15 minutes, you can
Craving a quick and delicious meal? Look no further than Garlic Chili Chicken Noodles! In just 15 minutes, you can
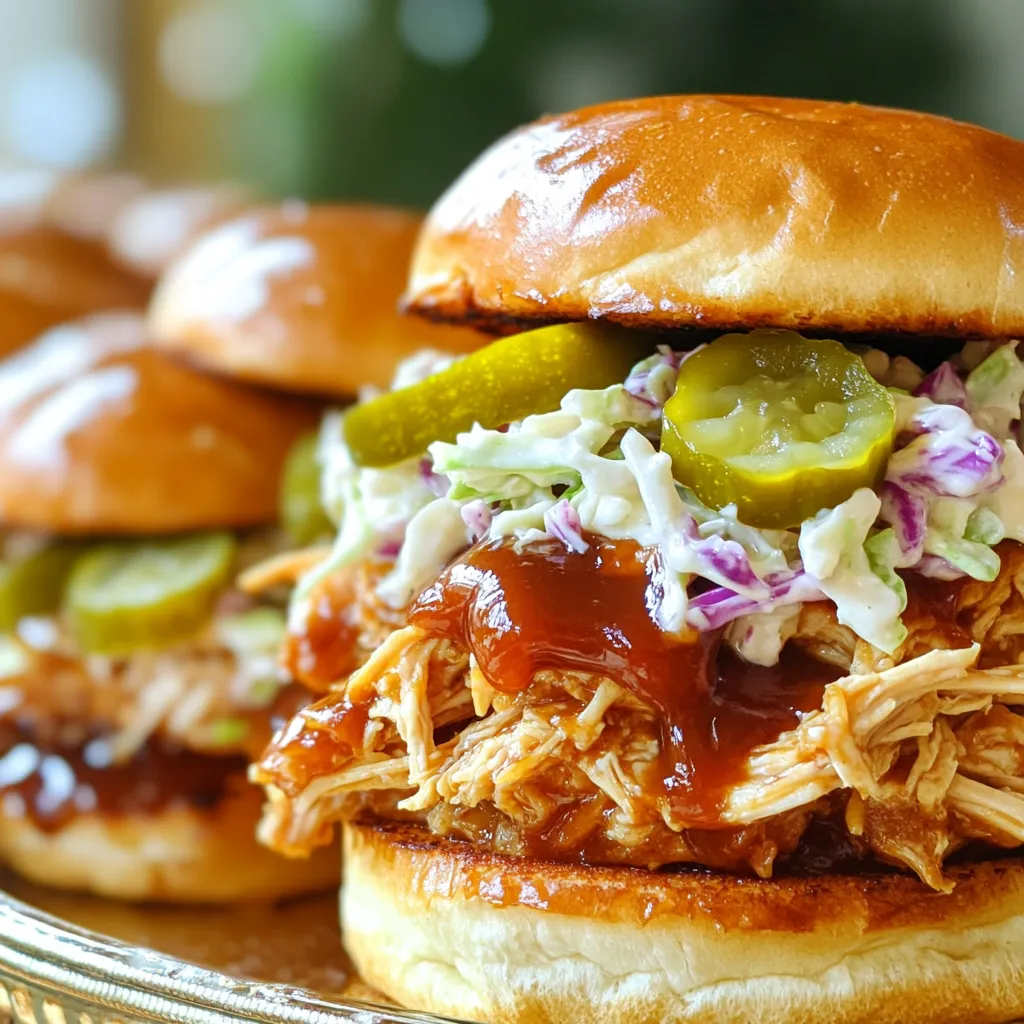
Get ready for a flavor explosion with BBQ Pulled Chicken Sliders! Using a slow cooker, you can create tender, juicy
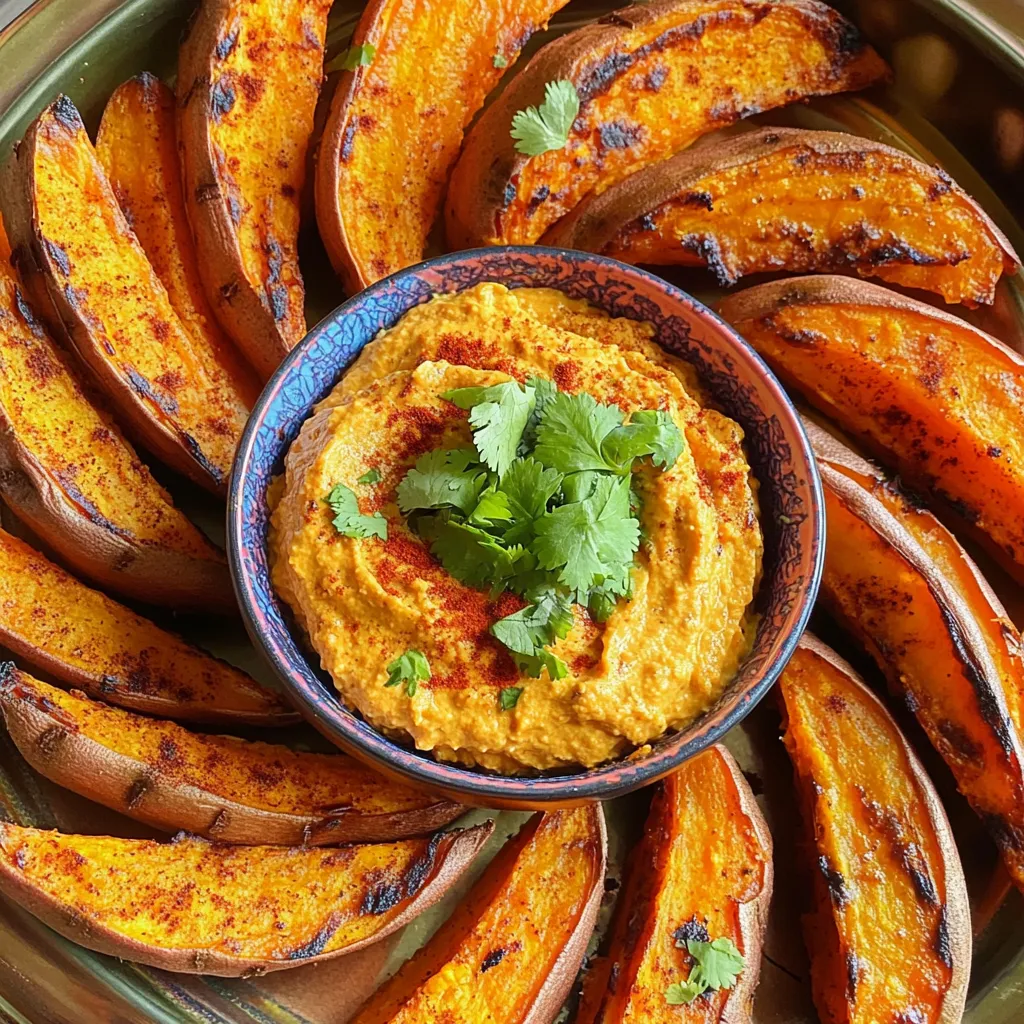
Looking for a delicious and healthy snack that won’t disappoint? Air Fryer Sweet Potato Wedges with Chipotle Dip are perfect

Craving a warm, hearty meal that’s easy to make? You’ll love my Slow Cooker Beef and Sweet Corn Chowder Delight!
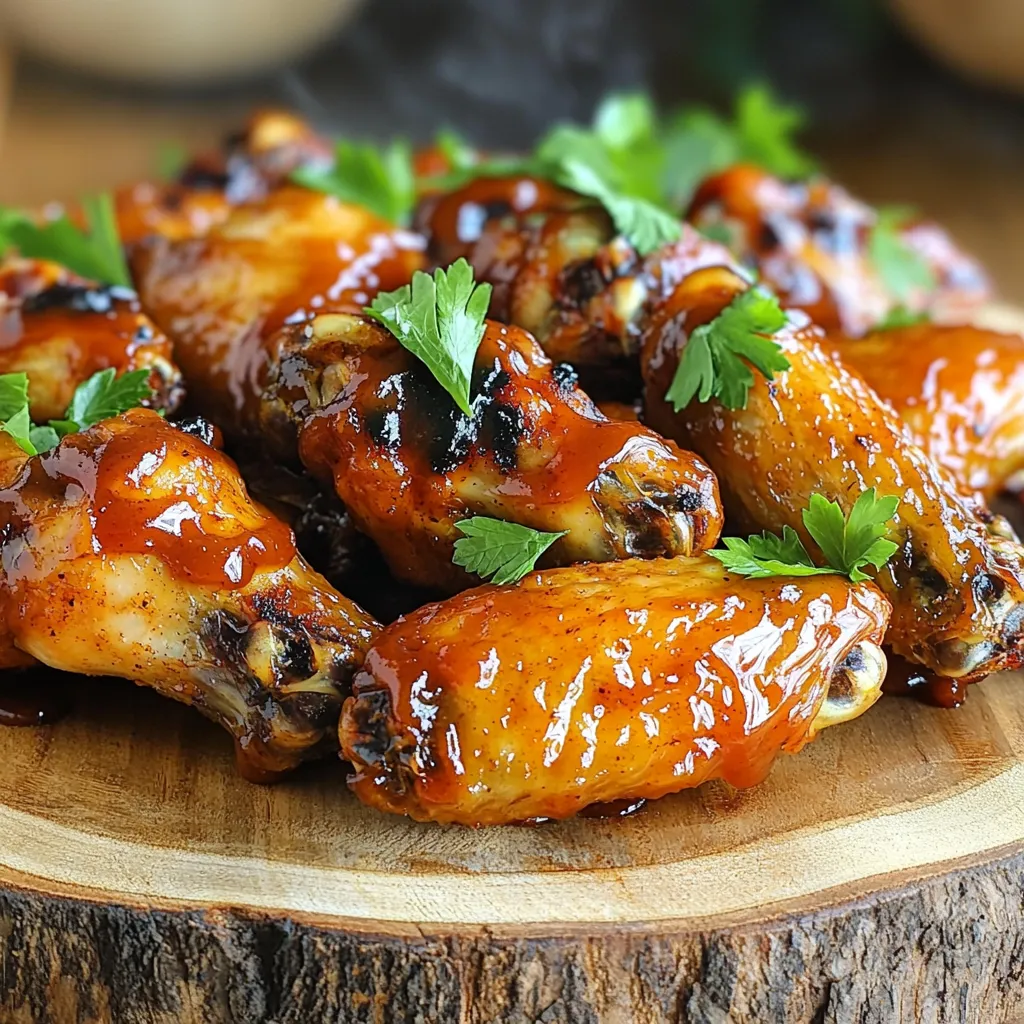
If you crave crispy, flavorful BBQ chicken wings, you’re in the right place! With an air fryer, you can whip

Get ready to savor a tasty twist! In this post, I’ll show you how to make Air Fryer Honey Garlic
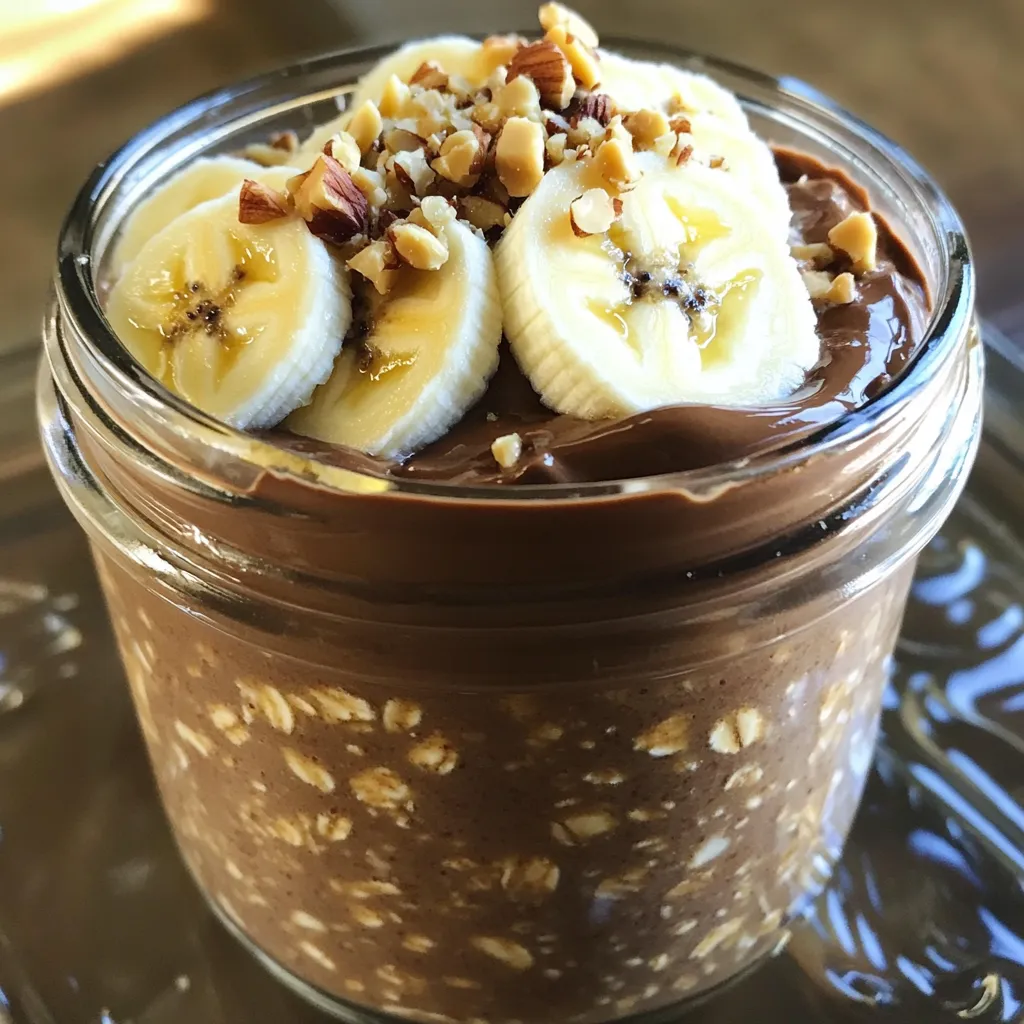
Start your day with a burst of rich flavor! Chocolate Peanut Butter Overnight Oats are not just delicious; they’re also

Craving a quick and healthy snack? You’re in for a treat! These No Bake Pumpkin Spice Energy Balls are simple,

Are you ready for a treat that will delight your taste buds? This Caramel Apple Cinnamon Roll Bake combines warm,
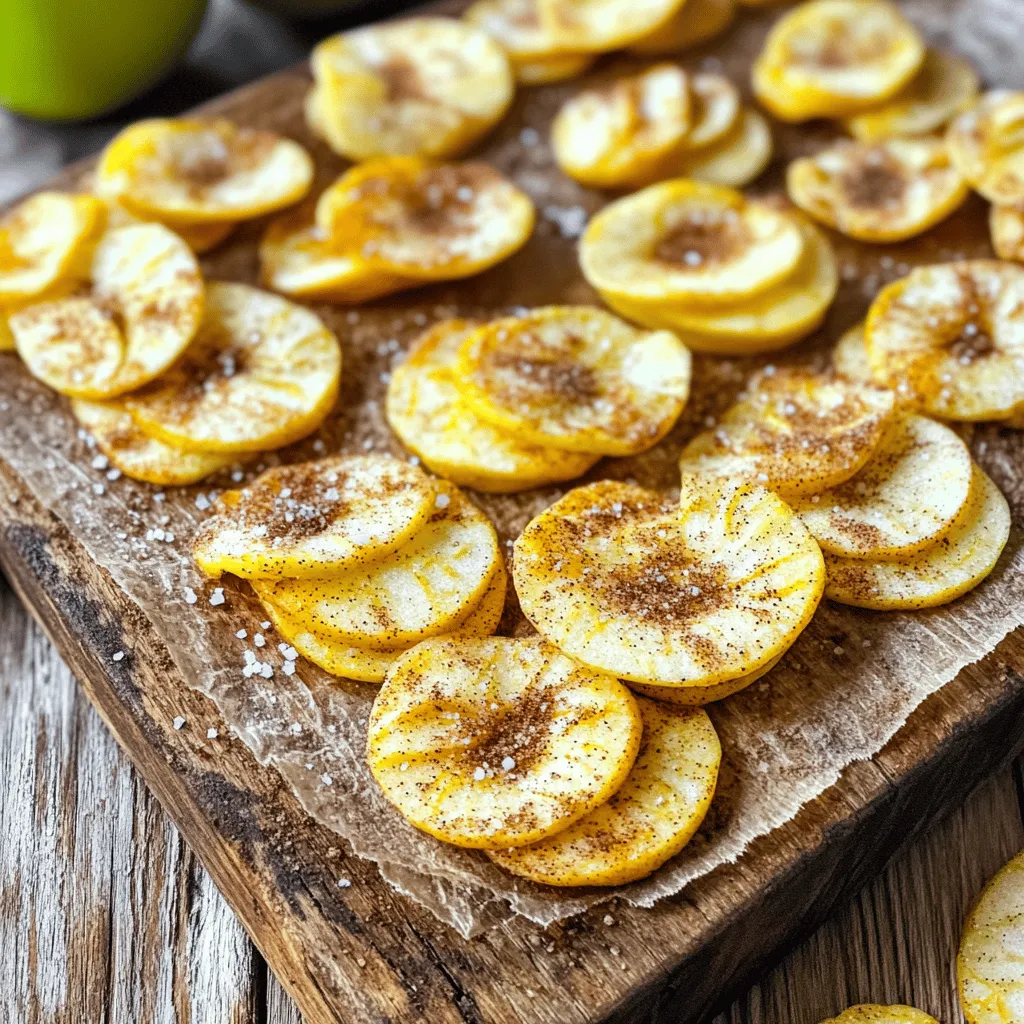
Looking for a tasty and healthy snack? Try making Air Fryer Cinnamon Apple Chips! These crispy delights are easy to
