. - Bring a large pot of salted water to a boil. - Add 8 oz of egg noodles and cook according to package instructions. - Drain the noodles and set them aside. Reserve about 1/2 cup of the pasta water for later. - Take 1 lb of sirloin steak, thinly sliced against the grain. - Season the steak with salt and pepper. - In a skillet, melt 2 tablespoons of butter over medium-high heat. - Add the steak slices in a single layer and sear for 2-3 minutes on each side. - Remove the steak and set it aside on a plate. - In the same skillet, lower the heat to medium and add the remaining 2 tablespoons of butter. - Once melted, add 5 cloves of minced garlic and 1 teaspoon of crushed red pepper flakes. - Cook for about 30 seconds, stirring constantly. - Watch closely so the garlic becomes fragrant but does not burn. - Return the seared steak to the skillet. - Add 2 tablespoons of soy sauce, 1 tablespoon of oyster sauce, and the cooked noodles. - Toss everything gently, coating the noodles and steak in the sauce. - If needed, splash in some reserved pasta water to help bind it all together. - Stir in 2 sliced green onions and taste for seasoning. - Adjust with more salt or pepper if needed. - Plate the dish and garnish with sesame seeds if you like. This method gives you a tasty Garlic Butter Steak Noodles dish with rich flavor. For the full recipe, check out the details above. Enjoy your meal! To get the best steak, slice it thinly against the grain. This helps make each bite tender. Use a sharp knife for clean cuts. For doneness, I recommend a meat thermometer. Aim for 130°F for medium-rare. Cook longer if you want it medium or well-done. Sear the steak for just 2-3 minutes per side. This gives it a nice crust without overcooking. To achieve the perfect al dente texture, cook the noodles in boiling salted water. Follow the package instructions closely. Test them a minute before they are done. To keep noodles from sticking, stir them often while cooking. After draining, toss them with a little oil. This helps keep them loose until you mix them with the sauce. You can customize the garlic butter sauce in many ways. Add a splash of lime juice for brightness. Try different herbs like basil or parsley for freshness. If you like heat, add more crushed red pepper flakes. For a deeper flavor, use a splash of Worcestershire sauce. Adjust the soy sauce for more saltiness or sweetness. {{image_4}} You can switch out steak for chicken or shrimp. Both options cook quickly and add great flavor. For chicken, use thin slices or small pieces. Cook it just like the steak, searing it until golden brown. For shrimp, toss them in the skillet for only a few minutes until they turn pink. If you prefer a vegetarian meal, consider using tofu or mushrooms. Firm tofu can soak up the garlic butter sauce well. Cut tofu into cubes and pan-fry until crispy. Mushrooms provide a nice, meaty texture. Sauté sliced mushrooms until golden brown before adding the noodles. Egg noodles are tasty, but you can try different types. Rice noodles work great and are gluten-free. Just soak them in hot water until soft. You can also use whole wheat noodles for a healthier touch. If you want a low-carb option, zucchini noodles are fun. Pair your noodles with various sauces. Peanut sauce adds a nutty twist. Teriyaki sauce brings sweetness. Experiment to find your favorite! Swap snap peas for seasonal greens like spinach or kale. These greens add color and nutrients. They cook quickly, so add them at the end of cooking. You can also add bell peppers, carrots, or broccoli. These veggies provide crunch and flavor. Dice them up and sauté until tender. The more colorful your dish, the more appealing it looks! To store your garlic butter steak noodles properly, let them cool first. Once cool, place them in an airtight container. This helps keep the flavors fresh. You can store these noodles in the fridge for up to three days. If you notice any odd smells or changes in color, it's best to toss them out. When reheating garlic butter steak noodles, I recommend using the stovetop. This method keeps the texture nice and prevents the noodles from getting mushy. Just add a splash of water to the skillet and heat on low. Stir gently until warmed. You can use the microwave, but be careful. Heat in short bursts and stir in between. This way, you avoid uneven heating and keep the dish tasty. To add some heat, try adding more crushed red pepper flakes. Start with one extra teaspoon. You can also add sliced fresh chili peppers. For a different spice, use hot sauce. Adjust until it hits your perfect level of spice. If you avoid soy or gluten, use coconut aminos. It has a similar taste but is soy-free. You can also try tamari, which is gluten-free soy sauce. Another option is using a mix of balsamic vinegar and water for a unique flavor. Yes, you can make garlic butter steak noodles ahead of time. Cook the noodles and steak, then store them separately. Keep the sauce in a jar. When you’re ready to eat, reheat everything together. This keeps flavors fresh. In the fridge, this dish lasts about 3-4 days. Store it in an airtight container to keep it fresh. Always check for any signs of spoilage before eating. Reheat thoroughly before serving. Yes, you can freeze garlic butter steak noodles. Allow it to cool completely, then place it in a freezer-safe bag. It will stay good for up to 3 months. To eat, thaw it overnight in the fridge. Then reheat on the stove until hot. For the full recipe, check out the details above! This dish combines egg noodles, tender steak, and a rich garlic butter sauce. You learned how to cook each ingredient perfectly—from the noodles to the steak. Plus, you discovered tips for making it spicy or customizing it with different proteins and veggies. Whether you want a quick meal or a flavorful twist, this recipe is a winner. Now, it’s time for you to try it out. Enjoy your cooking adventure!](https://tastymomrecipes.com/wp-content/uploads/2025/05/d9945c1e-a599-439b-bf6f-71b7a092dea3.webp)
Garlic Butter Steak Noodles Delicious and Easy Recipe
Looking for a quick dinner idea that packs a punch? Garlic Butter Steak Noodles are here to impress! This easy
Looking for a quick dinner idea that packs a punch? Garlic Butter Steak Noodles are here to impress! This easy
. This blog post guides you through a tasty Pecan Chicken Salad. You learned about essential ingredients, from chicken to grapes, and how to combine them. Chilling the salad is key for flavor. You can even try different ingredients or adjust for dietary needs. Remember to store it properly for best freshness. Enjoy making this salad and feel free to get creative! It's a great dish for any gathering. Now, you have the tools to impress with deliciousness.](https://tastymomrecipes.com/wp-content/uploads/2025/05/784d643e-35ac-40ab-8011-6321e5d330a0.webp)
Looking for a salad that’s fresh, tasty, and easy to make? You’ve found it! This Pecan Chicken Salad packs a
. 1. Preheat Oven: Start by preheating your oven to 450°F (230°C). This high heat helps give the bites a crispy texture. While the oven heats, line a large baking sheet with parchment paper. This will keep the bites from sticking and make cleanup a breeze. 2. Create the Batter Consistency: In a mixing bowl, combine the flour, garlic powder, onion powder, smoked paprika, and salt. Gradually pour in water or almond milk. Whisk this mix until it looks smooth, similar to pancake batter. This batter will coat the cauliflower well. 3. Coat the Cauliflower Florets: Take each cauliflower floret and dip it into the batter. Make sure each piece is fully coated. Place these battered florets on the prepared baking sheet, leaving space between them. This helps them cook evenly and get crispy. 4. First Baking Session for Crispiness: Put the baking sheet in the oven and bake the cauliflower for 20 minutes. Halfway through, turn the florets to ensure they brown nicely on all sides. This step is key for that perfect crunch. 5. Combine with Buffalo Sauce: In a separate bowl, mix the buffalo sauce with melted vegan butter if you're using it. Stir well and taste to adjust the heat. This is your flavor boost for the cauliflower. 6. Final Baking for Caramelization: After the first baking, take out the cauliflower. Toss the hot bites in the buffalo sauce mix until they are well coated. Return the coated cauliflower to the baking sheet and bake for an extra 10 to 15 minutes. This final bake will add depth and help caramelize the sauce. Enjoy creating these tasty Buffalo Cauliflower Bites! For a complete guide, check the Full Recipe. To get a crispy coating on your Buffalo Cauliflower Bites, follow these tips: - Use cold water or almond milk when making the batter. It helps create a lighter texture. - Don’t overcrowd the baking sheet. Space the florets out so they can crisp up nicely. To avoid sogginess, you can: - Bake the cauliflower before tossing it in the sauce. This makes sure they stay crisp. - Turn the oven to broil for the last few minutes. This adds a nice crunch to the outside. Want to spice it up? Here are some suggestions: - Custom spice blends can add new flavors. Try adding cayenne pepper or chili powder for heat. - Adjust the heat levels by mixing in more buffalo sauce or using a milder sauce. Taste as you go for the best result. Pair your Buffalo Cauliflower Bites with these: - Ideal dips include ranch or blue cheese dressing. They balance the heat well. - For a complete meal, serve with celery sticks and carrot sticks. They add crunch and freshness. For the full recipe, check the detailed instructions to create this amazing snack! {{image_4}} You can easily make Buffalo Cauliflower Bites vegan or gluten-free. For a gluten-free option, try using almond flour or chickpea flour instead of all-purpose flour. Both options give a nice flavor and texture. If you want a creamier batter, use almond milk instead of water. For a dairy-free buffalo sauce, look for brands that use plant-based ingredients. You can also make your own sauce using hot sauce and a splash of vinegar, plus a bit of maple syrup for sweetness. Buffalo Cauliflower Bites are not just spicy. You can add sweet and spicy flavors too. Mix honey or maple syrup with buffalo sauce for a sweet kick. Try different sauces like BBQ or teriyaki for a unique twist. These flavors bring a new life to the bites and keep them exciting. Buffalo Cauliflower Bites make a great salad topping. Just chop some greens, add the bites, and drizzle with dressing. You can also add them to wraps or sandwiches. Place them between bread with your favorite veggies and sauces. This way, you create a hearty meal that is both tasty and filling. For the full recipe, check out the detailed steps to make these delightful snacks! To keep your Buffalo Cauliflower Bites fresh, store them correctly. Place the bites in an airtight container. They will stay well in the fridge for up to three days. If you want to keep them longer, consider freezing. For freezing, let the bites cool completely. Then, arrange them in a single layer on a baking sheet. Freeze them for about an hour. Once frozen, transfer them to a freezer bag. Remove as much air as possible. They can last up to three months in the freezer without losing flavor. When it's time to eat your leftovers, you can reheat them in two ways: oven or microwave. The oven is best for keeping them crispy. Preheat the oven to 350°F (175°C). Spread the bites on a baking sheet and heat for about 10-15 minutes. If you need a quicker option, use the microwave. However, this method may make them a bit soft. Heat them in 30-second intervals until warm. For crispiness, try placing them in the oven for a few minutes after microwaving. How long can you keep Buffalo Cauliflower Bites stored? In the fridge, they last about three days. In the freezer, they can last three months if stored right. Check for signs of spoilage before eating. Look for any off smells or changes in color. If they seem mushy or have a strange taste, it's best to throw them away. Enjoy your bites while they’re fresh! For the full recipe, refer to the earlier sections. Yes, you can make Buffalo Cauliflower Bites in advance. To do this, follow these steps: - Prepare the cauliflower: Cut the cauliflower into bite-sized florets. - Make the batter: Mix the flour, spices, and liquid to create the batter. - Coat and bake: Dip the florets in the batter and bake them. Let them cool after baking. - Store: Place the cooled bites in an airtight container. They can stay in the fridge for up to three days. When you're ready to eat, just reheat in the oven. This helps maintain their crispy texture. Buffalo Cauliflower Bites pair well with many tasty sides and dips, including: - Veggie sticks: Carrots, celery, and cucumber add crunch. - Dips: Ranch or blue cheese dressing complement the spice. - Salads: A fresh green salad balances the meal. - Grains: Serve with rice or quinoa for a filling option. These sides enhance the flavor and make your meal more complete. Adjusting the heat of Buffalo Cauliflower Bites is easy: - To make it spicier: Add more buffalo sauce or include cayenne pepper in the batter. - To make it milder: Use less buffalo sauce or mix it with honey for sweetness. Feel free to taste as you go. This way, you can find the perfect heat level for your palate. Buffalo Cauliflower Bites are easy to make and packed with flavor. We explored essential ingredients, their health benefits, and how to prepare and serve them. Remember to experiment with spices and sauces for your perfect bite. Whether you go for a vegan or gluten-free option, these versatile snacks please everyone. They store well, and reheating is simple, keeping them crispy. Enjoy making this tasty dish that fits many meals and gatherings!](https://tastymomrecipes.com/wp-content/uploads/2025/05/daadb61c-2c2f-44c6-a1c6-4ac809c333bc.webp)
Looking for a tasty snack that won’t derail your healthy eating? Buffalo Cauliflower Bites are your answer! These bites pack

Are you craving a delicious yet simple dessert? My Peach Crisp with Oat Topping is just what you need! This
If you’re craving a tasty meal that’s both healthy and satisfying, you’ve come to the right place! My Vegan Cauliflower

Are you ready to impress your friends and family with a fresh, tasty dish? Lemon Basil Chicken Skewers are the
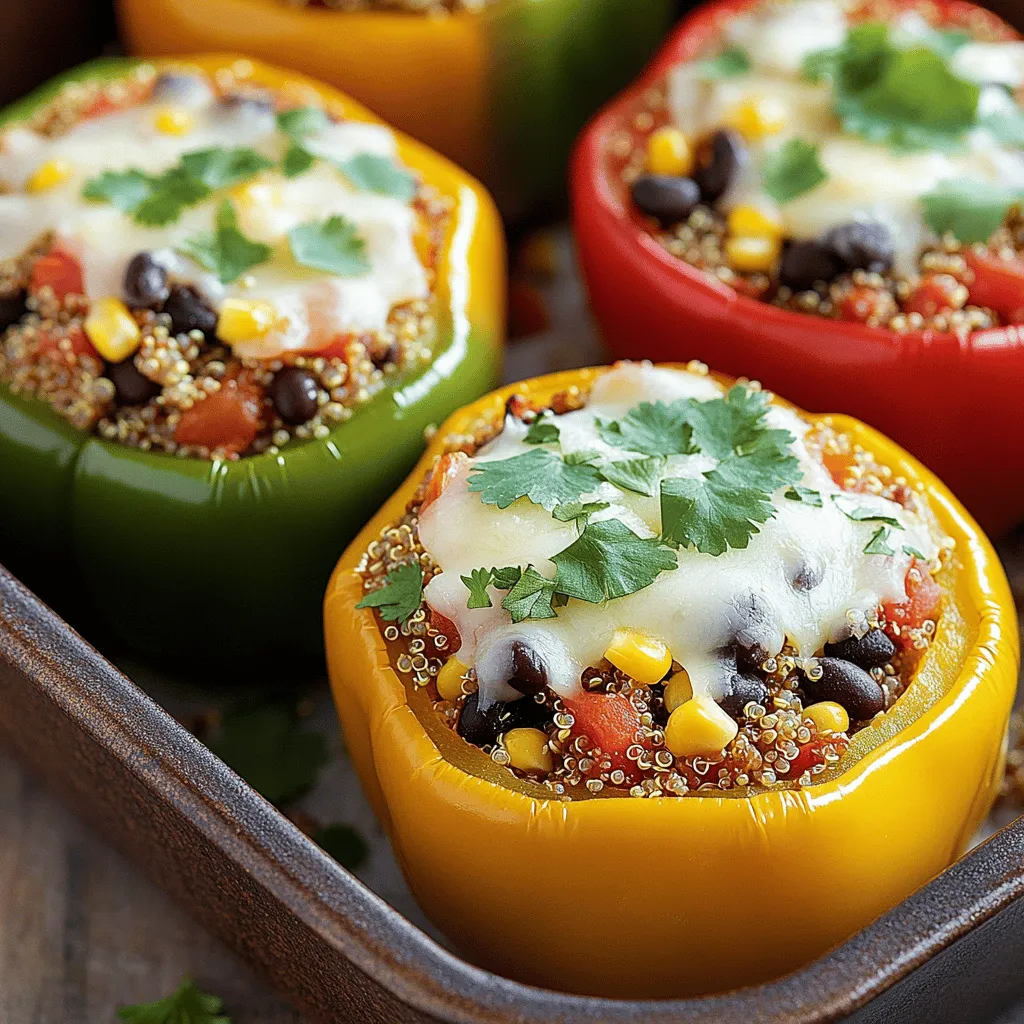
Looking for a healthy and tasty meal that’s easy to make? Stuffed bell peppers with quinoa are here to save

Cinnamon roll pancakes are a sweet twist on breakfast that everyone will love. Imagine fluffy pancakes swirled with a rich
![- Quinoa and broth requirements: - 1 cup quinoa, thoroughly rinsed - 2 cups vegetable broth (or water for a lighter flavor) - Fresh vegetables and spices: - 1 cup cherry tomatoes, halved for burst of sweetness - 1 cup cucumber, diced for a refreshing crunch - 1 bell pepper (choose any vibrant color), diced for color and taste - 1 cup shredded carrots, adding earthiness - 1 cup red cabbage, shredded for a pop of color and crunch - 1/2 cup corn (use fresh or thawed frozen) for sweetness - 1/4 cup red onion, finely chopped for a subtle bite - 1/4 cup fresh parsley, chopped for herbaceous freshness - Dressing components: - 1/4 cup extra virgin olive oil, for richness - 2 tablespoons fresh lemon juice, to brighten the flavors - 1 tablespoon apple cider vinegar, for a hint of tang - Salt and pepper to taste This Rainbow Veggie Quinoa Salad uses fresh, colorful ingredients. The quinoa gives it a nice base. The broth adds flavor, while the veggies bring crunch and sweetness. Each part plays a role in making this salad vibrant and tasty. You can find the Full Recipe above for all steps! To start, rinse 1 cup of quinoa in cold water. This step helps remove the bitter coating. Next, in a medium saucepan, combine the rinsed quinoa and 2 cups of vegetable broth. You can use water if you prefer a lighter taste. Place the saucepan over medium-high heat and bring it to a boil. Once it starts boiling, reduce the heat to low. Cover the saucepan with a lid and let it simmer gently for about 15 minutes. You know it’s ready when the quinoa is fluffy, and all the liquid is absorbed. Remove it from heat and let it cool for a few minutes with the lid on. This step allows steam to complete the cooking. While the quinoa cools, it’s time to chop the vegetables. Start with 1 cup of cherry tomatoes and cut them in half. Then, dice 1 cup of cucumber for a nice crunch. Next, take 1 bell pepper of your choice and dice it for color and taste. Shred 1 cup of carrots and 1 cup of red cabbage. This adds both earthiness and a pop of color. Use 1/2 cup of corn for sweetness. Finally, finely chop 1/4 cup of red onion for a subtle bite. For freshness, chop 1/4 cup of parsley. Mix all these veggies in a large bowl. Be gentle to keep the colors bright and appealing. Now, let’s make the dressing. In a small bowl, whisk together 1/4 cup of extra virgin olive oil, 2 tablespoons of fresh lemon juice, and 1 tablespoon of apple cider vinegar. Add salt and pepper to taste. This dressing will brighten the flavors of your salad. When the quinoa is cool, add it to your bowl of vegetables. Drizzle your dressing over everything. Carefully toss all the ingredients together until they are evenly coated. Taste your salad and adjust the seasoning with more salt, pepper, or lemon juice if needed. For the full recipe and detailed instructions, check out the [Full Recipe]. To make fluffy quinoa, rinsing it is key. Rinse it under cold water for two to three minutes. This removes the bitter coating called saponin. It is a simple step that makes a big difference. You can cook quinoa in two ways: on the stove or in a rice cooker. When using the stove, combine one cup of rinsed quinoa with two cups of vegetable broth or water. Bring it to a boil, then reduce the heat and cover. Let it simmer for about 15 minutes. If you use a rice cooker, just add the rinsed quinoa and broth. Press the button and let it do the work. To boost the flavor, think about spices and herbs. You can add a pinch of cumin or paprika for warmth. Fresh herbs like cilantro or mint give a bright touch. Don’t forget to taste your dressing. You want a good balance between tangy and rich. When you mix your dressing, whisk together olive oil, lemon juice, and apple cider vinegar. This combo will brighten your salad. Adjust the salt and pepper to suit your taste. Serving this salad well makes it even more appealing. Use a large, shallow bowl. Arrange each colorful ingredient in sections for a stunning look. This way, everyone can see the bright colors. Garnish with fresh parsley and lemon slices. These add a nice touch and look great. Plus, they give a refreshing aroma when served. {{image_4}} You can easily change the veggies in this salad. Use seasonal vegetables to keep it fresh. For example, swap cherry tomatoes with diced bell peppers in fall. Try roasted sweet potatoes instead of cucumbers in winter. You can also add proteins to make it a full meal. Chickpeas or grilled chicken work well. If you prefer plant-based options, try adding tofu or edamame. These additions make the salad hearty and filling. Ready to shake things up? Experiment with different dressings. Instead of the classic olive oil and lemon, try tahini or a yogurt-based dressing. These options give a new taste and texture. You can also explore international flavors. Add some cumin for a Middle Eastern twist or soy sauce for an Asian flair. Fresh herbs like mint or cilantro can bring a refreshing kick too. These flavor twists keep the salad exciting every time you make it. For the full recipe, check out the vibrant rainbow veggie quinoa salad. To keep your Rainbow Veggie Quinoa Salad fresh, use airtight containers. Glass or BPA-free plastic containers work best. They help prevent spills and keep flavors locked in. Store the salad in the fridge. It will stay good for about 3 to 5 days. If you see any wilting, it’s best to toss it. You can prepare this salad in advance. Cook and cool the quinoa ahead of time. Chop the veggies and store them separately. This keeps them crisp. When you're ready to eat, combine everything. Drizzle the dressing just before serving to keep it fresh. If you want to freeze the salad, leave out the dressing. Store it in a freezer-safe container. It can last up to three months in the freezer. When you’re ready to eat, thaw it in the fridge overnight. Then add the dressing and enjoy your vibrant meal! Quinoa is a tiny seed from the South American plant. It is packed with protein. It is a complete protein, which means it has all nine essential amino acids. Quinoa is also high in fiber, magnesium, and iron. You can find different types of quinoa. The most common are white, red, and black. White quinoa is fluffy and soft. Red quinoa has a nuttier flavor and a firmer texture. Black quinoa is slightly sweeter and chewier. Yes, you can make this salad ahead of time. The flavors blend well when it sits. To prepare, you can cook the quinoa and chop the veggies a day before. Keep the dressing separate until you are ready to serve. Store the salad in an airtight container in the fridge. It stays fresh for up to three days. Just remember to give it a good toss before serving. This salad pairs well with many dishes. You can serve it with grilled chicken or fish for protein. It also goes great with roasted vegetables for a full meal. If you want a lighter option, serve it with soup or a fresh sandwich. You can also enjoy it as a side dish at a picnic or barbecue. This salad is naturally vegan and gluten-free. Quinoa is a grain that does not contain gluten. All the veggies and the dressing are plant-based too. If you want to add protein, consider chickpeas or black beans. Both are great vegan options. Just make sure to check labels for any added ingredients if you have strict dietary needs. You can find the Full Recipe [here](#). This blog post covered all the key parts of making a Rainbow Veggie Quinoa Salad. We discussed the ingredients, cooking steps, and tips to enhance flavor. You learned how to store leftovers and how to customize the salad to fit your taste. In conclusion, this salad is nutritious, easy to make, and very flexible. Whether you follow our steps or add your own twist, it will turn out great. Enjoy your healthy creation and explore the many flavors you can add!](https://tastymomrecipes.com/wp-content/uploads/2025/05/9f66b6bb-a850-45cd-b41a-4bd397fe21e5.webp)
Welcome to a world of color and flavor with my Rainbow Veggie Quinoa Salad! This dish brings together fresh veggies,

Get ready to indulge in a warm and gooey treat that’s easy to make: S’mores Dip with Chocolate and Marshmallows!
