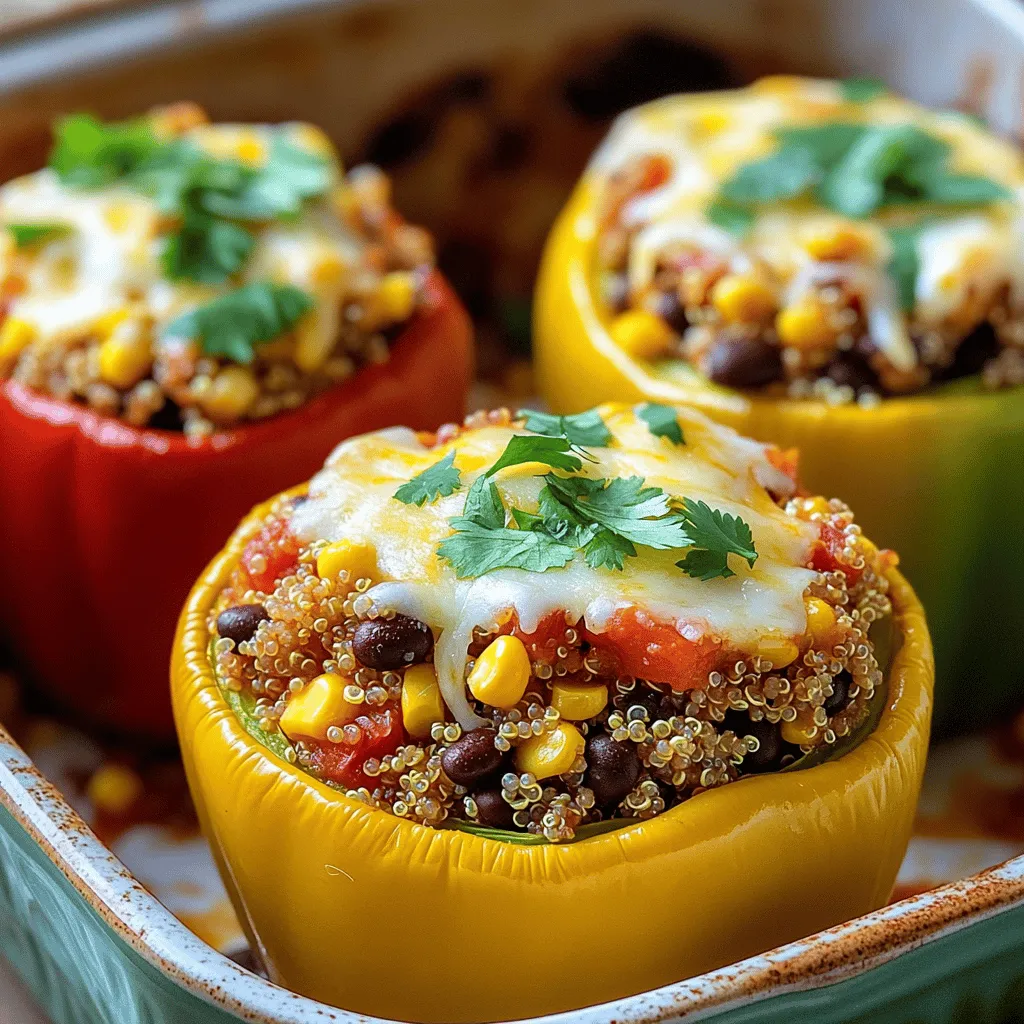
Stuffed Bell Peppers with Quinoa Flavorful Delight
Welcome to a vibrant and healthy dish: Stuffed Bell Peppers with Quinoa! This colorful meal is packed with flavor and
Welcome to a vibrant and healthy dish: Stuffed Bell Peppers with Quinoa! This colorful meal is packed with flavor and
![To make the best chocolate avocado pudding, gather these simple ingredients: - 2 ripe avocados - 1/2 cup unsweetened cocoa powder - 1/3 cup maple syrup or honey - 1/4 cup almond milk or milk of choice - 1 teaspoon pure vanilla extract - A pinch of sea salt - Optional toppings: shredded coconut, crushed nuts, fresh berries, whipped cream Each ingredient plays a vital role. The ripe avocados give a rich, creamy texture. The cocoa powder adds that deep chocolate flavor. Maple syrup or honey sweetens the mix naturally. Almond milk blends everything smoothly. Vanilla enhances the taste, while sea salt balances the sweetness. Feel free to get creative with toppings. Shredded coconut adds a fun texture. Crushed nuts give a nice crunch. Fresh berries bring a burst of color and flavor. Whipped cream offers a classic finish to your dessert. For the detailed steps to make this pudding, check out the Full Recipe. It guides you through a quick and easy process to enjoy a deliciously healthy treat. Start by slicing the ripe avocados in half. Use a knife to cut around the pit. Carefully twist to separate the two halves. Take a spoon and scoop out the creamy flesh into your blender. Be sure to get as much as you can for a rich texture. Now, add the cocoa powder, maple syrup or honey, and almond milk to the blender. Don't forget the vanilla extract and a pinch of sea salt. Blend on high speed until the mixture is smooth and creamy. This should take about 1-2 minutes. Pause to scrape down the sides as needed. You want every bit of the ingredients mixed well. After blending, taste the pudding. If it's not sweet enough for you, add more maple syrup or honey. Once you like the sweetness, transfer the pudding into serving bowls. Chill it in the fridge for at least 30 minutes. This helps the flavors blend and makes it even creamier. Before serving, feel free to add your favorite toppings. Try shredded coconut, crushed nuts, or fresh berries for extra fun and flavor. For those who love it, a dollop of whipped cream can add the final touch. Enjoy your delicious Chocolate Avocado Pudding! For the complete recipe, check out the [Full Recipe]. The ripeness of avocados is key to this pudding's success. Choose avocados that are soft but not mushy. They should yield gently when pressed. This means they are ready for blending. For a creamy texture, blend the ingredients on high. Start slowly to avoid splatter. Pause to scrape down the sides of your blender. This ensures even mixing. Blend for about one to two minutes until smooth. You can adjust the sweetness to your taste. If you like it sweeter, add more maple syrup or honey. This pudding is flexible. For those needing alternatives, use agave syrup or stevia. These options suit different diets. Serving this pudding can be fun and creative. Use small, cute bowls for individual servings. Layer your toppings artfully on top for a nice look. You can add shredded coconut or fresh berries. A mint leaf can also make it pop. For a final touch, dust with cocoa powder before serving. Enjoy making this pudding! For the full recipe, check out the [Full Recipe]. {{image_4}} For a vegan version, swap out honey for maple syrup. This keeps the sweetness while staying plant-based. You can also use almond milk or any other non-dairy milk. If you want to enhance the creaminess, use coconut cream instead of almond milk. This adds a rich texture without dairy. To make a sugar-free version, try using natural sweeteners like stevia or erythritol. These options keep the pudding sweet without adding sugar. You can also use mashed ripe bananas for sweetness. They blend well and enhance the chocolate flavor. Just be careful with the amount, as bananas can change the pudding's texture. You can personalize the flavor of your pudding easily. Adding a pinch of cinnamon gives warmth. A few drops of peppermint extract can add a fresh twist. For coffee lovers, a teaspoon of espresso powder will deepen the chocolate flavor. Mix and match these ingredients to create your perfect dessert. For the full recipe, check out the detailed steps above to make your own chocolate avocado pudding! You can store Chocolate Avocado Pudding in the refrigerator. Place it in an airtight container. This keeps it fresh and prevents it from absorbing other odors. Make sure to cover the surface with plastic wrap to stop browning. If you want to freeze it, pour the pudding into ice cube trays or small containers. Cover tightly to avoid freezer burn. If stored properly, this pudding lasts about 3-5 days in the fridge. You’ll notice it starts to lose its creamy texture after a few days. Look for changes in color or scent. If the pudding smells off or is brown, it’s time to toss it. Enjoy your Chocolate Avocado Pudding fresh for the best taste! For the full recipe, check out the earlier section. Avocados are full of good fats. These fats help your heart and keep you full. They also have fiber, which aids digestion. One avocado has many vitamins too, like Vitamin K, E, and C. These vitamins are great for your skin and overall health. Plus, they are low in sugar, making them a perfect choice for a dessert. Yes! You can make this pudding a day before. Just follow the recipe and chill it. It tastes even better after resting. Aim to chill it for at least 30 minutes. But chilling for a few hours works best. This time helps the flavors blend nicely. If you have nut allergies, use oat milk or soy milk instead of almond milk. For those with dairy issues, all the ingredients are dairy-free. If you are avoiding sugar, swap maple syrup with a sugar-free sweetener. Always check labels to ensure they are safe for your needs. This blog post shared how to make a healthy chocolate avocado pudding. We covered the best ingredients, preparation steps, and tips for the perfect texture. You learned about variations, storage methods, and answers to common questions. This pudding is simple, delicious, and nourishing. Experiment with flavors and toppings to make it your own. Enjoy your tasty treat and share it with friends for healthy dessert fun!](https://tastymomrecipes.com/wp-content/uploads/2025/05/788f21f0-4d70-4b15-abcc-d062ed50fccb.webp)
Looking for a dessert that’s both creamy and good for you? Let me introduce you to my Chocolate Avocado Pudding!

If you’re craving a warm, sweet treat, I have the perfect recipe for you: Honey Butter Biscuits! These simple and
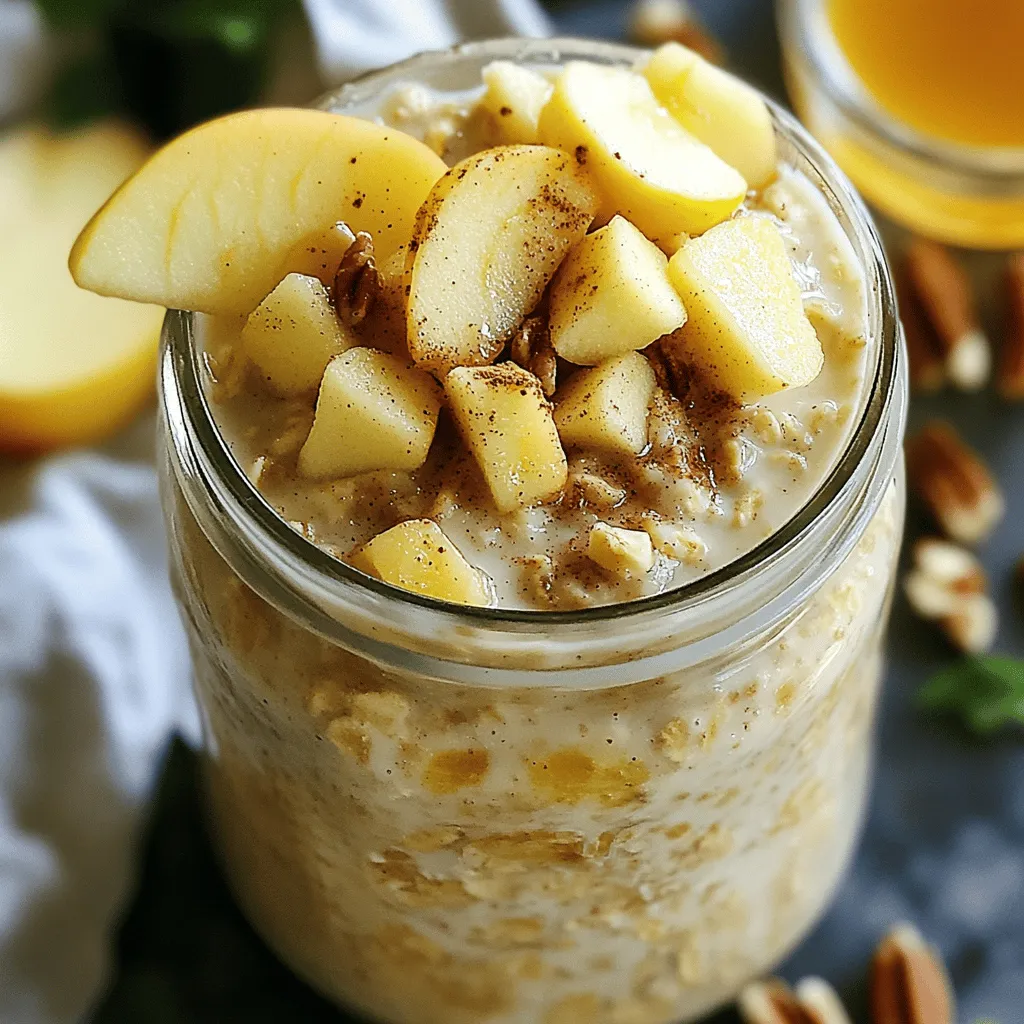
Start your day right with my Apple Cinnamon Overnight Oats! This easy breakfast packs flavor and nutrition in every bite.

Do you crave a breakfast that’s both fun and delicious? Nutella Stuffed Pancakes are here to save your mornings! With
. In summary, we explored how to make a delicious spinach artichoke dip. We covered the main ingredients, step-by-step instructions, and key tips for the best results. You learned about storage, variations, and answers to common questions. This dip is easy, tasty, and versatile. Experiment with flavors and enjoy it with your favorite dippers. Trust me, this will be a hit at your next gathering!](https://tastymomrecipes.com/wp-content/uploads/2025/05/d2ef399d-9433-40dd-8682-12136a2d0cb1.webp)
Are you ready to elevate your snack game? My creamy spinach artichoke dip is an irresistible flavor boost that will

Are you ready for a meal that’s both easy and delicious? One-Pan Lemon Herb Chicken and Rice is the answer!

Looking for a quick and easy treat? No-Bake Chocolate Oatmeal Cookies are the answer! With just a few simple ingredients,
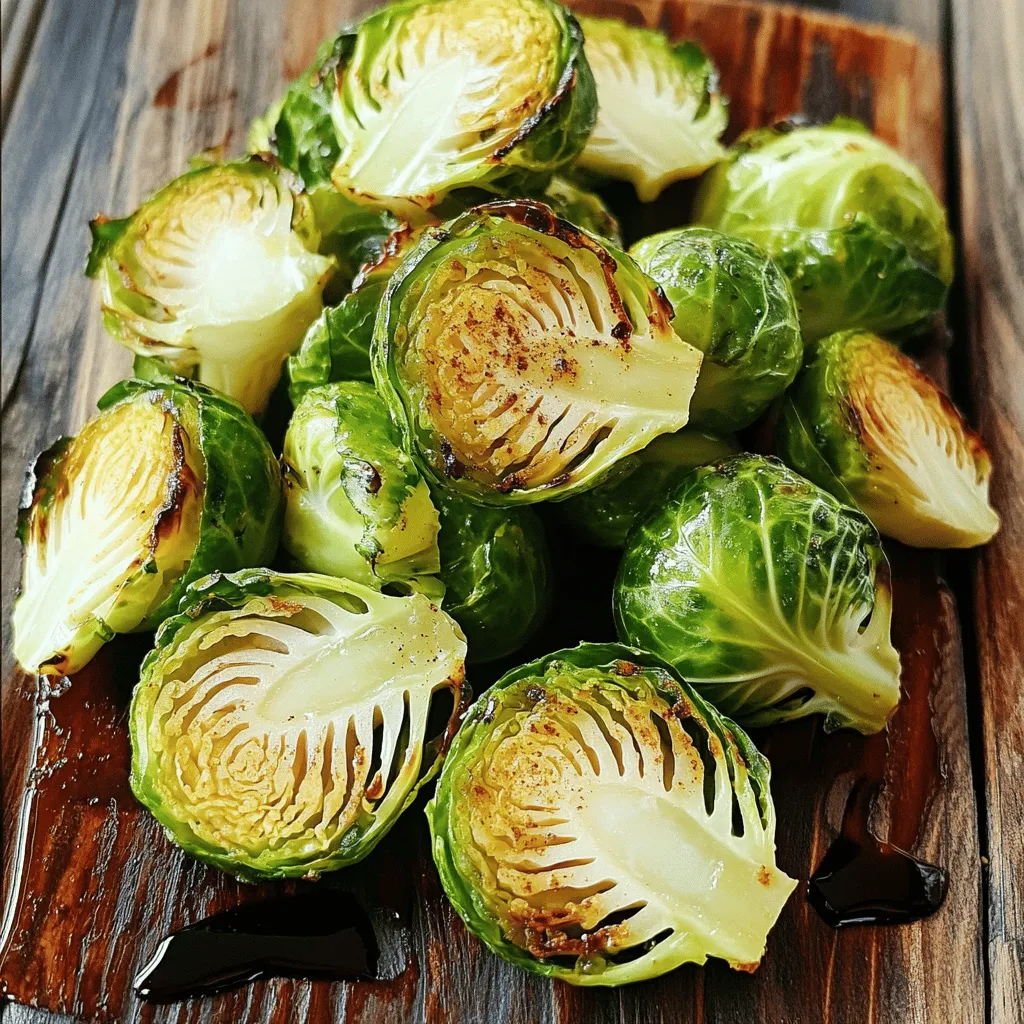
Tired of soggy Brussels sprouts? I get it. That’s why I love this easy air fryer recipe that gives them

Are you craving a fun and sweet treat that’s easy to make? This S’mores Dip in the Oven combines gooey
