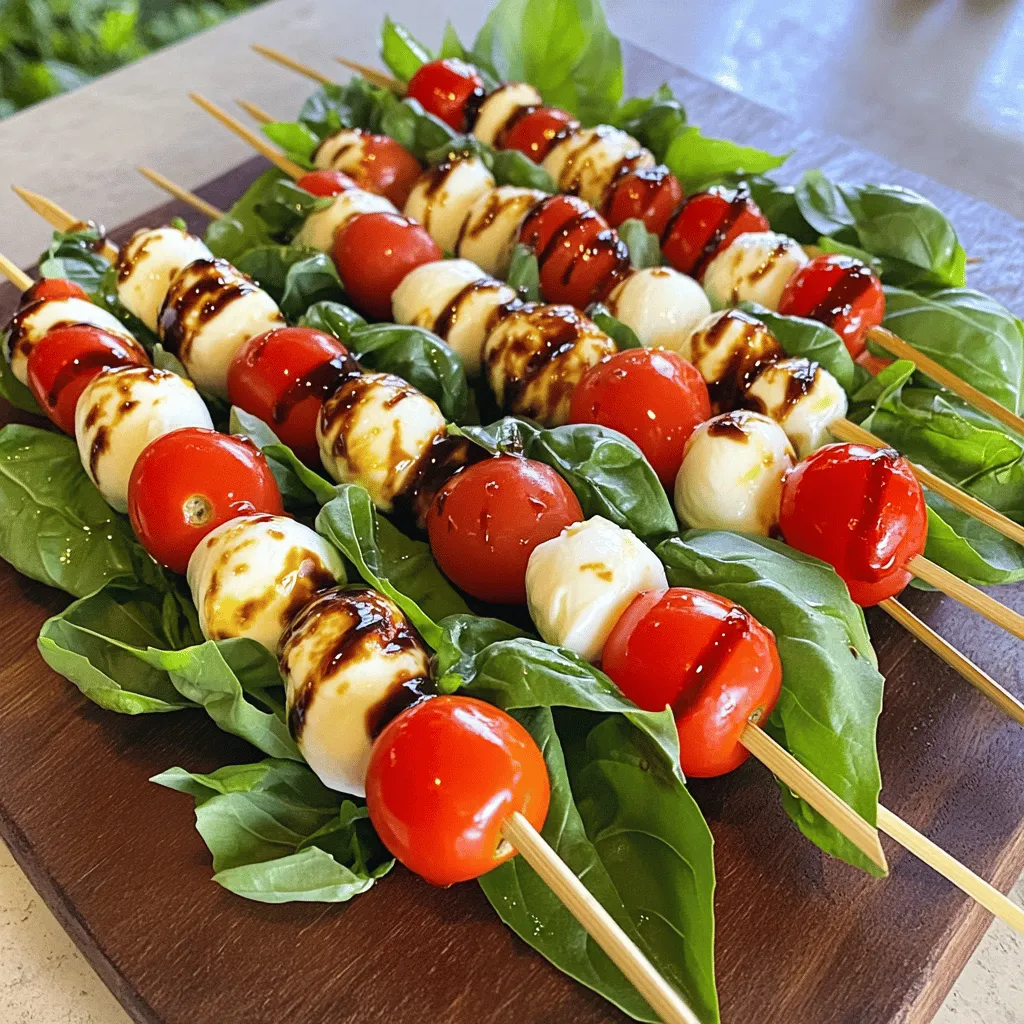
Easy Caprese Salad Skewers Simple and Tasty Recipe
Looking for a fresh, easy snack? These Easy Caprese Salad Skewers are perfect for you! With just a few simple
Looking for a fresh, easy snack? These Easy Caprese Salad Skewers are perfect for you! With just a few simple

Are you ready to take your taco game to the next level? Tacos Al Pastor is a fan favorite, packed
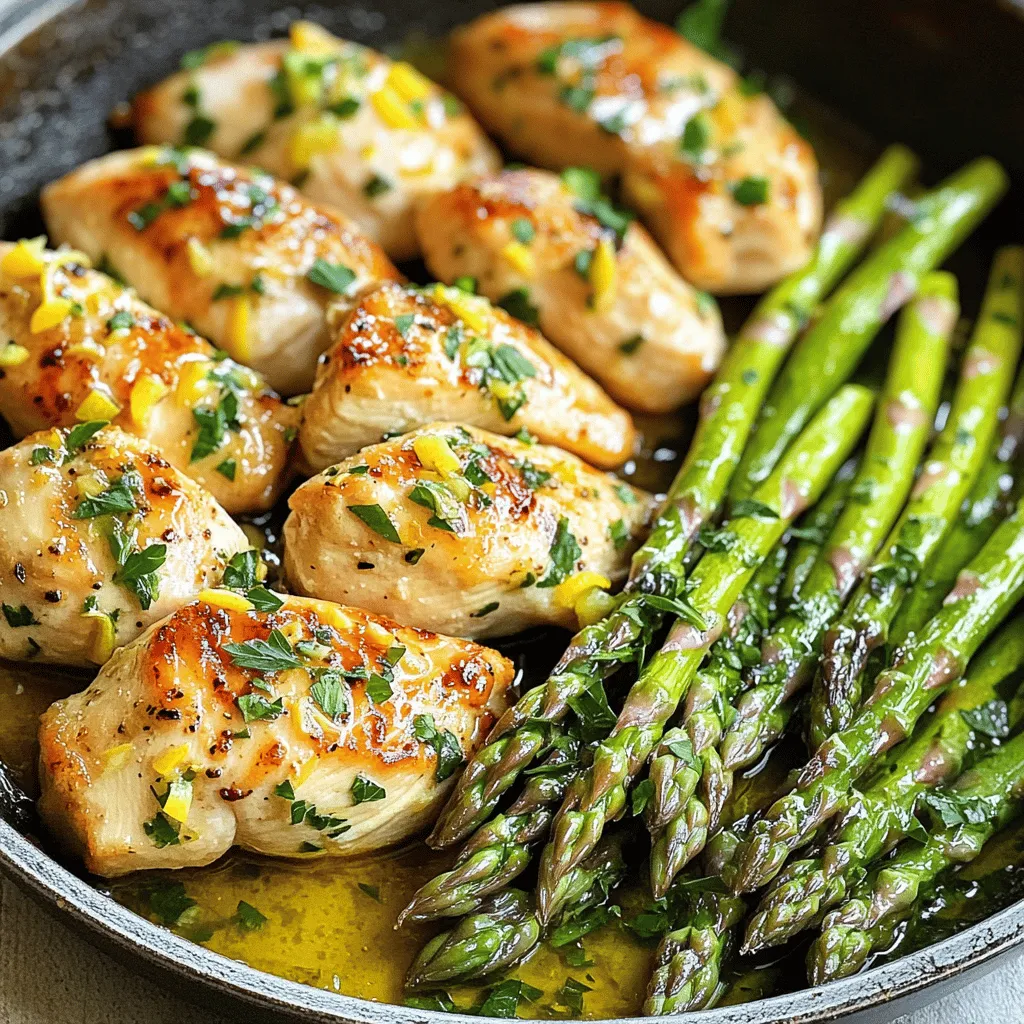
Welcome to a culinary adventure with One-Pan Lemon Garlic Chicken and Asparagus Delight. If you’re looking for a simple, tasty
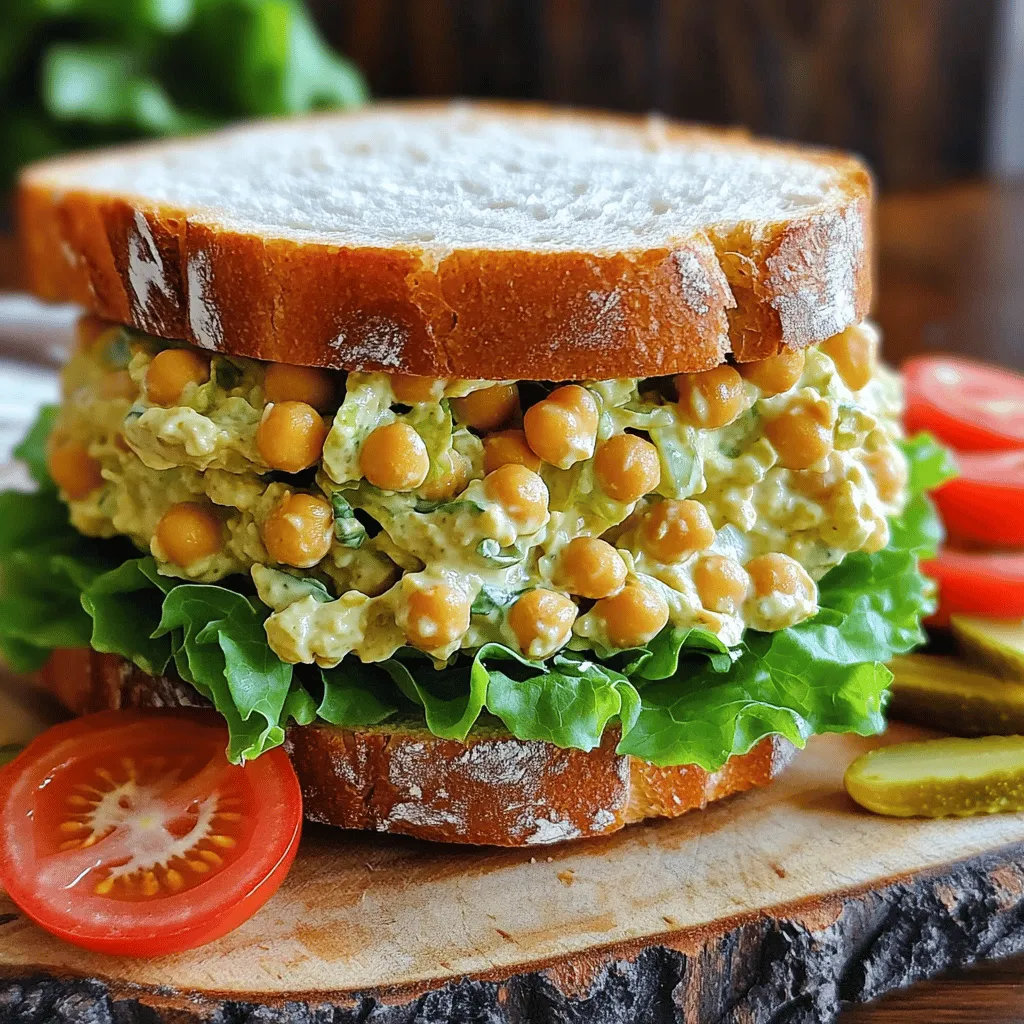
Looking for a quick, healthy meal? Try my Vegan Chickpea Salad Sandwich! Packed with protein and flavor, this easy recipe
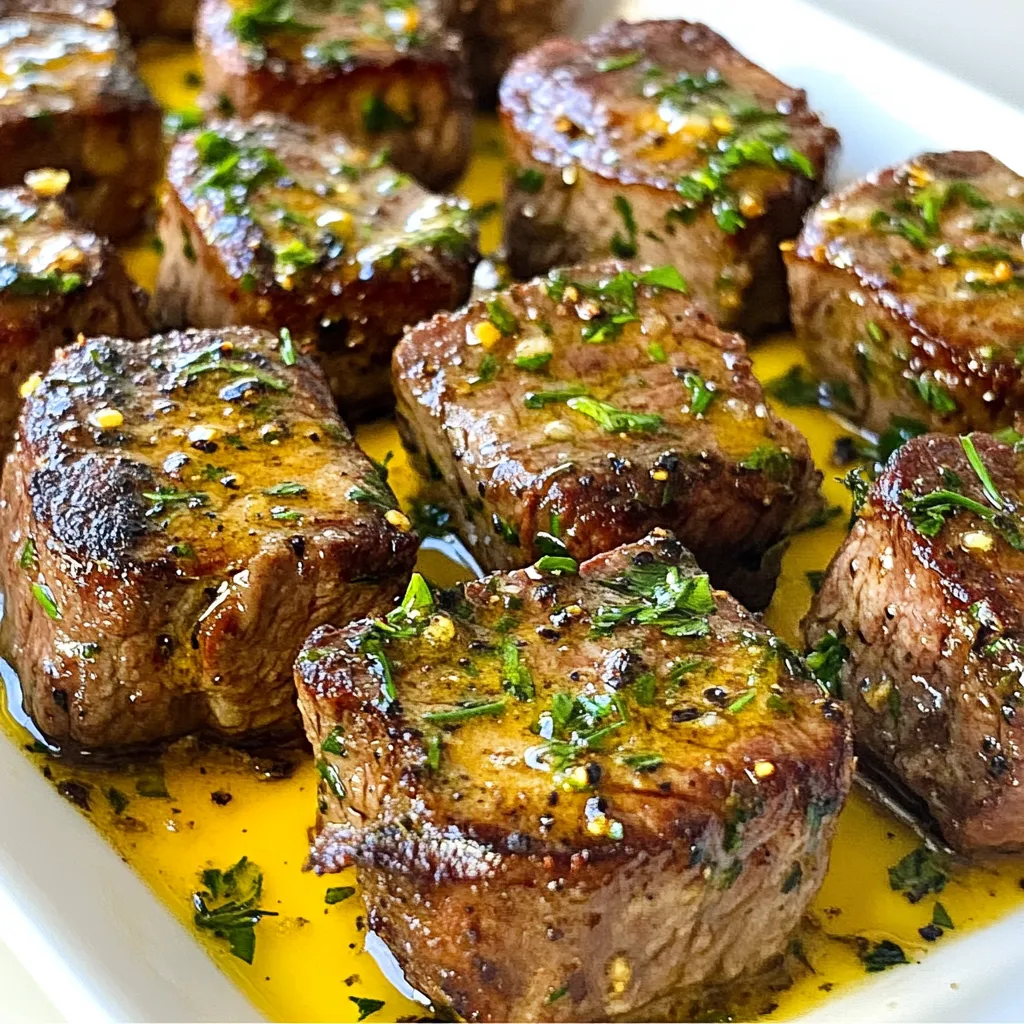
Get ready to ignite your taste buds with my Garlic Butter Steak Bites. These mouthwatering morsels combine tender sirloin steak
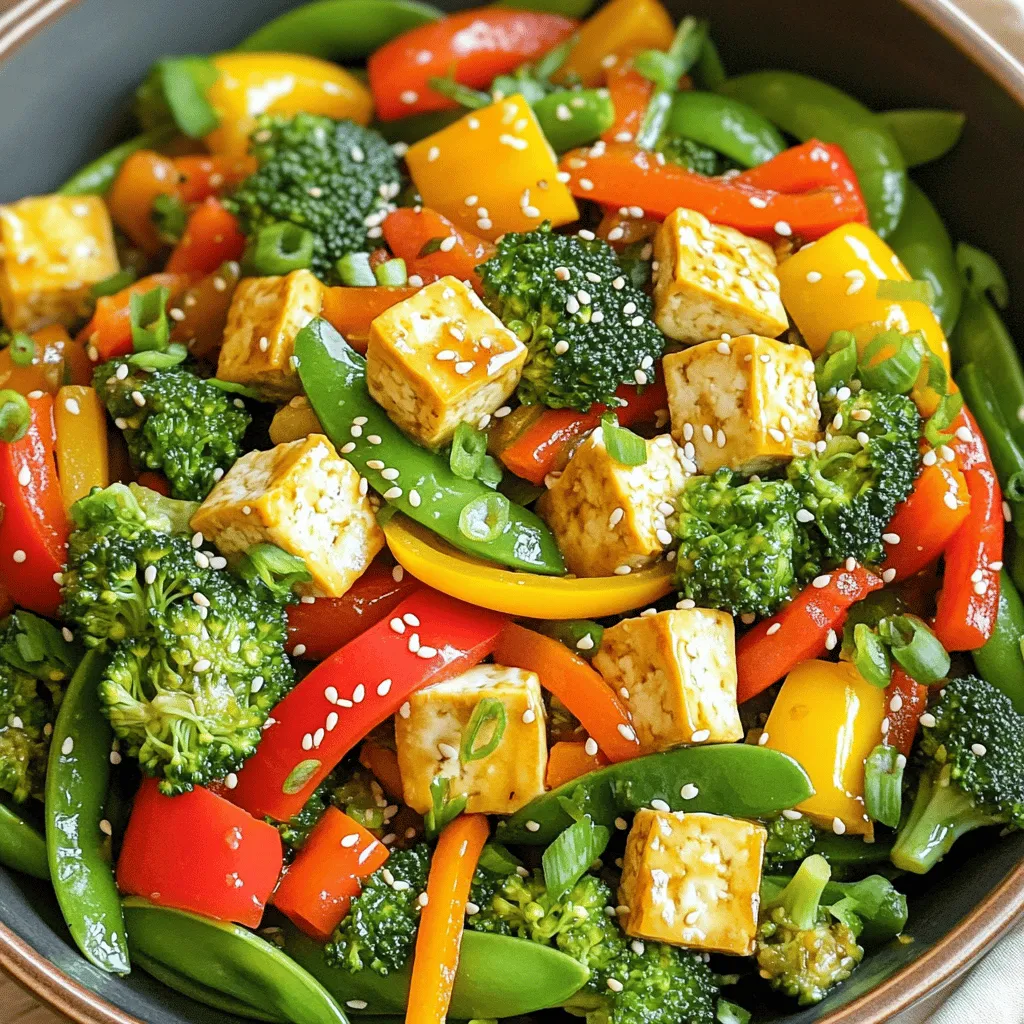
Looking for a quick, healthy meal? You’re in the right place! This Vegetable Stir-Fry with Tofu is colorful, tasty, and
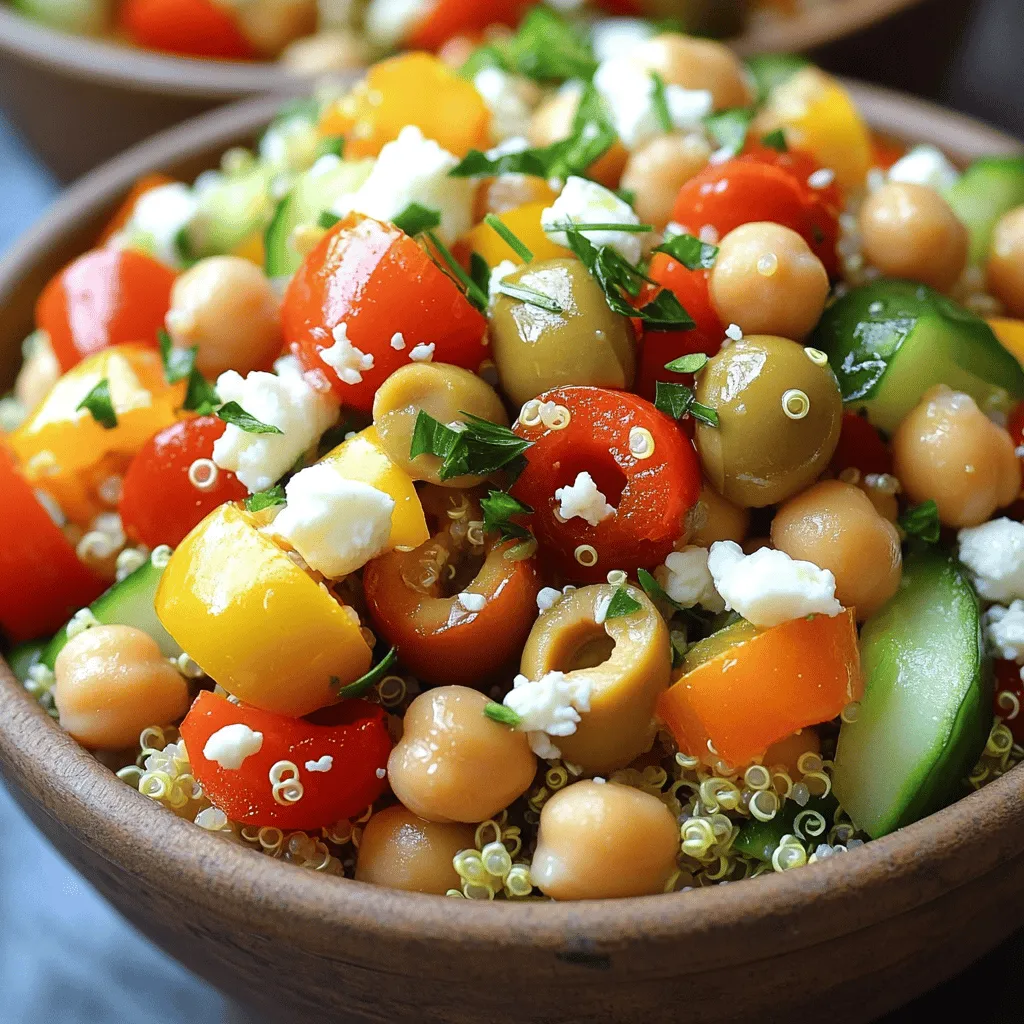
Welcome to a world of taste with my Mediterranean Quinoa Bowl! This dish is packed with flavor and health benefits,
![- 1 can (15 oz) chickpeas, fully drained and thoroughly rinsed - 1 tablespoon high-quality olive oil - 1 teaspoon smoked paprika for added depth - 1 teaspoon garlic powder for a savory touch - Freshly ground salt and black pepper to taste - 2 cups of mixed salad greens (such as arugula, spinach, and romaine) - 1 cup cherry tomatoes, halved for sweetness - 1/2 cucumber, diced into bite-sized pieces - 1/4 red onion, thinly sliced for mild sharpness - 1 ripe avocado, diced for creaminess - Juice of 1 fresh lemon for brightness - 2 tablespoons tahini, for rich creaminess - 1 tablespoon of maple syrup (or honey if preferred) for a touch of sweetness - Water to thin the dressing, as desired - Fresh herbs or sesame seeds for crunch - Lemon wedge on the side for a zesty touch Crispy Chickpea Salad is packed with vibrant flavors and textures. The chickpeas add protein and crunch, while the fresh veggies bring color and nutrition. You can find the Full Recipe above, which details how to prepare each ingredient. This salad is not just good; it’s a feast for your senses! First, preheat your oven to 400°F (200°C). This heat helps the chickpeas get crispy. In a bowl, mix the drained chickpeas with olive oil, smoked paprika, garlic powder, salt, and pepper. Stir until every chickpea is coated. Spread them on a baking sheet in one layer. Roast for 20-25 minutes. Shake the pan halfway to ensure even cooking. When done, the chickpeas should be golden and crunchy. While the chickpeas bake, grab a large bowl. Add mixed salad greens, halved cherry tomatoes, diced cucumber, sliced red onion, and diced avocado. Toss these ingredients gently. The colors and textures make the salad vibrant and inviting. In a small bowl, combine fresh lemon juice, tahini, maple syrup, and a splash of water. Whisk until smooth. If the dressing is thick, add more water. Taste and season with salt if needed. This creamy dressing adds flavor and richness to your salad. Once the chickpeas cool, add them to the salad bowl. Drizzle the tahini dressing over everything. Toss gently to coat all ingredients. Serve right away for the best texture. Enjoy your Crispy Chickpea Salad, a full meal packed with flavor and nutrients! For the complete recipe, check the Full Recipe section. To get your chickpeas nice and crispy, follow these steps: - Dry the Chickpeas: After rinsing, pat them dry with a towel. This step helps them crisp up well. - Spread Them Out: Place chickpeas in a single layer on the baking sheet. Crowding them can lead to steaming instead of roasting. - Toss Halfway Through: Shake the pan halfway through cooking. This helps them cook evenly on all sides. Adding extra flavors can take your salad to the next level. Here are some ideas: - Lemon Zest: Add some lemon zest to the dressing for a fresh kick. - Cumin: Sprinkle ground cumin on the chickpeas before baking for a warm flavor. - Nutritional Yeast: For a cheesy twist, mix in some nutritional yeast with the seasoning. Make your salad eye-catching and tasty with these tips: - Layer Ingredients: Place mixed greens at the bottom and top with colorful veggies. - Garnish: Add fresh herbs like parsley or cilantro for a pop of color. - Serve Fresh: For the best taste and texture, serve the salad right after tossing. For the full recipe, check out the detailed steps and ingredients list. {{image_4}} You can boost the protein in your crispy chickpea salad. Try adding grilled chicken, shrimp, or tofu. Each choice adds its own flavor. For a nutty twist, mix in roasted nuts or seeds. These options make your salad filling and hearty. They also keep it exciting, so you won’t get bored. This salad is easy to adapt for all diets. If you follow a vegan diet, stick with chickpeas and tahini for creaminess. You can also use plant-based yogurt in the dressing. It gives a nice tang without any animal products. For a vegetarian option, add cheese like feta or goat cheese for a rich flavor. Change up your salad with seasonal veggies. In spring, add asparagus or peas for fresh crunch. In summer, use bell peppers or zucchini for a colorful mix. Fall brings great squash options like butternut or roasted sweet potatoes. Winter greens like kale or collards work well too. These swaps keep your dish fresh and full of taste. For the full recipe, check out the [Full Recipe]. Store any leftover salad in an airtight container. Place it in the fridge for up to three days. Keep the crispy chickpeas separate to maintain their texture. If mixed, they may get soggy. Reheat the chickpeas in the oven for a few minutes at 350°F (175°C). This helps them regain their crunch. Avoid microwaving, as this will make them soft and chewy. - Chickpeas: Once opened, canned chickpeas last about three days in the fridge. - Mixed greens: They stay fresh for up to five days if stored properly. - Cherry tomatoes: Keep them at room temperature for best flavor, but refrigerate once cut. - Avocado: Cut avocado lasts a day or two in the fridge, but it's best fresh. - Tahini: It can last for months when sealed tight in a cool, dark place. You can explore the full recipe to know more about this delightful salad! Yes, you can make this salad ahead of time. Prepare the crispy chickpeas and salad base separately. Keep the chickpeas in an airtight container at room temperature. The salad base can stay in the fridge. Dress the salad right before serving for the best taste and texture. If you need a substitute for tahini, try using almond butter or sunflower seed butter. Both options add creaminess. You can also blend a bit of yogurt for a tangy twist. Adjust the amount to get the right consistency and flavor. This Crispy Chickpea Salad is naturally gluten-free. Just ensure all your ingredients are gluten-free. Use gluten-free dressings and check labels. Enjoy this meal without concern for gluten! This blog shared how to make a delicious Crispy Chickpea Salad. You learned about key ingredients, dressing, and optional garnishes. We covered easy steps to prepare the crispy chickpeas and how to mix the salad. I shared tips for perfect crispiness, flavor boosts, and great presentation ideas. You discovered fun variations and how to store leftovers safely. This dish is simple, nutritious, and adaptable for your taste. Try it out, and you’ll impress friends and family with your cooking skills!](https://tastymomrecipes.com/wp-content/uploads/2025/05/dd5e120b-52af-49d9-8d05-6bdbf19a36c8.webp)
If you’re searching for a meal that’s as tasty as it is healthy, look no further! This Crispy Chickpea Salad
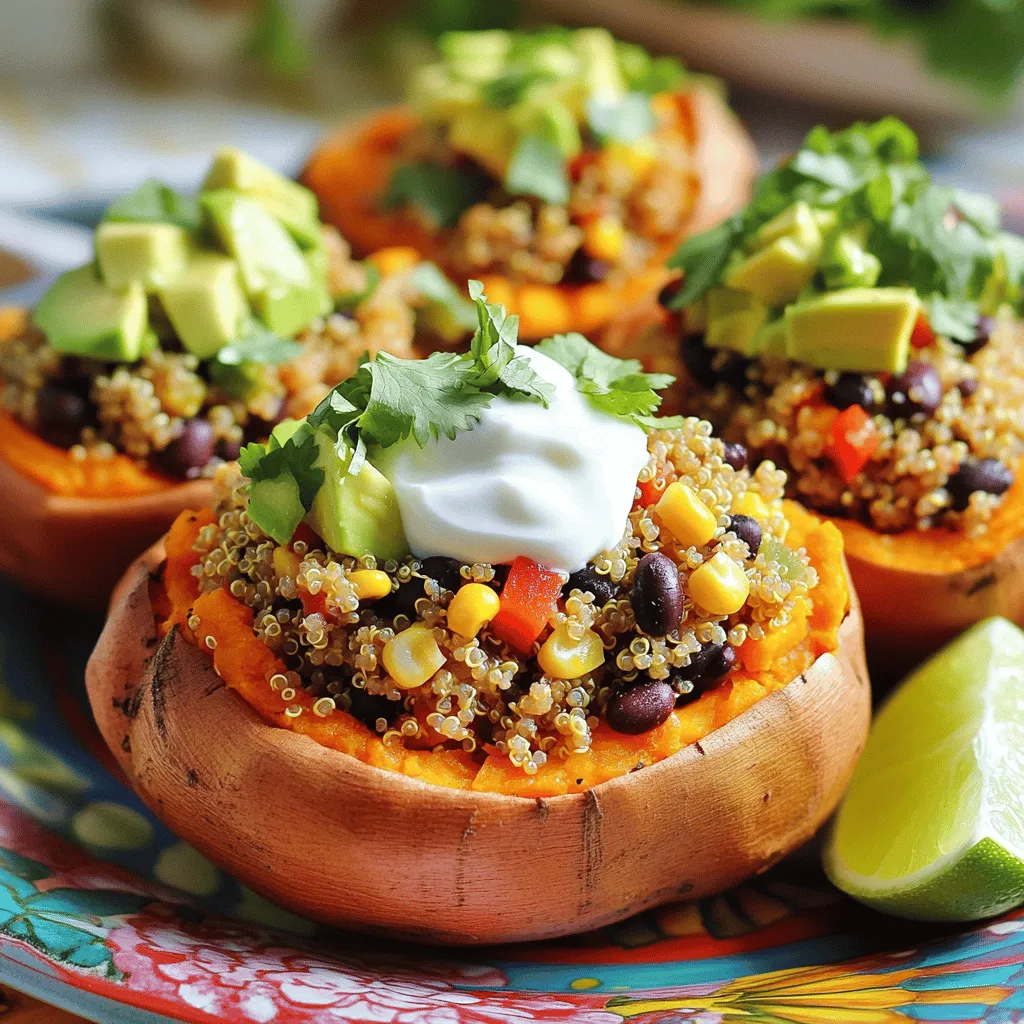
Looking for a healthy yet tasty meal? Savory stuffed sweet potatoes are what you need! Packed with fiber and flavor,
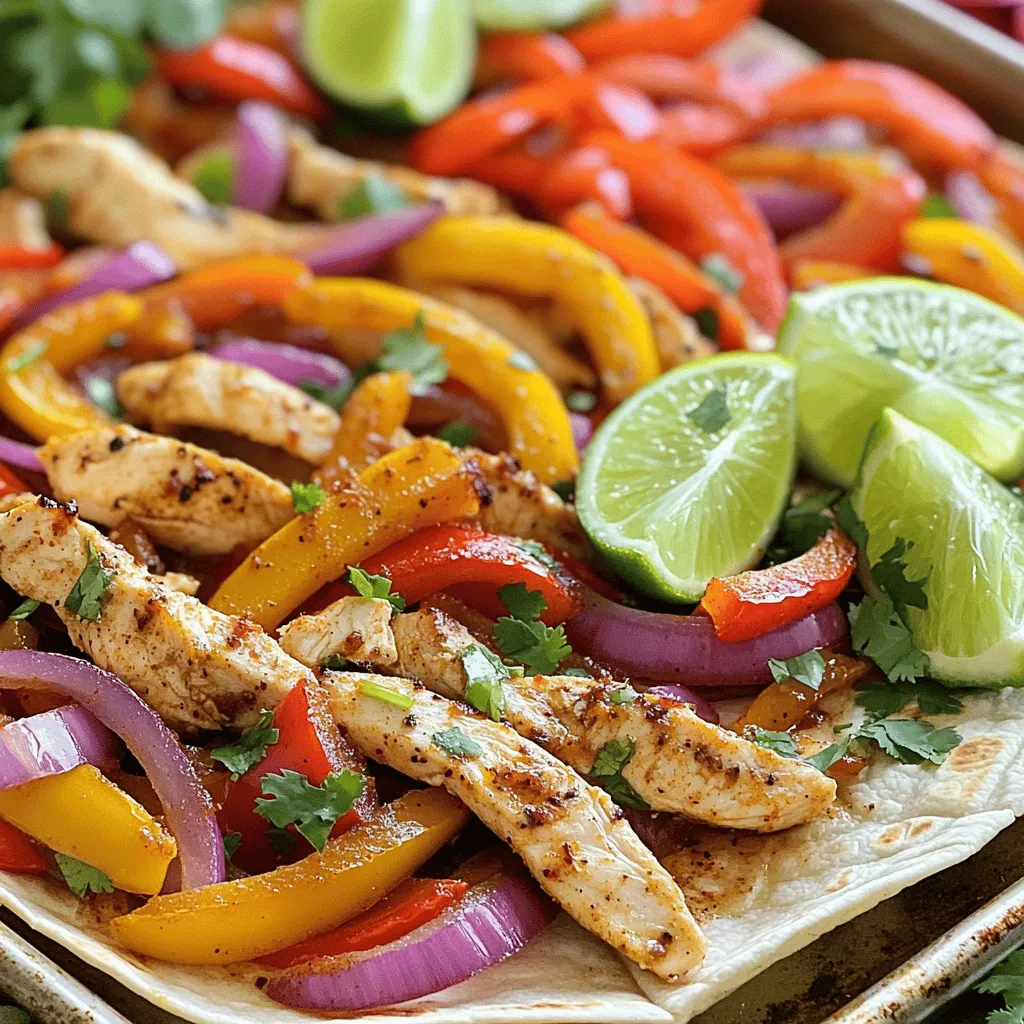
Looking for a quick and tasty dinner? Try these Sheet Pan Fajitas! This recipe combines tender chicken, vibrant peppers, and
