. To start, you need to clean the shrimp. Rinse them well under cold water. Use paper towels to pat them dry. This step helps remove any grit. Next, season the shrimp lightly with salt and black pepper. This adds flavor right from the start. Now, let's sauté the garlic. Use a large skillet and melt the butter over medium heat. Once it starts to bubble, add the minced garlic. Stir it for about a minute. Watch closely so the garlic doesn't burn. If it gets too brown, it will taste bitter. Next, create the sauce. Pour in honey, soy sauce, and lemon juice. If you like heat, add red pepper flakes. Stir everything well. Allow the mixture to simmer for about two minutes. This helps the flavors blend nicely. It’s time to cook the shrimp! Raise the heat a bit and add the seasoned shrimp to the skillet. Cook them for 2-3 minutes on one side. They will turn pink as they cook. Flip each shrimp and cook for another 2-3 minutes. They are done when they are fully opaque. Once cooked, take the skillet off the heat. Use a spoon to coat the shrimp in the sauce. Make sure each piece gets a nice glaze. This makes every bite delicious. For the full cooking instructions, check the Full Recipe. To make your honey garlic butter shrimp even better, try these seasonings: - Ginger: A bit of fresh ginger adds a nice kick. - Chili Powder: For a smoky flavor, mix in some chili powder. - Green Onions: Chopped green onions give a fresh taste. Balancing sweetness and saltiness is key. The honey gives a sweet touch, while the soy sauce adds salt. You can adjust by adding more soy sauce if it’s too sweet. A little lemon juice brightens the dish too. Choose a heavy skillet for the best results. Cast iron or stainless steel work great. They heat evenly and give a nice sear to the shrimp. Using high heat cooks the shrimp quickly. It gives them a nice brown color. Medium heat is good for cooking the garlic. This way, it won’t burn. Always keep an eye on your garlic to avoid a bitter flavor. Presentation matters! Serve the shrimp over fluffy rice or alongside bright green veggies. A slice of lemon on the plate adds color and a fresh zing. For a complete meal, consider these sides: - Steamed Broccoli: Adds crunch and is healthy. - Garlic Bread: Perfect for soaking up the sauce. - Quinoa Salad: A light and nutritious option. These tips will help you serve a stunning dish that looks as good as it tastes! Feel free to explore the Full Recipe for more details on making this delightful meal. {{image_4}} You can change the shrimp to chicken or tofu. Chicken works well and adds a nice texture. Use boneless, skinless chicken breasts for the best results. Cut the chicken into small pieces. This helps it cook evenly. Cook chicken for about 5-7 minutes. Make sure it turns golden brown and is no longer pink. Tofu is a great choice for a vegetarian option. Use firm tofu for the best texture. Press the tofu to remove excess water. Cut it into cubes for even cooking. Cook tofu for about 4-5 minutes on each side. It should be golden and crispy. Want to change the taste? You can add different spices to the recipe. Try smoked paprika for a warm flavor. Cumin adds a nice earthiness. Add a pinch of cayenne for more heat. Experiment with what you like! You can also switch the citrus in the sauce. Instead of lemon juice, use lime juice for a zesty twist. Orange juice makes it sweeter, while grapefruit juice adds a tangy kick. Adjust the honey based on the citrus you choose. You can grill or fry the shrimp for a different taste. Grilling adds a smoky flavor. Use skewers for easy flipping. Cook on medium heat for about 2-3 minutes on each side. Frying gives you a rich, buttery taste. Follow the same cooking times as the original recipe. If you prefer baking, try an oven-baked honey garlic shrimp recipe. Preheat your oven to 400°F. Place the shrimp on a baking sheet. Bake for about 10-12 minutes. This method makes cleanup easy and keeps shrimp juicy. For the full recipe, check out the Honey Garlic Butter Shrimp Delight. To store leftovers, place the honey garlic butter shrimp in an airtight container. This keeps the shrimp fresh and prevents them from drying out. You can safely store it in the fridge for up to three days. When it’s time to enjoy your leftovers, you want to keep the flavor. The best way to reheat shrimp is in a skillet over medium heat. This method warms them evenly and keeps them tender. The microwave is faster but can overcook the shrimp. If you use a microwave, heat in short bursts of 30 seconds. Stir in between to help it heat evenly. If you want to save the shrimp for later, freezing is a great option. To freeze, place the shrimp in a freezer-safe bag. Remove as much air as possible before sealing. You can freeze the shrimp for up to three months. When you're ready to eat, thaw the shrimp in the fridge overnight. For quick thawing, place the sealed bag in cold water. After thawing, reheat in a skillet to bring back the flavors. How long does it take to cook shrimp? Cooking shrimp takes about 4 to 6 minutes. They cook quickly, so watch them closely. You will know they are done when they turn pink and opaque. Can I make this dish ahead of time? You can prep the shrimp and sauce ahead of time. Store them separately in the fridge. Just cook the shrimp fresh when you are ready to eat. This keeps the shrimp tender and juicy. What sides pair well with Honey Garlic Butter Shrimp? Great sides include fluffy rice, steamed veggies, or a fresh salad. You can also serve it with noodles for a delicious twist. What to do if the shrimp are rubbery? If shrimp are rubbery, you may have overcooked them. Cook shrimp just until they are pink and opaque. If they are already overcooked, they cannot be saved, so timing is key. Why is my sauce too thick? If your sauce is too thick, add a splash of water or broth. This will help thin it out. Stir well to combine the ingredients and achieve your desired consistency. What can I use instead of honey? You can use maple syrup or agave nectar instead of honey. Both will add sweetness and flavor to the dish. Can I use dried garlic instead of fresh? You can use dried garlic, but it won't have the same strong flavor. If you use dried garlic, use about 1 teaspoon for every 4 cloves of fresh garlic. Adjust to your taste. For the full recipe, check out Honey Garlic Butter Shrimp Delight! In this post, we explored how to create tasty Honey Garlic Butter Shrimp. We covered essential ingredients, cooking steps, and helpful tips to elevate your dish. You'll learn to season shrimp, balance flavors, and even try variations with different proteins. Proper storage and reheating methods ensure your leftovers remain delicious. Whether you are a novice or pro, these insights will make your cooking easier and more enjoyable. Embrace these techniques and enjoy sharing your flavorful shrimp with others. Happy cooking!](https://tastymomrecipes.com/wp-content/uploads/2025/05/659f93fc-7edc-4e58-a37b-645516a9cd65.webp)
Honey Garlic Butter Shrimp Flavorful Dinner Delight
Craving a deliciously simple dinner that wows your taste buds? You’re in the right place! This Honey Garlic Butter Shrimp
Craving a deliciously simple dinner that wows your taste buds? You’re in the right place! This Honey Garlic Butter Shrimp

Looking for a tasty and healthy meal? Vegan stuffed bell peppers are here to impress! These vibrant, colorful peppers are
![- 4 boneless, skinless chicken breasts - 1 ripe mango, diced into small cubes - 1 small red onion, finely chopped - 1 red bell pepper, diced - 1 jalapeño, deseeded and minced to taste - 2 tablespoons fresh cilantro, chopped - 2 tablespoons fresh lime juice - 1 tablespoon extra virgin olive oil When I make Mango Salsa Chicken, I love using fresh, ripe ingredients. The chicken breasts are the heart of the dish. They soak up all the flavor from the salsa. The mango adds a sweet touch that pairs well with the spices. Red onion and red bell pepper bring in color and crunch. Jalapeño gives it a bit of heat, but you can adjust this to your taste. Fresh cilantro brightens the dish, while lime juice adds a zesty kick. Olive oil helps cook the chicken to a perfect golden brown. - Salt - Black pepper - Ground cumin - Garlic powder For seasoning, I use simple ingredients. Salt and black pepper bring out the natural flavors of the chicken. Ground cumin adds warmth and depth. Garlic powder gives a nice aroma and taste. These spices blend well, making the chicken savory and flavorful. - Extra cilantro leaves - Lime wedges Garnishing the dish makes it more appealing. I often add extra cilantro leaves on top for freshness. Lime wedges not only look great but also let diners add more zing to their meal. You can also serve it with rice or tortillas for a complete feast. For the full recipe, check out [Full Recipe]. To make the mango salsa, start with a medium bowl. Combine diced mango, red onion, bell pepper, jalapeño, cilantro, and lime juice. Mix them gently but well. The flavors will blend beautifully. Let this sit for a few minutes. This marinating time allows the ingredients to soak in each other's taste. Next, grab a separate bowl for the chicken. Mix salt, black pepper, cumin, and garlic powder. Take the chicken breasts and rub the seasoning onto them. Make sure every piece is covered. This step adds great flavor to the chicken. Now it’s time to cook. Heat olive oil in a large skillet over medium-high heat. When the oil is hot, place the seasoned chicken breasts in the skillet. Cook for about 5-6 minutes per side. To ensure it’s done, check the internal temperature. It should reach 165°F (75°C). This is key for safe and tasty chicken. For the full recipe, refer to the earlier sections. Enjoy your delicious Mango Salsa Chicken! To boost the taste, you should marinate the chicken. This step allows the flavors to soak in. Use lime juice, salt, and spices for an extra kick. You can also play with different herbs. Try fresh basil or mint for a twist. These can change the dish's taste in fun ways. You can cook the chicken on a grill or in a skillet. Grilling gives a smoky flavor. Skillet cooking allows for easy seasoning control. No matter the method, resting the chicken is key. Letting it sit for a few minutes helps keep it juicy. This step makes a big difference in texture and flavor. Plating the dish well makes it more inviting. Arrange the sliced chicken on a plate. Spoon the mango salsa over the top. Add extra cilantro as a garnish for color. Serve with lime wedges for a zesty touch. This makes the meal look vibrant and appetizing. You can find the full recipe to guide you through these steps. {{image_4}} You can make Mango Salsa Chicken gluten-free easily. Just ensure the spices you use are gluten-free. Most seasonings are safe, but always check the labels. For a low-sodium diet, cut back on salt. You can use herbs and spices to add flavor without adding salt. To spice things up, try adding pineapple or avocado to the salsa. Pineapple gives a sweet twist, while avocado adds creaminess. You can also switch up the heat. Use different chili peppers based on your taste. For mild, try a poblano. For more heat, use a serrano pepper instead of jalapeño. You can bake the chicken instead of using the stovetop. Preheat your oven to 375°F (190°C). Place the seasoned chicken on a baking sheet and cook for about 25-30 minutes. Use a meat thermometer to check for doneness. Another option is to use a slow cooker. Just place the chicken and salsa ingredients in the cooker. Cook on low for 6-8 hours or high for 3-4 hours until the chicken is tender. A pressure cooker is also a great choice. Cook on high pressure for about 10 minutes, then let it release naturally. These variations keep the dish fresh and exciting! For more details, check out the Full Recipe. To store leftovers, let the chicken cool first. Place it in an airtight container. Make sure to add the mango salsa in a separate container to keep it fresh. I like using glass containers because they are safe and easy to clean. You can store the chicken and salsa in the fridge for up to three days. If you want to freeze the chicken and salsa, wrap the chicken tightly in plastic wrap. Then, place it in a freezer-safe bag or container. Salsa can also freeze well in a separate container. When you are ready to eat, thaw the chicken overnight in the fridge. For reheating, cook it in a skillet or oven until it reaches 165°F (75°C). The salsa can be thawed in the fridge too. Just stir it well before serving. In the fridge, the chicken and salsa last about three days. In the freezer, the chicken can stay good for up to four months. Salsa can last about three months in the freezer. Always check for any signs of spoilage before eating. Enjoy your tasty Mango Salsa Chicken! You can serve Mango Salsa Chicken with many side dishes. Here are some great options: - Rice: White or brown rice pairs well with the dish. - Quinoa: A healthy, protein-packed choice. - Salad: A fresh green salad adds crunch and color. - Tortillas: Warm tortillas make a fun addition. - Grilled veggies: Zucchini and bell peppers complement the flavors nicely. These sides enhance the meal and add variety. Yes, you can prepare Mango Salsa Chicken ahead of time. This makes meal prep easy. Here are some tips: - Chicken: Season and marinate the chicken early. Store it in the fridge for up to 24 hours. - Salsa: You can make the mango salsa a day in advance. Keep it in an airtight container in the fridge. - Cooking: Just cook the chicken when you're ready to eat. This keeps it fresh and tasty. Planning ahead makes life easier and saves time. To ensure your chicken is fully cooked, check the internal temperature. It should reach 165°F (75°C). You can use a meat thermometer for accuracy. Here are some signs of doneness: - The juices should run clear when you cut into it. - The meat should no longer be pink inside. - It should feel firm to the touch. Following these tips will help you serve safe and delicious chicken. Mango Salsa Chicken is a vibrant dish filled with fresh flavors. We covered the main ingredients, like chicken and mango, and key seasonings for tasty results. Cooking instructions guide you through each step, ensuring perfect chicken every time. I shared tips to enhance flavor and offered variations to fit your diet. Proper storage methods help you enjoy leftovers safely. Try this recipe to impress your family or friends. It's simple, fun, and full of taste!](https://tastymomrecipes.com/wp-content/uploads/2025/05/261e8301-ca4b-4233-adc5-1cf83db955a5.webp)
Looking for a quick and tasty dinner idea? I’ve got just the thing! This Mango Salsa Chicken combines juicy chicken
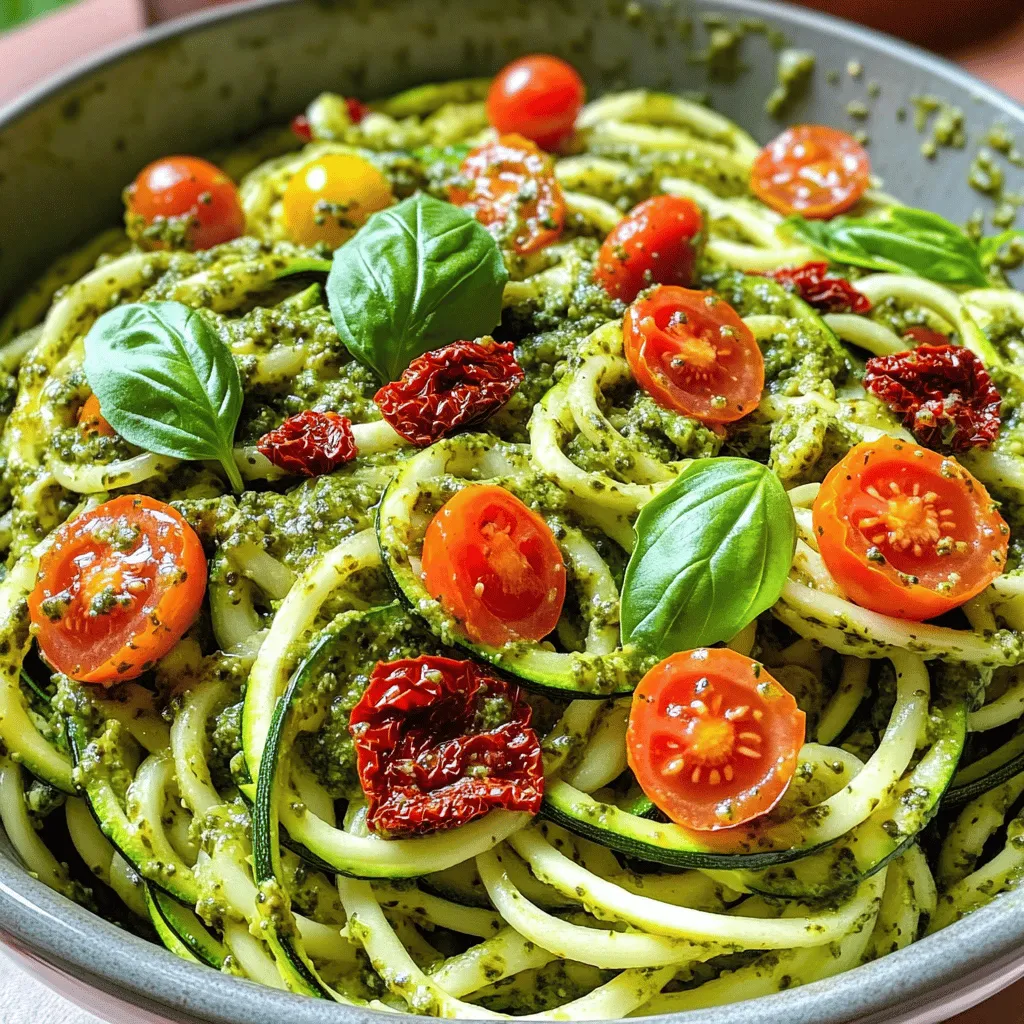
Are you ready to whip up a quick and tasty meal? Zucchini noodles with pesto offer a fresh twist on
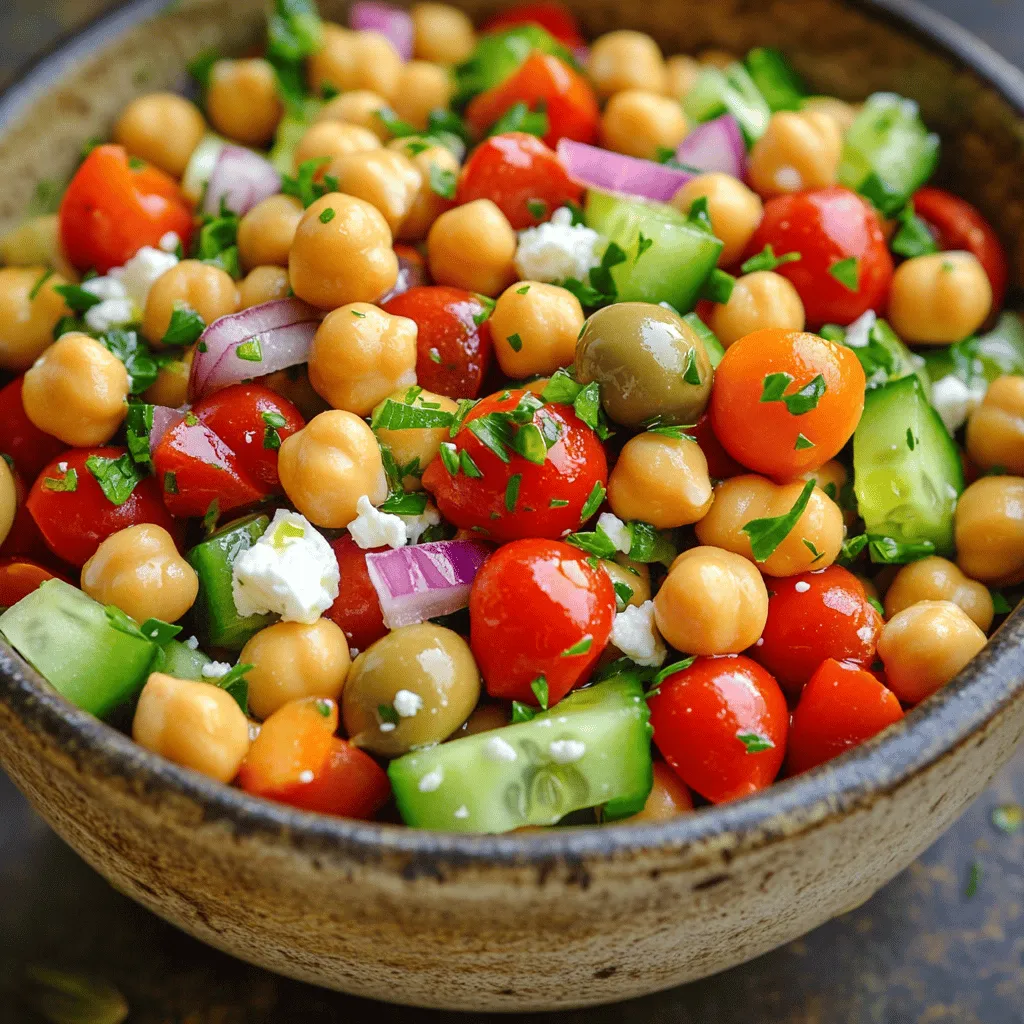
Are you ready to dive into a fresh and tasty world? This Mediterranean Chickpea Salad is here to brighten your
![- 1 cup cornmeal - 1 cup all-purpose flour - 1/4 cup sugar (optional) - 1 tablespoon baking powder - 1/2 teaspoon salt - 1/2 teaspoon black pepper - 1/2 teaspoon garlic powder - 1 teaspoon dried thyme - 1 teaspoon dried rosemary - 1/2 cup milk - 1/3 cup vegetable oil - 2 large eggs - 1/2 cup grated sharp cheddar cheese - 1/4 cup chopped fresh chives (or green onions) These ingredients create a warm, savory flavor. The cornmeal gives the muffins a lovely texture. The flour helps bind everything together. Baking powder makes them rise, while salt and spices add depth. - Dried thyme - Dried rosemary - Fresh chives or green onions Using different herbs can change the taste. Dried thyme adds an earthy flavor. Dried rosemary gives a pine-like note. Fresh chives or green onions add a mild onion taste. Feel free to mix and match based on your preference. - Different types of cheese - Other herbs and spices You can enhance your muffins with various add-ins. Adding cheese like feta or mozzarella can bring creaminess. Other herbs like basil or parsley can add freshness. Spice lovers might try a pinch of chili flakes for a kick. For the full recipe, check the earlier section. These choices let you customize your muffins for any meal. 1. Preheat your oven to 400°F (200°C). 2. Prepare a muffin tin by greasing it or using paper liners. 3. In a large bowl, mix the cornmeal, flour, sugar (if desired), baking powder, salt, black pepper, garlic powder, thyme, and rosemary. 4. Whisk these dry ingredients well, making sure there are no lumps. 1. In a separate bowl, whisk together the milk, vegetable oil, and eggs. 2. Keep whisking until the mixture is smooth and combined. 1. Pour the wet ingredients into the bowl with the dry mix. 2. Stir gently with a spatula or spoon until just combined. 3. Avoid overmixing to keep the muffins light and fluffy. 4. Carefully fold in the grated cheddar cheese and chopped chives. 5. Fill each muffin cup about two-thirds full with the batter. 6. Bake in the preheated oven for 15-18 minutes. 7. Check for doneness by inserting a toothpick; it should come out clean. This process is easy and fun! Enjoy making your savory herb cornbread muffins. For the complete recipe, refer to the Full Recipe section. To get the best texture in your muffins, avoid overmixing. When you combine wet and dry ingredients, mix just until you see no dry flour. This helps keep your muffins light and fluffy. The ideal baking time is between 15 to 18 minutes at 400°F (200°C). Watch for that golden brown color on top. Use a toothpick to check if they are done. If it comes out clean, you're good to go! Experimenting with herbs can take your muffins to a new level. Fresh herbs add brightness, while dried herbs offer depth. Try adding fresh basil or oregano for a twist. You can also include complementary ingredients like cheese or spicy peppers for added flavor. Mixing in sweet corn or jalapeños can create a fun texture and taste. These savory herb cornbread muffins pair well with many dishes. They complement soups, stews, and salads perfectly. Serve them warm, topped with a bit of butter or your favorite spread. For special occasions, arrange them in a charming basket lined with a cloth. This adds a cozy touch to your table. Don't forget to sprinkle extra chives on top for a fresh look! For a full recipe and more details, visit [Full Recipe]. {{image_4}} You can make these muffins even more exciting. Add some diced jalapeños for heat. Or toss in sweet corn kernels for a burst of flavor. If you love meat, try adding crispy bacon or cooked ham. These ingredients add depth and make each muffin unique. If you need a gluten-free option, swap the all-purpose flour with gluten-free flour. Look for a blend that works well for baking. Adjust the liquid slightly as gluten-free flours can absorb more moisture. This way, you keep the muffins soft and tasty. For a vegan version, replace the eggs and milk. Use flax eggs made from ground flaxseeds and water. Almond milk or oat milk also works well as a milk substitute. This keeps the muffins light and fluffy while being plant-based. To keep your savory herb cornbread muffins fresh, store them in an airtight container. This method works best for short-term storage. Place the container on your kitchen counter for up to three days. If you want to keep them longer, move to the fridge. They can last about a week this way. Just remember to let them cool completely before sealing. This prevents moisture buildup and soggy muffins. Freezing is a great way to save your muffins for later. Here’s a simple step-by-step process: 1. Cool Completely: Ensure your muffins are fully cooled. 2. Wrap Individually: Use plastic wrap to wrap each muffin tightly. This keeps them from getting freezer burn. 3. Place in a Bag: Put the wrapped muffins in a freezer-safe bag. Squeeze out all the air before sealing. 4. Label and Date: Write the date on the bag so you know how long they’ve been frozen. They can last up to three months in the freezer. To enjoy your muffins again, reheating is key. Here are the best ways to do this: - Microwave: Place a muffin on a microwave-safe plate. Heat for about 20-30 seconds. This keeps them soft and warm. - Oven: Preheat your oven to 350°F (175°C). Place muffins on a baking sheet and heat for about 10 minutes. This method keeps them crispy on the outside. - Air Fryer: If you have an air fryer, set it to 300°F (150°C). Heat for about 5 minutes for a quick and tasty result. With these tips, your savory herb cornbread muffins will stay delicious and ready to enjoy! For the full recipe, check out our main article. To make savory herb cornbread muffins from scratch, start with dry ingredients. In a bowl, mix cornmeal, flour, baking powder, salt, and spices. In another bowl, whisk milk, oil, and eggs. Combine wet and dry mixes without overmixing. Fold in cheese and chives. Fill muffin cups and bake at 400°F for 15-18 minutes. This process gives you fluffy, tasty muffins. Yes, you can make these muffins ahead of time. Bake them and let them cool completely. Store them in an airtight container for up to three days. For longer storage, freeze the muffins. When ready to eat, just reheat them in the oven or microwave. This way, you always have a tasty treat on hand. For cornbread muffins, I recommend using dried thyme and rosemary. Fresh chives add a nice burst of flavor. You can also try oregano or parsley. Mixing different herbs can create unique flavor profiles. Experiment to find your favorite combination. Cornbread muffins pair well with many dishes. Try serving them with chili, soups, or stews. They also work great with salads or grilled meats. For breakfast, enjoy them with eggs or bacon. The muffins add a nice touch to any meal. To adjust the recipe for fewer servings, simply halve the ingredients. Use half a cup of cornmeal and flour. You can also reduce the number of eggs to one. Keep the ratios the same for other ingredients. This way, you still get delicious muffins without waste. Yes, there are allergy-friendly substitutions. For gluten-free muffins, use a gluten-free flour blend instead of all-purpose flour. If you're dairy-free, substitute milk with almond or oat milk. Replace eggs with flaxseed meal or applesauce for a vegan option. These swaps allow everyone to enjoy the muffins. In this article, we covered how to make savory herb cornbread muffins. We detailed essential ingredients, helpful tips, and tasty variations. You can experiment with different herbs or add cheese to elevate flavors. Remember, avoid overmixing for the best texture. Whether sweet or savory, these muffins fit any meal. Store leftovers correctly to enjoy them later. Now, it’s time for you to try this recipe and enjoy the delightful results!](https://tastymomrecipes.com/wp-content/uploads/2025/05/42993e26-eff0-410d-a40b-41823d9ca725.webp)
Looking for a delicious side for your next meal? These savory herb cornbread muffins are perfect! With a golden crust
. {{image_4}} You can switch up the mango in your salsa. Try using fresh pineapple for a tropical twist. Chopped peaches also add a sweet touch. If you want a tart flavor, diced kiwi works great. For a berry boost, mix in some diced strawberries or blueberries. Each fruit brings its own flavor and color. This keeps your salsa interesting and fun. Chicken is a classic choice, but beef or pork work well, too. Use grilled shrimp for a seafood option. Tofu gives a nice plant-based alternative. Just remember to adjust cooking times for these proteins. Each choice adds a different taste and texture to your meal. Spices can enhance the flavor of your dish. Try adding smoked paprika for a hint of smokiness. A pinch of cayenne pepper adds heat if you like spice. Fresh mint or basil can add a unique taste to your salsa. Mix and match spices to find your favorite blend. Each addition transforms the dish into something new. For the full recipe, check out the details above. Store leftover Mango Salsa Chicken in an airtight container. Ensure it cools to room temperature first. Place the chicken in the fridge. It will stay fresh for up to three days. Keep the salsa in a separate container. This helps maintain its flavor and texture. You can freeze Mango Salsa Chicken if you want to save it for later. Wrap the chicken tightly in plastic wrap. Then, place it in a freezer bag. Label it with the date. This way, you can keep track of how long it has been frozen. The salsa can also be frozen. Just make sure to leave out the cilantro and lime juice before freezing. Add them back when you thaw and serve. To reheat the chicken, use the oven for the best results. Preheat the oven to 350°F (175°C). Place the chicken in a baking dish with a splash of water. Cover it with foil to keep it moist. Heat for about 20 minutes or until heated through. For the salsa, simply let it sit at room temperature for about 30 minutes before serving. This helps bring back its fresh taste. Enjoy your flavorful meal! For the full recipe, check out the details above. Yes, you can use frozen chicken. However, it is best to thaw it first. Thawing helps the marinade soak in better. You can thaw chicken in the fridge overnight or use the microwave. Just make sure the chicken is fully thawed before you start cooking. Marinating chicken takes at least 30 minutes. For more flavor, let it sit for 2 hours. The longer you marinate, the more the flavors mix into the chicken. Just remember not to marinate for over 24 hours. It can change the texture of the meat. Mango Salsa Chicken goes well with many sides. Here are some great options: - Rice or quinoa for a filling base - Grilled vegetables for a fresh touch - Black beans for added protein - A simple green salad for crunch - Tortillas for a fun, taco-style meal These sides enhance the meal and add more colors to your plate. Mango Salsa Chicken combines fresh ingredients and simple steps for a tasty meal. We covered how to marinate the chicken and make the salsa. You also learned cooking tips for juicy chicken and the best ways to store leftovers. This dish is versatile, allowing you to try different fruits and proteins. My final thought: enjoy the mix of flavors and feel free to customize it to your taste. This recipe can become a family favorite with just a bit of effort.](https://tastymomrecipes.com/wp-content/uploads/2025/05/44f2b1dc-480c-476c-acc6-cc7a64cecc4e.webp)
If you’re looking for a fun, bright dish to spice up your dinner, Mango Salsa Chicken is the answer! This

Are you ready to indulge in a warm, gooey Chocolate Chip Cookie Skillet? This decadent dessert treat combines rich flavors
. - Melt unsalted butter over medium heat. - Add minced garlic and sauté. To start, take a large skillet and turn the heat to medium. Add four tablespoons of unsalted butter. Watch the butter melt and foam. This is the base of our flavor. Once it’s melted, toss in four cloves of minced garlic. Stir it for about a minute until it smells amazing. Be careful not to let the garlic brown. If it does, it will taste bitter, and we want a rich, buttery flavor. - Season shrimp with spices and cook until pink. - Drizzle lime juice and finish cooking. Next, grab one pound of large shrimp that are peeled and deveined. Season them with sea salt, black pepper, one teaspoon of smoked paprika, and one teaspoon of chili powder. Add the shrimp to the skillet in a single layer. Let them cook without moving them for about two to three minutes. You want them to turn a lovely pink color. After that, flip the shrimp over. Drizzle fresh lime juice over the shrimp. Cook for another two to three minutes until they are fully pink and opaque. - Use a dry skillet to warm the tortillas. Now, let’s warm up the tortillas. Take eight small corn tortillas and place them in a dry skillet over medium heat. Heat them for about 30 seconds on each side. This makes them soft and easy to fold. - Add shrimp to tortillas and top with garnishes. Now comes the fun part! Take your warmed tortillas and lay down a generous portion of the garlic butter shrimp. Make sure to drizzle some of that tasty garlic butter on top. Next, add finely shredded red cabbage for a nice crunch. Then, lay down a few slices of ripe avocado for creaminess. Finish with fresh cilantro sprigs for a burst of flavor. You can serve the tacos with lime wedges on the side for an extra zesty kick. Enjoy your delicious garlic butter shrimp tacos! For the complete recipe, check out the Full Recipe. For the best garlic butter shrimp tacos, pick large shrimp. They hold flavor well and cook evenly. Look for fresh, pink shrimp. If you buy frozen shrimp, thaw them in cold water before use. Wild-caught shrimp has great taste, so choose that if you can. To get the best garlic flavor, avoid browning it. Browned garlic can taste bitter. Sauté minced garlic in butter over medium heat for just one minute. This method brings out its sweet, rich flavor. To add more depth, consider crushing the garlic before mincing. This helps release its oils and enhances the taste. Soft corn tortillas make the best base for tacos. To soften them, warm them in a dry skillet. Heat each tortilla for about 30 seconds on each side. This method keeps them pliable and ready for filling. You can also wrap them in a clean cloth to keep them warm while you cook. For the full recipe, check out the section above. {{image_4}} You can easily change the spice level in your tacos. To make them spicier, add more chili powder or even some cayenne pepper. Start with a pinch and taste. If you prefer less heat, reduce the chili powder or skip it entirely. You can also swap smoked paprika for sweet paprika to lower the spice. If shrimp isn't your favorite, try using fish or chicken. For fish, choose a firm type like cod or tilapia. Season and cook them in the garlic butter just like the shrimp. If you use chicken, cut it into bite-sized pieces. Cook until golden brown and no longer pink. Each protein brings its own unique flavor to the dish. Toppings can take your tacos from good to great. Try adding mango salsa for a sweet twist or jalapeños for more heat. A drizzle of creamy chipotle sauce adds richness. Fresh lime juice brightens up the flavors. You can even add a sprinkle of feta cheese for a salty kick. Explore different combinations to find your favorite! For the full recipe, check the [Full Recipe]. To store leftover tacos, place them in an airtight container. Make sure to separate the shrimp from the tortillas and toppings. This keeps everything fresh. Store the container in the fridge. They will stay good for up to two days. When you are ready to eat, you can reheat the shrimp and warm the tortillas again. Yes, you can freeze garlic butter shrimp. First, let the shrimp cool completely. Place them in a freezer-safe bag. Try to remove as much air as possible. Seal the bag tightly and label it with the date. You can freeze shrimp for up to three months. However, I recommend enjoying them fresh for the best taste. To reheat shrimp tacos, you have a few great options. You can warm the shrimp in a skillet over low heat. Stir gently until they are hot all the way through. For tortillas, heat them in a dry skillet for about 30 seconds on each side. You can also use the microwave. Just cover the shrimp and tortillas with a damp paper towel. Heat in short bursts, checking to avoid overcooking. This ensures your tacos stay delicious and moist. To make garlic butter shrimp tacos, follow these steps: 1. Prepare the Butter Sauce: Melt unsalted butter in a large skillet over medium heat. 2. Add Garlic: Stir in finely minced garlic and sauté for one minute. 3. Spice It Up: Add smoked paprika and chili powder, mixing well. 4. Cook the Shrimp: Add peeled and deveined shrimp. Season with salt and pepper. Cook for 2-3 minutes until they turn pink. 5. Finish Cooking: Flip shrimp and drizzle lime juice. Cook for another 2-3 minutes. 6. Warm the Tortillas: Heat corn tortillas in a dry skillet for about 30 seconds on each side. 7. Assemble the Tacos: Place shrimp on each tortilla, adding the garlic butter sauce. 8. Add Toppings: Top with shredded red cabbage and avocado slices. 9. Garnish: Finish with fresh cilantro and serve with lime wedges. Yes, you can prep these tacos ahead. Cook the shrimp and butter sauce in advance. - Tips for Meal Prepping: - Store shrimp in an airtight container in the fridge for up to two days. - Warm the tortillas just before serving to keep them fresh. - Prepare toppings like cabbage and avocado and keep them separate. These tacos go great with several sides. - Suggestions for Complementary Dishes: - Fresh corn salad adds crunch. - Cilantro lime rice gives a zesty kick. - Black beans offer protein and fiber. - A light slaw balances the richness of the shrimp. You can easily lighten up garlic butter shrimp tacos with a few swaps. - Substitution Ideas for a Lighter Meal: - Use olive oil instead of butter for a healthier fat. - Swap regular tortillas for whole grain or lettuce wraps. - Add more veggies, like bell peppers or zucchini, for extra nutrients. Check out the Full Recipe to dive deeper into making these delicious tacos! This blog post shared a tasty recipe for garlic butter shrimp tacos, with key ingredients and step-by-step instructions. You learned how to prepare a rich sauce and cook shrimp perfectly. Tips on choosing the best shrimp, garlic cooking methods, and tortilla techniques were also covered. Feel free to get creative with spice levels and toppings. Whether you want to store leftovers or meal prep, we provided clear guidance. Enjoy this flavorful dish, and share it with friends for a fun meal!](https://tastymomrecipes.com/wp-content/uploads/2025/05/d1d4a5ec-3f70-4a13-9d15-b668dfe84980.webp)
If you’re craving a quick, tasty meal, look no further! Garlic Butter Shrimp Tacos are simple to make and packed
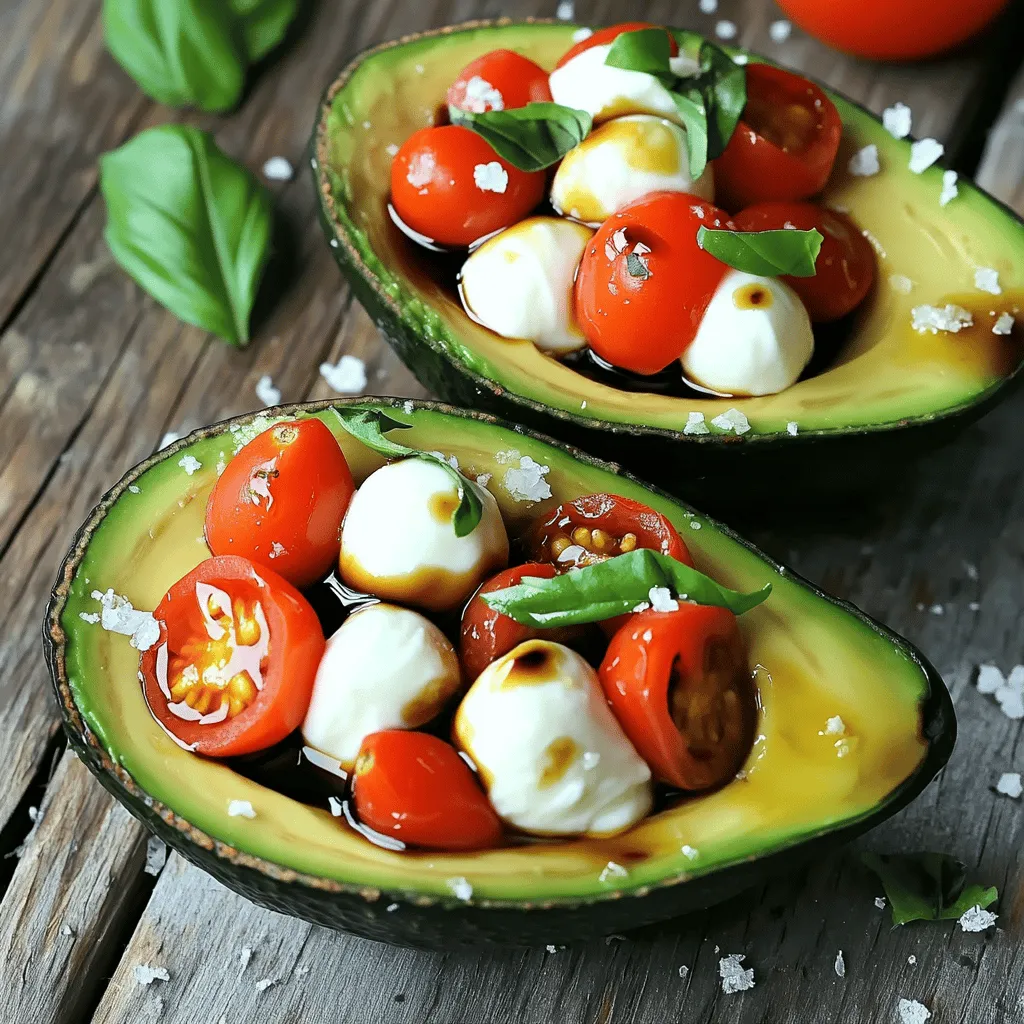
Looking for a fresh and tasty dish? Caprese Stuffed Avocados are the perfect choice! These easy-to-make treats blend creamy avocado
