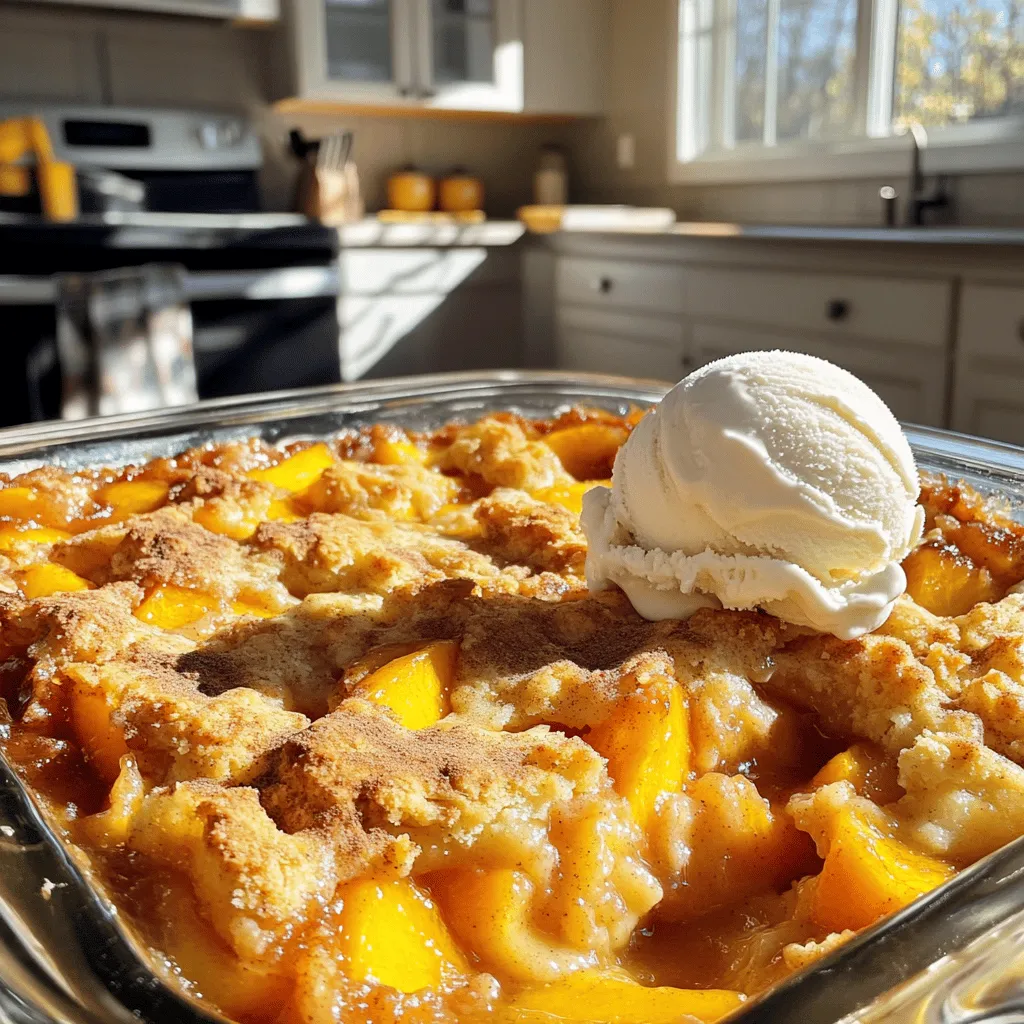
Peach Cobbler Dump Cake Delightful and Easy Recipe
If you crave a simple yet delicious dessert, you’re in the right place! My Peach Cobbler Dump Cake is the
If you crave a simple yet delicious dessert, you’re in the right place! My Peach Cobbler Dump Cake is the
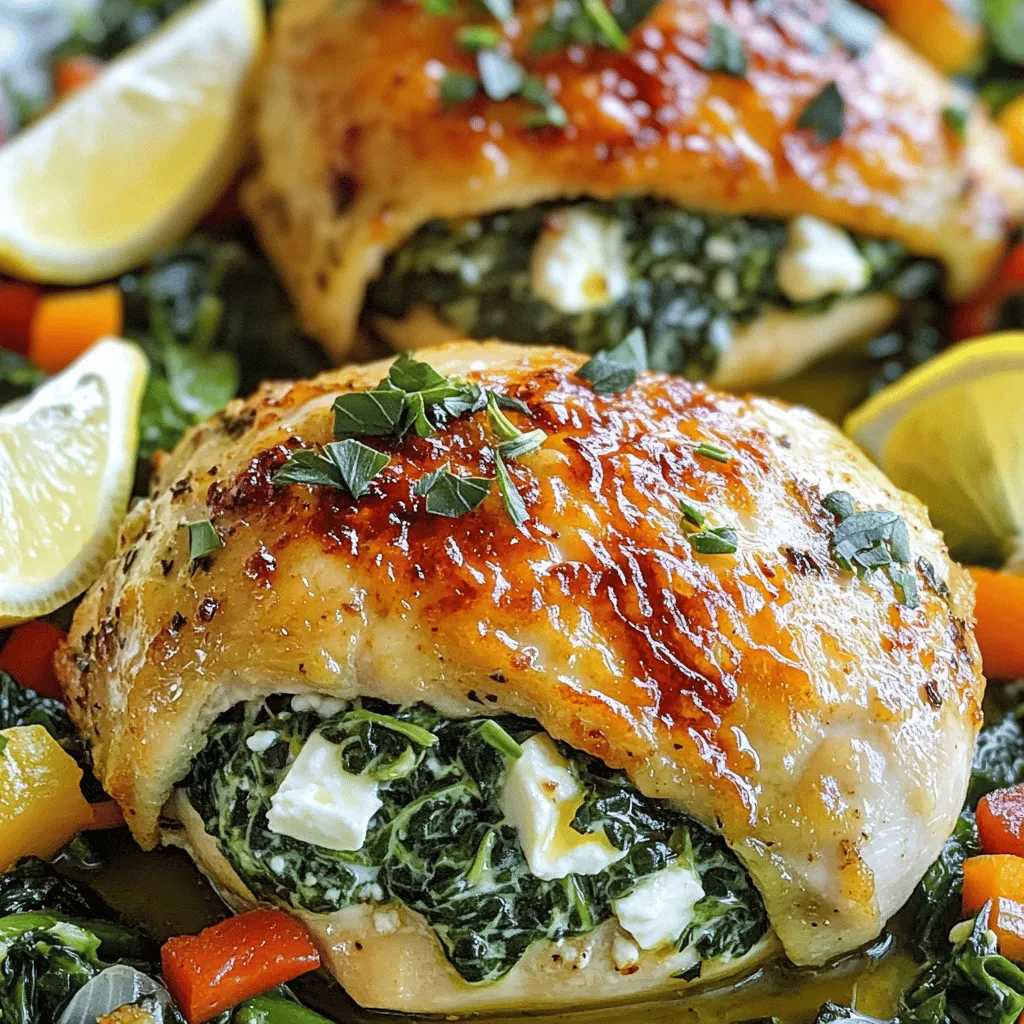
Are you ready to elevate your dinner game? This Savory Spinach Feta Stuffed Chicken recipe is your answer. You’ll love
![- 1 lb Brussels sprouts, trimmed and halved - 3 tablespoons extra virgin olive oil - 4 cloves garlic, finely minced - 1/2 cup freshly grated Parmesan cheese - 1 teaspoon smoked paprika - 1/2 teaspoon sea salt - 1/4 teaspoon freshly ground black pepper - 1 tablespoon balsamic glaze (optional) - Fresh parsley, finely chopped (for garnish) - Different cheese options (e.g., Pecorino, Asiago) - Additional herbs and spices (e.g., thyme, rosemary) When I make crispy garlic Parmesan Brussels sprouts, I love how simple it is. The ingredients are fresh and flavorful. You start with Brussels sprouts, which I trim and cut in half. This helps them cook evenly and get crispy. Next, I use extra virgin olive oil. It adds a rich flavor and helps the sprouts get that golden brown color. Then, I mince garlic. Fresh garlic gives a strong taste that pairs well with the sprouts. The Parmesan cheese adds a salty, nutty taste. I also use smoked paprika, sea salt, and black pepper for extra flavor. These spices make every bite taste amazing. If you want to add a touch of sweetness, a drizzle of balsamic glaze works wonders. Lastly, I sprinkle fresh parsley on top. It brightens up the dish and makes it look pretty. Feel free to swap cheeses if you want a different flavor or add herbs and spices you like. Using Pecorino or Asiago can change the taste a lot. Try adding thyme or rosemary for an herbal kick. The choices are endless! Check out the Full Recipe for more details. - Preheat the oven to 425°F (220°C). - In a large bowl, mix halved Brussels sprouts with olive oil, minced garlic, smoked paprika, sea salt, and black pepper. Toss well until every sprout is coated. - Line a baking sheet with parchment paper for easy cleanup. Arrange the Brussels sprouts in a single layer. Make sure they are not crowded. - Place the baking sheet in the oven and roast for 20-25 minutes. Flip the sprouts halfway through. This helps them brown evenly and become crispy. - In the last 5 minutes of roasting, sprinkle grated Parmesan cheese over the Brussels sprouts. Roast until the cheese melts and becomes slightly crispy. - If you want, drizzle balsamic glaze over the roasted sprouts before serving. This adds a sweet and tangy flavor. - Garnish with finely chopped fresh parsley to brighten the dish and add color. For the complete process, check the [Full Recipe]. To get that perfect crispiness, space your Brussels sprouts well on the baking sheet. Place them in a single layer. If they touch, they will steam instead of roast. Flipping during roasting is also key. Halfway through, turn them over. This helps them brown evenly on all sides. Adjusting your seasonings can boost flavor. If you want more heat, add chili flakes. To balance the garlic and Parmesan tastes, use a light hand with garlic. Too much can overpower the dish. Aim for a nice harmony between the two, letting each shine through. Serving matters! Use a rustic wooden platter or a bright bowl. This highlights their golden color. Add a sprinkle of Parmesan on top for flair. A few parsley leaves also add freshness. These small touches make your dish look stunning. For the full recipe, check the recipe section above. {{image_4}} You can cook crispy garlic Parmesan Brussels sprouts in many ways. The air fryer gives a quick and easy method. 1. Air fryer instructions: Preheat your air fryer to 400°F (200°C). Toss your Brussels sprouts with olive oil and seasonings. Place them in a single layer in the air fryer basket. Cook for about 15-18 minutes, shaking the basket halfway through. Add the Parmesan in the last 3 minutes. They will turn crispy and delicious. 2. Stovetop sautéing: Heat a large pan over medium heat. Add olive oil and the halved Brussels sprouts. Cook for about 8-10 minutes, stirring often. When they are golden brown, add garlic. Cook for another 2-3 minutes until garlic is fragrant. Finish with Parmesan cheese and toss until melted. You can change the flavor of the Brussels sprouts to match your taste. 1. Spicy version: Add chili flakes to the olive oil or sprinkle them on before serving. This gives a nice kick to the dish. 2. Sweet variation: Drizzle honey or maple syrup over the sprouts before roasting. This adds a sweet touch that balances the garlic and cheese. Don’t worry if you have dietary needs. You can still enjoy this dish! 1. Vegan substitutions: Instead of Parmesan cheese, try nutritional yeast. It gives a cheesy flavor without dairy. 2. Gluten-free adjustments: This recipe is naturally gluten-free. Just make sure all your ingredients are gluten-free. You can enjoy this dish without any worries. For the full recipe, check out the complete guide to making these crispy garlic Parmesan Brussels sprouts! To keep leftover crispy garlic Parmesan Brussels sprouts fresh, store them in an airtight container. Place them in the refrigerator within two hours of cooking. They will stay good for about 3 to 4 days. If you want to freeze cooked Brussels sprouts, let them cool first. Then, spread them on a baking sheet in a single layer. Freeze them for a few hours until solid. Once frozen, transfer them to a freezer bag. This way, they won’t stick together, and you can use them as needed. When reheating, the oven works best. Preheat your oven to 350°F (175°C). Place the Brussels sprouts on a baking sheet and heat for about 10-15 minutes. This method helps keep them crispy. If you use a microwave instead, place them in a microwave-safe dish. Cover with a damp paper towel to prevent them from drying out. Heat in short bursts of 30 seconds, checking often. To restore crispiness, consider broiling them for a minute after microwaving. This extra step helps revive that delightful crunch. How do I make my Brussels sprouts crispy? To make your Brussels sprouts crispy, space them well on the baking sheet. Overcrowding traps steam, which makes them soggy. Also, ensure you coat them well in oil and seasonings. Roasting at a high temperature helps them turn golden and crisp. Can I make this recipe ahead of time? Yes, you can prep the Brussels sprouts in advance. Trim and season them, then store in the fridge for up to a day. Roast them just before serving to keep them crispy. What pairings work best with crispy garlic Parmesan Brussels sprouts? These Brussels sprouts pair well with roasted meats, like chicken or pork. They also complement pasta dishes and creamy risottos. Add a fresh salad for a colorful meal. Can I use frozen Brussels sprouts? Yes, you can use frozen Brussels sprouts. However, they might not get as crispy as fresh ones. Thaw and drain them well before seasoning and roasting. How can I adjust the garlic flavor? If you want a milder garlic taste, use less minced garlic. Alternatively, roast whole cloves with the sprouts for a softer flavor. For more garlic punch, add garlic powder as well. Are Brussels sprouts nutritious? Yes, Brussels sprouts are very nutritious. They are high in fiber, vitamins C and K, and folate. Eating them can support digestion and overall health. What are the health benefits of garlic? Garlic is known for its health benefits. It boosts your immune system and may lower blood pressure. Garlic also has anti-inflammatory properties, making it a great addition to your diet. In this post, we explored how to make crispy garlic Parmesan Brussels sprouts. We covered the key ingredients, step-by-step cooking instructions, and tips for perfect results. You can also try flavor variations and different cooking methods. Remember to store your leftovers properly to keep them fresh. Investing a little time in this recipe brings big rewards in taste and health. You now have the tools to create a delicious dish that impresses friends and family. Enjoy your cooking!](https://tastymomrecipes.com/wp-content/uploads/2025/05/479442ef-5f8d-4e83-9052-ce129ca5440c.webp)
Are you ready to transform Brussels sprouts into a crispy, savory delight? In this post, I’ll show you how to
![For the best easy chicken fajitas, you need fresh, simple ingredients. Here’s what you’ll need: - 1 lb (450g) boneless, skinless chicken breasts, sliced into thin strips - 1 red bell pepper, sliced into thin strips - 1 green bell pepper, sliced into thin strips - 1 medium onion, thinly sliced - 3 tablespoons olive oil, divided - 8 small flour or corn tortillas - Fresh cilantro, chopped, for garnish - Lime wedges, for serving These ingredients combine to create a colorful and tasty dish. The chicken provides protein, while the peppers and onions add crunch and sweetness. The right seasonings make your fajitas burst with flavor. Here are the key spices: - 2 teaspoons chili powder - 1 teaspoon cumin - 1 teaspoon garlic powder - 1 teaspoon onion powder - Salt and freshly ground black pepper to taste Mix these spices to create a robust seasoning blend. This blend enhances the chicken and veggies, giving them a vibrant taste. Choosing the right tortilla is essential for a great fajita. You can use: - Small flour tortillas - Small corn tortillas Flour tortillas are soft and chewy. They hold the fillings well. Corn tortillas offer a slightly firmer texture and a distinct flavor. Choose the one you like best for your meal. For the full list of steps and preparation, check out the Full Recipe. To start, grab a medium bowl. Add the sliced chicken to the bowl. Drizzle 2 tablespoons of olive oil over the chicken. Next, sprinkle in 2 teaspoons of chili powder, 1 teaspoon of cumin, 1 teaspoon of garlic powder, and 1 teaspoon of onion powder. Season with salt and black pepper to taste. Mix everything well, ensuring the chicken is fully coated. Cover the bowl with plastic wrap and let it rest for at least 15 minutes. This allows the flavors to blend and the chicken to absorb the spices. Now, heat a large skillet over medium-high heat. Once the skillet is hot, add the marinated chicken. Cook for about 5-7 minutes, stirring often. You want the chicken to turn golden brown and be fully cooked. When it's done, transfer the chicken to a plate and set it aside. This step is key for juicy chicken with great flavor. In the same skillet, add a splash of olive oil if needed. Toss in the sliced red and green bell peppers and the onion. Sauté these for 4-5 minutes. Stir occasionally until the vegetables become tender and slightly charred. This charring adds a nice depth of flavor to your fajitas. Once cooked, you can move on to the next step. For the full recipe, check out the [Full Recipe]. To make your fajitas great, focus on these key points: - Marinate the chicken: Letting the chicken soak in spices adds more flavor. - High heat: Cook on medium-high heat for a nice sear on the chicken. - Don’t overcrowd the pan: Cook in batches if needed to avoid steaming. - Use fresh veggies: Fresh bell peppers and onions give the best taste. - Warm tortillas: Soft tortillas hold the filling better and taste great. You can replace ingredients easily if needed: - Chicken: Use shrimp, beef, or tofu for different flavors. - Peppers: Swap in zucchini or mushrooms for a veggie twist. - Spices: Use taco seasoning if you want a quick option. - Tortillas: Corn tortillas are gluten-free and add a nice crunch. - Cilantro: If you dislike cilantro, try parsley or omit it. Adjusting spice levels is simple: - Mild: Skip the chili powder and use sweet spices like paprika. - Medium: Stick to the recipe but add a pinch of cayenne. - Spicy: Add sliced jalapeños or extra chili powder to the mix. - Serve with: Offer hot sauce on the side for those who want more heat. - Tasting: Always taste as you go to find your perfect spice level. For more cooking details, check out the Full Recipe. {{image_4}} You can make hearty vegetarian fajitas by swapping chicken for veggies. Use a mix of mushrooms, zucchini, and eggplant. These ingredients grill well and add a nice texture. You can also use firm tofu or tempeh for protein. Marinate them just like the chicken. The spices will give them great flavor. You can still use the same spices from the chicken fajitas recipe. Don't forget to add bell peppers and onions for color and taste. If you want to try other proteins, you have many options. Shrimp is a great choice. It cooks fast and absorbs the flavors well. Just marinate and sauté it like chicken. You can also use steak, pork, or even fish. Each protein brings its unique taste. Adjust cooking times to make sure everything is cooked perfectly. For example, shrimp cooks much faster than chicken, so watch it closely. You can easily change the flavor of your fajitas. Try adding different spices to the mix. Smoked paprika adds a nice smoky taste. You can also use fresh herbs like cilantro or oregano for a bright flavor. If you like heat, add jalapeños or cayenne pepper. For a sweeter touch, add a splash of orange juice to the marinade. This gives a nice twist to the dish. You can explore many flavors to make your meal unique. The key is to enjoy the process and have fun! For the full recipe, check out the Easy Chicken Fajitas section. Store leftover fajitas in an airtight container. This keeps them fresh. Let the fajitas cool first. Use parchment paper between layers to avoid sticking. You can keep them in the fridge for up to three days. You can freeze chicken fajitas for later. Place the cooled fajitas in a freezer-safe bag. Remove as much air as possible. Label the bag with the date. They can last up to three months in the freezer. When you want to eat them, thaw in the fridge overnight. Reheat your fajitas in a skillet for the best taste. Heat over medium heat and stir often. This keeps them juicy and warm. You can also use the microwave, but the skillet is better. For extra flavor, add a splash of water while reheating. Enjoy your flavorful meal again! For the full recipe, check out the [Full Recipe]. To spice up your fajitas, add more chili powder. You can also use hot sauce or diced jalapeños. For extra heat, try adding cayenne pepper to your seasoning mix. Adjust the spice to your taste, and remember, it’s easier to add than to take away. The best tortillas for fajitas are either flour or corn. Flour tortillas are soft and easy to fold. Corn tortillas have a nice, earthy flavor. Choose what you like best, or mix both for fun. Each type brings its own taste to the dish. Yes, you can prepare fajitas in advance! Marinate the chicken and slice the veggies a day ahead. Store them in the fridge until you’re ready to cook. This saves time and lets the flavors deepen. Just remember to cook them fresh for the best taste. Great toppings for chicken fajitas include: - Shredded cheese - Avocado or guacamole - Sour cream - Salsa or pico de gallo - Fresh cilantro - Sliced jalapeños These toppings add flavor and texture. Mix and match to find your perfect combo! For the full recipe, check out the [Full Recipe]. You learned how to make easy chicken fajitas. First, gather fresh ingredients and seasonings. Then, marinate and cook your chicken just right. Sauté bright vegetables for flavor and color. I shared tips for perfecting your fajitas, like ingredient swaps and spice levels. You can also explore tasty variations, from vegetarian options to different proteins. Don’t forget to store leftovers properly. A little prep now will lead to great meals later. Enjoy creating delicious fajitas your way!](https://tastymomrecipes.com/wp-content/uploads/2025/05/df5f4fc8-f8bb-48e9-bcc3-505443d4dfe7.webp)
Craving a quick and tasty dinner? Easy Chicken Fajitas are the answer! This recipe packs bold flavors into juicy chicken
. To get a creamy texture in your casserole, use enough cream of mushroom soup and milk. Mix them well with the rice and broccoli. This keeps the dish moist as it cooks. If you find it too thick, add a bit more milk to reach your desired creaminess. To prevent over-baking, cover the dish with foil for the first part of cooking. This keeps moisture in and stops the top from burning. Check the casserole at the end of the baking time. If the cheese is bubbling and golden, it’s ready. Spices can change your casserole from good to great. I recommend adding a pinch of cayenne pepper for a bit of heat. You can also mix in some onion powder for extra depth. Fresh herbs like thyme or parsley can brighten the dish. Add them just before serving to keep their flavor fresh. If you want more texture, consider adding cooked chicken or bacon bits for a savory twist. For the full recipe, check out the Cheesy Broccoli Bliss Casserole. {{image_4}} For those who need gluten-free options, use gluten-free rice and check your soup label. Many brands offer gluten-free cream of mushroom soup. You can also make your own at home using gluten-free flour. If you want to go dairy-free, swap the cheddar cheese with a plant-based cheese. Coconut milk can also work instead of regular milk. There are many delicious dairy-free soups on the market, too. You can add protein to make this dish heartier. Chicken or diced ham works well. Crisped bacon can also add a nice flavor. Just mix it in with the rice and broccoli. For more veggies, think about using cauliflower or peas. Cauliflower gives a nice texture, while peas add a sweet note. You can also mix in some carrots for color and crunch. Check out the Full Recipe for a tasty way to enjoy this comforting dish! To keep your casserole fresh, store it in an airtight container. This helps lock in moisture. Refrigerate the leftovers within two hours of cooking. It will stay good for about three to four days. If you want to keep it longer, freezing is a great option. For freezing, let the casserole cool completely. Then, wrap it tightly in plastic wrap, followed by aluminum foil. This prevents freezer burn and keeps flavors intact. You can freeze it for up to three months. Just remember to label it with the date. To reheat your casserole, I suggest using the oven for the best taste. Preheat the oven to 350°F (175°C). Place the casserole in a baking dish and cover it with foil. Heat for about 20 minutes or until it’s hot all the way through. If you’re short on time, the microwave is a quick option. Transfer a portion to a microwave-safe dish. Heat it on medium power for two to three minutes. Stir halfway through to ensure even heating. Enjoy your delicious Cheddar Broccoli Rice Casserole! You can find the full recipe above. Can I make this casserole ahead of time? Yes, you can prepare this casserole a day before. Just mix all the ingredients and store it in the fridge. Before baking, let it sit at room temperature for a bit. This helps it cook evenly. What can I substitute for cream of mushroom soup? If you don't have cream of mushroom soup, try using cream of chicken or cream of celery. You can also make your own by blending cooked mushrooms with cream. This will keep the dish creamy and tasty. Best side dishes and drinks to accompany This casserole goes well with a fresh green salad or garlic bread. For drinks, a crisp lemonade or iced tea complements the meal. These options balance the dish's richness and add freshness. How to garnish the casserole for presentation To make your casserole look great, sprinkle fresh parsley or green onions on top. This adds a pop of color. You can also add a bit more cheese right before serving for extra appeal. What if I have leftover ingredients? If you have leftover rice or broccoli, use them in this casserole. You can also add leftover cooked chicken or ham. This dish is flexible and perfect for using what you have. Can I use fresh versus frozen broccoli? You can use either fresh or frozen broccoli. If using frozen, just thaw and drain it first. Fresh broccoli adds a nice crunch and color, but both work well in this casserole. This blog post covered the key ingredients, steps, and tips for making Cheddar Broccoli Rice Casserole. You learned about the main components, how to mix and bake them, and ways to enhance flavor. You also discovered storage tips and answers to common questions. Now, you can make this dish your own by trying different variations and substitutions. Cooking is fun and creative! Enjoy your delicious casserole and share it with friends and family.](https://tastymomrecipes.com/wp-content/uploads/2025/05/75e67890-05ef-40e3-ac0d-b18b9d2f49f5.webp)
Craving a warm and hearty meal? This Cheddar Broccoli Rice Casserole is the answer! Packed with fresh broccoli, creamy cheese,
![- 2 medium acorn squashes - 1 cup quinoa - 2 cups vegetable broth - 1 cup canned black beans - 1 large red bell pepper - 1 small red onion - 2 cloves garlic - 1 teaspoon ground cumin - 1 teaspoon smoked paprika - Salt and freshly cracked black pepper, to taste - 1 cup corn kernels (can be fresh, frozen, or canned) - 1/2 cup feta cheese, crumbled (optional) - Fresh cilantro or parsley for garnish I love gathering these bright and healthy ingredients. Acorn squash serves as a perfect bowl. It adds a warm, nutty flavor. Quinoa gives a fluffy texture and protein. Black beans add heartiness, making this dish filling. The red bell pepper and onion provide a sweet crunch. Garlic adds depth to every bite. Don't forget your spices! Ground cumin and smoked paprika bring warmth and a hint of smokiness. You can adjust the salt and pepper to your taste. Feel free to add corn for sweetness and color. If you want, sprinkle feta cheese on top for a creamy finish. Fresh herbs like cilantro or parsley brighten up the dish. These ingredients come together to create a vibrant meal. You can find the full recipe in the section above. This dish is not just tasty; it's a feast for the eyes too! First, you need to preheat your oven to 400°F (200°C). This step makes sure your squash cooks evenly and gets that nice roast. Next, take your acorn squashes and cut them in half. Use a spoon to scoop out the seeds. Place the halves cut-side up on a baking sheet. Drizzle some olive oil over them. Then, sprinkle salt and black pepper on top. This seasoning brings out the natural sweetness of the squash. While your squash roasts, it’s time to cook the quinoa. First, rinse your quinoa under cold water. This helps remove any bitterness. In a medium pot, combine the rinsed quinoa with 2 cups of vegetable broth. Bring this to a boil over high heat. Once it boils, lower the heat and cover the pot. Let it simmer for about 15 minutes until the quinoa is fluffy. When done, fluff it with a fork to keep the grains separate. Next, grab a large skillet and heat one tablespoon of olive oil on medium heat. Add the finely chopped red onion and diced red bell pepper. Sauté these for about 5 minutes until they soften. Then, add the minced garlic and cook for one more minute. The garlic will fill your kitchen with a lovely aroma. Now it’s time to mix everything together. Add the cooked quinoa to your skillet. Then, stir in the black beans and corn. Season this mixture with ground cumin, smoked paprika, and more salt and pepper to taste. Mix well and cook for an extra 3 to 5 minutes. This step ensures all the flavors blend nicely together. Carefully take the roasted acorn squashes out of the oven. Spoon the cooked quinoa mixture generously into each squash half. Press it down gently to pack it in. If you like, sprinkle crumbled feta cheese on top for added flavor. Place the stuffed squashes back in the oven and bake for another 10 to 15 minutes. This final bake warms everything through and gives a nice golden touch on top. Enjoy your flavorful and filling vegetarian stuffed acorn squash! For the full recipe, check out the details above. To ensure a tender squash, choose firm acorn squashes without blemishes. Bake them until they feel soft when pierced with a fork. This usually takes about 25-30 minutes at 400°F. To enhance flavor, roast the squash with olive oil, salt, and pepper. This simple step adds depth and brings out the natural sweetness. For a beautiful presentation, serve each stuffed squash half on a colorful plate. Drizzle a little olive oil on top for shine. Place fresh cilantro leaves around the squash to add color and freshness. Pair the dish with a simple salad or some crusty bread to create a complete meal. This adds texture and balances the flavors. The key ingredients in this dish offer many health benefits. Acorn squash is high in vitamins A and C. Quinoa is a complete protein, providing all essential amino acids. Black beans add fiber and iron. One serving of this dish is around 350 calories, making it nutritious and filling. For detailed nutritional info, check the Full Recipe. {{image_4}} You can change the flavors in your stuffed acorn squash by adding different herbs and spices. Try using thyme, oregano, or rosemary for a fresh taste. If you like heat, add a splash of hot sauce or a pinch of cayenne pepper to the filling. This can give your dish a spicy kick that wakes up the taste buds. If you want to switch up the protein, consider using other beans. Chickpeas or kidney beans work great in this recipe. You can also add plant-based proteins like lentils or tempeh for a hearty option. These alternatives make the dish filling and satisfying. Making this recipe vegan is easy! Simply skip the feta cheese or use a dairy-free cheese substitute. Look for brands that melt well and add flavor. This way, everyone can enjoy this delicious meal, no matter their diet. To keep your vegetarian stuffed acorn squash fresh, follow these tips: - Refrigeration tips: Place leftovers in an airtight container. They will stay good in the fridge for up to four days. Make sure to cool them down before sealing. - Freezing recommendations: If you want to store them longer, freeze the stuffed squash. Wrap each half tightly in plastic wrap, then place them in a freezer-safe bag. They can last for up to three months. When it's time to enjoy your leftovers, follow these methods: - Best methods to maintain texture: The oven is best for reheating. Preheat it to 350°F (175°C). Place the stuffed squash on a baking sheet and cover with foil. Bake for about 20-25 minutes until heated through. - Microwave vs. oven: You can use a microwave if you're short on time. Place one half on a microwave-safe plate. Heat for 2-3 minutes. However, this method may make the squash less tender. I recommend the oven for better results. For the complete recipe, check out the [Full Recipe]. If you want to swap quinoa, you have options. Rice works great in this recipe. You can use brown rice for a nutty taste. Couscous is another good choice and cooks quickly. Both options keep the dish hearty and filling. You can store stuffed acorn squash in the fridge. It will stay fresh for about three to five days. Just put it in an airtight container. If you want to keep it longer, freeze it for up to three months. Yes, you can prepare this recipe ahead. Cook the quinoa and stuff the squash. Then, cover and refrigerate them. When you’re ready, bake them until they’re hot. This makes meal prep easy and saves time on busy days. Feel free to mix in other veggies. Seasonal options like zucchini or spinach work well. Chopped mushrooms add a nice umami flavor. Try different combinations to keep it fun and fresh. Stuffed acorn squash is a delightful and nutritious dish. You learned how to prepare it step-by-step, from selecting the right ingredients to baking. Remember the tips for perfecting its texture and flavor. You can also customize it with different spices or proteins. Leftovers can be stored easily and reheated for another tasty meal. Embrace this recipe for a healthy dinner that satisfies your cravings and impresses your guests. Enjoy your cooking journey!](https://tastymomrecipes.com/wp-content/uploads/2025/05/070b9785-c758-4d38-a6ec-6119e9dcea58.webp)
Looking for a hearty, plant-based meal? My Vegetarian Stuffed Acorn Squash recipe is both flavorful and filling. With simple ingredients

Get ready for a flavorful adventure with my Easy Shrimp Tacos with Mango Salsa. These vibrant tacos burst with fresh
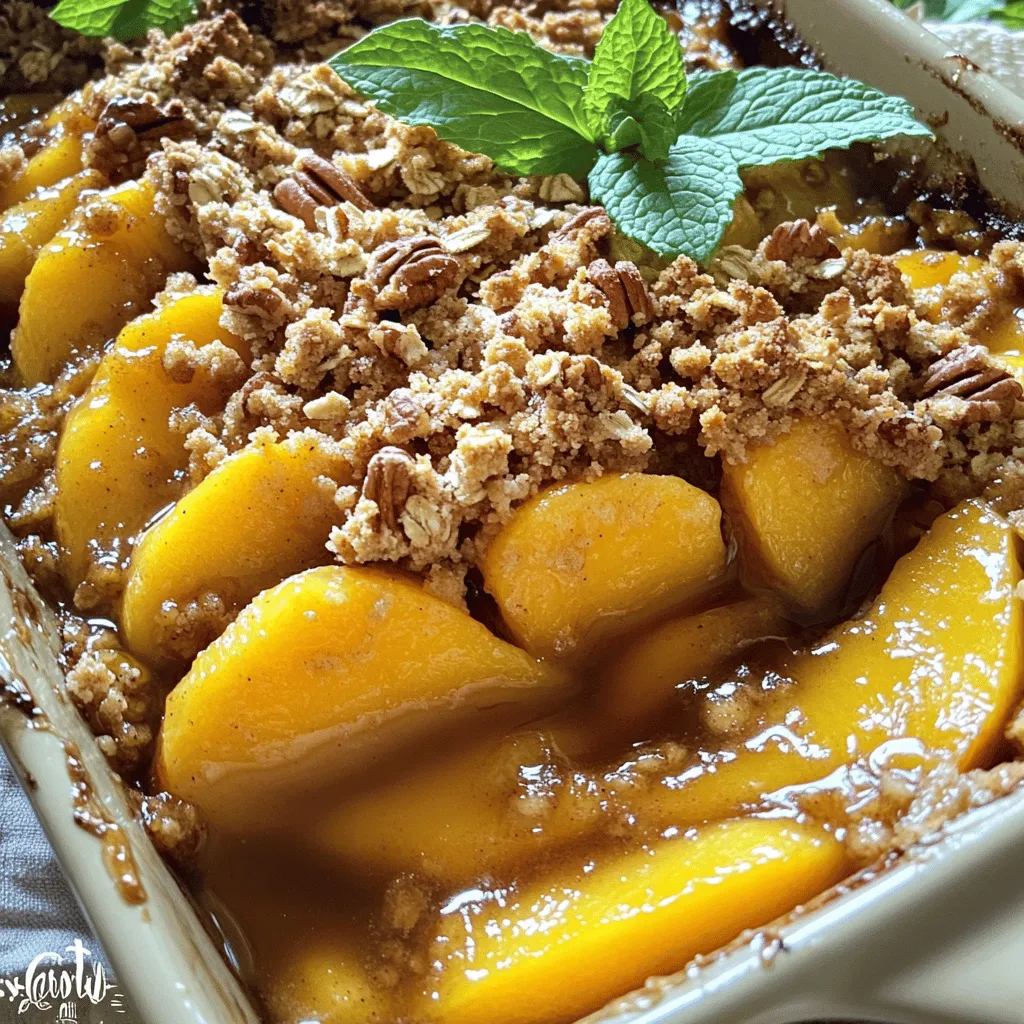
Looking for a simple and tasty dessert? Try my Peach Crisp with Oat Topping. Juicy peaches combined with a crunchy

If you’re craving a fresh and tasty treat, look no further than Chili Lime Corn on the Cob. This simple

Craving a tasty snack that’s both crunchy and healthy? Look no further! My Baked Sweet Potato Fries are a delicious
