Skip to content
DisclaimerTerms Of UseGDPR PolicyCookie Policy

tastymomrecipes

  • Home
  • Drinks
  • Appetizers
  • Dinner
  • Dessert
  • About
  • Contact
  • Privacy Policy
DisclaimerTerms Of UseGDPR PolicyCookie Policy

Olivia

- 1 pound beef sirloin - 3 tablespoons soy sauce - 2 tablespoons oyster sauce - 1 tablespoon cornstarch - 2 tablespoons vegetable oil (divided) - 4 cloves garlic, minced - 1 tablespoon fresh ginger, grated - 1 red bell pepper, sliced into strips - 1 cup broccoli florets - 1 carrot, thinly sliced into rounds - 1 tablespoon chili paste (adjust according to your preferred spice level) - 2 green onions, chopped (for garnish) - Sesame seeds (for garnish) - Salt and black pepper to taste For this spicy garlic beef stir fry, I like to keep my ingredients fresh and vibrant. The beef sirloin gives great flavor and tenderness. The marinade is simple but powerful, using soy sauce, oyster sauce, and cornstarch to coat the beef. This helps it stay juicy and adds a nice shine. To make it colorful, I use bell peppers, broccoli, and carrots. These veggies not only taste great but also add crunch. The garlic and ginger bring warmth and aroma, making the dish irresistible. Don't forget the chili paste! You can adjust this based on how spicy you want your meal. The toppings of green onions and sesame seeds really complete the dish. They add freshness and a bit of crunch. This mix of ingredients creates a quick meal that’s full of flavor and color. To make the beef flavorful, mix these ingredients in a bowl: - 1 pound beef sirloin, thinly sliced - 3 tablespoons soy sauce - 2 tablespoons oyster sauce - 1 tablespoon cornstarch - A pinch of black pepper Stir everything until the beef is well-coated. Cover the bowl and let it marinate for about 15 minutes. This step is key. Marinating helps to tenderize the beef and infuse it with flavor, making your stir fry taste amazing. Now, heat 1 tablespoon of vegetable oil in a large skillet or wok over high heat. Once the oil is hot, add the marinated beef in a single layer. Stir-fry for about 3 to 4 minutes. You want the beef to brown nicely and just cook through. After that, remove the beef from the skillet and set it aside. This keeps it tender and juicy for later. In the same skillet, add another tablespoon of vegetable oil. Next, toss in the minced garlic and grated ginger. Stir quickly for about 30 seconds until they smell great. Be careful not to burn them. Then, add the sliced red bell pepper, broccoli florets, and thinly sliced carrot rounds. Stir-fry these veggies for 3 to 5 minutes. You want them to stay vibrant and tender-crisp. After that, return the cooked beef to the skillet and mix in the chili paste. Toss everything together until the beef and veggies are well-coated. Cook for an additional 2 to 3 minutes to let the flavors meld. Now, it’s time to taste your dish. Adjust the spice and seasoning with extra salt, pepper, or more chili paste if you like it spicier. Remove the skillet from the heat and gently stir in the chopped green onions. This adds a fresh burst of flavor. For a beautiful presentation, transfer the stir fry to a serving dish and sprinkle sesame seeds on top. This gives a delightful crunch and makes your meal look even more inviting. Marinating is key for great flavor. I suggest marinating the beef for at least 15 minutes. This helps the meat soak up the sauces and become tender. If you have time, let it marinate longer. Adjusting your seasoning can balance the flavors. If you want more heat, add more chili paste. If it’s too spicy, add a pinch of sugar to cool it down. Taste as you go to find your perfect mix. A good skillet or wok is essential. I recommend using a heavy-bottomed skillet or a traditional wok. These help distribute heat evenly. Heat level matters too. Always cook on high heat. This gives you a nice sear on the beef and keeps the veggies bright. For a complete meal, serve the stir fry over rice or noodles. Jasmine rice is my favorite. It soaks up the sauce well. To make your dish pop, garnish with green onions and sesame seeds. These add color and crunch. Serve it hot for the best taste! {{image_4}} For your spicy garlic beef stir fry, you can switch up the protein. If you want to try different cuts of beef, go for flank steak or ribeye. Both are tender and full of flavor. You can also opt for chicken or pork if you prefer. If you want a vegetarian or vegan option, use tofu or mushrooms. Tofu absorbs the flavors well, making it a great choice. You can press the tofu to remove excess water for a better texture. Mushrooms add a nice umami flavor and a hearty bite. Feel free to mix in other vegetables! Snap peas, bok choy, or zucchini work great. Just remember to cut them into equal sizes for even cooking. When using different veggies, adjust the cook times. Softer vegetables like zucchini cook faster, while firmer ones like carrots take longer. Start with the firmer veggies, then add the softer ones to keep everything crisp and bright. Not a fan of too much heat? You can reduce the spice by cutting back on the chili paste. Start with a smaller amount and taste as you go. If you want to spice things up, try different chili options. You might use fresh chili peppers or sriracha for a different flavor profile. Each option will give your stir fry a unique kick! To keep your spicy garlic beef stir fry fresh, store leftovers right away. Place the stir fry in an airtight container. Let it cool first to avoid steam buildup. Refrigerate it for up to three days. Reheat the stir fry on the stove for the best texture. Heat a pan over medium heat. Add a splash of water or broth to keep it moist. Stir for about five minutes until it's hot. You can also use a microwave. Heat in short bursts, checking often. This keeps the beef from getting tough. If you want to save some for later, freeze the stir fry. Use a freezer-safe container or a zip-top bag. Remove as much air as you can before sealing. It will last up to three months in the freezer. To thaw, place it in the fridge overnight or use the microwave. Heat it well before serving. You should marinate the beef for about 15 minutes. This short time boosts flavor and tenderness. If you leave it too long, the meat can get mushy. The marinade combines soy sauce, oyster sauce, and cornstarch. Together, they create a tasty coating. Yes, you can prep this dish in advance. You can slice the beef and mix the marinade a few hours before cooking. Keep the beef in the fridge to stay fresh. Chop the veggies and store them in a container. This saves you time when you're ready to cook. This stir fry goes well with steamed rice or quinoa. You can also serve it with noodles for a fun twist. Adding a fresh salad on the side brightens up the meal. For a complete experience, sprinkle some sesame seeds on top for crunch. This blog post guided you through making a tasty Spicy Garlic Beef Stir Fry. We discussed key ingredients, the marinating process, and how to perfectly cook the beef and veggies. I shared tips for flavor and equipment, along with serving and storage advice. Stir fry is fun and easy. With practice, you’ll impress friends and family. Enjoy creating your own variations and have fun with flavors! Cooking should be a joyful experience, so get in the kitchen and start stirring!

Spicy Garlic Beef Stir Fry Savory and Quick Meal

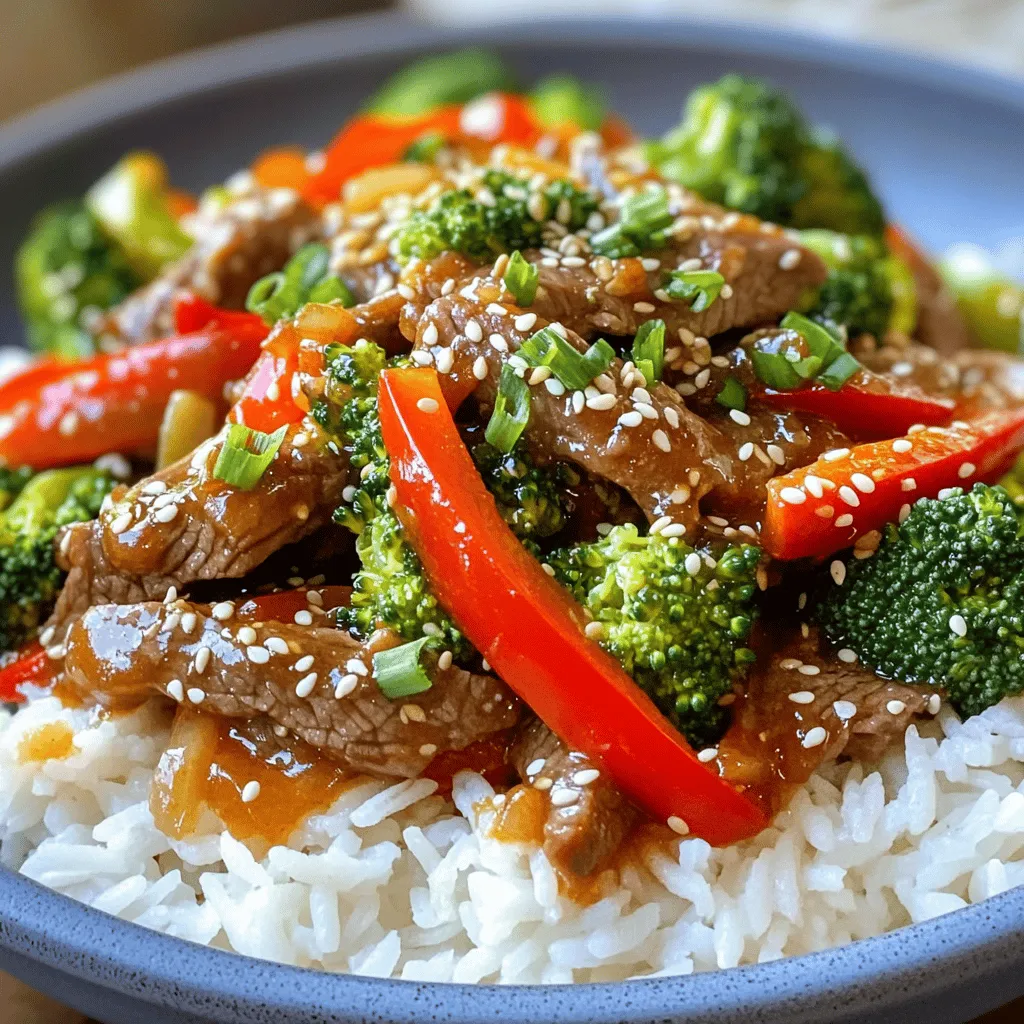
Are you ready to spice up your dinner routine? My Spicy Garlic Beef Stir Fry is a quick and tasty

To make a great Pizza Tot Casserole, you need the following main ingredients: - 1 pound ground beef or turkey - 1 small onion, finely diced - 1 red bell pepper, diced into small cubes - 2 cups pizza sauce - 1 teaspoon Italian seasoning - Salt and freshly cracked pepper to taste - 2 cups shredded mozzarella cheese - 1 cup sliced pepperoni - 1 (32-ounce) bag frozen tater tots - 1/2 cup grated Parmesan cheese - Fresh basil leaves for garnish These items create a comforting and tasty dish. The blend of meat, cheese, and veggies gives it charm. The tater tots add a fun twist that kids adore. You can customize your casserole with optional toppings and add-ins. Consider these choices: - Sliced olives for a briny bite - Diced mushrooms for extra earthiness - Spinach for a pop of color and nutrition - Crumbled feta cheese for a tangy kick These extras let you tailor the dish to your family’s tastes. It’s a great way to use leftovers too! If you have dietary needs, there are easy swaps: - Use ground chicken or plant-based meat for a lighter option. - Swap tater tots for sweet potato tots for a healthier twist. - Choose gluten-free pizza sauce to keep it gluten-free. - Vegan cheese can replace mozzarella for a dairy-free variant. These substitutions help everyone enjoy this dish without worry. You can still make it delicious and satisfying! {{ingredient_image_2}} To start, gather all your ingredients. You will need: - 1 pound ground beef or turkey - 1 small onion, finely diced - 1 red bell pepper, diced into small cubes - 2 cups pizza sauce - 1 teaspoon Italian seasoning - Salt and freshly cracked pepper to taste - 2 cups shredded mozzarella cheese - 1 cup sliced pepperoni - 1 (32-ounce) bag frozen tater tots - 1/2 cup grated Parmesan cheese - Fresh basil leaves for garnish (optional) First, preheat your oven to 425°F (220°C). This step is key for crispy tots. Next, brown the ground meat in a skillet over medium heat. Cook until there is no pink left. Drain any excess fat to keep it light. Add the diced onion and red bell pepper. Sauté for about five minutes. You want the onion to be soft and clear. Now, pour in the pizza sauce and sprinkle in the Italian seasoning. Add salt and pepper to taste. Stir it well and let it simmer for five more minutes. This lets all the flavors mix nicely. Grab a large casserole dish. Spread half of the sauce mixture evenly on the bottom. This makes a tasty base. Next, layer half of the frozen tater tots over the sauce. Top with half of the shredded mozzarella cheese and half of the sliced pepperoni. Repeat this process. Add the remaining sauce, tater tots, mozzarella, and pepperoni. Each layer should be packed with flavor. Finish with a generous sprinkle of grated Parmesan cheese on top. This will give it a nice golden crust. Place your casserole in the preheated oven. Bake for about 25 to 30 minutes. You’ll know it’s done when the tater tots turn golden brown and the cheese is bubbly. Once it’s ready, take it out of the oven and let it cool for a few minutes. This helps it set before you cut into it. If you want, garnish with fresh basil leaves before serving. It adds a nice touch and some fresh flavor. Enjoy your meal! To achieve crispy tater tots, preheat your oven to 425°F (220°C). Spread the frozen tater tots in a single layer. This helps them cook evenly and get that golden crust. Bake them for about 20 minutes before adding them to the casserole. This step ensures every bite is crunchy. Seasoning is key to making your pizza tot casserole shine. Adding Italian seasoning enhances the pizza flavor. Don't forget to sprinkle salt and freshly cracked pepper throughout. For extra zest, consider adding garlic powder or crushed red pepper flakes. This adds heat and depth to your dish. Layering is essential for a well-balanced casserole. Start with half of the sauce on the bottom. This keeps everything moist. Then add half of the tater tots, followed by cheese and pepperoni. Repeat with the remaining ingredients. Make sure every layer is even. This helps each bite be full of flavor. Pro Tips Perfectly Browned Meat: Ensure your ground meat is well-browned to develop deeper flavors. Don't rush this step; allow it to caramelize slightly for that savory taste. Layering for Crispiness: When layering the tater tots, try to spread them evenly to ensure all parts get that delightful crispiness when baked. Cheese Variations: Feel free to mix different cheeses like cheddar or pepper jack with mozzarella for a unique flavor profile and added depth. Customize Your Toppings: Get creative with toppings! Add veggies like mushrooms or olives, or switch up the protein for a fun twist on this classic dish. {{image_4}} You can easily make a vegetarian version of this casserole. Substitute the ground meat with lentils or mushrooms. Both options add great flavor and texture. Use more veggies like zucchini, spinach, or olives. Top it with extra cheese for a rich taste. This dish remains fun and tasty for all! If you love heat, add spicy pepperoni or sausage. These meats give the casserole a bold kick. You can mix in jalapeños or crushed red pepper for extra spice. Just be careful not to overpower the dish. Balance is key to keep everyone happy. For a gluten-free version, try using cauliflower tater tots. They taste great and give a unique twist. Another option is to make homemade tater tots using gluten-free potatoes. Just ensure all other ingredients are gluten-free too. Enjoy a delicious meal without worry! After your meal, let the casserole cool down. Transfer any leftovers to an airtight container. This helps keep the flavors fresh. Store it in the fridge for up to three days. If you want to keep it longer, consider freezing. To reheat, preheat your oven to 350°F (175°C). Place the casserole in an oven-safe dish. Cover it with foil to keep it moist. Heat for about 20-25 minutes. If you want a crispy top, remove the foil for the last 5 minutes. You can also use a microwave. Heat in short bursts, checking often to avoid overcooking. For meal prep, you can freeze Pizza Tot Casserole. First, cool it completely. Cut it into portions and wrap each piece tightly in plastic wrap. Place them in a freezer-safe bag or container. This way, it stays fresh for up to three months. When ready to eat, thaw in the fridge overnight before reheating. Yes, you can make Pizza Tot Casserole ahead of time. Prepare the dish as usual, but stop before baking. Cover it tightly with plastic wrap and store it in the fridge for up to 24 hours. When you're ready to bake, just pop it in the oven. You may need to add a few extra minutes to the cooking time. To reheat Pizza Tot Casserole, preheat your oven to 350°F (175°C). Place the casserole in an oven-safe dish and cover it with foil. Heat for about 15-20 minutes or until it's hot throughout. You can also reheat individual portions in the microwave for about 1-2 minutes. Yes! Fresh vegetables work well in this dish. You can chop fresh onions and bell peppers instead of frozen ones. Sauté them until soft before adding to the sauce. Fresh veggies can add great flavor and texture to the casserole. Pizza Tot Casserole lasts about 3-4 days in the fridge. Store it in an airtight container to keep it fresh. If you want to save it longer, consider freezing it. Just remember to label it with the date! Pizza Tot Casserole brings comfort and fun to your meals. We covered its tasty ingredients, easy steps, and helpful tips. You can customize it with different toppings or make it vegetarian or gluten-free. Storage and reheating tips ensure you enjoy leftovers too. With these ideas, you can create a dish your whole family will love. Don't wait; it's time to make your own delicious casserole!

Pizza Tot Casserole Tasty Family Dinner Choice

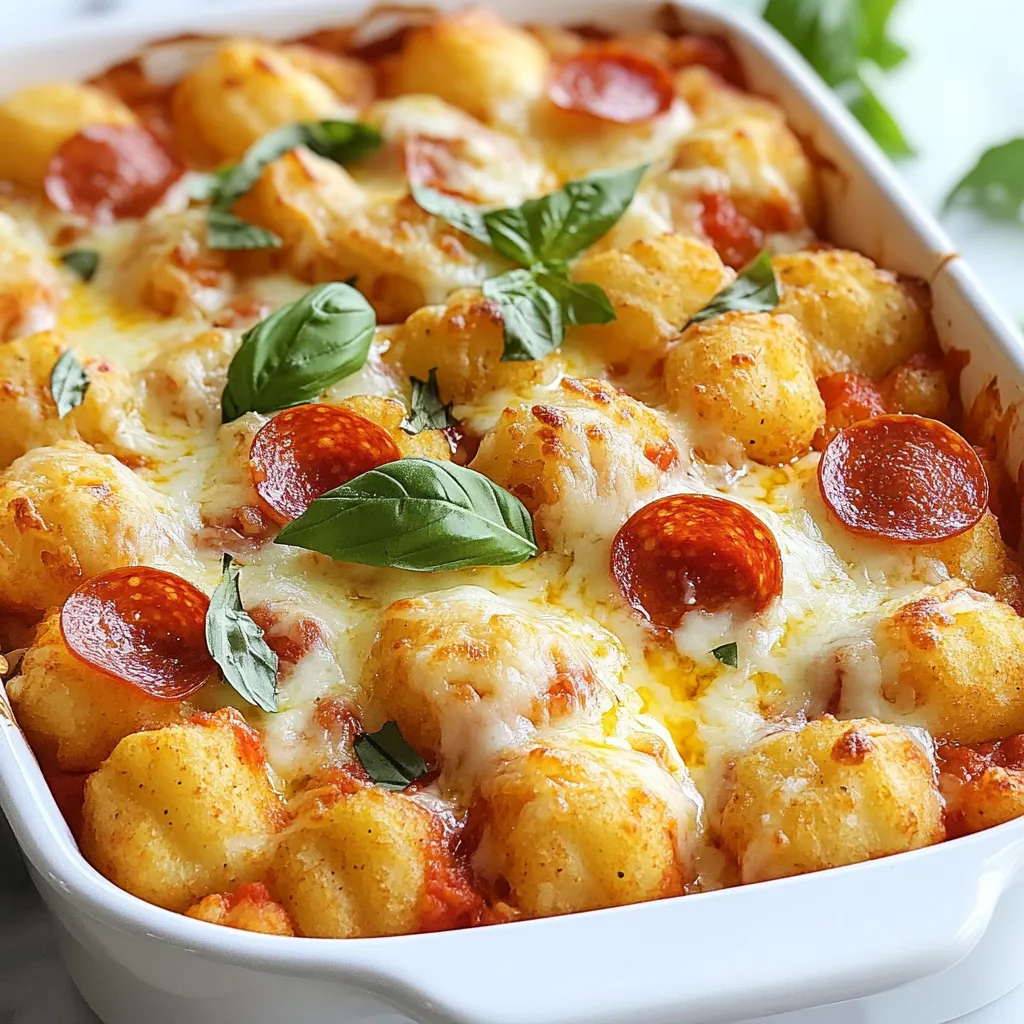
Looking for a fun family dinner that everyone will love? Try my Pizza Tot Casserole! It’s a simple dish packed

- 4 bone-in, skin-on chicken thighs - 1 cup fresh cranberries - 1 medium orange, zested and juiced - 1/2 cup low-sodium chicken broth - 1/4 cup honey - 2 tablespoons soy sauce - 2 cloves garlic, minced - 1 teaspoon fresh ginger, grated - 1/2 teaspoon black pepper - 1 teaspoon salt - 1 tablespoon olive oil - Fresh thyme or parsley for garnish - A splash of balsamic vinegar for tang - Chopped green onions for a fresh finish - A pinch of red pepper flakes for heat - Slow cooker for even cooking - Medium-sized skillet for searing - Mixing bowl for the sauce - Whisk for blending ingredients - Tongs for easy chicken handling - Measuring cups and spoons for accuracy Start by patting the chicken thighs dry with paper towels. This step helps the skin get crispy. Next, season both sides of each thigh with salt and black pepper. Use enough to bring out the chicken's natural taste. Heat olive oil in a medium skillet over medium-high heat. Once hot, add the chicken thighs skin-side down. Sear them for about 5-7 minutes until they turn golden brown. Then, flip the thighs and cook for 3-5 more minutes. After searing, remove the chicken from the skillet and set it aside. In a mixing bowl, combine the orange juice and zest, honey, soy sauce, minced garlic, grated ginger, and chicken broth. Whisk these ingredients together until they blend well. This sauce will bring the dish to life with its sweet and tangy flavor. Now, place the seared chicken thighs into the slow cooker. Pour the cranberry-orange sauce over the top. Make sure the cranberries spread evenly around the chicken. This helps each bite be full of flavor. Cover the slow cooker with its lid. Set it to cook on low for 6-8 hours or on high for 3-4 hours. The chicken is done when it's tender and fully cooked. You’ll know it’s perfect when it falls off the bone. Once cooking is done, carefully take the chicken out using tongs. If you want a thicker sauce, pour the remaining sauce into a saucepan. Simmer it over medium heat for a few minutes. This will help it thicken up. Finally, arrange the chicken on a platter, drizzle with sauce, and garnish with fresh thyme or parsley. Enjoy the delightful dish! To get perfect chicken, always start with good quality meat. Use bone-in, skin-on chicken thighs. They stay juicy and add flavor. Pat the chicken dry with paper towels. This helps the skin get crispy. Season the chicken well with salt and pepper. This step is key to flavor. To get that crispy skin, sear the chicken first. Heat olive oil in a skillet over medium-high heat. Add the chicken skin-side down for about 5-7 minutes. Look for a nice golden color. Flip and cook for 3-5 more minutes. This step locks in moisture and enhances taste. If you want a thicker sauce, simmer it after cooking. After removing the chicken, pour the sauce into a saucepan. Heat it over medium heat. Let it reduce for a few minutes. Stir occasionally. This will thicken the sauce and deepen the flavor. Adjust it to your liking before serving. {{image_4}} You can change some ingredients to suit your taste. Instead of chicken thighs, try chicken drumsticks or breasts. If you want a sweeter flavor, use maple syrup instead of honey. For a different citrus twist, swap orange juice for lemon or lime juice. If you don’t have fresh cranberries, canned cranberries work too. Just remember to rinse and drain them well. You can cook this dish in different ways. If you want to use an Instant Pot, follow these steps. Sear the chicken as you would in a skillet. Then, add the sauce and cook on high pressure for about 10 minutes. Let the steam release naturally for better texture. For the oven, preheat it to 375°F. Place the chicken and sauce in a baking dish, cover with foil, and bake for about 45 minutes. Check that the chicken is cooked through before serving. This dish is great for any season. In fall, serve it with mashed potatoes and roasted veggies. In winter, add a side of stuffing for a cozy meal. For a summer twist, pair it with a fresh salad or grilled corn. You can also garnish it with seasonal herbs like rosemary in the fall or basil in the summer for added flavor. After enjoying your Slow Cooker Cranberry Orange Chicken Roast, let any leftovers cool. Place the chicken and sauce in an airtight container. Store in the fridge for up to four days. If you prefer, you can also separate the chicken from the sauce for easier storage. To reheat, take the chicken and sauce from the fridge. You can use a microwave or stovetop. If using a microwave, cover the dish and heat for 1-2 minutes. Check if it's warm; if not, heat for another minute. On the stovetop, warm the chicken and sauce in a saucepan over low heat until hot. Stir gently to avoid burning. If you want to freeze leftovers, first cool them completely. Place the chicken and sauce in a freezer-safe bag or container. Remove as much air as possible to prevent freezer burn. You can freeze them for up to three months. To eat, thaw overnight in the fridge, and then reheat using the instructions above. Yes, you can use chicken breasts. They will cook faster than thighs. Adjust cooking time to 4-6 hours on low or 2-3 hours on high. Keep in mind that breasts may be less juicy than thighs. To serve more people, simply double the ingredients. Use 8 chicken thighs and increase the sauce. Make sure your slow cooker can hold the extra food. Cook time remains the same, but check for doneness. This chicken roast goes well with: - Rice (white or brown) - Mashed potatoes - Quinoa - Steamed vegetables - Green salad These sides balance the sweet and tart flavors of the dish. Yes, you can make it a day ahead. Cook the chicken and store it in the fridge. Reheat it gently in the slow cooker or on the stove. This allows the flavors to meld even more. Yes, you can use frozen cranberries. Just toss them in directly from the freezer. They will thaw and cook down as the chicken roasts. Frozen cranberries may be slightly softer in texture. This article shared how to make a delicious chicken dish. We covered the key ingredients, tools, and step-by-step cooking instructions. You learned tips for perfect results and ways to tweak the recipe for your taste. Storing and reheating leftovers is easy, and we answered common questions about the dish. Cooking can be fun and rewarding. With these methods, you can impress your family and friends. Enjoy your chicken, and don’t hesitate to explore your own variations!

Slow Cooker Cranberry Orange Chicken Roast Delight

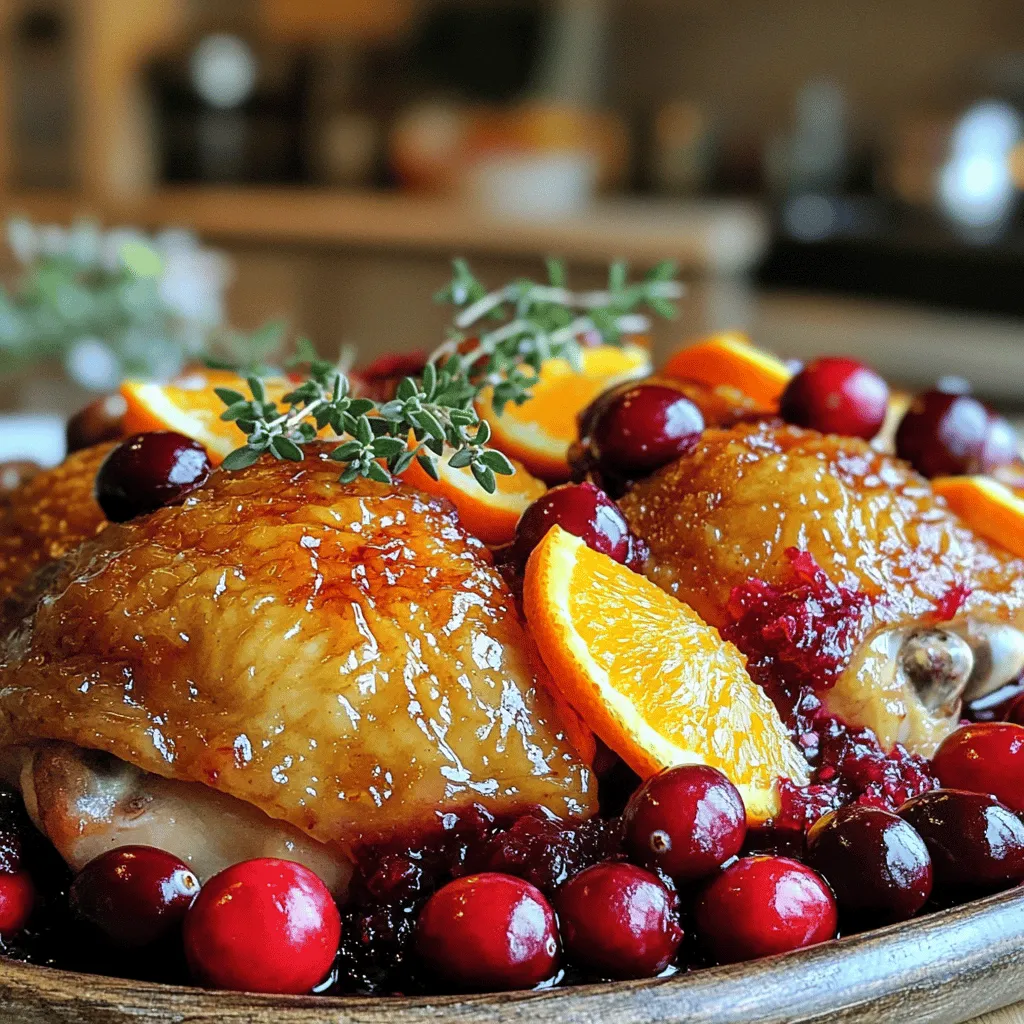
Welcome to my kitchen! Today, I’m sharing a recipe for Slow Cooker Cranberry Orange Chicken Roast Delight. This dish combines

- 24 Oreo cookies, finely crushed - 1/2 cup unsalted butter, melted - 1 (8 oz) package cream cheese, softened to room temperature - 1 cup canned pumpkin puree (not pumpkin pie filling) - 1 cup powdered sugar, sifted - 1 teaspoon pure vanilla extract - 1 teaspoon pumpkin pie spice (or to taste) - 1 cup whipped topping (such as Cool Whip) The base of these bars starts with Oreo cookies. You need to crush them finely. This gives the dessert a rich, chocolatey flavor. Next, you mix the crushed Oreos with melted butter. This combo forms a crust that holds everything together. The filling is where the magic happens. Cream cheese adds creaminess and a nice tang. Make sure it’s soft. It blends better this way. The pumpkin puree gives the bars their fall flavor. Be sure to use pure pumpkin, not pie filling. Then, you add powdered sugar for sweetness. It helps balance the flavors. Vanilla extract adds depth, while pumpkin pie spice gives that warm, cozy taste. Lastly, whipped topping makes the filling light and fluffy. This is the secret to a great texture. - Additional crushed Oreos - Whipped cream For a little extra fun, you can add toppings. Crushed Oreos on top make it look pretty and tasty. Whipped cream adds a light, creamy finish. It’s all about making your dessert look and taste amazing! 1. Start by crushing 24 Oreo cookies in a bowl. You want them very fine. 2. Pour in 1/2 cup of melted unsalted butter. Mix until it looks like wet sand. 3. Grab a 9x9-inch baking dish. Press the Oreo mix firmly into the bottom. 4. Make sure it is even and compact. Then, chill it in the fridge while you make the filling. 1. In a clean bowl, take 1 (8 oz) package of softened cream cheese. Beat it until smooth and creamy. 2. Gradually add in 1 cup of canned pumpkin puree, 1 cup of sifted powdered sugar, 1 teaspoon of pure vanilla extract, and 1 teaspoon of pumpkin pie spice. 3. Mix everything well until the filling is smooth. 4. Now, carefully fold in 1 cup of whipped topping using a spatula. This keeps the mixture light and fluffy. 1. Take your chilled Oreo crust from the fridge. Spread the creamy pumpkin filling over the crust. 2. Use a spatula to smooth the top evenly. 3. If you like, sprinkle some crushed Oreos on top for added texture and taste. 4. Cover the dish with plastic wrap. Place it back in the fridge for at least 4 hours or overnight for better flavor. Now you have a delicious dessert ready to serve! To make your cheesecake smooth, use room temperature ingredients. This means letting the cream cheese sit out for about 30 minutes. When it’s soft, it blends easily with other ingredients. Next, when you mix in the whipped topping, use a folding technique. Start by adding a little whipped topping to your cream cheese mix. Gently scoop from the bottom and fold over. Repeat this until it’s all combined. This keeps the filling light and fluffy. For a great presentation, cut the bars into even squares. Place each square on a decorative plate. You can sprinkle some pumpkin pie spice on top for a nice touch. Garnishing with whipped cream adds creaminess and looks nice. You can also add crushed Oreos on top for extra flavor and crunch. These simple tips can make your no-bake cheesecake bars shine at any gathering! {{image_4}} You can easily switch up flavors in this dessert. For a fun twist, try adding different spices. Instead of just pumpkin pie spice, mix in cinnamon, nutmeg, or ginger. These spices can enhance the warm flavors of pumpkin. Experiment with your favorites! Another way to change the taste is by using flavored whipped topping. You can find options like cinnamon or vanilla. This small swap can add a new layer of flavor to your cheesecake bars. It’s a simple way to keep things fresh and exciting. If you need gluten-free options, there are alternatives for Oreo cookies. Look for gluten-free sandwich cookies at your local store. These work just as well in the crust. Your cheesecake bars will still have that great cookie crunch. For those on a vegan diet, you can substitute cream cheese. Look for vegan cream cheese options made from nuts or soy. These provide similar creaminess without any animal products. Your dessert will remain delicious and suitable for everyone. To keep your No-Bake Oreo Pumpkin Cheesecake Bars fresh, store them in the fridge. Use an airtight container or cover the dish tightly with plastic wrap. This prevents moisture loss and keeps the bars tasting great. They should stay fresh for several days. If you want to store them longer, freezing is an option. Cut the bars into portions and wrap each piece in plastic wrap. Then, place them in a freezer-safe bag. Make sure to label the bag with the date. They can last up to three months in the freezer. In the fridge, these cheesecake bars last about 4 to 5 days. Make sure to check for signs of spoilage. If you see any mold or the bars smell off, it's best to toss them. The texture may also change if they sit too long. Fresh is always best for this treat! No, you should not use pumpkin pie filling. Pumpkin pie filling has added spices and sugar. This can change the taste and texture of your cheesecake bars. Always choose plain pumpkin puree for the best flavor. These cheesecake bars need to set for at least 4 hours. For the best results, let them chill overnight. This allows the bars to firm up and develop rich flavors. Patience is key to enjoying a perfect treat! If you don’t have whipped topping, you can use heavy cream. To do this, whip the cream until it forms soft peaks. This will give your cheesecake bars a light texture. You can also use Greek yogurt for a tangy twist. Both options work well for this recipe. No-Bake Oreo Pumpkin Cheesecake Bars are easy and delicious. We covered the main ingredients, like Oreos, cream cheese, and pumpkin puree. You learned how to create the crust and filling, and we shared tips for the best texture. We also looked at fun variations, storage tips, and answered common questions. These bars are a treat for any season, and you can make them your own. Enjoy your baking adventure!

No-Bake Oreo Pumpkin Cheesecake Bars Delightful Treat

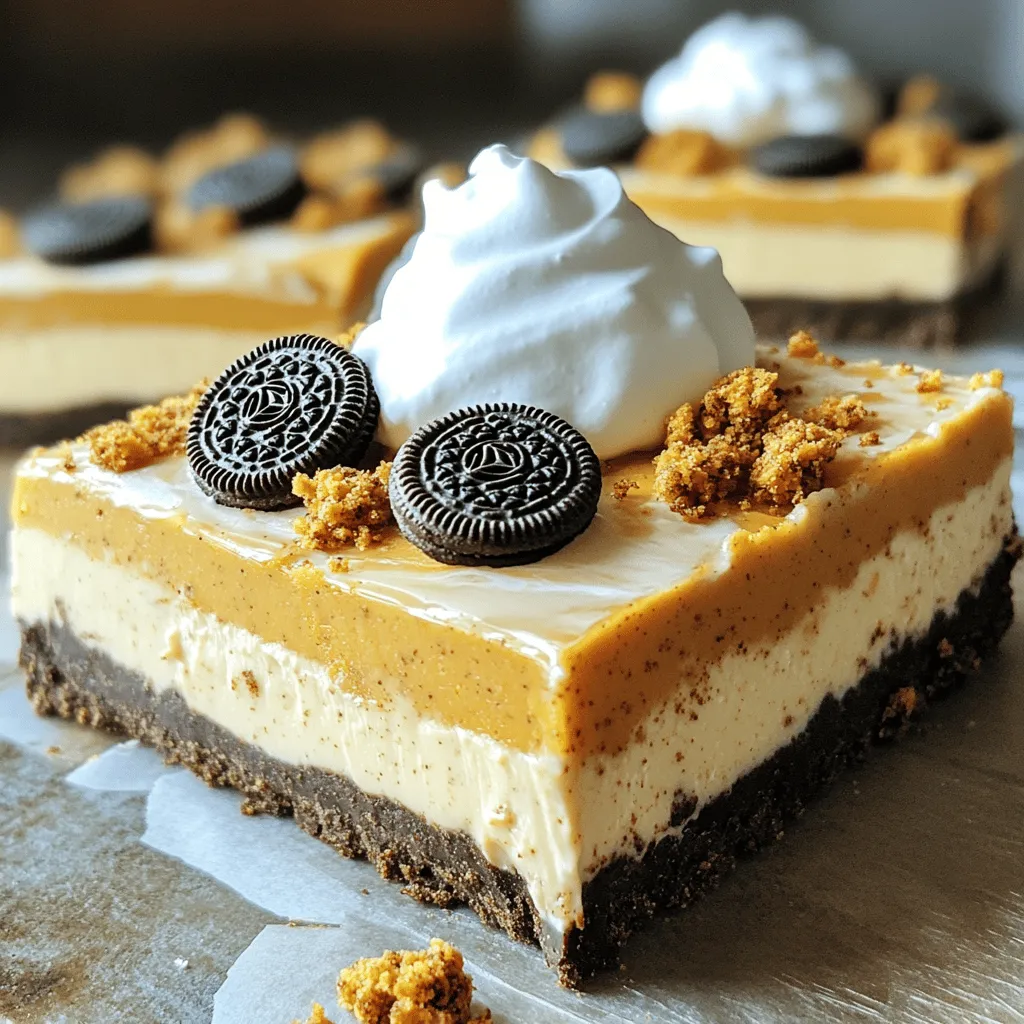
Are you ready to treat yourself? These No-Bake Oreo Pumpkin Cheesecake Bars are a must-try! Perfect for fall, this dessert

- 1/2 cup unsalted butter, melted - 1 cup granulated sugar - 2 large eggs - 1 teaspoon vanilla extract - 1/3 cup unsweetened cocoa powder - 1/2 cup all-purpose flour - 1/4 teaspoon salt - 1/4 teaspoon baking powder - 8 oz cream cheese, softened at room temperature - 1/2 cup pumpkin puree - 1/4 cup granulated sugar - 1 large egg - 1 teaspoon pumpkin pie spice - 1 teaspoon vanilla extract The ingredients for these pumpkin spice cheesecake brownie swirl bars create a perfect blend of flavors. The brownie layer brings a rich and fudgy texture, while the cheesecake layer adds a creamy, spiced delight. The melted butter and sugar make the base sweet and moist. The eggs help the brownies rise and bind everything together. Cocoa powder gives the brownies their deep chocolate flavor. The flour, salt, and baking powder balance the sweetness and add structure. For the cheesecake layer, softened cream cheese is key. It blends smoothly with pumpkin puree, sugar, and spices. Using fresh pumpkin puree enhances the taste. The egg helps set the cheesecake layer, while vanilla and pumpkin pie spice add warmth. This mix of ingredients creates a treat that feels special. Each layer brings something tasty, making these bars perfect for any gathering or a cozy evening at home. Set your oven temperature to 350°F (175°C). While the oven heats, prepare a 9x9 inch baking pan. You can grease it lightly or line it with parchment paper. This will help you remove the bars easily later. In a mixing bowl, combine the melted butter with the granulated sugar. Stir until the mixture is smooth. Next, add two large eggs to the bowl, mixing well after each one. Pour in one teaspoon of vanilla extract and keep mixing until the batter looks uniform. Now, sift in the dry ingredients: 1/3 cup cocoa powder, 1/2 cup flour, 1/4 teaspoon salt, and 1/4 teaspoon baking powder. Stir gently until just combined. Be careful not to overmix; this keeps your brownies fudgy. In a separate bowl, beat 8 oz of softened cream cheese until it is smooth and creamy. Then, mix in 1/2 cup pumpkin puree, 1/4 cup sugar, and one large egg. Add one teaspoon of pumpkin pie spice and one teaspoon of vanilla extract. Blend until everything is well mixed, creating a rich cheesecake layer. Now, gently spoon this mixture over the brownie layer in the baking pan. Spread it evenly for the best results. Take a knife or a skewer and swirl the cheesecake into the brownie batter. This creates a beautiful marbled effect. Place the pan in the oven and bake for 30-35 minutes. The bars are ready when the center is set and a toothpick comes out with a few moist crumbs. After baking, remove the pan from the oven and let it cool on a wire rack. Once cool, slice the bars into squares. For a lovely presentation, serve them on a decorative platter. You can dust them with powdered sugar and add a dollop of whipped cream for an extra touch. - Use room temperature ingredients. This helps the batter blend well. - Avoid overmixing for a fudgy texture. Mix just until combined for the best result. - Ensure cream cheese is fully softened. This makes mixing smooth and creamy. - Use fresh pumpkin puree for a flavor boost. It gives a richer taste than canned versions. - Dust with powdered sugar before serving. This adds a nice touch to your bars. - Add whipped cream and cinnamon for flair. It makes each bite feel special and festive. {{image_4}} You can easily make this dessert gluten-free. Just substitute all-purpose flour with a gluten-free flour blend. This swap keeps the texture nice and still gives you that rich brownie flavor. Feel free to get creative with flavors! You can add chocolate chips or nuts to the brownie batter for extra texture. If you're in the mood for more spice, try using nutmeg or ginger. These spices will enhance the warm pumpkin flavor and add a unique twist. These bars pair wonderfully with coffee or tea. The warm drinks balance the sweet flavors. You can also serve them with a side of autumn fruit, like sliced apples or pears. This adds freshness and makes your dessert look even more inviting. You can keep these bars in an airtight container. They stay fresh at room temperature for up to 3 days. Make sure to seal them well to maintain their tasty goodness. For longer storage, refrigerate the bars. They will last up to a week in the fridge. If you want to save them for later, freeze them. They can stay frozen for up to 3 months. Just wrap them well to avoid freezer burn. If you freeze the bars, you should thaw them first. Place the frozen bars in the refrigerator for a few hours before serving. To enjoy them warm, pop them in the microwave for a few seconds. This step brings back their soft texture and rich flavors. Yes, you can use mascarpone or ricotta if you want. These cheeses add a different texture and taste. Mascarpone gives a creamier feel, while ricotta adds a light texture. Both options work well for this recipe. You can tell the bars are done when the center looks set. Insert a toothpick into the middle. If it comes out with a few moist crumbs, the bars are ready. They should not jiggle too much when you gently shake the pan. Absolutely! You can prepare the bars a day in advance. After baking, let them cool completely. Then, store them in an airtight container. This will keep them fresh and tasty for your guests. These bars pair great with whipped cream or vanilla ice cream. You can also serve them with a warm cup of coffee or spiced tea. A drizzle of caramel sauce can add extra sweetness too! To sum up, we explored a tasty recipe for Pumpkin Spice Cheesecake Brownie Swirl Bars. You learned about the ingredients needed, from rich brownie components to creamy cheesecake layers. I shared step-by-step instructions that made baking easy. Plus, I included storage tips and FAQs to guide you further. These bars are not only a treat but can be adjusted for your taste. Enjoy creating and sharing this delicious dessert with others!

Pumpkin Spice Cheesecake Brownie Swirl Bars Delight

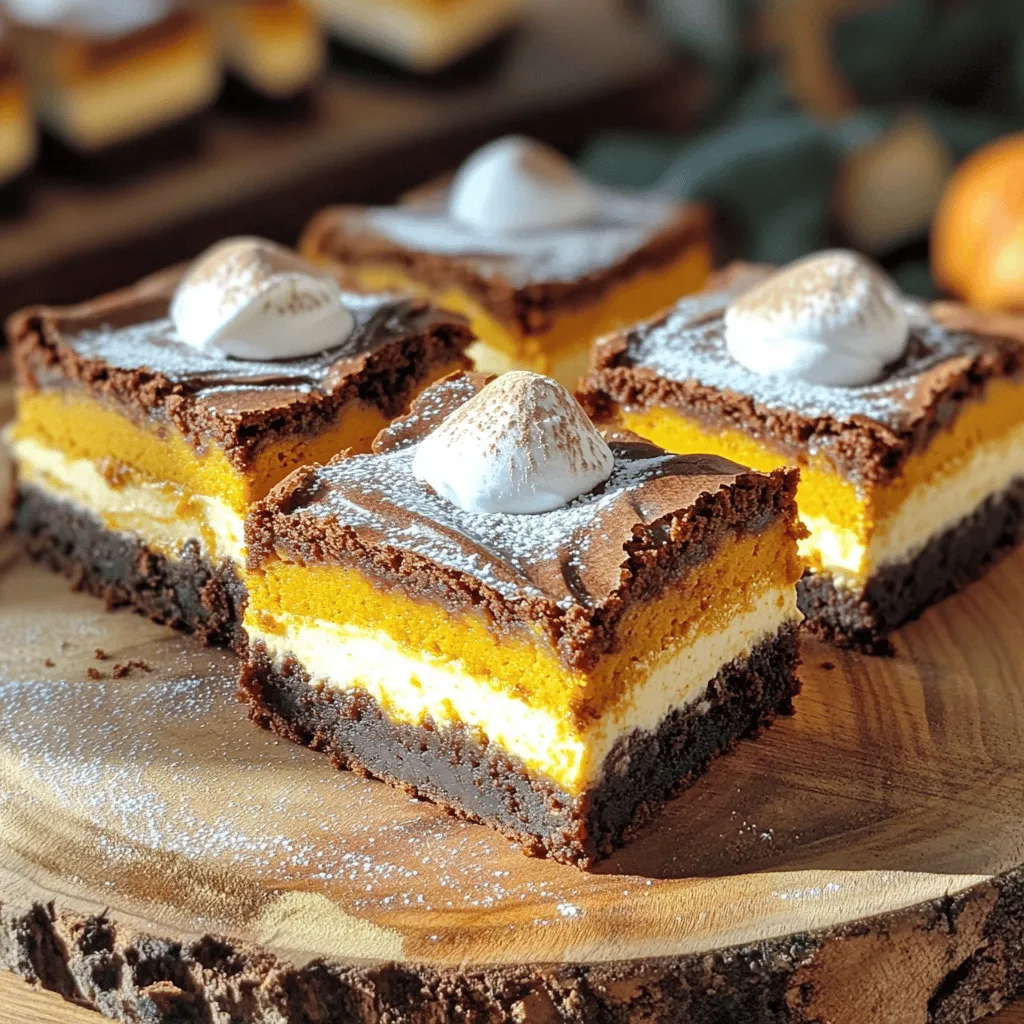
Get ready to fall in love with Pumpkin Spice Cheesecake Brownie Swirl Bars! This delightful treat combines rich brownies with

- 1 lb large shrimp, peeled and deveined - 1 tablespoon Cajun seasoning - 2 tablespoons olive oil - 1 medium onion, diced - 1 red bell pepper, diced - 3 cloves garlic, minced - 1 cup long-grain white rice - 2 cups chicken broth - 1 can (14.5 oz) diced tomatoes, undrained For this dish, I use large shrimp, about one pound. They soak up the spice well and cook fast. Cajun seasoning adds a kick. Just one tablespoon is enough to make a big impact. Olive oil is great for sautéing, and two tablespoons keep everything from sticking. Next, I add vegetables. I like to use one medium onion, diced finely. It gives a nice base flavor. A red bell pepper adds sweetness and color. I also use three cloves of garlic, minced for a strong aroma. Now, let's talk rice and liquids. I prefer long-grain white rice, one cup is perfect. It cooks well and stays fluffy. For the liquid, I use two cups of chicken broth. This adds depth. I also toss in one can of diced tomatoes, undrained, to keep things moist and flavorful. This mix of ingredients makes my one-pot spicy Cajun shrimp and rice a hit! - Marinating the shrimp First, take 1 pound of large shrimp. Place them in a mixing bowl. Add 1 tablespoon of Cajun seasoning. Toss the shrimp well until each one is coated. Let them sit for a few minutes to soak up the flavor. - Sautéing vegetables Next, heat 2 tablespoons of olive oil in a large pot over medium heat. Once the oil is hot, add 1 diced medium onion and 1 diced red bell pepper. Sauté these for about 3 to 4 minutes. You want the veggies soft and slightly clear. Then, add 3 minced garlic cloves. Sauté for 1 more minute. The garlic will smell great! - Incorporating rice and liquids Now, add 1 cup of uncooked long-grain white rice to the pot. Stir it often for about 2 minutes. This helps toast the rice and keeps it from sticking. Then, carefully pour in 2 cups of chicken broth and 1 can of undrained diced tomatoes. Stir everything well and turn the heat up until it starts to boil. - Simmering the dish Once it boils, reduce the heat to low and cover the pot. Let it simmer for about 15 minutes. The rice should be almost done and soak up most of the liquid. - Adding shrimp and peas After simmering, gently fold in the marinated shrimp and 1 cup of frozen peas. Cover the pot again and cook for another 5 to 7 minutes. The shrimp should turn pink and be fully cooked. - Seasoning to taste Taste your dish now. Add salt and pepper to your liking. Mix it well to combine the flavors. - Resting time before serving Finally, remove the pot from heat. Let it sit covered for 5 minutes. This resting time helps the flavors meld together. Serve it in bowls and enjoy! - To ensure shrimp is tender, cook them just until pink. Overcooked shrimp can turn rubbery. - Avoiding overcooked rice is key. Keep an eye on the simmering time to retain texture. - Adjusting spice levels is easy. Add more Cajun seasoning or a dash of hot sauce for heat. - Incorporating additional herbs, like thyme or basil, can brighten the dish. Fresh herbs add more flavor. - For serving, use shallow bowls. This allows the vibrant colors to shine. - Garnishing techniques matter. Sprinkle fresh parsley on top for color. Adding a lemon wedge can enhance the meal's brightness. {{image_4}} You can change the seafood in this dish. Try scallops or crab for a twist. You can even use fish if you prefer. This keeps the dish fresh and exciting. For grains, swap long-grain rice with quinoa or farro. They add a unique texture. Quinoa is also gluten-free, which is a bonus. To make this dish gluten-free, just check the broth. Use gluten-free chicken broth to ensure safety. This keeps the flavors intact without using gluten. For a vegetarian option, skip the shrimp. Use mushrooms for a meaty feel. You can add chickpeas for protein. This way, everyone can enjoy this dish. Want more heat? Add diced chili peppers to the mix. Jalapeños or serranos work well. This amps up the spice level and adds depth to the dish. You can also experiment with different spice blends. Try Creole seasoning for a different flavor. Each blend brings its own unique taste, so feel free to explore! To store your One-Pot Spicy Cajun Shrimp and Rice, let it cool first. Place leftovers in an airtight container. This keeps the dish fresh and prevents odors. It lasts in the fridge for up to three days. Be sure to check for any off smells before serving. To freeze, let the dish cool completely. Divide it into portions and place them in freezer-safe bags or containers. Remove as much air as possible to avoid freezer burn. This dish can last for up to three months in the freezer. To thaw, place it in the fridge overnight. The best way to reheat this dish is on the stove. Add a splash of broth or water to keep it moist. Heat it over low heat, stirring occasionally. If you use the microwave, place it in a microwave-safe bowl. Cover it loosely and heat in short bursts, stirring in between. This helps maintain the rice's texture and shrimp’s tenderness. You can cook this dish in about 30 minutes. This includes 10 minutes for prep and 20 minutes for cooking. The rice cooks while the shrimp absorbs all that delicious flavor. Yes, you can use frozen shrimp. Just make sure to thaw them before cooking. You can thaw shrimp overnight in the fridge or place them in cold water for 15-20 minutes. This dish pairs well with a simple salad or crusty bread. You can also serve it with a side of roasted vegetables for added color and nutrition. You can prepare the shrimp and season them in advance. However, it’s best to cook the rice fresh for the best texture. If you want to store it, keep it in the fridge and reheat it later. To adjust the spice level, start with less Cajun seasoning. You can always add more later. For extra heat, consider adding diced jalapeños or a pinch of cayenne pepper. This blog post covered how to make one-pot spicy Cajun shrimp and rice. We discussed key ingredients like shrimp, Cajun seasoning, and rice. I detailed step-by-step instructions for preparation and cooking. Tips helped ensure perfect texture and flavor. We also explored variations for dietary needs and storage options. Enjoy this dish and make it your own! The blend of flavors and simple method will impress anyone at your table.

One-Pot Spicy Cajun Shrimp and Rice Easy Recipe

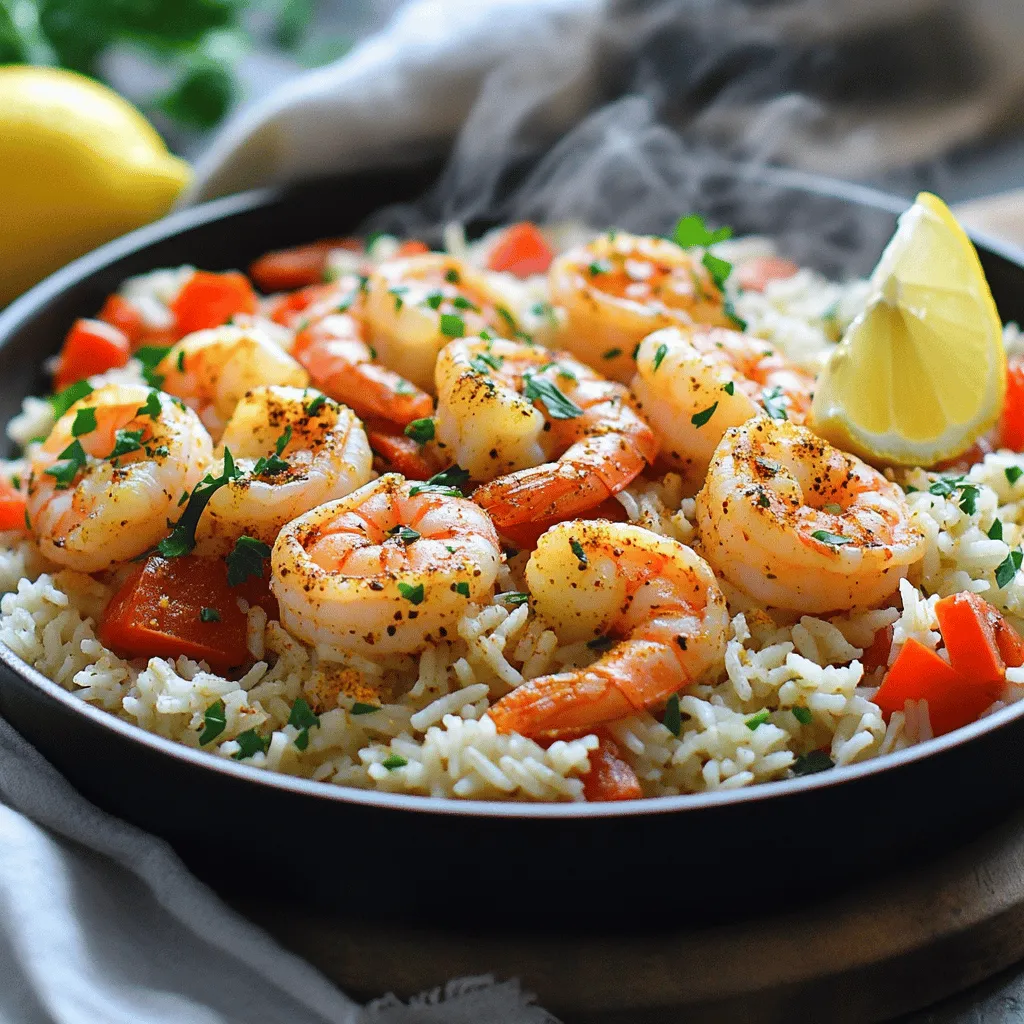
Are you ready to spice up your dinner routine? This One-Pot Spicy Cajun Shrimp and Rice recipe is packed with

For these tasty Pumpkin Streusel Muffins, you will need: - 1 ½ cups all-purpose flour - 1 cup canned pumpkin puree - ½ cup packed brown sugar - ½ cup granulated sugar - 1/3 cup vegetable oil - 2 large eggs - 1 teaspoon pure vanilla extract - 1 teaspoon baking powder - ½ teaspoon baking soda - ½ teaspoon salt - 1 teaspoon ground cinnamon - ½ teaspoon ground nutmeg - ½ teaspoon ground ginger - ½ cup chopped pecans (optional, for added crunch) For the Streusel Topping: - ½ cup all-purpose flour - ¼ cup packed brown sugar - ¼ cup rolled oats - ½ teaspoon ground cinnamon - ¼ cup cold unsalted butter, diced To make your muffins just right, measure your ingredients carefully. Use a dry measuring cup for flour. Spoon the flour into the cup and level it with a knife. This helps avoid packing it down too tightly. For sugar, use the same method. When measuring liquid, use a clear measuring cup. Check the measurement at eye level. You can add personal touches to your muffins. Chopped pecans give a nice crunch but are optional. You can also mix in chocolate chips or dried fruits for extra flavor. If you want a touch of spice, add a pinch of cloves or allspice. If you like a sweeter muffin, increase the sugar by a couple of tablespoons. This flexibility lets you make these muffins your own! Start by preheating your oven to 350°F (175°C). This step warms the oven, ensuring even baking. Next, prepare your muffin tin. You can use paper liners or lightly grease each cup. This helps the muffins pop out easily. In a large bowl, combine the pumpkin puree, brown sugar, granulated sugar, and vegetable oil. Add in the eggs and vanilla extract. Whisk until everything blends well. You want a smooth, uniform mixture that looks inviting. In a separate bowl, sift the all-purpose flour, baking powder, baking soda, and salt. Add the ground cinnamon, nutmeg, and ginger. Mix well to combine. Gradually add this dry mix to the wet batter. Stir gently until just combined. If you like, fold in the chopped pecans for extra crunch. In a small bowl, mix the flour, brown sugar, rolled oats, and cinnamon for the streusel. Add the cold, diced butter. Use your fingers or a fork to mix until you have coarse crumbs. This crumbly topping adds a delightful texture. Using a spoon or an ice cream scoop, fill each muffin cup about two-thirds full with batter. Be generous and top each muffin with the streusel mixture. This creates a crunchy topping that contrasts nicely with the soft muffin. Once baked, let the muffins cool in the tin for about five minutes. Then, transfer them to a wire rack to cool completely. For serving, drizzle honey or maple syrup over the muffins. Arrange them on a rustic wooden board with fresh rosemary or autumn leaves for a seasonal touch. Enjoy the warm, inviting aroma as you serve these treats! To keep your pumpkin streusel muffins moist, follow these tips: - Use fresh ingredients. They make a big difference. - Do not overmix the batter. Stir just until combined. - Add a bit more pumpkin puree if the batter seems dry. - Bake muffins until they are golden brown. This helps lock in moisture. Many people make simple mistakes while baking muffins. Avoid these: - Overfilling muffin cups can lead to messy muffins. Fill them only two-thirds full. - Using cold eggs or oil can affect batter texture. Make sure they are at room temperature. - Forgetting to check your oven's temperature can lead to uneven baking. Use an oven thermometer. Testing muffins for doneness is easy. Here’s how: - Insert a toothpick into the center of a muffin. - If it comes out clean or with a few crumbs, they are done. - If there is wet batter on the toothpick, bake for a few more minutes. - Let muffins cool for a few minutes before removing them from the tin. This helps them set. {{image_4}} You can make these muffins gluten-free. Use a gluten-free flour blend. Make sure it has xanthan gum for better texture. The muffins will still be soft and tasty. You might want to try almond flour for a nice nutty flavor. To make vegan pumpkin streusel muffins, swap eggs for flaxseed meal. Mix one tablespoon of flaxseed meal with three tablespoons of water. Let it sit for a few minutes to thicken. You can also use coconut oil instead of vegetable oil. This change adds a hint of sweetness. Adding extra flavors makes these muffins even better. You can stir in chocolate chips for a sweet twist. Dried cranberries or raisins add chewiness and tartness. Try adding a pinch of nutmeg for a warm, cozy flavor. You can mix in chopped apples for fresh bites. Each addition brings a new taste and fun! To keep your muffins fresh, let them cool completely. Then, place them in an airtight container. You can store them at room temperature for up to three days. If you want to enjoy them later, the fridge can extend their life for about a week. However, this might change their texture a bit. If you want to save your muffins for longer, freezing is a great option. Wrap each muffin in plastic wrap. Then, place the wrapped muffins in a freezer bag. Make sure to remove as much air as possible. You can freeze them for up to three months. This way, you can enjoy your pumpkin streusel muffins whenever you like. When you’re ready to eat your muffins, reheating is easy. For the best results, use an oven or toaster oven. Preheat it to 350°F (175°C). Place the muffin on a baking sheet for about 5-10 minutes. This warms them up and brings back their lovely texture. If you’re in a hurry, you can use the microwave. Heat each muffin for about 10-15 seconds. Just be careful not to overheat them, as this can make them tough. Enjoy your warm, fresh muffins! Yes, you can use fresh pumpkin. Start with a small pumpkin. Cook it by baking or steaming until soft. Then, mash it until smooth. Measure out one cup for the recipe. Fresh pumpkin can add a brighter taste. To make these muffins dairy-free, replace the butter with coconut oil or a dairy-free spread. Use a non-dairy milk, like almond or oat milk, in place of any regular milk. This keeps the muffins moist and tasty. Each muffin has about 180 calories. It contains 3 grams of protein and 8 grams of fat. The muffins have about 24 grams of carbs and 2 grams of fiber. The exact values may change based on the ingredients you use. To check if the muffins are done, stick a toothpick in the center. If it comes out clean, they are ready. If you see batter on the toothpick, bake them a few more minutes. They should be golden brown and spring back when touched. This guide covers all you need to make perfect pumpkin streusel muffins. You learned about the key ingredients, methods, and tips for great texture. I shared ways to customize and store your muffins for longer enjoyment. Remember, simple steps lead to tasty results. Avoid common pitfalls, and you’ll succeed. Enjoy baking and trust your skills. Happy muffin-making!

Pumpkin Streusel Muffins Bakery Irresistible Treats

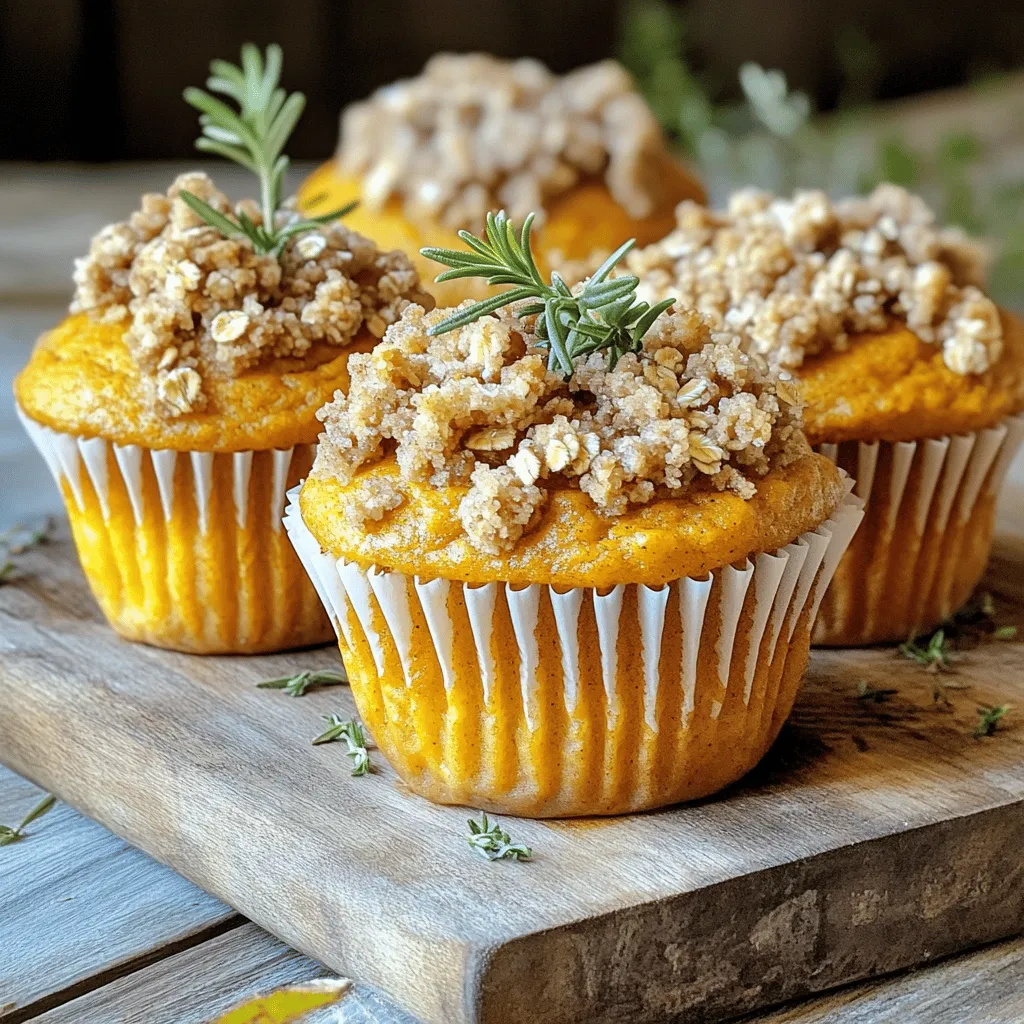
Welcome to the world of Pumpkin Streusel Muffins! These treats are warm, soft, and oh-so-delicious. You’ll love how easy they

- 1 cup dark chocolate chips - 2 cups fresh strawberries, hulled and halved - 1 cup granola or crushed graham crackers - 1/2 cup whipped cream or coconut cream - 1 teaspoon vanilla extract - Sea salt for garnish - Microwave-safe bowl - Muffin cups - Spoon for spreading and layering Gathering these ingredients is the first step to making your chocolate covered strawberry cups. The dark chocolate chips are key. They bring richness and deep flavor. Fresh strawberries add a bright, juicy taste. You can choose granola or crushed graham crackers for a crunchy base. The whipped cream or coconut cream gives creaminess and a light touch. For an extra boost, a teaspoon of vanilla extract can enhance the cream flavor. If you want to play with taste, a sprinkle of sea salt can add a nice contrast. Ensure you have the right tools. A microwave-safe bowl is a must for melting chocolate. Muffin cups help shape the chocolate into cups. And a spoon is great for spreading and layering your ingredients neatly. With everything ready, you can start creating your delightful dessert! To melt chocolate safely, use a microwave-safe bowl. Place the dark chocolate chips in the bowl. Heat them at medium power in 30-second intervals. Stir well after each interval until smooth. Avoid overheating by watching closely. If the chocolate looks glossy and fluid, it is ready. Line six muffin cups with silicone or paper liners. Spoon a generous amount of melted chocolate into each liner. Use the back of a spoon to spread the chocolate up the sides. This forms a cup shape. After the chocolate sets, remove the cups from the fridge. Spoon a layer of granola or crushed graham crackers into each cup. Press down gently to create a firm base. Now it’s time for the strawberries. Arrange the halved strawberries on top of the granola. This makes each cup colorful and inviting. In a mixing bowl, combine the whipped cream with the vanilla extract. Mix until just combined. You can spoon or pipe the creamy mixture on top. This adds an elegant touch to your dessert. Use any remaining melted chocolate to drizzle over the whipped cream. This enhances both flavor and look. For a gourmet touch, sprinkle a tiny pinch of sea salt on each cup. Return the cups to the fridge for another 10 minutes. This helps all the layers set together perfectly. Enjoy your delicious creation! - Overheating chocolate: Always melt chocolate in short bursts. Heat it for 30 seconds, then stir. Repeat until smooth. If you overheat it, the chocolate can burn. Burnt chocolate is grainy and unusable. - Not allowing cups to set properly: After you fill the cups with chocolate, chill them long enough. They need about 10-15 minutes to set. If you skip this step, the cups may fall apart. - How to create an eye-catching dessert: Use bright and fresh strawberries on top. Arrange them in a fun pattern. Drizzle some melted chocolate on the whipped cream for a fancy look. A pinch of sea salt on top adds a nice touch too. - Serving suggestions and plating ideas: Place your cups on a colorful platter. Add extra strawberries or a sprig of mint around them. This creates a beautiful scene and makes the dessert pop. - Alternatives for dark chocolate: You can use milk chocolate if you prefer a sweeter taste. White chocolate is another option for a creamy flavor. Just remember to adjust the melting time. - Dairy-free options for cream: Use coconut cream instead of whipped cream. It gives a rich taste and keeps the dessert dairy-free. You can also try using a dairy-free whipped topping for a similar effect. {{image_4}} You can switch up the fruit in your cups for fun. Try using blueberries or raspberries instead of strawberries. These berries add great color and taste. You could even mix different berries for a colorful treat. Seasonal fruit variations are also a great idea. In summer, use peaches or cherries. In fall, think about apples or pears. Each fruit brings its own flavor and texture. This keeps your dessert fresh and exciting. You can change the chocolate you use. Using milk or white chocolate can make a sweeter cup. Milk chocolate gives a creamy taste, while white chocolate adds a nice sweetness. Infusing flavors into the chocolate is another fun way to mix things up. You can add a dash of espresso powder for a coffee kick. Zest from an orange or a splash of peppermint extract can create a fresh twist. Just be careful not to add too much. A little goes a long way! If you want to make these cups a bit lighter, consider using yogurt instead of whipped cream. Greek yogurt adds protein and a nice tang. You can also sweeten it with honey or a bit of maple syrup. For lower sugar options, try using dark chocolate with less sugar. Look for granola that has no added sugars. This way, you still enjoy delicious flavors without all the extra sugar. These swaps help keep your dessert tasty and a bit healthier! To keep your chocolate covered strawberry cups fresh, store them in the fridge. Place them in an airtight container. This helps prevent them from drying out. These cups will last about 3 to 5 days. After that, the strawberries may lose their texture and flavor. You can freeze these cups if you need to store them longer. First, place the cups in a single layer on a baking sheet. Freeze them for about 2 hours until solid. After that, wrap each cup in plastic wrap and then place them in a freezer-safe bag. When you want to enjoy them, take out a cup and thaw it in the fridge for a few hours. Serve them chilled for a refreshing treat. If you have leftover chocolate, you can make chocolate drizzles for other treats. Melt it again and drizzle it over popcorn or pretzels. You can also use leftover whipped cream in coffee or on pancakes. As for extra fruit, mix halved strawberries into yogurt or salads. These ideas help reduce waste and keep your meals exciting. Yes, you can use milk chocolate or white chocolate. Each type brings a unique taste. Milk chocolate adds creaminess, while white chocolate offers sweetness. Just be sure to melt them gently, like you would dark chocolate. Their melting process is similar. To make these cups vegan, use dairy-free chocolate chips. Swap whipped cream for coconut cream. Make sure the granola is also vegan-friendly. These changes keep the dessert delicious and plant-based. Taste will stay great! You can serve these cups with extra strawberries or a sprig of mint. Fresh mint adds a nice touch. You might also offer a scoop of vanilla ice cream on the side. This helps balance the sweetness and adds creaminess. Yes, you can make these cups ahead of time. Just store them in the fridge. They stay fresh for about three days. For best taste, add toppings just before serving. This keeps everything looking and tasting fresh. You learned how to make tasty chocolate-covered strawberry cups. We covered the main ingredients, kitchen tools, and step-by-step instructions. I shared tips for avoiding common mistakes and ideas for variations and storage. These treats are fun to make and great for sharing. You can impress friends or enjoy them yourself. With simple ingredients and easy steps, you can create a delightful dessert any time. Enjoy your delicious creation!

Chocolate Covered Strawberry Cups No Bake Delight

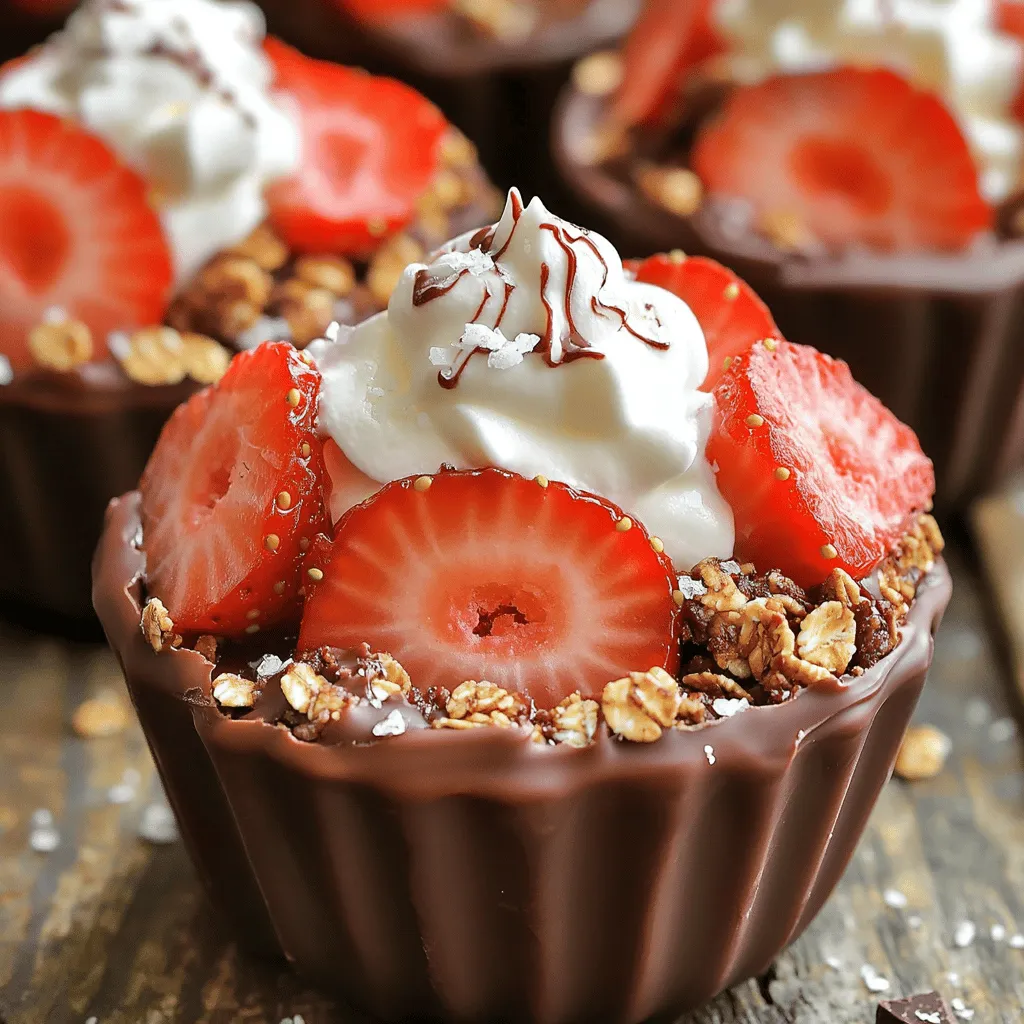
Ready to treat yourself to a sweet delight? My no-bake Chocolate Covered Strawberry Cups are the perfect quick dessert! With

- 1 cup all-purpose flour - 1/2 cup granulated sugar - 1 teaspoon baking powder - 1/2 teaspoon baking soda - 1 teaspoon ground cinnamon - 1/2 teaspoon ground nutmeg - 1/2 teaspoon ground ginger - 1/2 teaspoon salt - 1/2 cup canned pumpkin puree - 1/4 cup vegetable oil - 1 large egg - 1 teaspoon vanilla extract - 1/2 cup cream cheese, softened to room temperature - 1/4 cup powdered sugar - 1 tablespoon milk To create delicious pumpkin cheesecake muffins, you will need both dry and wet ingredients. The dry mix includes flour, sugar, baking powder, baking soda, spices, and salt. These build the muffin's texture and flavor. For the wet mix, you'll use canned pumpkin puree, oil, egg, and vanilla. The pumpkin gives moisture and a rich taste. The egg helps bind everything together. Next, we prepare the cream cheese filling. This sweet and creamy layer adds a delightful surprise inside each muffin. You just mix cream cheese, powdered sugar, and milk until smooth. Gather all these ingredients, and you'll be ready to make some tasty muffins! First, preheat your oven to 350°F (175°C). This step is key for even baking. Next, prepare your muffin tin. You can use paper liners or grease each cup lightly. This makes it easy to remove the muffins later. In a large bowl, combine the dry ingredients. Use the following: - 1 cup all-purpose flour - 1/2 cup granulated sugar - 1 teaspoon baking powder - 1/2 teaspoon baking soda - 1 teaspoon ground cinnamon - 1/2 teaspoon ground nutmeg - 1/2 teaspoon ground ginger - 1/2 teaspoon salt Whisk these until well mixed. In another bowl, mix the wet ingredients. You’ll need: - 1/2 cup canned pumpkin puree - 1/4 cup vegetable oil - 1 large egg - 1 teaspoon vanilla extract Stir until the mixture is smooth. Now, combine the wet and dry ingredients. Pour the wet mix into the dry bowl. Gently stir until just combined. It’s okay if some lumps remain. Avoid overmixing to keep the muffins soft. Now, let’s prepare the cream cheese filling. In a small bowl, beat together: - 1/2 cup cream cheese, softened - 1/4 cup powdered sugar - 1 tablespoon milk Mix until creamy and smooth. Grab a spoon or cookie scoop. Fill each muffin liner halfway with pumpkin batter. Then, add a dollop of cream cheese filling right in the center of each cup. Cover the cream cheese with more pumpkin batter. Fill each liner about three-quarters full. Place your muffin tin in the preheated oven. Bake for 18-20 minutes. To check for doneness, insert a toothpick into the center of a muffin. It should come out clean or with a few moist crumbs. Once baked, take the muffins out and let them cool for about 5 minutes. After that, transfer them to a wire rack to cool completely. To ensure your muffins turn out great, avoid overmixing. When combining wet and dry ingredients, stir gently. Stop as soon as you see no dry flour. A few lumps are fine. Overmixing can make your muffins tough. For an even bake, use a muffin tin that heats well. Rotate the tin halfway through baking. This helps the muffins rise evenly. Also, check for doneness with a toothpick. It should come out clean or with a few crumbs. Make your muffins pop with a light dusting of powdered sugar. You can also drizzle cream cheese icing on top for extra flavor. Serve them on a pretty platter. Adding fresh mint leaves will make it look fancy and fresh. For a fun touch, try placing them in cupcake liners with fun designs. This can make them more inviting for guests or kids. You can prepare the batter in advance. Mix the dry ingredients in one bowl and the wet in another. Keep them separate until you are ready to bake. This can save time, especially for busy mornings. If you want to make the cream cheese filling ahead, store it in the fridge. Just remember to stir it before using. This makes it easy to whip up fresh muffins anytime you like. {{image_4}} To make these muffins even more fun, you can add chocolate chips. Just mix in about half a cup of mini chocolate chips with the pumpkin batter. This addition gives a rich, sweet surprise in each bite. You can also try incorporating nuts or seeds. Chopped walnuts or pecans add a nice crunch. Pumpkin seeds sprinkle a bit of extra flavor and texture. If you want a gluten-free version, swap the all-purpose flour for a gluten-free blend. Many blends work well in baking, so choose your favorite. For those who follow a vegan diet, you can replace the egg with a flax egg. Just mix one tablespoon of ground flaxseed with three tablespoons of water. Let it sit until it thickens. Use a plant-based cream cheese to keep the cream cheese filling vegan-friendly. You can spice things up with different spices. Try adding cardamom or allspice to the mix. These spices bring a warm flavor that fits right in with fall. You can also incorporate additional fall flavors, like maple syrup or apple. A touch of maple in the batter can bring out the sweetness. Chopped apples mixed into the pumpkin batter can create a delicious apple-pumpkin combo. To keep your pumpkin cheesecake muffins fresh, store them in the fridge. Place them in an airtight container. This helps prevent them from drying out. They can last up to five days this way. For long-term storage, freezing is a great option. Allow the muffins to cool completely first. Wrap each muffin tightly in plastic wrap, then place them in a freezer bag. They can stay good in the freezer for up to three months. When you're ready to enjoy them again, just take out the muffins you need. To reheat your muffins, the oven works best. Preheat your oven to 350°F (175°C). Place the muffins on a baking sheet. Heat them for about 10 minutes. This keeps the texture nice and soft. You can also use the microwave. Place a muffin on a microwave-safe plate. Heat it for about 15-20 seconds. This method is quick but may make the muffin a bit chewy. How do I know when the muffins are done baking? You can check if your muffins are done by inserting a toothpick into the center. If it comes out clean or with a few moist crumbs, they are ready. This usually takes 18-20 minutes in the oven at 350°F. Can I double the recipe? Yes, you can double the recipe! Simply double each ingredient and follow the same steps. Just be sure to use two muffin tins or bake in batches. What can I use instead of cream cheese? If you need a substitute for cream cheese, try using Greek yogurt or silken tofu. They both create a creamy texture and add moisture to your muffins. Can I substitute fresh pumpkin for canned? Yes, you can use fresh pumpkin. Just cook and puree the pumpkin first. Measure it to match the amount in the recipe. This can add a lovely flavor! Why are my muffins dense? Dense muffins often result from overmixing the batter. Mix just until combined to keep them light and fluffy. Another reason could be too much flour, so be careful when measuring. How do I fix overmixed muffin batter? If you overmix, there's not much you can do. However, you can add a bit of milk to loosen the batter. This can help, but best to mix gently from the start! You learned how to make delicious pumpkin muffins from scratch using simple ingredients. I shared tips for mixing, baking, and storage to ensure success. Don’t forget variations like adding chocolate chips for extra fun. With these easy steps, you can impress friends and family alike. Enjoy your tasty muffins fresh from the oven or keep some for later. Baking is joyful, and now you have the tools to create amazing flavors. Happy baking!

Pumpkin Cheesecake Muffins Delightful and Easy Recipe

Get ready to indulge in Pumpkin Cheesecake Muffins that are both tasty and easy to make! This delightful treat combines

- 1 cup cherry tomatoes - 1 red bell pepper - 1 yellow bell pepper - 1 medium zucchini - 1 red onion - 2 cups broccoli florets - 3 tablespoons balsamic vinegar - 2 tablespoons extra virgin olive oil - 1 teaspoon garlic powder - 1 teaspoon dried thyme - Salt and freshly ground black pepper - 1 cup cooked quinoa - Fresh basil leaves for garnish Gathering the right ingredients is key. Each veggie brings its own flavor and texture. Cherry tomatoes add sweetness and zest. Red and yellow bell peppers give crunch and color. Zucchini adds a nice, tender bite. Red onion offers a mild sharpness, while broccoli gives a delightful crunch. For the dressing, balsamic vinegar and olive oil mix to create a rich glaze. Garlic powder and thyme enhance the dish with herb notes. Don’t forget the salt and pepper to bring all the flavors together. When it's time to serve, the cooked quinoa acts as the perfect base. Fresh basil leaves will add a pop of freshness and aroma. This bowl not only looks good but also tastes amazing. Each bite is a mix of roasted veggies and nutty quinoa. Enjoy the harmony of flavors and colors in every serving! - Set oven temperature to 425°F (220°C). - Prepare a large baking sheet with parchment paper. This helps the veggies not stick. - Combine halved cherry tomatoes, diced red and yellow bell peppers, sliced zucchini, red onion, and broccoli in a bowl. - Toss the veggies gently to mix them well. This step ensures even roasting. - Whisk together balsamic vinegar, olive oil, garlic powder, dried thyme, salt, and pepper in a bowl. - This dressing adds great flavor to your veggies. Make sure it’s well-mixed. - Drizzle the balsamic dressing over the vegetables and toss until coated. - Spread vegetables on the baking sheet in a single layer. Roast for 20-25 minutes. Stir halfway for even roasting. - Divide cooked quinoa among serving bowls. - Top each bowl with the roasted veggies. Garnish with fresh basil leaves for a lovely touch. To get perfect roasted veggies, space them out on the sheet pan. If they are too close, they will steam instead of roast. This step ensures they turn golden brown and crispy. Stir the vegetables halfway through cooking. This helps them cook evenly and develop a nice texture. For a burst of flavor, add an extra drizzle of balsamic vinegar right before serving. This makes the dish even more delicious. You can also add lemon wedges on the side. The citrus adds a fresh twist that brightens the meal. Garnish your bowls with more fresh basil leaves. This not only looks nice but adds aroma. Consider placing your bowls on colorful plates to make the meal pop. A drizzle of balsamic vinegar on top also enhances the look and taste. {{image_4}} You can enhance your bowls with some protein. Grilled chicken adds a nice flavor. Just slice it thin and place it on top of the veggies. Tofu is another great choice. It soaks up the balsamic dressing well. Use firm tofu for the best texture. Chickpeas are a tasty, plant-based option. They add protein and a bit of crunch. Just toss them with the veggies before roasting. Feel free to use any seasonal or favorite vegetables. Carrots bring a sweet crunch. Sweet potatoes add richness and color. Cauliflower works well, too. It roasts nicely and takes on great flavors. If you like greens, try adding spinach or kale. Just toss them in at the end, so they wilt slightly. While the recipe calls for quinoa, many grains work well. Brown rice is a hearty choice. It fills you up and pairs nicely with the veggies. Farro adds a nutty flavor that complements the dish. You can also use barley or even couscous for a different texture. Cook the grains first, then layer them in your bowl. To store leftovers in the fridge, let the bowls cool first. Place the roasted veggies in an airtight container. Add the quinoa to a separate container to keep it fresh. Store both in the fridge for up to four days. This keeps your meal tasty and safe to eat. The best methods for reheating roasted veggies are simple. You can use a microwave or an oven. For the microwave, place the veggies on a plate and heat in short bursts. Stir between each burst to avoid hot spots. For the oven, preheat it to 350°F (175°C). Spread the veggies on a baking sheet and warm for about 10 minutes. This helps them stay crispy. To freeze roasted vegetable bowls, make sure they are cool. Place the veggies and quinoa in freezer-safe bags. Remove as much air as possible before sealing. Label each bag with the date. You can freeze them for up to three months. When ready to eat, thaw in the fridge overnight and reheat as needed. Yes, you can use many types of veggies. Think about using: - Carrots - Cauliflower - Sweet potatoes - Asparagus - Brussels sprouts Feel free to mix and match based on what you like. Just keep in mind that cooking times may vary. Cut thicker veggies smaller for even cooking. Yes, this recipe is vegan. It uses no animal products. The balsamic vinegar and olive oil are plant-based. All the veggies are also vegan-friendly. You can enjoy this dish without worry. Leftovers can last up to four days. Store them in an airtight container. Keep them in the fridge for best results. When you reheat, make sure they are hot all the way through. You can also freeze them for up to three months. Just thaw in the fridge before reheating. This article shared how to make a tasty roasted vegetable bowl. You learned about the main ingredients and how to prepare each step. Tips for roasting, flavor, and presentation will help your dish shine. You can even try fun variations with proteins or grains. Storing and reheating leftovers is easy with simple guidelines. Now, gather your ingredients and start roasting. Enjoy a healthy meal full of flavor!

Sheet-Pan Balsamic Roasted Veggie Bowls Delight

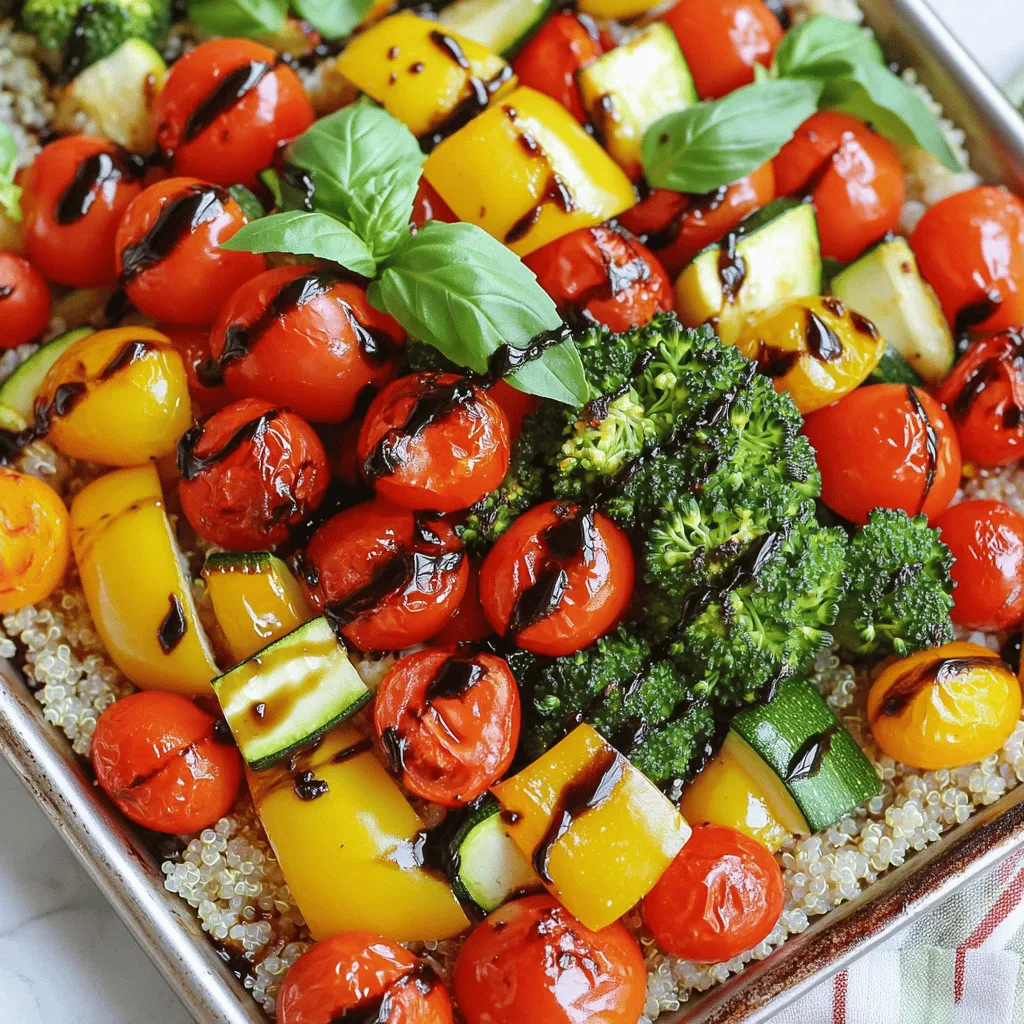
Are you ready to make a tasty meal that’s simple and healthy? These Sheet-Pan Balsamic Roasted Veggie Bowls bring together

Older posts
Newer posts
← Previous Page1 … Page7 Page8 Page9 … Page75 Next →

dsad

© 2025 tastymomrecipes • Built with GeneratePress

Our Policies

  • Copyright Policy
  • Cookie Policy
  • GDPR Policy
  • Privacy Policy
  • Disclaimer
  • Terms Of Use

More Information

  • Home
  • About
  • Contact
  • Appetizers
  • Dessert
  • Dinner
  • Drinks
©2025, tastymomrecipes About Back To Top