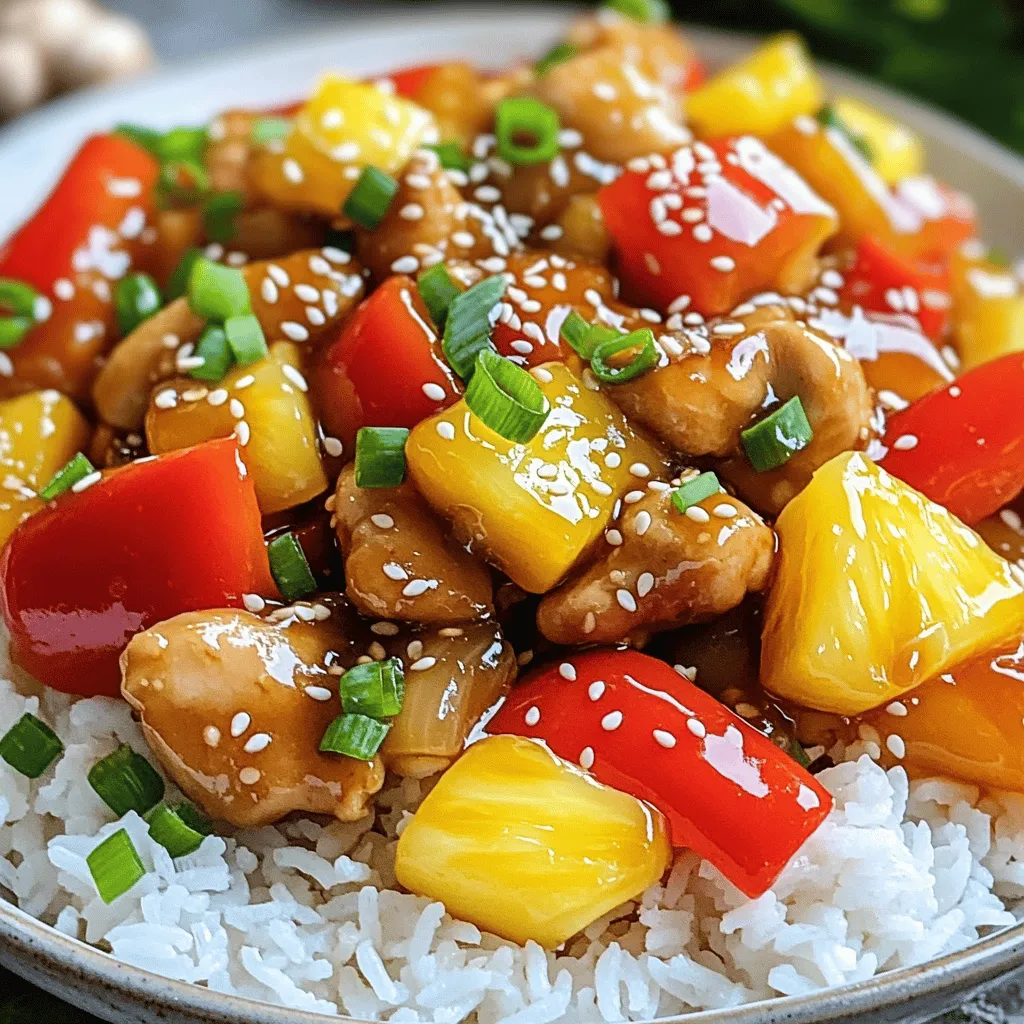
Sweet and Sour Chicken Stir Fry Flavorful Dinner Delight
Looking for a quick and tasty dinner? You’ve found it! My Sweet and Sour Chicken Stir Fry packs a flavorful
Looking for a quick and tasty dinner? You’ve found it! My Sweet and Sour Chicken Stir Fry packs a flavorful
![To make this rich and creamy chocolate avocado mousse, you will need: - 2 ripe avocados, pitted and peeled - 1/2 cup unsweetened cocoa powder - 1/2 cup maple syrup or honey (adjust to your preferred sweetness) - 1/2 cup almond milk (or any milk of your choice) - 1 teaspoon pure vanilla extract - A pinch of fine sea salt - Fresh mixed berries (such as strawberries, raspberries, and blueberries) and sprigs of mint for garnish You can swap some ingredients if you want to change flavors or make it allergy-friendly. - Avocados: Try ripe bananas for a different taste, but the texture will vary. - Cocoa Powder: Use carob powder for a caffeine-free option. - Maple Syrup or Honey: Agave syrup works well too, just use less. - Almond Milk: Any plant-based milk works, like soy or oat milk. - Vanilla Extract: You can skip it if you prefer a simpler taste. Garnishes add a nice touch to your mousse and make it look pretty. Consider: - Fresh mixed berries for a burst of color and flavor. - Mint leaves for a refreshing aroma. - A sprinkle of dark chocolate shavings for added richness. - A dusting of cocoa powder for an elegant finish. For the full recipe, check out the details above. Enjoy your chocolate avocado mousse! Start by gathering all your ingredients. You need ripe avocados, cocoa powder, and sweeteners. Measure out almond milk, vanilla extract, and sea salt. This step makes cooking easier. Once you have everything ready, you can work quickly. Place your ripe avocados in the food processor. Blend them until they are smooth. This takes about 1-2 minutes. Stop to scrape the sides with a spatula. This helps mix everything evenly. Next, add cocoa powder, maple syrup or honey, almond milk, vanilla, and sea salt. Blend again until everything is creamy and smooth. Taste it! If it needs more sweetness, add more syrup or honey. Blend one last time to mix. Spoon your mousse into serving bowls or dessert glasses. Cover them with plastic wrap. Place them in the fridge for at least 30 minutes. This helps the mousse firm up and get cool. When you’re ready to serve, add fresh mixed berries and mint leaves on top. This makes your dish look beautiful and fresh. Enjoy your rich and creamy chocolate avocado mousse! For the full recipe, check out the details above. To make your mousse silky, blend the ingredients well. Start with ripe avocados. They should be soft to touch. Use a good food processor for the best results. Blend until smooth, then scrape the sides to mix everything. If it feels too thick, add a splash more almond milk. This small change can help to get that creamy texture you want. Taste the mousse as you blend. If you want it sweeter, add more maple syrup or honey. Start with less, then keep adding until it fits your taste. Remember, balance is key. Too much sweetness can hide the rich cocoa flavor. Aim for a mix that feels just right on your tongue. You can add a few fun flavors to your mousse. A shot of espresso can add depth. Or try a bit of peppermint extract for a fresh twist. Spices like cinnamon or chili powder can give it a kick. Experiment with what you love. Each option can change the mousse into something special. For the full recipe, check out the details above. Enjoy your cooking! {{image_4}} You can change the sweeteners in this recipe to fit your taste. Maple syrup adds a nice flavor. Honey is another great choice. If you want a low-calorie option, use stevia or agave syrup. Each sweetener gives a unique taste. Just remember to adjust the amount based on how sweet you want it. Taste as you mix, and you’ll find your perfect balance. This mousse is already dairy-free since we use almond milk. For a vegan version, just stick to maple syrup or agave as the sweetener. If you want a creamier texture, try coconut milk instead of almond milk. It adds a rich flavor that pairs well with chocolate. This keeps the dessert light and healthy while making sure it suits everyone. Want to spice things up? Add flavor infusions to your mousse! A splash of coffee can deepen the chocolate taste. For a fresh twist, mix in some mint extract. You can also fold in a bit of orange zest for a fruity kick. Each of these options can make your mousse even more fun and delicious. Explore different flavors and find what you like best! To keep leftover chocolate avocado mousse fresh, place it in an airtight container. Make sure to cover the surface with plastic wrap to avoid browning. This keeps the mousse creamy and delicious. Store it in the fridge for easy access. You can enjoy your mousse for up to three days in the fridge. After that, the texture may change. If you see browning on the surface, just scrape it off before serving. The mousse will still taste great! If you want to store it longer, freezing is a good option. Spoon the mousse into a freezer-safe container. Leave some space at the top, as it may expand when frozen. It can last for up to two months in the freezer. When you’re ready to eat, thaw it in the fridge overnight. Give it a gentle stir to restore its creamy texture. For the full recipe, check the [Full Recipe]. You can use ripe bananas, but the taste and texture will change. Bananas add sweetness and a different flavor. The mousse will be less creamy with bananas. Avocados provide a rich, smooth base that makes this dessert special. If you want to try bananas, blend them well to avoid lumps. Yes, Chocolate Avocado Mousse is healthy! It uses natural ingredients like avocados and cocoa. Avocados are full of good fats and nutrients. They help keep your heart healthy. Cocoa is rich in antioxidants, which are great for your body. If you choose honey or maple syrup, you add some natural sweetness too. This dessert is a tasty way to enjoy healthy foods. You can serve this mousse with many tasty items. Fresh mixed berries add a lovely touch and flavor. You might try some whipped cream or coconut cream for added creaminess. Nuts, like chopped almonds or hazelnuts, give a nice crunch. For a fun twist, serve with a crispy cookie or a thin biscuit. Get creative and enjoy your delicious mousse! For the full recipe, check out the detailed steps to make this delightful treat. You learned about making a delicious chocolate avocado mousse. We covered key ingredients, helpful tips, and various ways to customize your treat. Remember, storing it well keeps it fresh longer. Use the right sweetener for your taste. You can even try other flavors like mint! Now, take your skills and create your own version. Enjoy this tasty and healthy dessert!](https://tastymomrecipes.com/wp-content/uploads/2025/05/ca7f7be2-30be-412d-a36b-11ba15cc35fe.webp)
Get ready to indulge in a rich and creamy treat with my Chocolate Avocado Mousse! This delightful dessert not only
![To make the best Garlic Parmesan Roasted Brussels Sprouts, you need simple, fresh ingredients. Here’s what you will need: - 1 pound Brussels sprouts, trimmed and halved - 4 cloves garlic, minced - ¼ cup freshly grated Parmesan cheese - 3 tablespoons extra virgin olive oil - 1 teaspoon garlic powder - 1 teaspoon onion powder - Sea salt and freshly cracked black pepper, to taste These core ingredients bring out the natural sweetness of the Brussels sprouts. The garlic adds a bold kick, while the Parmesan cheese gives a rich, salty flavor. You can take these Brussels sprouts to the next level with optional ingredients: - 1 tablespoon balsamic vinegar (for added depth of flavor) - Fresh parsley, finely chopped (for garnishing) Balsamic vinegar adds a sweet and tangy note, making the dish even more exciting. The fresh parsley not only looks nice but also brightens the taste. Each ingredient packs a punch when it comes to nutrition: - Brussels sprouts are high in fiber, vitamins C and K, and antioxidants. - Garlic supports immune health and may lower blood pressure. - Parmesan cheese provides protein and calcium. - Olive oil is a healthy fat that supports heart health. - Garlic powder and onion powder both add flavor with fewer calories. Using fresh, high-quality ingredients enhances both the taste and nutritional value of the dish. For the full recipe, check out the instructions above. To start, gather your Brussels sprouts. You want to trim the ends and cut them in half. This helps them cook evenly. Make sure to rinse them in cold water. Then, dry them well with a towel. Wet sprouts won’t roast nicely. In a large bowl, mix the halved Brussels sprouts with olive oil, minced garlic, garlic powder, onion powder, and a good pinch of salt and pepper. You want every sprout to be coated well. This mix adds great flavor. The garlic brings a nice kick, while the cheese will add richness later on. If you want more depth, add balsamic vinegar. It makes the dish even tastier. Now, spread the seasoned sprouts on a baking sheet lined with parchment paper. Make sure they are in a single layer. This helps them get crispy. Roast them in your preheated oven at 400°F for about 20 to 25 minutes. Halfway through, stir them to ensure they brown evenly. When they are golden and crispy, take them out. Sprinkle the grated Parmesan on top while they are hot. If you added balsamic vinegar, drizzle it now and put them back in the oven for 5 more minutes. This melts the cheese perfectly. Finally, toss them gently and garnish with parsley before serving. Enjoy this delicious dish! For the full recipe, check out the details above. To get that amazing crisp, start with fresh Brussels sprouts. Trim and halve them. This helps them cook faster and evenly. Use a high heat, around 400°F (200°C). Make sure to spread them out on the baking sheet. Overcrowding will create steam, not crispness. Stir them halfway through cooking. This ensures all sides turn golden and crisp. You can boost flavor with a few simple additions. Try adding balsamic vinegar for a sweet kick. A touch of lemon zest can brighten up the dish. If you love heat, add red pepper flakes for a spicy twist. Feel free to mix in different herbs like thyme or rosemary. Cheddar or feta cheese can also add a delicious twist if you want to change the cheese. Avoid using old or soggy Brussels sprouts. They won't roast well. Don't skip the oil; it helps with browning. Skipping the garlic powder can lessen the flavor. Finally, be careful not to overcook them. They should be tender but not mushy. Follow these tips for perfect Garlic Parmesan Roasted Brussels Sprouts every time. For the full recipe, check the detailed instructions above. {{image_4}} You can change the cheese to mix up the flavor. Try using Asiago for a sharper taste. Feta adds a nice tang. If you want a creamier option, try goat cheese. Each cheese brings a unique twist to Garlic Parmesan Roasted Brussels Sprouts. Adding other veggies boosts the nutrients in this dish. Carrots add sweetness and color. Broccoli pairs well and gives extra crunch. You can also toss in bell peppers for a pop of flavor. Mix these in with the Brussels sprouts before roasting for a hearty side. If you enjoy heat, add some spice! A pinch of red pepper flakes works great. You can also stir in a bit of cayenne pepper for more warmth. For a smoky flavor, try smoked paprika. These spices will kick up the flavor of your Garlic Parmesan Roasted Brussels Sprouts. Don't forget to check the [Full Recipe] for the base preparation! To keep your Garlic Parmesan Roasted Brussels Sprouts fresh, store them in an airtight container. Make sure to let them cool first. You can keep them in the fridge for up to three days. If you want the best taste, eat them within a day or two. When you reheat Brussels sprouts, you want to keep them crispy. The best way is to use the oven. Preheat it to 350°F (175°C). Spread the sprouts on a baking sheet and heat for about 10-15 minutes. This method helps maintain their crunch and flavor. If you're short on time, you can use the microwave. Just heat them in short bursts, stirring in between, but they may lose some crispiness. If you want to store Brussels sprouts for longer, freezing works well. First, blanch them in boiling water for about three minutes. Then, cool them in an ice bath. Drain and pat them dry, then place them in freezer bags. Remove as much air as possible. They can last up to three months in the freezer. When you’re ready to use them, just thaw and reheat. For the best flavor, try to use them straight from the freezer into your dishes. For more tips on how to make these delicious sprouts, check the Full Recipe. Yes, you can make these sprouts ahead. Simply prepare them, but do not roast yet. Store the seasoned sprouts in the fridge for up to 24 hours. When ready, roast them as usual. This keeps the flavor fresh and vibrant. If you need a substitute, try nutritional yeast. It gives a cheesy flavor without dairy. You can also use pecorino Romano or any hard cheese you like. Just remember, each cheese has its own taste. Adjust the amount based on your preference. To make this dish vegan, skip the Parmesan cheese. Instead, use a mix of nutritional yeast and a little salt for flavor. You can also try vegan cheese that melts well. These options will keep the dish tasty while staying plant-based. For the full recipe, check the detailed cooking steps above. Garlic Parmesan roasted Brussels sprouts are tasty and nutritious. We covered key ingredients, steps, and tips for success. You learned about optional flavors and how to store leftovers well. Remember, small changes can boost taste and texture, like using different cheeses or adding spices. With these ideas in mind, you can easily whip up this dish for any meal. Enjoy experimenting and making it your own!](https://tastymomrecipes.com/wp-content/uploads/2025/05/fb13aa00-97f0-4796-b218-933e7a089640.webp)
If you’re searching for a tasty way to enjoy Brussels sprouts, you’ve hit the jackpot! My Garlic Parmesan Roasted Brussels
![- Chicken and Marinade Components - 1.5 lbs chicken breasts, cut into bite-sized pieces - 1 cup plain yogurt (preferably whole milk for creaminess) - Spices and Aromatics - 2 tablespoons tikka masala spice blend - 1 medium onion, finely chopped - 4 cloves garlic, minced - 1 tablespoon fresh ginger, minced - Liquids and Garnishes - 1 can (14 oz) crushed tomatoes - 1 cup coconut milk (full-fat for the best flavor) - 2 tablespoons vegetable oil (can substitute with ghee for richness) - Salt and pepper to taste - Fresh cilantro, chopped (for garnish) The chicken and yogurt create a tender base. The tikka masala spice blend adds warmth and complexity. Onion, garlic, and ginger bring depth to the dish. Crushed tomatoes and coconut milk form a creamy sauce. This recipe offers a balance of rich flavors and satisfying textures. The use of fresh cilantro adds a bright touch. Each ingredient plays a key role in the final dish. Together, they create a comforting and flavorful meal. Make sure to follow the [Full Recipe] for exact measurements and instructions. Start by cutting your chicken into bite-sized pieces. In a bowl, mix the chicken with yogurt, one tablespoon of tikka masala spice blend, and a pinch of salt. Make sure the chicken is well-coated. Cover the bowl and let it sit for at least 30 minutes. For deeper flavor, let it marinate overnight in the fridge. Set your Instant Pot to the sauté setting. Add vegetable oil and let it heat up. Once hot, add the chopped onion and cook for about 5 minutes. You want the onion soft and clear. Stir occasionally to avoid burning. Next, add minced garlic and ginger. Cook for one minute until you smell the aromas. Be careful not to let them brown. Add the marinated chicken to the pot. Spread it evenly and sauté for about 5 minutes. This step helps seal in the flavor. Then, sprinkle the remaining tikka masala spice blend over the chicken. Stir well to coat the chicken with spices. Now, pour in the crushed tomatoes and coconut milk. Mix everything well, scraping the bottom of the pot to prevent any sticking. Close the Instant Pot lid tightly. Set it to cook on high pressure for 10 minutes. This will make the chicken tender and soak up all the flavors. When the cooking time is up, let the pressure release naturally for 5 minutes. After that, carefully turn the valve to release any remaining steam. Open the lid and stir the chicken tikka masala. Taste it and add salt and pepper as needed. Your dish is now ready! Serve it over basmati rice or with warm naan. Garnish with fresh cilantro for a bright finish. Enjoy your savory Instant Pot chicken tikka masala delight! - Ensuring Proper Marinade Time Marinate the chicken for at least 30 minutes. This step makes the chicken juicy and flavorful. For the best taste, try marinating it overnight. The longer the chicken sits, the better it absorbs the spices. - Tips for Preventing Burn Warning To avoid the burn warning, scrape the bottom of the pot well after adding the crushed tomatoes and coconut milk. Ensure no bits stick to the pot. This simple step helps your dish cook evenly and safely. - Adjusting Spice Levels If you like heat, add more tikka masala spice blend. For milder flavor, use less. You can also add a pinch of sugar to balance the spices if it gets too spicy. Taste as you go to find your perfect level. - Serving Suggestions Serve your chicken tikka masala over fluffy basmati rice. You can also pair it with warm naan bread for dipping. This combo makes every bite special and satisfying. - Garnishing Ideas Top your dish with fresh cilantro for a pop of color. A dollop of yogurt adds creaminess and a cooling effect. You can also sprinkle some chili flakes for a bright look and extra spice. - Enhancing Visual Appeal Use a colorful bowl or plate to serve your chicken tikka masala. A bright dish makes the meal more inviting. Adding sides like colorful veggies can create a nice contrast and complete your meal beautifully. For the full recipe, check the details above! {{image_4}} - Alternative Proteins You can swap chicken for beef or shrimp. Firm tofu works well for a vegan option. Just adjust cooking times. - Dairy-Free Options Use almond yogurt or coconut yogurt to replace the plain yogurt. For creaminess, try cashew cream instead of coconut milk. - Vegetarian Version Replace chicken with chickpeas or paneer. Both add great texture and soak up the spices. - Additional Spices to Try Consider adding cumin or coriander for more depth. A pinch of cinnamon can also bring warmth to the dish. - Adding Vegetables Mix in bell peppers, peas, or spinach for added nutrition. These veggies cook quickly in the Instant Pot. - Different Sauces and Accompaniments Pair with mango chutney or raita for extra flavor. You can also serve it with a side of roasted vegetables for a complete meal. Check out the Full Recipe for more details to create your own savory Instant Pot chicken tikka masala delight! To keep your chicken tikka masala fresh, follow these steps: - Refrigeration Tips: Place the cooled chicken tikka masala in an airtight container. It will stay good for up to 3-4 days in the fridge. You can divide it into smaller portions for easy meals. - Freezing Chicken Tikka Masala: If you want to save it for later, freeze the masala. Use freezer-safe containers or bags. It can last up to 2-3 months in the freezer. Make sure to label with the date for easy tracking. When you’re ready to enjoy your leftovers, here are the best ways to reheat: - Best Ways to Reheat: You can use the microwave or stovetop. If using a microwave, heat in short bursts, stirring in between. For the stovetop, place it in a pan over low heat. Stir often to avoid sticking. - Maintaining Texture and Flavor: Add a splash of coconut milk or water while reheating. This helps keep the sauce creamy and prevents it from drying out. Stir well to mix the flavors. Can I use frozen chicken? Yes, you can use frozen chicken. Just add a few extra minutes to the cooking time. This will ensure the chicken cooks through and remains juicy. How do I make this dish spicier? To spice it up, add more tikka masala spice blend. You can also include fresh chili peppers or cayenne pepper. Start with a small amount, then taste as you go. What to serve with chicken tikka masala? Chicken tikka masala pairs well with fluffy basmati rice or warm naan bread. You can also serve it with a simple cucumber salad for added crunch. Can I make this recipe in advance? Yes, you can make this dish a day ahead. Just store it in the fridge and reheat it before serving. The flavors often deepen overnight. How can I thicken the sauce? To thicken the sauce, simmer it without the lid for a few minutes. You can also mix in a cornstarch slurry. Just combine cornstarch with water, then stir it into the sauce. Can I use other types of curry spices? Absolutely! Feel free to experiment with different spices like garam masala or curry powder. Each will bring its own unique flavor to your dish. For the full recipe, check out [Full Recipe]. This blog post gave a clear guide on making Instant Pot Chicken Tikka Masala. We covered key ingredients, step-by-step cooking methods, helpful tips, and tasty variations. You learned how to store and reheat leftovers while keeping flavors strong. Remember, cooking is about fun and creativity. Experiment with flavors and enjoy the process. With this easy recipe, you’ll impress your family and friends. Happy cooking!](https://tastymomrecipes.com/wp-content/uploads/2025/05/84faffbb-d78b-4632-8cbc-03544ba49ce2.webp)
Are you ready to dive into a world of rich flavors? My Savory Instant Pot Chicken Tikka Masala Delight offers
. Enjoy the bright and fresh flavors! To cook corn perfectly, boil it in a large pot of water. Bring the water to a rolling boil first. Once boiling, add the husked corn. Cook for 5-7 minutes. The corn should be tender but still have a good crunch. If you prefer other methods, try grilling the corn. Grilling gives the corn a nice smoky flavor. You can also roast the corn in the oven. Set the oven to 400°F (200°C) and bake for about 30 minutes. This method caramelizes the corn and adds depth to its taste. For a vibrant presentation, serve the salad in a large, colorful bowl. Add extra cilantro leaves on top for a fresh look. A sprinkle of chili powder adds a fun pop of color. You can also use small cups or bowls for individual servings. This makes it great for parties or gatherings. Pair this salad with grilled meats or tacos for a complete meal. It also pairs well with fish or as a side for barbecues. The bright flavors of the salad complement many dishes. You can customize the spice levels based on your taste. If you like it spicier, add more chili powder or some diced jalapeños. For a milder flavor, reduce the chili powder. Using seasonal ingredients can add variety to your salad. In summer, add diced bell peppers or zucchini. In fall, consider mixing in roasted sweet potatoes. Fresh herbs like basil or mint can also give the salad a unique twist. {{image_4}} You can change the cheese to add new flavors. If you can't find queso fresco, try using feta. Feta has a similar crumbly texture and salty taste. For a creamier option, you might use goat cheese. This adds a tangy twist to the salad. If you want a dairy-free choice, consider vegan cheese. Look for brands that offer a creamy texture. Cashew cheese is a great option. It adds richness without dairy. Nutritional yeast also gives a cheesy flavor without the milk. Feel free to get creative with extra items. Adding black beans boosts protein and fiber. They also add a nice texture. You can mix in diced bell peppers for crunch. Cherry tomatoes are great, but you might also add corn from a can for ease. For a sweet touch, think about fruits. Diced mango or pineapple can enhance the taste. These fruits pair well with lime juice. They add a refreshing burst to the dish. While the lime dressing is tasty, you can switch it up. A creamy dressing, like ranch or yogurt-based, gives a different flavor. You can mix in some avocado for creaminess, too. If you run out of lime juice, use lemon juice instead. It has a similar tartness that works well. Vinegar, like apple cider or red wine, can also be a fun twist. It brings a tangy flavor that contrasts nicely with the sweetness of the corn. For the complete recipe, check out the Full Recipe section. To keep your Mexican Street Corn Salad fresh for a few days, store it in an airtight container. This helps to seal in the flavors. Place the salad in the fridge right after serving. It will stay good for up to three days. The flavors will meld together, which can enhance the taste. However, the avocado may brown a bit. To slow this, add lime juice to the avocado before mixing it in. You can also store the dressing separately for longer freshness. Can you freeze Mexican Street Corn Salad? I do not recommend freezing it. The fresh textures and flavors of the salad do not hold up well in the freezer. Freezing may make the corn and avocado mushy when thawed. If you have leftovers, it's best to enjoy them fresh rather than freeze them. To enjoy leftovers, do not reheat the salad. Instead, eat it cold or at room temperature. If you want to warm it, try letting it sit out for a bit before serving. If you need to add freshness, squeeze a little lime juice over it. This will help revive the flavors and make it taste like new. You can enjoy this salad with many tasty dishes. Here are some ideas: - Grilled chicken or steak for a hearty meal - Tacos or burritos for a festive touch - Rice or quinoa for a filling side - Fresh tortilla chips for a crunchy snack - A cold beverage like agua fresca or limeade Yes, you can prepare this salad ahead. To do this: - Cook the corn and chop the veggies. - Mix all the ingredients, except for the cheese and avocado. - Store it in the fridge. - Add cheese and avocado just before serving. This keeps the salad fresh and tasty. Perfectly cooked corn is tender yet crisp. Look for these signs: - Bright yellow color - Kernels that feel plump and juicy - A slight snap when bitten Cooking time is usually 5-7 minutes in boiling water. Yes, this salad is gluten-free. All the ingredients are safe for gluten-free diets: - Corn, tomatoes, and avocado have no gluten. - Queso fresco and spices also do not contain gluten. Always check labels for any packaged ingredients to be sure. For the full recipe, check out the Mexican Street Corn Salad Bliss recipe. In this blog post, we explored how to make a fresh and vibrant Mexican Street Corn Salad. We covered the key ingredients, from fresh corn to essential seasonings. I provided step-by-step instructions for cooking and mixing. Tips for serving and storage helped make this recipe easy to enjoy. This salad is flexible, allowing for variations and personal twists. Whether you're serving it at a party or enjoying it yourself, it’s a delightful dish. You can customize it to fit your taste and needs. Enjoy making this fresh and tasty salad!](https://tastymomrecipes.com/wp-content/uploads/2025/05/3ca91e69-a069-4133-a545-20cde8a1e393.webp)
Are you ready to add a burst of flavor to your meals? This Mexican Street Corn Salad is both simple
![- 1 lb chicken breast, cut into bite-sized cubes - 1/4 cup fresh lemon juice - Zest of 1 lemon - 1/4 cup extra virgin olive oil - 2 cloves garlic, finely minced - 1/4 cup fresh basil leaves, chopped - 1 teaspoon honey - Salt and freshly cracked black pepper, to taste - Wooden or metal skewers (if using wooden skewers, soak them in water for 30 minutes) Fresh ingredients are crucial for the best flavor. Here’s what to focus on: - Chicken Breast: Choose high-quality, lean cuts for juicy skewers. - Lemon Juice and Zest: Use fresh lemons. They add bright and zesty notes to the dish. - Basil: Fresh basil brings a sweet, aromatic flavor that pairs well with lemon. To make your Lemon Basil Chicken Skewers stand out, follow these tips: - Buy Organic: Look for organic chicken and fresh herbs. It makes a difference in taste. - Freshness Matters: Use fresh garlic and lemon for a vibrant flavor. - Quality Olive Oil: Choose high-quality extra virgin olive oil. It enhances the marinade and adds richness. If you want the full experience, check the Full Recipe for more details! To start, gather your ingredients for the marinade. You will need fresh lemon juice, lemon zest, extra virgin olive oil, finely minced garlic, chopped fresh basil, honey, salt, and pepper. In a mixing bowl, combine these ingredients. Whisk them together until they blend well. The mixture should have a light, creamy texture. This marinade gives your chicken a fresh and zesty flavor. Next, you will prepare the chicken. Cut your chicken breast into bite-sized cubes. Place the chicken in the marinade, using a spatula to coat each piece well. Cover the bowl with plastic wrap or a lid. Put it in the fridge. Let the chicken marinate for at least 30 minutes. For the best taste, leave it for up to two hours. This time allows the flavors to soak into the chicken, making it delicious. While the chicken is marinating, preheat your grill or grill pan to medium-high heat. This step is crucial for getting nice grill marks and a good sear on your chicken. After marination, take the chicken out of the fridge. Prepare your skewers by threading the marinated chicken onto them. Leave a small gap between each piece for even cooking. Now, place the skewers on the hot grill. Cook them for about 10-12 minutes. Turn them occasionally to ensure even browning. Your chicken is ready when it reaches an internal temperature of 165°F (75°C). It should have beautiful grill marks. Once done, remove the skewers from the grill and let them rest for five minutes. This resting time helps keep the chicken juicy. If you like, brush some leftover marinade on the skewers before serving for extra flavor. Enjoy your Lemon Basil Chicken Skewers! For the complete recipe, refer to [Full Recipe]. For the best taste, marinate your chicken for at least 30 minutes. I recommend 2 hours for full flavor. The longer it sits, the more the chicken absorbs the lemon and basil essence. Use a covered bowl in your fridge to keep it fresh. Preheat your grill to medium-high heat. This step is key for getting nice grill marks. Once hot, place the skewers on the grill and turn them every few minutes. This helps cook the chicken evenly and gives it a nice char. Don't overcrowd the grill; give each skewer some space. Use a meat thermometer to check the chicken. The safe internal temperature should be 165°F (75°C). This ensures your chicken is fully cooked but still juicy. Let the skewers rest for about 5 minutes after grilling. This helps keep the juices inside, making each bite tender and delicious. These simple tips can elevate your Lemon Basil Chicken Skewers to a whole new level! For the full recipe, check the earlier section. {{image_4}} If you want to switch things up, try different proteins for your skewers. Shrimp is a great choice. It cooks fast and takes on flavors well. Tofu is another option. It absorbs the marinade like a sponge, adding a rich taste. You can also use beef or pork. Just remember to adjust cooking times based on the protein you choose. Chicken cooks quickly, but beef may need more time. Adding veggies makes your skewers even better. Bell peppers add sweetness and color. Cherry tomatoes bring a juicy pop. Zucchini is great too. It grills nicely and has a mild flavor. Just cut them into similar sizes as the chicken. This way, everything cooks evenly. Thread them onto the skewers along with the chicken. You get a tasty mix of flavors and a splash of color. You can play around with flavors to make your skewers unique. Try adding fresh herbs like thyme or oregano for a new taste. A splash of soy sauce can give your marinade a savory kick. If you like heat, add red pepper flakes or a dash of hot sauce. For a sweet twist, use maple syrup instead of honey. These small changes can make a big difference. Experiment and find your favorite flavor combo. For the full recipe, check out the Lemon Basil Chicken Skewers . After enjoying your Lemon Basil Chicken Skewers, store any leftovers in an airtight container. Make sure to let them cool completely before placing them in the fridge. Properly stored, they will stay fresh for up to three days. When you’re ready to eat, they will still taste great and keep their flavor. To keep your skewers for a longer time, freezing is a smart choice. First, let the skewers cool completely. Then, wrap them tightly in plastic wrap. After that, place them in a freezer-safe bag or container. They can last for up to three months in the freezer. When you’re ready to use them, just thaw them in the fridge overnight. When it’s time to enjoy your leftover skewers, reheating is easy. You can use an oven, air fryer, or grill. If using an oven, preheat it to 350°F (175°C). Place the skewers on a baking sheet. Heat for about 10-15 minutes until warm. If you prefer an air fryer, set it to 350°F (175°C) and cook for about 5-7 minutes. The goal is to heat them through without drying them out. Enjoy the same great taste as before! For a full experience, check out the Full Recipe for more tips. Marinate the chicken for at least 30 minutes. For the best flavor, aim for 2 hours. The longer it sits, the more the flavors soak in. This helps make the chicken tender and tasty. Yes, you can! Feel free to swap chicken for shrimp or beef. Just adjust the marinating time. Shrimp needs less time, about 15-20 minutes, while beef should marinate for at least 1 hour. Each meat will bring its own unique taste. Serve the skewers on a nice platter with fresh basil leaves and lemon wedges. This adds color and makes it look appealing. You can also drizzle some olive oil on top for extra flavor. Enjoy these skewers as a main dish or a fun appetizer at your next gathering. For the complete preparation, check the Full Recipe. In this post, we explored ingredients and tips to make tasty chicken skewers. We covered marinade prep, grilling, and storage. You learned about using fresh ingredients to boost flavor. I shared clever tricks to make skewers juicy and delicious. Remember, you can try different meats and add veggies for fun. With these tips, you’ll impress friends and family every time. Enjoy your cooking journey!](https://tastymomrecipes.com/wp-content/uploads/2025/05/8b65d1fa-1179-4ba6-84d1-d16b5bed8b3c.webp)
Are you ready to impress at your next BBQ? Lemon Basil Chicken Skewers are tasty and easy to make! With
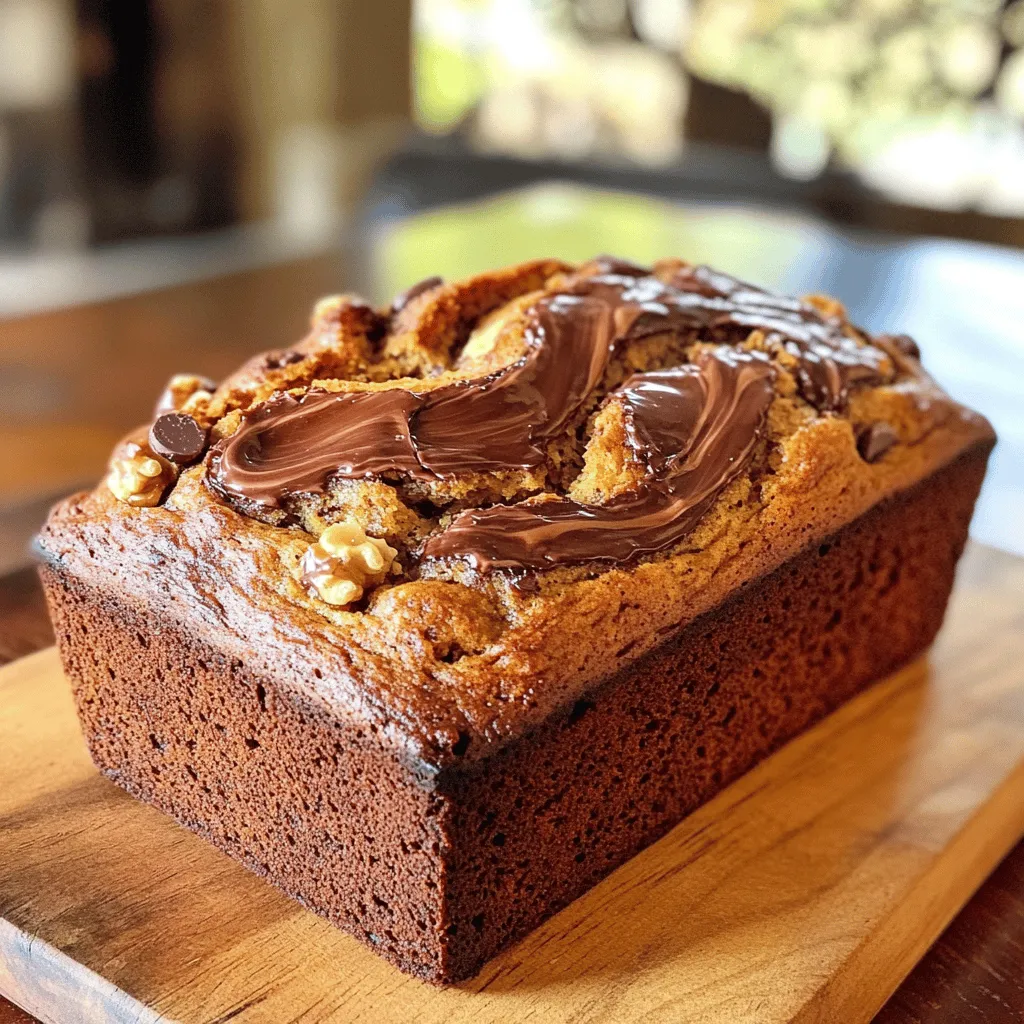
If you love the warm scent of baked goods and the rich taste of Nutella, you’re in for a treat!
![Making Creamy Cajun Chicken Pasta is easy and fun. Gather your ingredients for a delicious meal. You will need basic items and some optional ones for extra flavor. Here’s what you need for the main dish: - 2 boneless, skinless chicken breasts - 2 tablespoons Cajun seasoning - 1 tablespoon olive oil - 1 cup heavy cream - 1 cup chicken broth - 8 oz fettuccine or penne pasta - 1 cup cherry tomatoes, halved - 1 cup bell peppers, thinly sliced - 1 small onion, finely chopped - 2 cloves garlic, minced - Salt and pepper to taste - Grated Parmesan cheese for garnish - Fresh parsley, chopped for garnish You can add more to make this dish your own: - Spinach or kale for greens - Other spices like paprika or cayenne - Different pasta shapes like farfalle or rigatoni - A splash of lemon juice for brightness - Crushed red pepper for extra heat Feel free to mix and match these ingredients. The beauty of this recipe is its flexibility! For a full recipe, be sure to check the detailed instructions. To cook the pasta just right, start with a big pot. Fill it with water and add a pinch of salt. Bring the water to a rolling boil. Once boiling, add the pasta. Stir it gently to prevent sticking. Cook according to the package instructions. Aim for al dente, which means the pasta should be firm but not hard. When done, drain the pasta, but save about half a cup of the water. This starchy water helps the sauce stick later. Set the pasta aside while you prepare the rest. While the pasta cooks, it’s time for the chicken. Take two boneless, skinless chicken breasts. Sprinkle Cajun seasoning all over them. Make sure every part is coated well. This adds great flavor. Heat olive oil in a large skillet over medium heat. Once it’s hot, place the seasoned chicken in the skillet. Cook each side for about 6 to 7 minutes. You want the chicken to reach an internal temperature of 165°F (75°C). After cooking, take the chicken out and let it rest for a few minutes. Then slice it into strips. In the same skillet, add a finely chopped onion. Sauté it for about 3 to 4 minutes until it’s soft and clear. Next, toss in minced garlic and sliced bell peppers. Cook these for another 2 to 3 minutes. The peppers should soften nicely. Now, pour in the chicken broth and let it simmer gently. Slowly stir in heavy cream, watching the sauce thicken. If it gets too thick, add some of that reserved pasta water. This helps achieve the right consistency. Finally, mix in the cooked pasta and halved cherry tomatoes. Toss everything together so the pasta is well coated in the creamy sauce. Adjust the flavor with salt and pepper. Now, you're ready to serve your creamy Cajun chicken pasta! For the full recipe, check back at the beginning. To boost flavor in your creamy Cajun chicken pasta, use fresh herbs. Fresh parsley adds a bright note. You can also try using fresh basil for a sweet twist. For more heat, add diced jalapeños or extra Cajun seasoning. Don't forget to season each layer. Salt the pasta water well to infuse taste. Season the chicken generously before cooking. This helps the flavors really shine. A creamy sauce should be smooth and rich. Start with heavy cream for that perfect texture. If your sauce is too thick, add a bit of reserved pasta water. Mix in small amounts until you reach your desired creaminess. If it's too thin, let it simmer longer. The sauce will thicken as it cooks. Stir often to avoid burning on the bottom of the pan. Timing is key to a perfect creamy Cajun chicken pasta. Cook your pasta until al dente, which keeps it firm. This means it should still have a slight bite. While the pasta cooks, season and sauté the chicken. Cook it for about 6-7 minutes per side. After that, let it rest before slicing. This keeps it juicy. Finally, combine everything in the skillet just before serving. This ensures all flavors blend well. For the best taste, serve immediately. {{image_4}} If you want a meat-free version, replace the chicken. Use firm tofu or tempeh instead. Season them with Cajun spice for the same bold taste. You can also try mushrooms for a hearty texture. They soak up the sauce well and add depth. To make this dish gluten-free, swap the pasta with gluten-free options. Brown rice pasta or chickpea pasta works great. Ensure that your Cajun seasoning is gluten-free too. Most brands are, but always double-check the label for safety. Boost the nutrition by adding more veggies to your dish. Spinach, zucchini, or broccoli are fantastic choices. They add color and crunch to your creamy pasta. Simply sauté them with the onions and peppers. This not only enhances the flavor but also makes it healthier. For the complete recipe, check out the [Full Recipe]. To keep your creamy Cajun chicken pasta fresh, place it in an airtight container. Make sure to let it cool first. Store it in the fridge. It will last for up to three days. If you want to keep it longer, consider freezing it. When it's time to eat again, reheat the pasta gently. You can use a microwave or a skillet. If using a microwave, heat in short bursts. Stir often to heat evenly. If using a skillet, add a splash of chicken broth to keep it creamy. Heat on low until warm. For meal prep, you can freeze this dish. First, let it cool completely. Divide it into portions in airtight containers. Label the containers with the date. Freeze for up to three months. When you are ready to eat, thaw in the fridge and reheat as mentioned above. Enjoy your delicious meal even on busy days! The best pasta for creamy Cajun chicken pasta is fettuccine or penne. These shapes hold sauce well. Fettuccine has a wide surface area, while penne’s tube shape captures sauce inside. You can also use linguine or rotini for variety. Just ensure you cook the pasta until al dente for the best texture. Absolutely! You can swap chicken for shrimp, sausage, or even tofu. Shrimp cooks quickly and adds a nice flavor. Sausage gives a hearty touch, while tofu makes it vegetarian-friendly. Just adjust cooking times as needed to ensure everything is cooked through. To spice it up, add more Cajun seasoning or a dash of hot sauce. You can also include diced jalapeños or red pepper flakes for extra heat. Start small and taste as you go. This way, you can control the spice level to suit your taste. For the full recipe, check the above section. This blog post covered the full recipe for creamy Cajun chicken pasta. I shared essential and optional ingredients to suit your taste. You learned easy steps to cook pasta and sauté chicken for the best result. I also shared tips to enhance flavors and ensure the sauce is creamy. Plus, I offered variations for vegetarians and gluten-free options. Enjoy making this dish your own! It’s simple to prepare and satisfies many tastes. Happy cooking!](https://tastymomrecipes.com/wp-content/uploads/2025/05/4f57f164-3220-4ed3-8182-9b0ce8a1233a.webp)
Get ready for a dinner treat with my Creamy Cajun Chicken Pasta! This dish packs a punch of flavor that’s
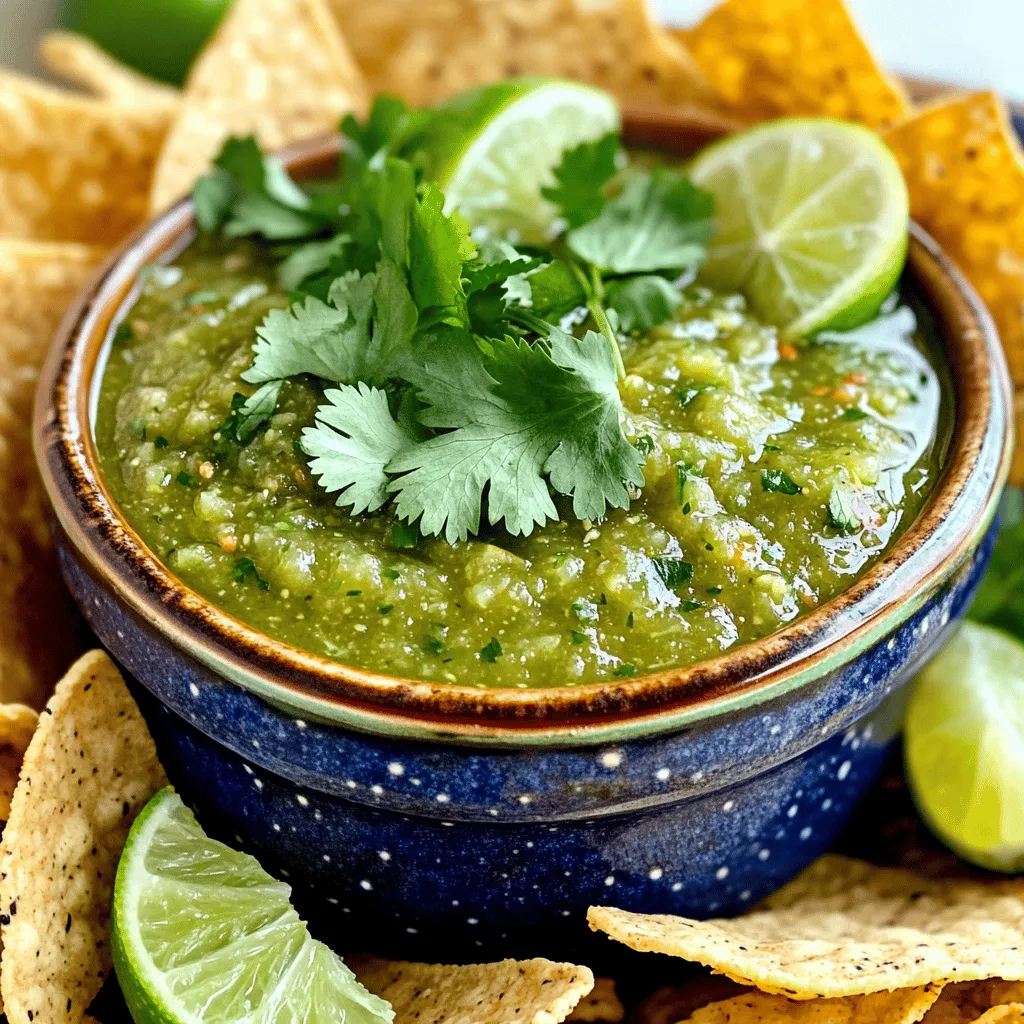
If you love fresh flavors, this Homemade Salsa Verde recipe will excite your taste buds! You only need a few
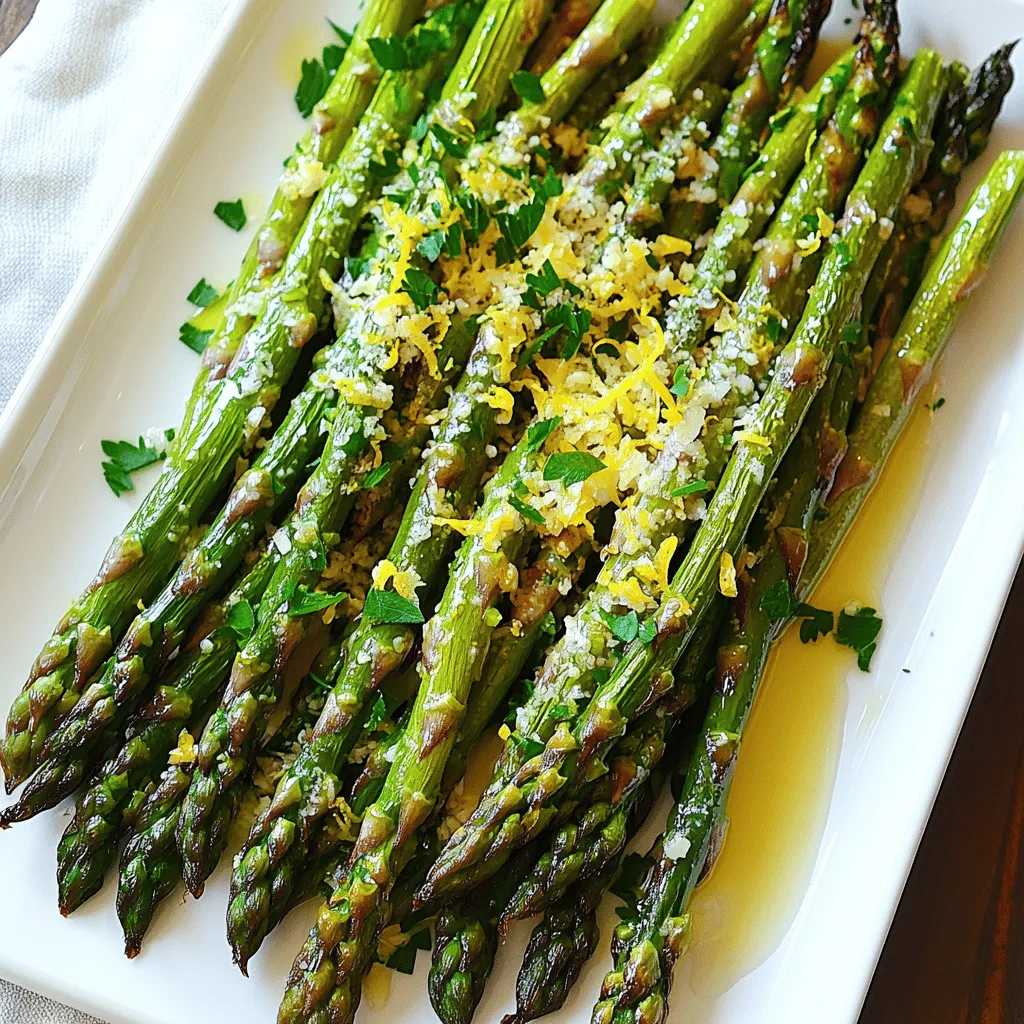
Looking for a side dish that bursts with flavor? You’ve come to the right place! Lemon Garlic Roasted Asparagus is
