Skip to content
DisclaimerTerms Of UseGDPR PolicyCookie Policy

tastymomrecipes

  • Home
  • Drinks
  • Appetizers
  • Dinner
  • Dessert
  • About
  • Contact
  • Privacy Policy
DisclaimerTerms Of UseGDPR PolicyCookie Policy

Olivia

To make stuffed bell peppers with quinoa, you'll need: - 4 large bell peppers (any color you prefer) - 1 cup quinoa, thoroughly rinsed - 2 cups vegetable broth - 1 can (15 oz) black beans, drained and rinsed - 1 cup corn (fresh or frozen) - 1 cup diced tomatoes (canned or fresh) - 1 small onion, finely chopped - 2 cloves garlic, minced - 1 teaspoon ground cumin - 1 teaspoon smoked paprika - Salt and pepper, to taste - 1 cup shredded cheese (cheddar, Monterey jack, or a blend) - Fresh cilantro or parsley for garnish (optional) If you can't find certain ingredients, here are some easy swaps: - Quinoa: Use brown rice or couscous. - Black beans: Substitute with kidney beans or chickpeas. - Corn: You can use peas or skip it entirely. - Diced tomatoes: Fresh tomatoes or tomato sauce work too. - Cheese: Try dairy-free cheese for a vegan option. These stuffed peppers offer great nutrition: - Quinoa: A complete protein with fiber. - Black beans: Packed with protein and iron. - Bell peppers: High in vitamins A and C. - Corn: Provides fiber and B vitamins. - Cheese: Adds calcium and protein. Each stuffed pepper is a balanced meal, rich in nutrients that keep you full and happy. First, preheat your oven to 375°F (190°C). This step warms up the oven for baking later. Next, rinse 1 cup of quinoa thoroughly. This removes any bitter taste. In a medium pot, bring 2 cups of vegetable broth to a boil. Add the rinsed quinoa and lower the heat. Cover the pot and let it simmer for about 15 minutes. The quinoa will absorb the broth and become fluffy. While the quinoa cooks, prepare the bell peppers. Take 4 large bell peppers and slice off their tops. Remove the seeds and membranes gently. Brush the outside of the peppers with olive oil. Place them upright in a baking dish. In a large skillet, heat a drizzle of olive oil over medium heat. Add the finely chopped onion and minced garlic. Sauté for 3 to 4 minutes until the onion is soft and fragrant. Next, stir in 1 can of black beans, 1 cup of corn, and 1 cup of diced tomatoes. Season with 1 teaspoon of ground cumin and 1 teaspoon of smoked paprika. Mix well. Once everything is combined, fold in the cooked quinoa. Let this mix cook for an additional 5 minutes. Season it with salt and pepper to taste. Once done, take the skillet off the heat and gently mix in half of the shredded cheese. Now, it’s time to stuff the peppers. Fill each bell pepper with the quinoa mixture. Press down lightly to fit it all in. Top each pepper with the remaining cheese. Cover the baking dish with aluminum foil and place it in the preheated oven. Bake for 25 minutes. After 25 minutes, take off the foil. Bake for an extra 10 minutes until the cheese is bubbly and golden brown. Once cooked, let the stuffed peppers cool for a few minutes before serving. You can garnish with fresh cilantro or parsley for extra flavor. Enjoy your flavorful stuffed bell peppers with quinoa! For the full recipe, check out the details provided earlier. To cook quinoa perfectly, rinse it well before using. Rinsing removes a bitter coating called saponin. Use a fine mesh strainer for best results. Cook quinoa with a ratio of 1 cup quinoa to 2 cups vegetable broth for flavor. Bring the broth to a boil, then reduce the heat. Cover the pot and let it simmer for around 15 minutes. Once done, fluff it with a fork. This keeps the grains separate and light. When selecting bell peppers, look for ones that are firm and shiny. They should have smooth skin without blemishes. Choose colors based on your taste; red, yellow, and orange are sweeter. Green peppers are more bitter but still delicious. Check the tops for freshness; they should be bright and green. Avoid peppers with soft spots or wrinkles. For the best cheese melt, use freshly shredded cheese. Pre-shredded cheese may have anti-caking agents that hinder melting. Mix half of the cheese into your filling before stuffing. This helps create a gooey center. Top each pepper with the remaining cheese for a nice crust. When baking, cover the dish with foil for the first part of cooking. This keeps moisture in, ensuring the cheese melts evenly. Remove the foil later for a golden finish. For a complete guide, check the Full Recipe for more details! {{image_4}} You can easily make stuffed bell peppers vegetarian or vegan. For a vegetarian twist, just keep the cheese. If you want it vegan, skip the cheese or use a dairy-free alternative. You can also add more veggies like spinach or mushrooms. These extra ingredients boost flavor and nutrition. This recipe is already gluten-free since quinoa is the main grain. If you want to change it up, use brown rice instead of quinoa. Just remember, brown rice needs more cooking time. Always check your canned goods, like beans or tomatoes, to ensure they are gluten-free. You can get creative with your fillings! Try adding nuts or seeds for crunch. Diced zucchini or carrots also work well. For extra flavor, mix in fresh herbs like basil or oregano. A splash of lime juice can brighten up the dish. These enhancements make each bite even more delicious. For the complete recipe, check out the Full Recipe. Leftover stuffed peppers are easy to store. First, let the peppers cool down. Then, place them in an airtight container. Keep them in the fridge for up to four days. This helps retain their flavor and texture. If you want to keep them longer, freezing is a great option. To reheat stuffed peppers, you have a few options. The best way is to use an oven. Preheat your oven to 350°F (175°C). Place the stuffed peppers in a baking dish. Cover them with foil to keep moisture in. Heat for about 20 minutes or until warm. You can also use a microwave. Just place one pepper on a microwave-safe plate. Heat for 1-2 minutes, checking to ensure it’s hot throughout. Freezing stuffed peppers is simple. After cooking, allow them to cool completely. Wrap each pepper in plastic wrap, then place them in a freezer-safe bag. Label the bag with the date. Frozen peppers can last up to three months. When you’re ready to eat, thaw them overnight in the fridge. Then, reheat them as mentioned above. This makes meal prep easy and delicious! For the full recipe, check out the main article. Yes, you can make stuffed bell peppers ahead of time. Prepare the quinoa filling and stuff the peppers. Then, cover them well and store in the fridge for up to two days. When you are ready to eat, bake them straight from the fridge. This method saves time and helps you enjoy a quick meal. Stuffed bell peppers pair well with many sides. Here are some ideas: - A fresh green salad with a light dressing - Steamed vegetables like broccoli or green beans - A side of rice or quinoa for extra fiber - Homemade salsa or guacamole for added flavor These options keep your meal balanced and delicious! Absolutely! Stuffed bell peppers are perfect for meal prep. They store well and reheat nicely. You can make a batch over the weekend and enjoy them throughout the week. Just follow the Full Recipe and store them in airtight containers. This way, you have tasty meals ready when you need them! We explored how to make delicious stuffed bell peppers with quinoa. We covered key ingredients, cooking steps, and helpful tips. Remember, you can choose different fillings and adjust ingredients to fit your needs. Storing leftovers and reheating them is easy. This dish works well for meal prep, making it a perfect choice for busy days. Enjoy crafting your version of this tasty meal!

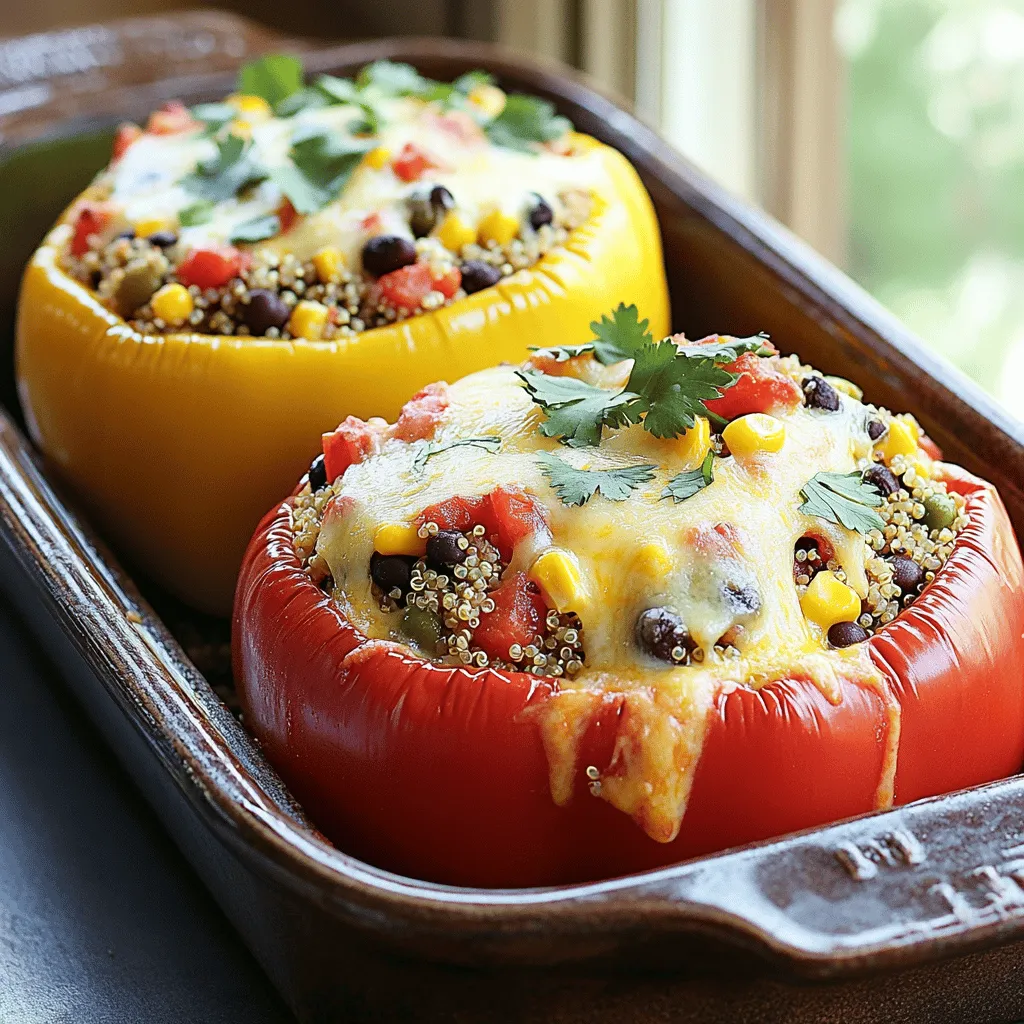
Stuffed Bell Peppers with Quinoa Flavorful Delight

Are you ready to elevate your meals with a tasty twist? Stuffed bell peppers with quinoa are not just colorful;

- Cauliflower - Mixed bell peppers - Snap peas - Onion, garlic, and ginger For this dish, I use fresh ingredients. The star is cauliflower. It becomes rice-like and tasty. I also add mixed bell peppers for color and crunch. Snap peas bring a nice sweetness. Onion, garlic, and ginger add depth. - Soy sauce or tamari - Sesame oil - Vegetable oil Cooking oils matter. I use vegetable oil to stir-fry. It has a high smoke point. Soy sauce or tamari gives the dish umami. Sesame oil adds a nutty flavor that elevates the meal. - Green onions - Sesame seeds Garnishes make a dish pop. I slice green onions for freshness. Sprinkling sesame seeds adds texture. These little touches enhance the look and taste of your stir-fry. For the complete recipe and more detailed steps, check the Full Recipe. To make cauliflower rice, start with a medium head of cauliflower. Remove the leaves and stem. Cut the cauliflower into small florets. Use a box grater or a food processor to grate the florets. Aim for a rice-like texture, which should be even in size. First, heat 1 tablespoon of vegetable oil in a large frying pan over medium-high heat. Wait until it shimmers. Add the finely chopped onion. Stir-fry for about 2-3 minutes until it turns soft and clear. Next, add 2 cloves of minced garlic and 1-inch piece of grated ginger. Stir quickly for another minute to avoid burning. Now, toss in 1 cup of diced mixed bell peppers and 1 cup of snap peas. Stir-fry these for 3-4 minutes. You want them tender but crunchy. Add the prepared cauliflower rice to the pan. Pour in 2 tablespoons of soy sauce and 1 tablespoon of sesame oil. Mix everything well and cook for 4-5 more minutes. This lets the cauliflower rice soak up the flavors. Taste your stir-fry. Adjust flavors with salt and pepper as needed. When done, transfer it to a serving dish. Garnish with sliced green onions and sesame seeds for a nice finish. This dish is not just easy to make but also packed with flavor! For full details, check out the Full Recipe. To cook cauliflower rice well, start with fresh cauliflower. Chop it into small pieces for even cooking. Use a food processor to grate it quickly. This gives the rice a nice texture. You can also use a box grater. Both methods work great. To keep your veggies crunchy, don’t overcook them. Stir-fry at high heat for a short time. This helps them stay bright and crisp. Add your cauliflower rice last. It only needs a few minutes to warm up. Want to boost the flavor? Try adding more seasonings. A splash of lime juice adds a nice zesty taste. You can also use chili flakes for some heat. For a savory touch, mix in some oyster sauce. Fresh herbs make a big difference too. Chopped cilantro or basil can bring freshness. You can also use mint for a unique twist. Experiment with spices like cumin or paprika for added depth. For a beautiful presentation, serve the stir-fry in a wide bowl. This lets the colors shine. Top it with green onions in a circular pattern. Sesame seeds can add a nice touch too. Consider drizzling a bit of sesame oil for shine. Use a small spoon to make pretty designs on the dish. This extra effort makes your meal look gourmet. For the full recipe, check the section above. {{image_4}} You can boost your cauliflower rice stir-fry with protein. Chicken, shrimp, or tofu work great. For chicken, cut it into cubes and cook it first. Shrimp cooks quickly, so add it after the veggies. If you choose tofu, press it to remove water, then sauté it until golden. Adjust your cooking times based on your protein choice. Chicken needs about 7-10 minutes, shrimp around 3-5 minutes, and tofu about 5-7 minutes. For those who need gluten-free or vegan options, you can easily switch ingredients. Use tamari instead of soy sauce for gluten-free. For a vegan dish, skip the chicken or shrimp and use firm tofu. If you're looking for low-carb or keto-friendly choices, stick with cauliflower rice. You can add more vegetables like zucchini or mushrooms to keep it filling and nutritious. Switching up your veggies can keep this dish fresh. Use seasonal or local vegetables for the best taste. Carrots, broccoli, or spinach can add color and flavor. Frozen vegetables are also a good choice. They save time and have a longer shelf life. Just be sure to thaw them and drain excess water before cooking. Fresh produce will give you the best crunch, but frozen can work just as well if you’re in a pinch. For the full recipe, follow the steps above and enjoy experimenting with your favorite flavors! To keep your cauliflower rice stir-fry fresh, store it in the fridge. Use an airtight container to prevent moisture loss. This helps maintain flavor and texture. Let the stir-fry cool down before sealing the container. This step stops steam from making it soggy. You can enjoy your leftovers for easy meals later. If you want to save your stir-fry for later, freezing works great. First, let the dish cool completely. Then, transfer it to a freezer-safe container or bag. Make sure to remove as much air as possible. This helps prevent freezer burn. When you are ready to eat, thaw the stir-fry in the fridge overnight. For reheating, use the microwave or a skillet. Heat gently to keep the veggies crunchy. In the fridge, your stir-fry lasts about 3 to 4 days. Check for signs of spoilage before eating. Look for changes in color or a bad smell. If the stir-fry feels slimy, it’s best to toss it. Always prioritize your health when it comes to leftovers. Enjoy your tasty, homemade meal with confidence! Cauliflower rice is finely grated cauliflower that resembles rice. It is low in carbs and high in nutrients. It provides fiber, vitamins C and K, and antioxidants. This makes it a great choice for those wanting to eat healthier. Yes, you can use pre-packaged cauliflower rice. It saves time and is convenient. However, store-bought options may lack freshness and flavor. Always check the ingredients for additives or preservatives. To reheat cauliflower rice stir-fry, use a skillet or microwave. In a skillet, add a splash of water to keep it moist. Heat over low until warm, stirring often. In the microwave, cover the dish and heat in short bursts to keep the texture. This blog post covered how to make a tasty cauliflower rice stir-fry. We explored key ingredients, step-by-step cooking methods, and smart tips. I shared ways to enhance flavor and make it colorful. You can also adjust proteins and vegetables based on your needs. In the end, this dish is versatile and healthy. Enjoy creating your own version inspired by these ideas. Happy cooking!

Cauliflower Rice Stir-Fry Flavorful and Easy Recipe

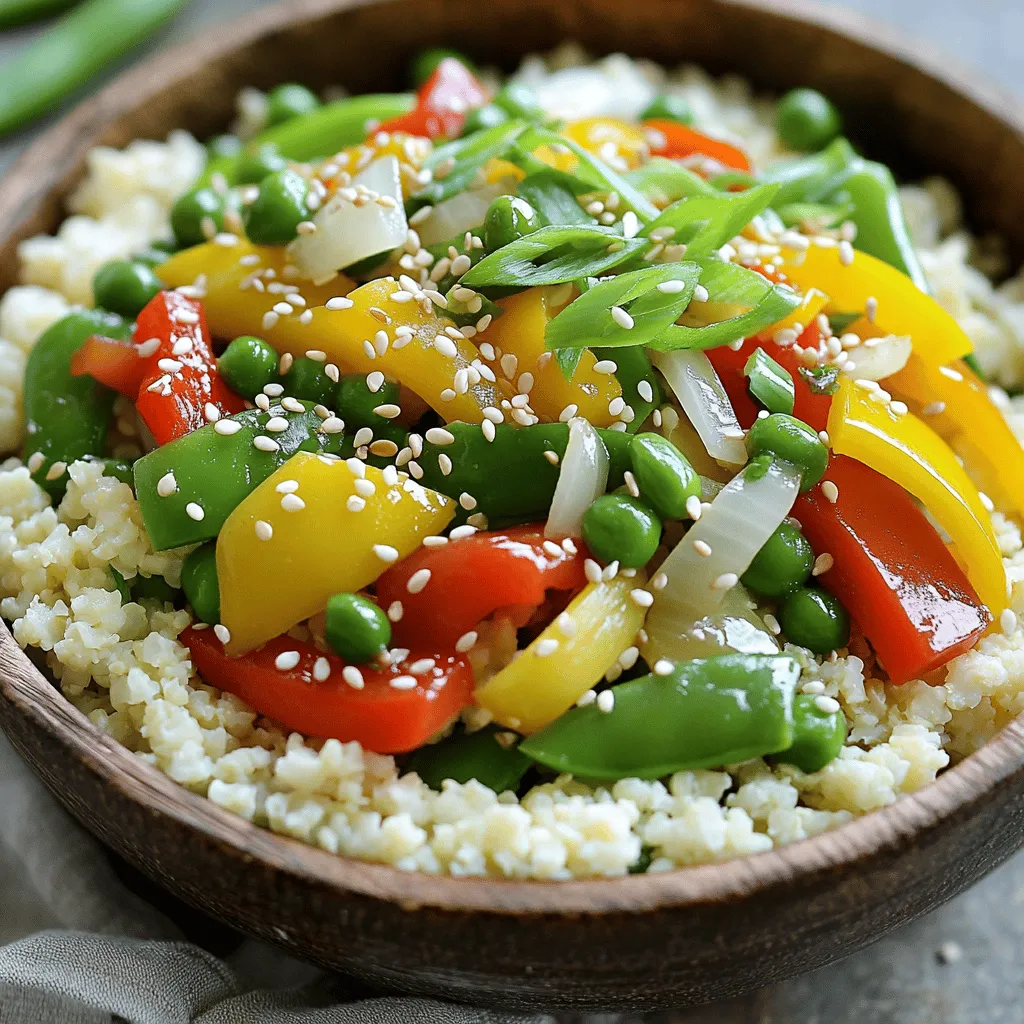
Are you ready to transform your meals with a tasty and healthy option? This Cauliflower Rice Stir-Fry is not only

To make Broccoli Cheddar Stuffed Potatoes, you will need: - 4 large russet potatoes - 2 cups steamed broccoli florets - 1 cup sharp cheddar cheese, shredded - 1/2 cup cream cheese, softened - 1/4 cup Greek yogurt or sour cream - 2 tablespoons melted butter - 2 cloves garlic, minced - Salt and freshly cracked pepper to taste - 1/4 teaspoon paprika (optional) - 2 tablespoons fresh chives, finely chopped (for garnish) When choosing russet potatoes, look for large, firm ones. The skin should be smooth and free from blemishes. A good potato feels heavy for its size. Avoid potatoes with a green tint or sprouts. These can affect the flavor and texture. For broccoli, fresh is best, but frozen works in a pinch. Fresh broccoli gives a nice crunch and bright color. If using frozen, make sure to steam it and drain excess water. This helps keep the filling from getting soggy. You can find the full recipe in the earlier sections if you need detailed instructions. Enjoy making this comforting meal! To start, you need to wash the russet potatoes. Rinse them under cool water. Scrub each potato to remove dirt. This step is key for taste and health. After washing, poke several holes in each potato with a fork. This allows steam to escape while baking. If you skip this step, the potatoes might burst in the oven. Next, let's make the filling. In a large bowl, mix the steamed broccoli, shredded cheddar cheese, and softened cream cheese. Add Greek yogurt, melted butter, and minced garlic. Season with salt and pepper, and add paprika if you'd like. Mix everything until it is fully blended. The filling should be creamy but not too runny. You can adjust the consistency by adding more cheese or yogurt. Once the potatoes are baked, let them cool for a bit. Slice each potato in half lengthwise. Use a spoon to scoop out the potato flesh. Be gentle so you don’t break the skin. Leave a thin layer of potato to keep the shape. Mix the scooped-out flesh into the broccoli and cheese mixture. Stir until it is well combined. Now, take the filling and spoon it back into the potato skins. Mound the filling for a hearty look. Place the stuffed potatoes on a baking sheet and pop them back in the oven. Bake for another 15-20 minutes, until the filling is hot and the cheese melts. You can find the full process in the [Full Recipe]. When baking your potatoes, size matters. Larger russet potatoes take longer to cook. For big potatoes, plan for about 60 minutes. Smaller ones can be ready in about 45 minutes. To check if they are done, poke a fork in them. If the fork goes in easily, they are ready. You want them soft and tender. Want to take your stuffed potatoes to the next level? Try adding spices like garlic powder or onion powder. You can also sprinkle some chili flakes for heat. For a creamier filling, mix in an extra scoop of cream cheese or Greek yogurt. This makes the filling rich and smooth. Stuffed potatoes pair well with a fresh salad. A simple green salad with lemon dressing works great. You can also serve them with a side of steamed veggies for a balanced meal. To impress guests, arrange the stuffed potatoes on a platter. Drizzle some melted butter over the top or add a dollop of Greek yogurt for flair. This not only looks nice but adds extra flavor too. {{image_4}} You can switch out cream cheese for ricotta or cottage cheese. Greek yogurt can be replaced with sour cream or even a dairy-free yogurt. For a vegan version, use a plant-based cream cheese and skip the yogurt. You can also use cashew cream to get that rich taste without dairy. This way, you can still enjoy the creamy filling while keeping it plant-based. Want to add protein to your stuffed potatoes? You can mix in cooked chicken, crispy bacon, or even black beans. All three options give a nice boost in flavor and nutrition. Chicken pairs well with garlic and chives, while bacon adds a salty crunch that enhances the cheese taste. If you go with beans, try adding cumin for a tasty kick. Cheddar is classic, but feel free to explore! You can use mozzarella for a stretchy, gooey texture or pepper jack for some heat. Mixing cheeses is fun too! Combine sharp cheddar with creamy gouda or tangy feta for a unique twist. The cheese mix will take your stuffed potatoes to the next level, creating a flavor explosion. For more tips and the complete recipe, check out the [Full Recipe]. To keep your stuffed potatoes fresh, let them cool first. Once cool, wrap each potato in plastic wrap. Place them in an airtight container. This will help keep them soft and tasty. Store them in the fridge for up to three days. When reheating, use the oven to keep the skin crisp. Heat at 350°F for about 15-20 minutes. You can also use a microwave, but the potatoes may lose their texture. If you want to freeze your stuffed potatoes, let them cool completely. Wrap each one tightly in plastic wrap. Place them in a freezer-safe bag or container. This way, they can last up to three months in the freezer. To thaw, move them to the fridge overnight. For reheating, bake them at 350°F for about 30-40 minutes. Make sure they are heated all the way through. Enjoy the flavors just like fresh! For the full recipe, check out the Broccoli Cheddar Stuffed Potatoes preparation steps. Yes, you can make these stuffed potatoes ahead. To prepare in advance, follow these steps: - Bake the potatoes and let them cool. - Prepare the filling and store it separately. - Keep both in the fridge for up to two days. When ready to eat, assemble and bake. This way, you keep the flavor fresh and the texture great. These stuffed potatoes pair well with many sides. Here are some great options: - A simple green salad for freshness. - Roasted vegetables for a colorful plate. - Garlic bread for a hearty meal. - A light soup, like tomato or vegetable, for warmth. For drinks, try lemonade or iced tea. They balance the rich flavors nicely. Absolutely! The leftover filling is versatile. Here are some fun ideas: - Use it in a pasta bake for a creamy twist. - Spread it on toast for a quick snack. - Mix it into scrambled eggs for a tasty breakfast. - Stuff it in bell peppers and bake for a new dish. These ideas help you waste less and enjoy more! Broccoli Cheddar Stuffed Potatoes are easy to make and fun to enjoy. We covered all the steps, from choosing the best potatoes to the perfect filling. Remember, cooking is about getting it right for you. Adjust the recipe, use what you like, and impress your friends. Try new flavors and sides to keep it fresh. With storage tips, you can enjoy leftovers too. Have fun cooking!

Broccoli Cheddar Stuffed Potatoes Flavorful and Easy

Looking for a tasty and easy meal? You’re in the right place! Broccoli Cheddar Stuffed Potatoes bring comfort food to

- 1 pound large shrimp, peeled and deveined - 4 tablespoons unsalted butter - 4 cloves fresh garlic, finely minced - Zest and juice of 1 large lemon - 1 teaspoon red pepper flakes - Salt, to taste - Freshly ground black pepper, to taste - Fresh parsley, finely chopped, for garnish - Lemon wedges, for serving You need large shrimp for this dish. They bring a nice texture. Use fresh garlic for the best flavor. The lemon zest adds brightness, while the juice keeps it zesty. Red pepper flakes give it a little kick. Always season with salt and pepper to taste. Fresh parsley adds a pop of color and freshness. Serve with lemon wedges for extra zest. - White wine or chicken broth - Different herbs, like thyme or basil - Garlic powder If you want more flavor, add white wine or chicken broth. These liquids create a nice sauce. You can also use different herbs to switch things up. Thyme or basil can add new notes. Garlic powder is another option if you like garlic flavor. Feel free to mix and match these options to suit your taste. For the full recipe, check out the [Full Recipe]. To start, heat a large skillet over medium heat. Add the unsalted butter. Watch it closely as it melts. You want it to foam but not brown. This keeps the taste fresh and light. Next, add the minced garlic and red pepper flakes. Sauté for about one minute. Stir constantly so the garlic stays golden. Avoid browning the garlic for the best flavor. Now it’s time for the shrimp! Carefully add them to the skillet. Make sure they are in a single even layer. This helps them cook evenly. Season them with salt and black pepper to your taste. Let the shrimp cook for 2-3 minutes. Watch for them to turn pink and opaque on one side. Once that happens, gently flip each shrimp. This will cook the other side perfectly. It’s time to add that bright flavor! Pour in the freshly squeezed lemon juice. Add the lemon zest over the shrimp too. Cook for another 2-3 minutes. This will ensure your shrimp is fully cooked and still juicy. Once done, take the skillet off the heat. Sprinkle freshly chopped parsley on top. This adds a pop of color and flavor. Serve the shrimp hot with lemon wedges on the side. Guests can squeeze extra lemon juice on their dish for more zing. For the full recipe, check out the section above! To pick fresh shrimp, look for these signs: - Clear eyes: They should be bright and clear. - Firm texture: Shrimp should feel firm, not mushy. - Fresh smell: There should be no strong fishy odor. - Color: For raw shrimp, a slight sheen is ideal. You can buy shrimp at local fish markets or grocery stores. Always ask for wild-caught shrimp when possible, as they often taste better. Overcooking shrimp can ruin the dish. Here are some tips: - Cook shrimp just until they turn pink and opaque. - Use medium-high heat to cook them quickly. - Keep an eye on the time; they usually take 4-6 minutes total. This timing helps keep them juicy and tender. Pair Lemon Garlic Butter Shrimp with these sides: - Garlic bread: Great for sopping up the sauce. - Steamed vegetables: Broccoli or asparagus work well. - Rice or pasta: They help balance the meal. For wine, a crisp white like Sauvignon Blanc complements shrimp nicely. Enjoy! {{image_4}} To make your dish spicy, simply adjust the heat. You can add more red pepper flakes to the shrimp. If you want more flavor, try using cayenne pepper or chili powder. Both add warmth without overpowering the lemon. You can turn this dish creamy by adding heavy cream. This gives the sauce a rich texture. To make this version, you need: - 1 cup heavy cream - 1 tablespoon lemon juice - 1 teaspoon garlic powder Add the cream after cooking the shrimp and let it simmer for a few minutes. Stir well to mix the flavors. This results in a smooth and luscious sauce that clings to the shrimp perfectly. To change this dish into a pasta meal, simply toss cooked pasta with the shrimp. I recommend using linguine or fettuccine for a great pairing. You’ll also need: - 8 ounces of pasta - 1/2 cup pasta water - Additional lemon zest Cook the pasta according to the package. Drain and reserve some pasta water. Add the shrimp, pasta, and some of the water to the skillet. Toss everything together and add lemon zest for extra flavor. This makes a wonderful and hearty meal that feels special. For the full recipe, check out the [Full Recipe]. After you make lemon garlic butter shrimp, you may have some leftovers. Here are some best practices for storing them: - Let the shrimp cool to room temperature. - Place leftovers in an airtight container. - Use a glass or plastic container with a tight lid. If you want to keep shrimp for a longer time, freezing is a great option. Here are some tips: - Wrap the shrimp tightly in plastic wrap. - Place them in a freezer-safe bag. - Squeeze out as much air as possible before sealing. To reheat shrimp without losing texture: - Thaw in the fridge overnight. - Heat gently in a skillet over low heat. Cooked shrimp can last in the fridge for a few days. Here’s what you need to know: - Leftovers will stay fresh for about 3 days in the fridge. - If they smell sour or look slimy, it’s best to throw them away. Storing your shrimp properly helps keep them tasty and safe to eat. For the full recipe, check out the details above. For this recipe, I recommend using large shrimp. Fresh shrimp always tastes best, but frozen shrimp works too. Just make sure to thaw it properly. When choosing size, go for 16-20 count shrimp. They are big enough to hold the flavor of the lemon garlic butter well. Yes, you can prepare shrimp in advance. Cook and chill the shrimp, then store it in the fridge. Reheat it gently in a skillet with a bit of butter. This keeps it tasty without overcooking. To make this dish low-carb, skip any breading or pasta. Instead, serve it over zucchini noodles or cauliflower rice. You can also use avocado oil instead of butter for a keto-friendly fat option. If you're looking for a vegetarian option, try using plant-based proteins like tofu or tempeh. Marinate them in lemon juice and garlic before cooking. This gives them a similar flavor profile to the shrimp. You can also use mushrooms for a meaty texture. For the full recipe, check the link provided. This blog covered how to make Lemon Garlic Butter Shrimp. We looked at essential ingredients, like fresh shrimp and garlic, along with key cooking steps. I shared tips for selecting shrimp, avoiding overcooking, and storing leftovers. You can also explore variations, such as a spicy version or shrimp pasta. Remember to enjoy this dish fresh, but feel free to get creative! With these insights, you can impress anyone at your next meal. Cooking shrimp can be simple and delicious. Try it, and make it your own!

Lemon Garlic Butter Shrimp Quick & Tasty Recipe

If you’re craving a quick and tasty meal, look no further! Lemon Garlic Butter Shrimp is simple, tasty, and ready

To make Maple Pecan Granola, you need a few simple ingredients. Here’s what you'll need: - 3 cups rolled oats - 1 cup pecans, coarsely chopped - 1/2 cup almond slivers - 1/4 cup pumpkin seeds - 1/2 cup pure maple syrup - 1/4 cup coconut oil, melted - 1 teaspoon pure vanilla extract - 1 teaspoon ground cinnamon - 1/2 teaspoon sea salt - 1/2 cup dried cranberries (optional) These ingredients come together to create a crunchy, sweet, and healthy granola. The oats provide fiber, while the nuts and seeds add protein and healthy fats. The maple syrup gives it that delightful sweetness, making it a perfect snack or breakfast option. You can even customize it by adding your favorite dried fruits. I recommend checking out the Full Recipe for Maple Pecan Granola Delight to get all the details you need. First, set your oven to 350°F (175°C). This is the perfect temperature for baking granola. Line a large baking sheet with parchment paper. This step helps keep the granola from sticking and makes cleanup easy. In a big mixing bowl, add the rolled oats, chopped pecans, almond slivers, and pumpkin seeds. Stir these dry ingredients together. Make sure they are well mixed. This ensures every bite is packed with flavor and crunch. In another bowl, mix the pure maple syrup, melted coconut oil, vanilla extract, ground cinnamon, and sea salt. Whisk these wet ingredients until smooth. This mixture adds sweetness and binds the granola together. Pour the wet mixture over the dry ingredients. Use a spatula or wooden spoon to coat all the dry ingredients evenly. Spread the mixture on the baking sheet in an even layer. Bake it for 20-25 minutes. At the 12-minute mark, stir gently. This helps it bake evenly. Look for a golden brown color and a sweet aroma while it bakes. Once baked, take the pan out of the oven. Let it cool completely on the baking sheet. As it cools, the granola will become crisp. After it cools down, break it into clusters. If you want, fold in dried cranberries at this step for added flavor. Transfer the granola to an airtight container. It will stay fresh for up to two weeks. Store it in a cool, dry place. Enjoy it with yogurt, fresh fruit, or as a snack. For the full recipe, refer to the earlier sections. To achieve perfect granola, follow these simple tips. First, ensure your oven is preheated to 350°F (175°C). This helps the granola bake evenly. Spread the mixture in a thin layer on the baking sheet. A thick layer may bake unevenly. Stir the granola halfway through the baking time. This promotes even browning. Keep an eye on it during the last few minutes. Granola can go from golden to burnt quickly. You can easily swap ingredients based on what you have. If you need a nut-free option, use seeds instead of nuts. Pumpkin seeds or sunflower seeds work great. Maple syrup can be replaced with honey or agave nectar. If you want a different flavor, try using almond or coconut extract instead of vanilla. You can even add spices like nutmeg or ginger for a twist. Granola is super versatile! You can serve it in many ways. Try it with yogurt and fresh fruit for breakfast. It makes a tasty snack on its own, too. For a fun dessert, sprinkle it on ice cream. You can also mix it into smoothies for added crunch. The options are endless, so get creative with your servings. {{image_4}} You can easily make this granola nut-free. Just skip the pecans and almond slivers. Replace them with seeds like sunflower or hemp. This way, you keep the crunch but avoid nuts. The flavor from maple syrup and cinnamon still shines. It's a great option for those with nut allergies. If you love chocolate, add some chocolate chips! After baking, sprinkle in your favorite dark or milk chocolate chips. Stir gently to mix them in without breaking the granola. The warm granola will melt the chips slightly, creating a delicious treat. This adds a sweet twist to the classic recipe. To make this granola gluten-free, use certified gluten-free oats. Most oats are naturally gluten-free, but some may cross-contaminate during processing. Always check the label. You can still enjoy this recipe while staying gluten-free. The taste and texture will remain delightful. Feel free to customize your granola! You can find the full recipe in the previous sections. Enjoy experimenting with flavors and ingredients! Each serving of Maple Pecan Granola offers a wholesome balance of nutrients. Here’s what you get: - Calories: 250 - Protein: 6 grams - Carbohydrates: 30 grams - Fiber: 4 grams - Sugars: 10 grams - Fat: 12 grams This granola packs energy and nutrition. It fuels your day without heavy ingredients. The ingredients in this granola provide great health benefits. Here are some highlights: - Rolled oats: They are rich in fiber. This helps lower cholesterol and supports heart health. - Pecans: These nuts are full of healthy fats. They support brain health and provide antioxidants. - Almonds: Almonds boost vitamin E levels. This vitamin helps keep your skin healthy. - Pumpkin seeds: Packed with zinc, they support your immune system. - Maple syrup: This natural sweetener has minerals like manganese. It provides energy without refined sugars. - Coconut oil: It has healthy fats that can support your metabolism. Each bite is not just tasty but also good for you. Homemade granola beats store-bought options in many ways. Here are some key points: - Ingredients: You control what goes in. No hidden sugars or preservatives. - Freshness: Homemade granola tastes fresh. Store-bought often lacks that true flavor. - Cost: Making your own is often cheaper than buying it. - Customizable: You can add or skip ingredients as you like. This recipe gives you the freedom to create a healthy snack. For the complete guide, check the Full Recipe. Store your homemade granola in an airtight container. This keeps it fresh and crunchy. You can use glass jars or plastic containers with tight lids. Avoid storing it in a warm place. A cool, dry pantry works best. Yes, you can use different nuts or seeds! Almonds, walnuts, or sunflower seeds all work well. Feel free to mix and match to your taste. Just keep the total amount similar to the original recipe. This way, your granola stays balanced. Serve your granola in a bowl with yogurt for a tasty breakfast. You can also add fresh fruit like berries or banana slices. Another option is to enjoy it as a snack on its own. It’s crunchy and satisfying! Homemade granola lasts up to two weeks when stored properly. Keep it in an airtight container to maintain its crunch. If you want it to last longer, you can freeze it. Just thaw and enjoy when you’re ready. You can find maple pecan granola at many grocery stores. Check the cereal aisle or the health food section. If you prefer homemade, I recommend making it yourself for the best flavor. For the full recipe, refer to the recipe section above. It has all the details you need to make this delicious granola at home. Enjoy every crunchy bite! Making maple pecan granola is simple and fun. You need just a few ingredients and steps. Start with oats, nuts, and seeds. Mix in syrup and oil, then bake until golden. Homemade granola is easy to customize too. You can swap ingredients or add yummy chocolate chips. In the end, you can know what’s in your food. This granola is tasty and healthy. Enjoy it in many ways or share it with friends. You made something special!

Maple Pecan Granola Healthy and Simple Recipe

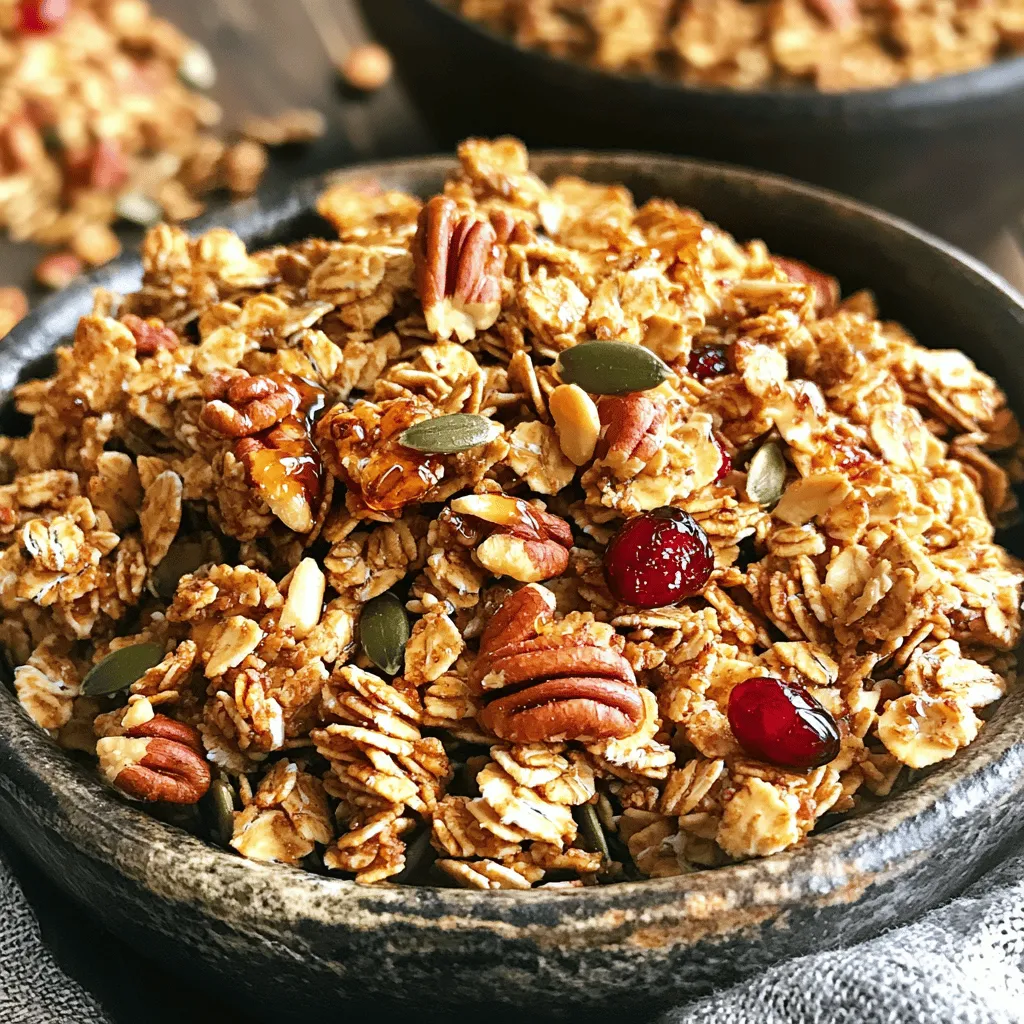
Looking for a healthy and simple snack? This Maple Pecan Granola packs a crunchy punch. I’ll show you how to

- 1 cup red lentils, thoroughly rinsed - 1 can (14 oz) creamy coconut milk - 4 cups vegetable broth (preferably low-sodium) - 1 medium onion, finely chopped - 2 cloves garlic, minced - 1 tablespoon fresh ginger, grated - 2 tablespoons red curry paste - 1 teaspoon ground turmeric - 1 teaspoon ground cumin - Salt and freshly cracked black pepper to taste - 1 medium carrot, diced into small cubes - 1 red bell pepper, diced - 2 cups fresh spinach leaves, washed and drained When I make Coconut Curry Lentil Soup, I love how each ingredient plays a role in creating a warm and cozy dish. The red lentils provide a soft texture and absorb the flavors well. The coconut milk adds creaminess, making the soup rich and satisfying. The aromatics like onion, garlic, and ginger create a beautiful base. They fill your kitchen with an amazing smell that makes you eager to taste the soup. The spices, especially red curry paste, give it that delightful kick. I often add fresh veggies, like diced carrots and bell peppers, for color and crunch. The spinach adds a nice touch of green and nutrition. This blend of ingredients is what makes each bowl a hearty and nourishing meal. For the full recipe, check out the steps to create this amazing dish! - Prepare all vegetables and rinse lentils. - Measure out spices and coconut milk. First, gather your ingredients. Make sure your vegetables are fresh. Rinse the lentils well to remove any dirt. This step is important for cooking. Measure out the spices and coconut milk, so you have everything ready. - Heat olive oil and sauté onions until translucent (approx. 5 minutes). - Add garlic and ginger, sauté for 1 minute. - Incorporate red curry paste, turmeric, and cumin, cooking for 2 minutes. In a large pot, heat the olive oil over medium heat. Add the finely chopped onion to the pot. Sauté it for about five minutes. You want the onion to turn translucent. This means it is cooked just right. Next, add the minced garlic and grated ginger. Sauté these for one minute. You will smell a lovely aroma. Now, mix in the red curry paste, turmeric, and ground cumin. Cook this for two minutes to enhance the flavors. - Mix in carrot and red bell pepper, cook for 3-4 minutes. Add the diced carrot and red bell pepper to the pot. Stir well and let them cook for about three to four minutes. This will make them tender yet still crisp. - Pour in vegetable broth, bring to a boil, then add lentils. - Cover and simmer for 15 minutes, stirring occasionally. Now pour in the vegetable broth. Bring everything to a rolling boil. Once boiling, add the rinsed lentils. Reduce the heat to medium-low. Cover the pot and let it simmer for about 15 minutes. Stir occasionally to prevent sticking. - Stir in coconut milk and spinach, heat for 5 minutes. - Season with salt and pepper. After the lentils are soft, stir in the creamy coconut milk and fresh spinach. Cook this for another five minutes. You want the spinach to wilt and the soup to heat through. Finally, season with salt and cracked black pepper to taste. - Ladle soup into bowls and garnish with cilantro. Ladle the soup into deep bowls. Finish by garnishing with fresh cilantro. This adds a nice touch and flavor. For a special twist, you can also add a squeeze of lime juice. Enjoy your Coconut Curry Lentil Soup! For the full recipe, see above. - Add a squeeze of lime juice before serving. This brightens the soup. - Use fresh herbs as garnish for additional flavor. Cilantro works wonders here. - Ensure lentils are rinsed thoroughly to reduce cooking time. This makes them cook faster. - Sauté spices well to maximize flavor absorption. This helps bring out the best taste. - Add more vegetable broth for a thinner soup. This will make it lighter and easier to sip. - Stir in additional coconut milk for creaminess. This gives the soup a rich, smooth texture. Enjoy the delightful layers of taste in this Coconut Curry Lentil Soup! For the Full Recipe, check the previous section. {{image_4}} You can add cooked chicken or tofu for extra protein. Both options work well and keep the soup hearty. If you want a different texture, try including chickpeas. They add a nice bite and pair well with the lentils. The red curry paste controls the heat. You can increase or reduce it for your desired spice level. If you like it hot, consider adding fresh chilies for more kick. This gives you control over how spicy you want your soup. Feel free to swap vegetables to suit your taste. Instead of spinach, you can use kale or Swiss chard. These greens add a different flavor and nutrition. You might also try seasonal vegetables like zucchini or butternut squash. They bring a new twist to your soup while keeping it fresh and exciting. For the full recipe, check back to ensure you don't miss any steps! To keep your Coconut Curry Lentil Soup fresh, store it in an airtight container. You can enjoy it for up to 5 days in the refrigerator. This makes it easy to have a quick meal on hand. If you want to save some for later, freezing is a great option. Freeze portions in freezer-safe containers for up to 3 months. When you're ready to enjoy it again, thaw the soup overnight in the refrigerator. This keeps the flavors intact and makes reheating simple. When it's time to eat, gently reheat the soup. You can use the stove or microwave for this. If the soup is too thick, add a bit of broth to adjust the consistency. This will bring your soup back to its creamy, delicious state. You can use different lentils, but red lentils work best for this soup. If you use green or brown lentils, they will need longer cooking times. Red lentils cook fast and break down to create a creamy texture. Yes, this soup is naturally vegan. You can also make it gluten-free by checking the broth and curry paste labels. This means everyone can enjoy it! This soup pairs well with crusty bread, rice, or a side salad. These options add a nice touch and make the meal more filling. To spice it up, increase the amount of red curry paste. You can also add fresh or dried cayenne pepper. Adjust based on your taste for heat. This blog shared a simple and tasty recipe for Coconut Curry Lentil Soup. You learned about the main ingredients, key spices, and fresh veggies. The step-by-step guide helps you prepare a warm, flavorful dish. Plus, I offered tips to enhance flavors and adjust consistency. You can store this soup easily and even make variations to suit your taste. Enjoy experimenting with this recipe. It's a great meal for any day!

Coconut Curry Lentil Soup Hearty and Nourishing Meal

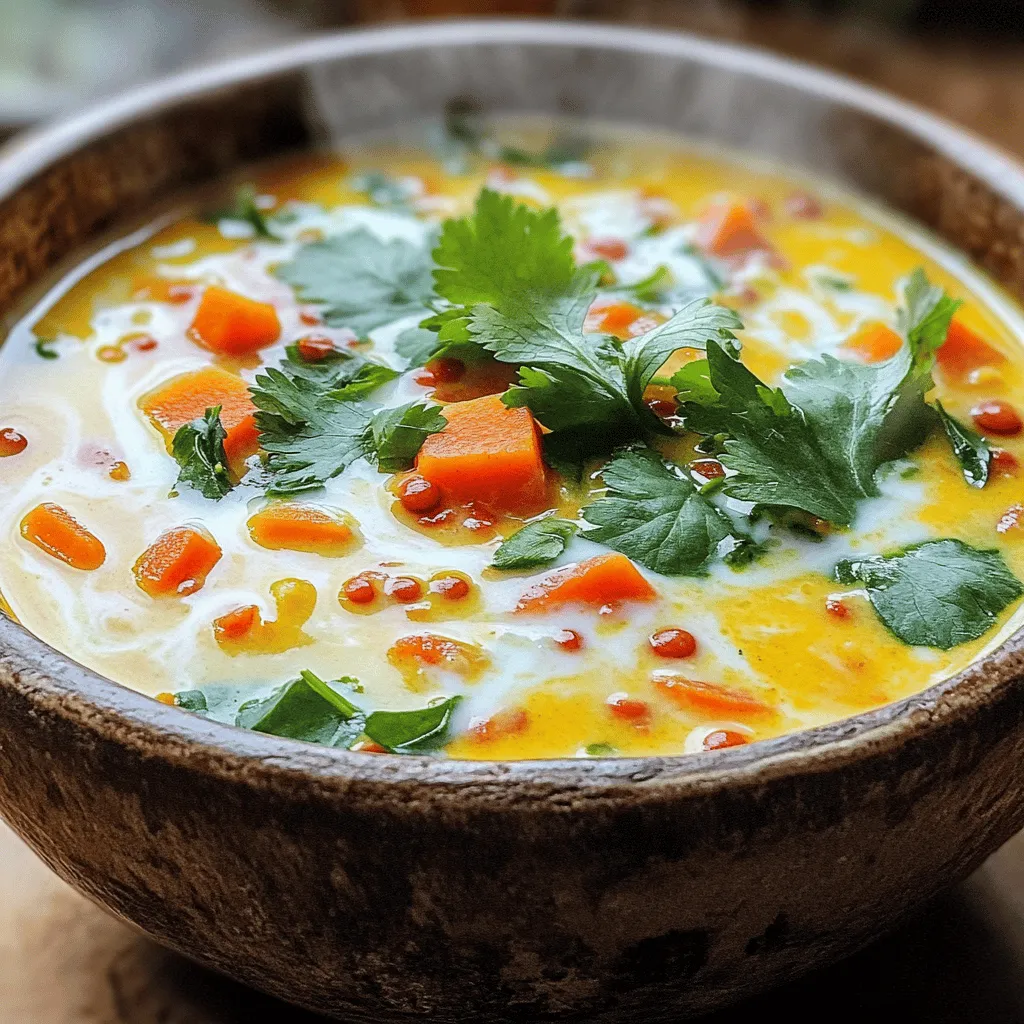
Looking for a warm, filling dish that’s easy to make? Coconut Curry Lentil Soup is the answer! Packed with protein,

- 2 cups fresh strawberries, hulled and sliced - 1 tablespoon granulated sugar - 1 batch of vanilla sponge cake (approximately 4 cups, cubed) - 2 cups whipped cream (can be store-bought or homemade) - 1 cup mascarpone cheese - 1 teaspoon vanilla extract - Fresh mint leaves for garnish - Mixing bowls - Hand mixer or stand mixer - Trifle dish or serving cups - Other berries (blueberries, raspberries) - Flavored extracts (almond, lemon) To create a delightful strawberry shortcake trifle, you need fresh strawberries. I love using ripe strawberries. They add sweetness and a lovely color. You will also need mascarpone cheese. This cheese gives a rich, creamy taste. Vanilla sponge cake is key for a light texture. It soaks up the strawberry juice perfectly. Gather your mixing bowls and a hand mixer or stand mixer. A trifle dish or clear serving cups makes the layers shine. This dessert looks as great as it tastes! You can also add optional ingredients. Other berries like blueberries or raspberries bring extra flavor. Flavored extracts like almond or lemon can enhance the taste. Mix and match to create your perfect trifle! For the full recipe, check out the complete guide. To start, take 2 cups of fresh strawberries. Hull and slice them into small pieces. Place the strawberries in a medium bowl and add 1 tablespoon of granulated sugar. Gently stir the strawberries to coat them in sugar. Let them sit for about 10-15 minutes. This step draws out the natural juices, creating a sweet syrup that adds flavor. Next, we need to make the whipped cream. If you prefer homemade, pour 2 cups of heavy cream into a mixing bowl. Use a hand mixer or a stand mixer to whip the cream until soft peaks form. This should take just a few minutes. After that, fold in 1 cup of mascarpone cheese and 1 teaspoon of vanilla extract. Mix until the mixture is smooth and well combined. This creamy layer is key to your trifle's success. Now it’s time to build your trifle. Grab your trifle dish or some clear serving cups. Start by layering the cubed vanilla sponge cake at the bottom. Spread it out evenly. Next, spoon a generous layer of the macerated strawberries over the cake. Don’t forget to drizzle some of that delicious syrup on top. Then, add a layer of the whipped cream. Spread it evenly over the strawberries. Repeat these layers until you fill the dish. Start with more sponge cake, then another layer of strawberries, and finish with the remaining whipped cream. For a nice touch, create a decorative swirl on top of the cream. Finally, chill your trifle in the refrigerator for at least 1 hour. This time helps the flavors meld together. It also lets the sponge cake soak up the strawberry juices. Just before serving, garnish with fresh mint leaves for color and aroma. You now have a delightful Strawberry Shortcake Trifle to enjoy! For the complete process, refer to the Full Recipe. How to adjust sweetness: Start by tasting your strawberries. If they are tart, add a bit more sugar when macerating them. Mix in a teaspoon at a time until you reach a level you enjoy. You want the strawberries to be sweet but not overly sugary. Enhancing the strawberry flavor: To boost the strawberry flavor, try adding a splash of fresh lemon juice. This will brighten the taste without overpowering it. You can also mix in a bit of strawberry extract for a deeper flavor. Tips for even layers: When adding layers, use a spoon to gently spread each layer evenly. This helps to keep the layers distinct and beautiful. Try to avoid pressing down too hard, or the layers may mix. Best practices for presentation: Use a clear trifle dish or individual cups to show off your colorful layers. This makes the dessert visually appealing. Garnish with fresh mint leaves on top for a pop of color and a fresh scent. Over-mixing the whipped cream: Be careful not to over-mix your whipped cream. Stop as soon as soft peaks form. If you mix too long, it may turn grainy or become butter. Not chilling long enough: Chill your trifle for at least one hour before serving. This step allows the flavors to blend nicely. Skipping this step can lead to a less tasty dessert. {{image_4}} You can mix up your strawberry shortcake trifle with different flavors. A chocolate strawberry shortcake trifle is a fun twist. Just add chocolate cake cubes instead of vanilla. This combination gives a rich, sweet taste. You can also add some chocolate sauce between the layers for extra flavor. Another great option is to add lemon zest to the whipped cream. This brightens the dessert and adds a zing. Simply mix in about a teaspoon of fresh lemon zest when you combine the mascarpone and cream. You can serve the trifle in different ways. Individual cup servings look nice and are easy to handle. Guests can enjoy their own little trifle. If you're hosting a big group, a large family-style dish works great too. Feel free to add other seasonal fruits to the layers. Blueberries and raspberries pair well with strawberries. They add color and flavor. Mix and match your favorite fruits for a unique twist. If you want a lighter version, swap out the mascarpone for Greek yogurt. It gives a creamy texture and adds protein. You could also use low-fat whipped cream to cut down on calories. For the sponge cake, choose low sugar options. You can find many recipes online. These swaps help make a delicious dessert without all the sugar. You can still enjoy the layers and flavors without the guilt. For more details, check the Full Recipe. To keep your strawberry shortcake trifle fresh, store it in the fridge. Use an airtight container or cover the trifle dish with plastic wrap. This keeps the air out and the flavors in. If you use a trifle dish, make sure to cover it well. This helps prevent the whipped cream from drying out. The trifle stays fresh for up to three days in the fridge. After that, the layers may start to break down. Signs of spoilage include a sour smell or liquid pooling at the bottom. If you notice these changes, it’s best to toss it out and make a new batch. You can freeze the layers, but it’s not ideal for the whipped cream. Freezing can change its texture. To freeze the sponge cake and strawberries, layer them in an airtight container. When ready to enjoy, let the layers thaw in the fridge overnight. Reassemble the trifle with fresh whipped cream before serving. This way, you’ll have a delightful dessert that tastes fresh and delicious! To make a simple sponge cake, start with these steps: 1. Gather Ingredients: You need eggs, sugar, flour, and a pinch of salt. 2. Mix Eggs and Sugar: In a bowl, beat eggs and sugar until pale and fluffy. 3. Sift Flour: Gently sift flour and salt into the egg mixture. 4. Fold Together: Carefully fold the flour into the egg mix without deflating it. 5. Bake: Pour the batter into a lined cake pan. Bake at 350°F for 20-25 minutes. This sponge cake forms a soft base for your trifle. Yes, you can prepare the trifle ahead. - Chill Time: Let it chill in the fridge for at least 1 hour for the best flavor. - Storage: Cover the trifle with plastic wrap to keep it fresh. - Make Ahead: You can assemble the trifle one day in advance. It will stay tasty. Just remember, the longer it sits, the softer the cake will become. Absolutely! - Gluten-Free Cake: Use a gluten-free cake mix or blend. - Adjustments: Ensure any other ingredients, like whipped cream, are also gluten-free. - Check Labels: Always read labels to avoid hidden gluten. These changes let everyone enjoy the trifle. Choosing the right strawberries makes a big difference. - Look for Bright Color: Choose strawberries that are deep red and shiny. - Check for Firmness: They should be firm, not mushy. - Smell Them: Ripe strawberries have a sweet aroma. If they need sweetness, sprinkle a little sugar as you macerate them. You can create a delicious trifle with fresh ingredients like strawberries, mascarpone, and sponge cake. Follow the steps to layer textures and flavors for a stunning dessert. Remember to chill your creation and avoid common mistakes for the best results. Don't forget to explore variations like chocolate or lemon zest for added flair. With these tips, your trifle will impress everyone. Enjoy making this simple yet elegant treat that highlights fresh flavors and creativity!

Strawberry Shortcake Trifle Delightful Layered Dessert

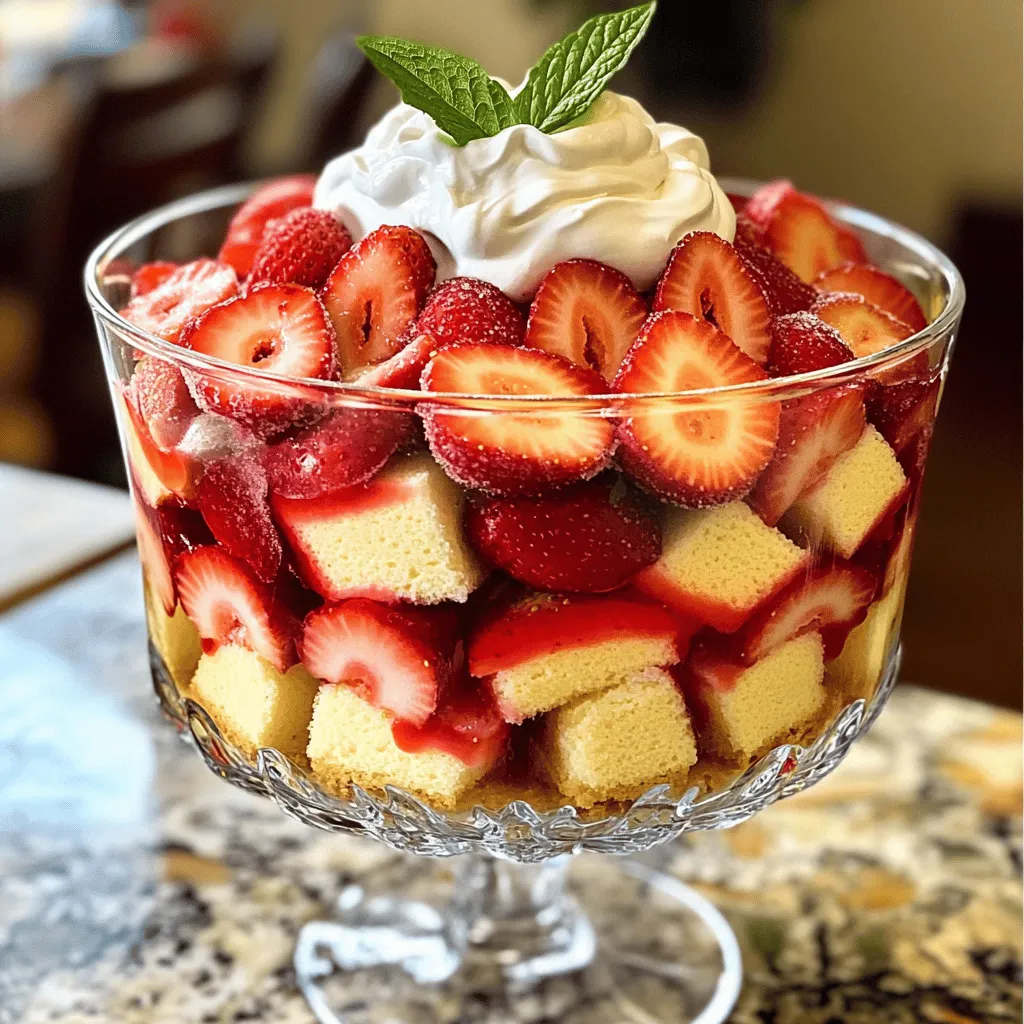
Ready to impress your friends and family with a show-stopping dessert? The “Strawberry Shortcake Trifle” is your answer! This delightful

To make these tasty Blueberry Lemon Overnight Oats, gather these ingredients: - 1 cup rolled oats - 2 cups almond milk (or any dairy-free milk of your choice) - 1 cup fresh blueberries, divided - 1 tablespoon chia seeds - 2 tablespoons maple syrup (or honey if preferred) - Zest of 1 lemon - 2 tablespoons freshly squeezed lemon juice - ½ teaspoon vanilla extract - A pinch of salt You can swap ingredients based on your taste or needs. Here are some options: - Oats: Quick oats work if you prefer a softer texture. - Non-dairy milk: Use coconut milk or soy milk for different flavors. - Sweetener: Agave syrup or stevia can replace maple syrup. - Chia seeds: Flax seeds can be used, but they will change the texture. For the best results, I suggest quality brands. Here are my favorites: - Rolled oats: Look for Bob's Red Mill or Quaker Oats. - Dairy-free milk: Almond Breeze and Silk are great choices. These ingredients make a delightful start to your day. For the full recipe, check out the details above. Enjoy! To make Blueberry Lemon Overnight Oats, start by gathering all your ingredients. In a medium bowl, mix 1 cup of rolled oats with 2 cups of almond milk. Add 1 tablespoon of chia seeds and 2 tablespoons of maple syrup. Next, include the zest of 1 lemon and 2 tablespoons of freshly squeezed lemon juice. Toss in ½ teaspoon of vanilla extract and a pinch of salt. Whisk until everything blends well. This step is key for flavor. After that, fold in half of the fresh blueberries gently. This keeps them whole and bright. Then, take two jars or containers and spoon the oat mix into each one. Layer it evenly to ensure a great texture. When you mix your ingredients, whisk slowly at first. This helps avoid splashes. Make sure all ingredients are well combined before adding the blueberries. This way, every bite will have a nice blend of flavors. If you like a creamier texture, let the oats sit longer before eating. Layering your oats is simple yet important. Pour some of the oat mixture into your jar first. Then, add a layer of blueberries. Repeat this until the jar is full. This gives you a nice look and a mix of flavors. When you eat, you’ll get bites of creamy oats and juicy blueberries together. Enjoy your tasty creation cold for a refreshing start to your day! To make great overnight oats, use rolled oats. They soak well and stay chewy. Always mix your oats with liquid in a bowl first. This helps them absorb moisture evenly. Adding chia seeds boosts nutrition and thickens the mix. Ensure you whisk in the lemon juice and zest for a bright flavor. Refrigerate them overnight for the best results. One mistake is using quick oats. They get mushy and lose texture. Avoid adding too much liquid; it can make your oats runny. Remember to fold in blueberries gently. If you crush them too much, they will make the oats soggy. Lastly, don’t forget to seal your jars. This keeps the oats fresh and prevents spills. For a lovely presentation, top your oats with fresh blueberries and a sprinkle of lemon zest. You can also add a dollop of yogurt for creaminess. A sprig of mint adds color and fresh taste. Serve in clear jars to show off the layers. This makes your breakfast both tasty and pretty. Check out the Full Recipe for more ideas! {{image_4}} You can change the flavor of your blueberry lemon overnight oats easily. Swap blueberries for other fruits like strawberries, raspberries, or peaches. Each fruit brings its own taste and color. You can also mix fruits for a fun twist. Try banana and blueberry or lemon and strawberry. These changes keep breakfast exciting and fresh. If you follow a vegan diet, this recipe is already vegan! Use almond milk or any plant-based milk you enjoy. For a gluten-free option, choose certified gluten-free oats. This way, you can enjoy your oats without worry. You can also make them nut-free by using oat milk. Customize the recipe to fit your needs. Want to boost your overnight oats? Add nuts or seeds! Chopped almonds or walnuts give a nice crunch. You can also add pumpkin seeds or sunflower seeds for extra protein. For a sweet touch, stir in some dried fruit like raisins or cranberries. These add-ins make your breakfast even more nutritious and tasty. For the full recipe, check the Blueberry Lemon Bliss Overnight Oats section! Store any leftover Blueberry Lemon Overnight Oats in an airtight container. Make sure to seal it tightly. This keeps them fresh and prevents odors from other foods in the fridge. These oats are best served cold. If you prefer them warm, you can microwave them. Heat in short bursts, about 15-20 seconds. Stir between intervals to avoid hot spots. Add a splash of almond milk if they seem too thick. You can store these oats in the fridge for up to five days. The flavors meld and get better over time. However, after three days, they may lose some freshness. Enjoy your delicious Blueberry Lemon Overnight Oats within this time for the best taste. For the full recipe, check the earlier section. Yes, you can make these overnight oats ahead of time. They store well in the fridge. I suggest making them a day in advance. This way, the oats absorb the flavors and become creamy. Just grab a jar in the morning for a quick breakfast. If you don’t have chia seeds, don’t worry! You can use flaxseeds or even hemp seeds. Both add a nice texture and some nutrition. If you want a nutty flavor, try crushed nuts like almonds or walnuts. They won’t thicken the oats, but they taste great! To make your overnight oats more filling, add protein. Greek yogurt or nut butter works well. You can also mix in some nuts or seeds for extra crunch and nutrition. Another idea is to increase the oats or add a banana for more fiber and energy. Enjoy your tasty breakfast! In this blog, we covered how to make Blueberry Lemon Overnight Oats. We explored key ingredients, substitutions, and recommended brands to use. I gave you simple steps for preparing the oats and shared tips for the best texture. We also discussed flavor variations and storage tips. Making these oats is easy and fun. With a few tweaks, you can enjoy them your way. I hope you try this simple recipe and enjoy the tasty results. Your breakfast will never be boring again!

Blueberry Lemon Overnight Oats Easy and Tasty Recipe

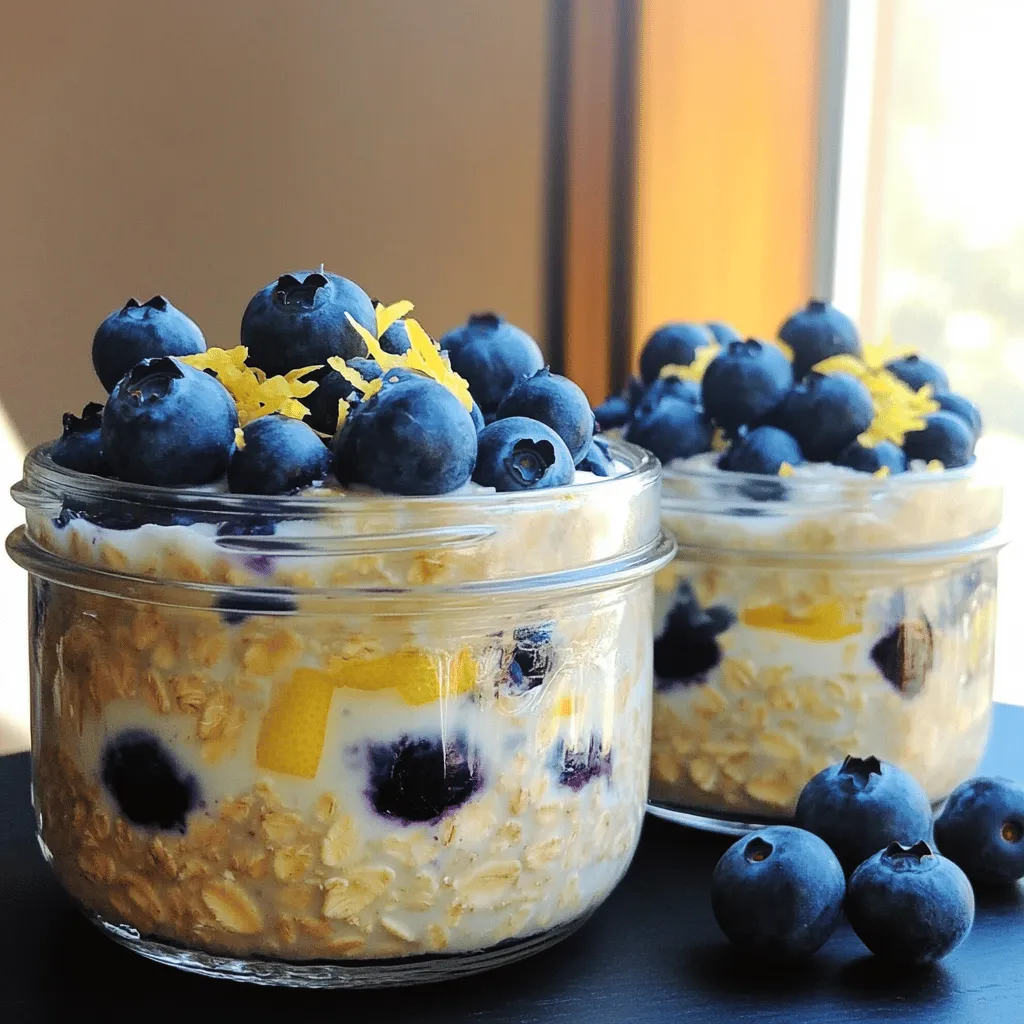
Start your mornings with a burst of flavor! Blueberry Lemon Overnight Oats are easy to whip up, healthy, and delicious.

- Baby carrots or whole carrots - Garlic cloves - Olive oil - Fresh herbs (thyme and rosemary) - Honey - Lemon zest - Sea salt and black pepper - Baking sheet - Mixing bowl - Whisk When I make Garlic Herb Roasted Carrots, I love using baby carrots for their sweetness and tenderness. If you can’t find them, whole carrots work too. Just cut them into sticks. Fresh garlic adds a strong flavor that pairs well with the carrots. Olive oil is key for roasting. It helps the carrots caramelize and get that golden color. I also like to use fresh thyme and rosemary. They bring a lovely herbal note that elevates the dish. Honey adds a hint of sweetness, while lemon zest gives a fresh kick. Don't forget sea salt and black pepper for seasoning. For equipment, a simple baking sheet works great. A mixing bowl is perfect for making the marinade. You will need a whisk to blend the flavors well. This recipe is all about using quality ingredients. They make the dish shine. For the full recipe, check out the section below. - Preheat the oven to 425°F (220°C). - In a large bowl, mix minced garlic, olive oil, honey, thyme, rosemary, lemon zest, salt, and pepper. Whisk until well combined. This mix will create a fragrant marinade. - Add the baby carrots to the bowl. Toss them in the marinade until they are well coated. This step ensures every carrot gets that amazing flavor. - Spread the coated carrots on a baking sheet lined with parchment paper. Make sure they are in a single layer. This helps them roast evenly. - Place the baking sheet in the oven. Roast for 20-25 minutes, turning the carrots halfway through. You’ll know they are ready when they are tender with a nice caramelized look. For the full recipe, check out the Garlic Herb Roasted Carrots section. To get the best taste from your Garlic Herb Roasted Carrots, the right temperature is key. I recommend using a high heat of 425°F (220°C). This will help the carrots caramelize and develop sweet flavors. Arrange your carrots in a single layer on the baking sheet. This allows them to roast evenly and get that nice golden color. You can take the flavor to the next level by adding different herbs and spices. Consider using dill or parsley for a fresh twist. If you want a sweeter touch, add more honey or cut back if you prefer a savory taste. Each change gives the dish a new vibe! How you serve the dish matters. For a beautiful look, place the roasted carrots on a colorful platter. A sprinkle of lemon zest adds brightness. You can also garnish with a fresh sprig of rosemary. These simple touches make your dish not only tasty but also lovely to see. For the full recipe, check the section above. {{image_4}} You can swap baby carrots for parsnips or sweet potatoes. These vegetables add a different taste and texture. Mixing them with carrots makes a colorful dish. You can also combine them with other roasted vegetables. Think about bell peppers, zucchini, or onions. This adds more flavors and makes your meal more exciting. To change the taste, add spices like cumin or paprika. These spices give a warm kick to your dish. You can also try citrus zest. Orange or lime zest can brighten the flavors. Each option brings a new twist, making every meal unique. If you need a gluten-free dish, this recipe is already safe. You can enjoy it without worry. For vegan options, replace honey with maple syrup or agave. This keeps the sweetness while fitting your diet. Feel free to explore these adjustments to fit your needs. After cooking, let the carrots cool down at room temperature. This step helps to avoid condensation in storage. Once cooled, place the carrots in airtight containers. Glass or plastic containers work well. You can also use resealable plastic bags. Just remove as much air as possible before sealing. To reheat, use the oven for best results. Preheat it to 350°F (175°C). Spread the carrots on a baking sheet and heat for about 10 to 15 minutes. This method keeps the carrots tasty and crispy. You can also use a microwave, but be careful. Heat in short bursts of 30 seconds to avoid sogginess. Yes, you can freeze roasted carrots! To do this, let them cool fully first. Then, spread them out on a baking sheet and freeze for an hour. This prevents them from sticking together. After that, transfer the carrots to a freezer-safe bag. Label it with the date, and they can last up to three months. For the best taste, use them sooner rather than later. To clean carrots, start by rinsing them under cool water. Use a vegetable brush to scrub off any dirt. If you use whole carrots, peel them with a vegetable peeler to remove the skin. For baby carrots, just rinse them well. Make sure they are dry before cooking. Clean carrots help the flavors shine in Garlic Herb Roasted Carrots. To make roasted carrots less sweet, simply reduce the amount of honey in the recipe. You can also add more salt or lemon zest to balance the sweetness. If you want a savory twist, consider adding spices like cumin or smoked paprika. These adjustments can help you achieve the taste you like best. Yes, you can prepare Garlic Herb Roasted Carrots ahead of time. You can marinate the carrots and store them in the fridge for up to 24 hours. When you are ready to cook, just spread them on a baking sheet and roast as directed. This makes meal prep easy and fun, especially when entertaining. Roasting carrots is simple and fun! You learned about choosing fresh ingredients like baby carrots and garlic. The recipe guides you from marinating to roasting at the perfect temperature. Remember to try different herbs and spices for added flavor. You can also mix in other veggies for variety. Enjoy your tasty creation and share it with loved ones! Eating well can be easy and delicious. Now, get cooking and make your kitchen come alive!

Garlic Herb Roasted Carrots Flavorful and Simple Dish

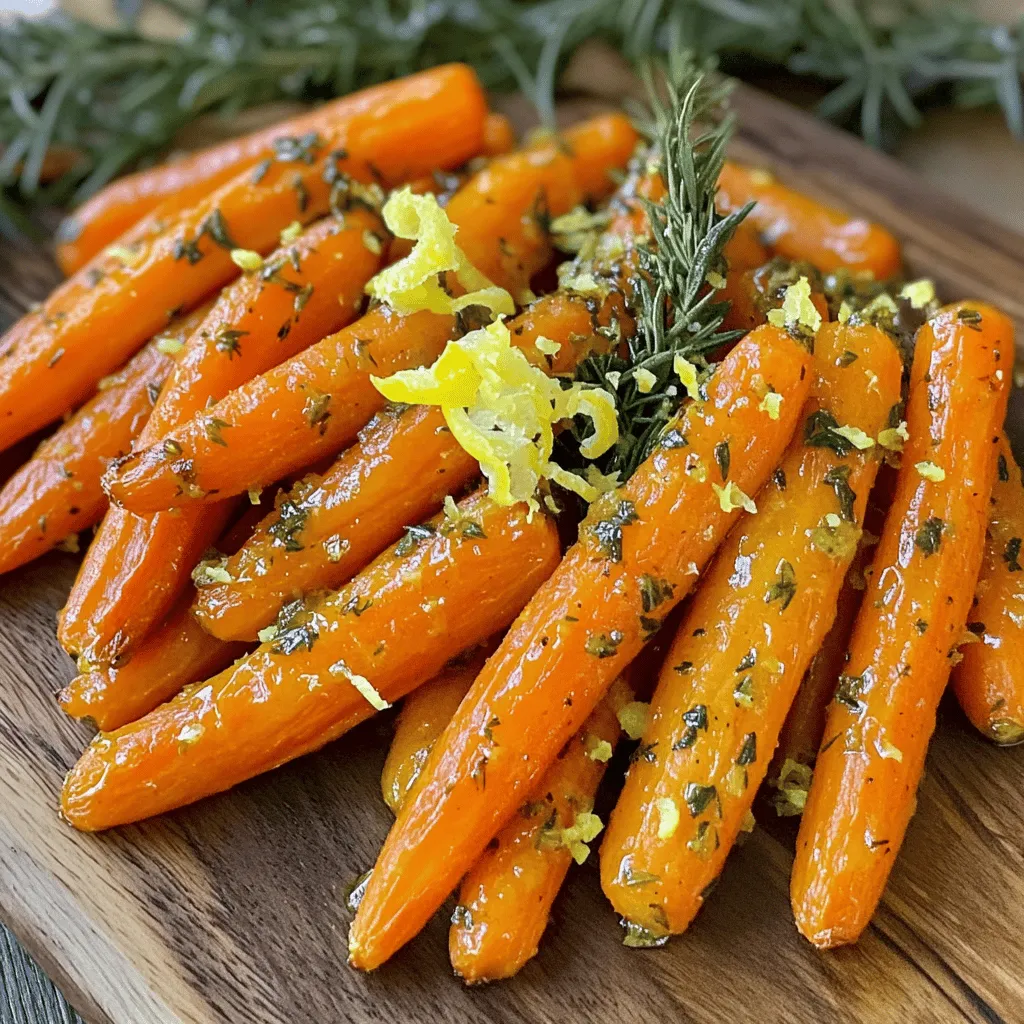
Looking for a simple way to elevate your meals? Try my Garlic Herb Roasted Carrots! This dish pairs sweet, tender

- 400g spaghetti - 6 cloves garlic, thinly sliced - ½ cup extra virgin olive oil - 1 teaspoon red pepper flakes - Zest of 1 lemon - 2 tablespoons freshly squeezed lemon juice - ¼ cup fresh parsley, finely chopped - Salt, to taste - Freshly grated Parmesan cheese (optional) When I make spaghetti aglio e olio, I love how simple it is. The main ingredients shine through. You only need four key components to create this classic dish. Let’s break them down. First, the spaghetti. I use 400g of good-quality spaghetti. It holds the sauce well and gives the right texture. Next, garlic is crucial. I slice six cloves thinly. This way, it cooks evenly and releases flavor. Then comes the olive oil. I prefer ½ cup of extra virgin olive oil. It adds richness and a smooth finish. Finally, I add one teaspoon of red pepper flakes. This gives the dish a nice kick. You can adjust this based on your spice level. Now, for the additional flavor enhancers. I add zest from one lemon and two tablespoons of freshly squeezed lemon juice. This brightens the dish. The lemon balances the rich oil and garlic. I also chop ¼ cup of fresh parsley. It adds color and freshness. A little salt to taste enhances the flavors. Lastly, for those who love cheese, I suggest freshly grated Parmesan cheese on top. It’s optional but highly recommended for added flavor. This recipe is quick, easy, and full of taste. For the full recipe, check the section above. Enjoy your cooking! - Fill a large pot with water and add salt. - Bring the water to a boil. - Add 400g of spaghetti to the pot. - Cook until it is al dente, about 8-10 minutes. - Before draining, reserve about 1 cup of the pasta water. - Drain the spaghetti in a colander. - Heat ½ cup of extra virgin olive oil in a skillet over medium heat. - Add 6 cloves of thinly sliced garlic to the oil. - Sauté the garlic until it turns golden brown, about 2-3 minutes. - Stir in 1 teaspoon of red pepper flakes. - Cook for another 30 seconds to infuse the oil. - Toss the drained spaghetti into the skillet with the garlic and oil. - Add the reserved pasta water, zest of 1 lemon, and 2 tablespoons of lemon juice. - Gently toss to mix all the ingredients. - Cook for 1-2 more minutes to allow the pasta to absorb the flavors. - Stir in ¼ cup of finely chopped fresh parsley and season with salt. For the detailed instructions, check out the Full Recipe. - Monitor garlic closely to avoid burning. Garlic cooks fast and can turn bitter. - Adjust red pepper flakes for desired spice level. Start with a little, then add more. - Use high-quality extra virgin olive oil. This makes a big difference in taste. - Incorporate freshly grated cheese for richness. It adds a creamy texture and flavor. - Serve in a large, shallow dish. It makes a beautiful centerpiece for your table. - Garnish with parsley and lemon wedges for visual appeal. This adds color and freshness. For a full experience, check the Full Recipe and enjoy your cooking adventure! {{image_4}} You can make your spaghetti Aglio e Olio heartier by adding proteins. Shrimp, chicken, or bacon can enhance the dish. Just cook the protein separately and add it to the pasta before serving. Shrimp cooks quickly and adds a lovely flavor. Chicken, sliced thinly, offers a hearty touch. Bacon gives a smoky taste that pairs well with garlic. For a vegan version, simply omit the Parmesan cheese. You can also use plant-based cheese. Nutritional yeast is a great substitute if you want a cheesy flavor without dairy. It adds a nutty taste and packs a nutritious punch. You can boost the nutrition and taste by adding cherry tomatoes or spinach. Cherry tomatoes bring a sweet burst of flavor. Just cut them in half and toss them in with the garlic. Spinach wilts nicely when mixed with hot pasta. It adds color and extra vitamins. These simple additions can transform your dish into something special. For the full recipe, check out [Full Recipe]. Store your spaghetti aglio e olio in an airtight container for up to 3 days. This keeps it fresh and tasty. Make sure it cools down before you seal the container. To reheat, gently warm it on the stove. Add a splash of water to restore moisture. This helps avoid dry pasta. Stir it often to heat evenly. You can freeze spaghetti aglio e olio for up to a month. Use freezer-safe containers to keep it fresh. However, I recommend enjoying it fresh. The flavors shine best when made and eaten right away. Look for good-quality durum wheat spaghetti for the best texture. Durum wheat creates a firm noodle that holds sauce well. This makes each bite satisfying. You can find it in most stores. Yes, but it's best served fresh for optimal flavor and texture. If you make it early, the garlic flavor may fade. The pasta can also become gummy. If you must prepare it ahead, store it well. Reheat gently to bring back some taste. Use less olive oil while ensuring enough for flavor, or incorporate more pasta water. Reducing the oil helps keep it light. Adding pasta water gives moisture without adding fat. This way, you still get that lovely taste without feeling heavy. This blog post explored a simple, delicious Aglio e Olio recipe. We covered the main ingredients and added flavor enhancers. You learned how to cook the spaghetti and prepare the garlic oil. We shared tips for perfect sautéing and creative variations. Lastly, I discussed storage and reheating methods. Enjoy making this dish with friends and family. The fresh flavors can brighten any meal. Keep experimenting to find your favorite twist!

Savory Spaghetti Aglio e Olio Quick and Easy Recipe

Are you craving a quick and delicious meal? Spaghetti Aglio e Olio is packed with flavor and super easy to

Older posts
Newer posts
← Previous Page1 … Page5 Page6 Page7 Page8 Next →

dsad

© 2025 tastymomrecipes • Built with GeneratePress

Our Policies

  • Copyright Policy
  • Cookie Policy
  • GDPR Policy
  • Privacy Policy
  • Disclaimer
  • Terms Of Use

More Information

  • Home
  • About
  • Contact
  • Appetizers
  • Dessert
  • Dinner
  • Drinks
©2025, tastymomrecipes About Back To Top