Cauliflower Buffalo Wings Crispy and Flavorful Treat

If you’re craving a tasty snack that’s both crispy and flavorful, you need to try these Cauliflower Buffalo Wings! This veggie twist on the classic chicken dish packs a punch of spice without the guilt. With just a few simple ingredients and easy steps, you can create a scrumptious treat perfect for game day or a fun appetizer. Let’s dive into this delicious recipe and transform your snack game today!

Ingredients

Main Ingredients

For the perfect cauliflower buffalo wings, you’ll need these key items:

– 1 medium cauliflower head, broken into bite-sized florets

– 1 cup all-purpose flour

– 1 cup almond milk (or any plant-based milk of your choice)

– 1 cup buffalo sauce (store-bought or homemade)

– 2 tablespoons unsalted butter or vegan butter, melted

Additional Ingredients

To enhance the flavor and presentation, gather these extras:

– 1 teaspoon garlic powder

– 1 teaspoon onion powder

– 1 teaspoon smoked paprika

– 1/2 teaspoon cayenne pepper (adjust for spice)

– 1/2 teaspoon salt

– 1/2 teaspoon freshly ground black pepper

– Fresh parsley, finely chopped (for garnish)

– Crunchy celery sticks (for serving)

– Creamy ranch or tangy blue cheese dressing (for dipping)

These ingredients create a crispy and flavorful treat. For the full recipe, check the detailed steps outlined earlier. Enjoy cooking!

Step-by-Step Instructions

Preparing the Cauliflower

1. Preheat your oven to 450°F (232°C). This high heat helps make the wings crispy.

2. Prepare a baking sheet by lining it with parchment paper. This keeps the wings from sticking.

3. In a large bowl, mix the dry ingredients. Combine 1 cup of all-purpose flour, 1 teaspoon of garlic powder, 1 teaspoon of onion powder, 1 teaspoon of smoked paprika, 1/2 teaspoon of cayenne pepper, 1/2 teaspoon of salt, and 1/2 teaspoon of black pepper. Whisk these until they are well mixed.

Coating and Baking

4. Gradually pour in 1 cup of almond milk. Whisk until you have a smooth batter without lumps. It should be thick enough to coat the cauliflower.

5. Take each cauliflower floret and dip it into the batter. Make sure each piece is well-coated. Then, place the battered florets on the baking sheet. Space them out so they cook evenly.

Finishing Touches

6. Bake the cauliflower wings for about 20 minutes. They should turn golden brown and crispy.

7. While the wings bake, prepare your buffalo sauce. In a bowl, mix 1 cup of buffalo sauce with 2 tablespoons of melted butter. Stir well to blend the flavors.

8. After 20 minutes, take the baking sheet from the oven. Toss the baked cauliflower in the buffalo sauce, coating each piece well.

9. Return the wings to the oven and bake for another 10-15 minutes. This helps the sauce stick and makes the wings extra crispy.

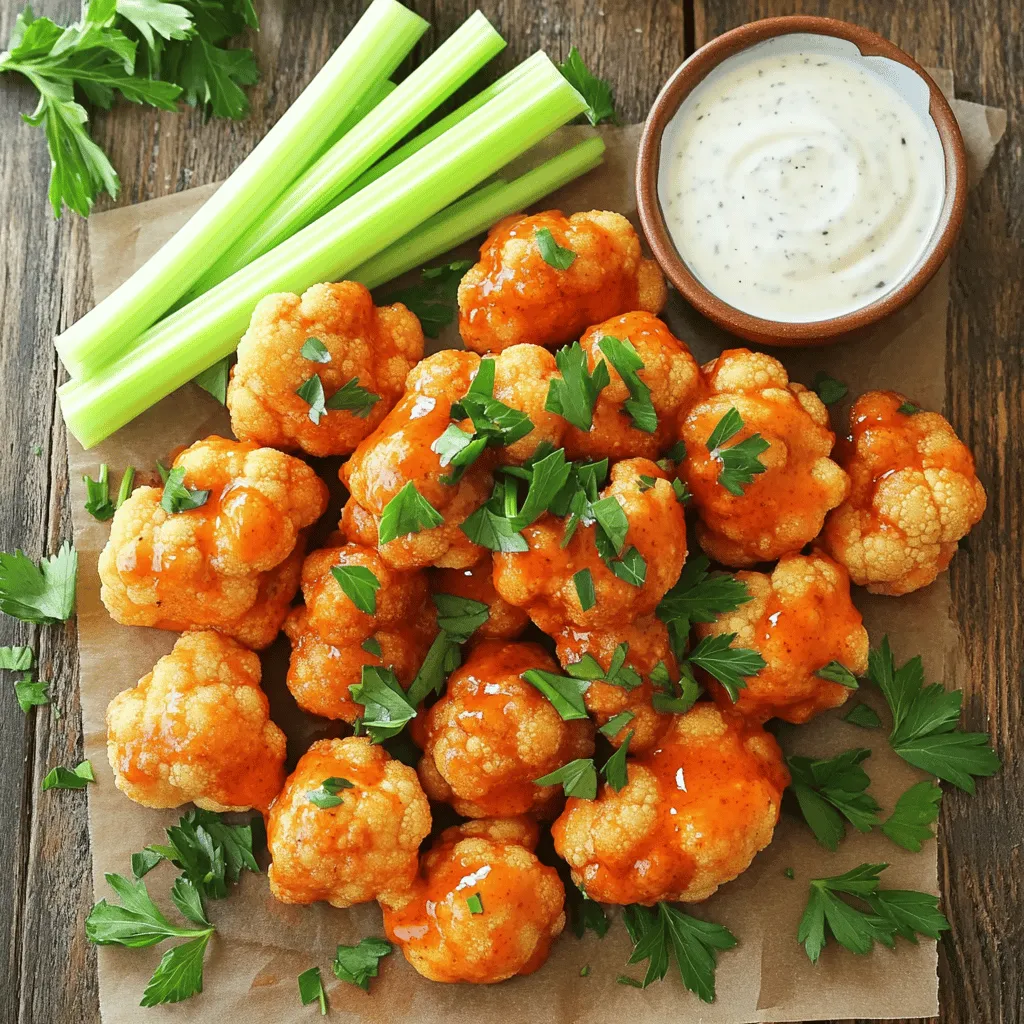
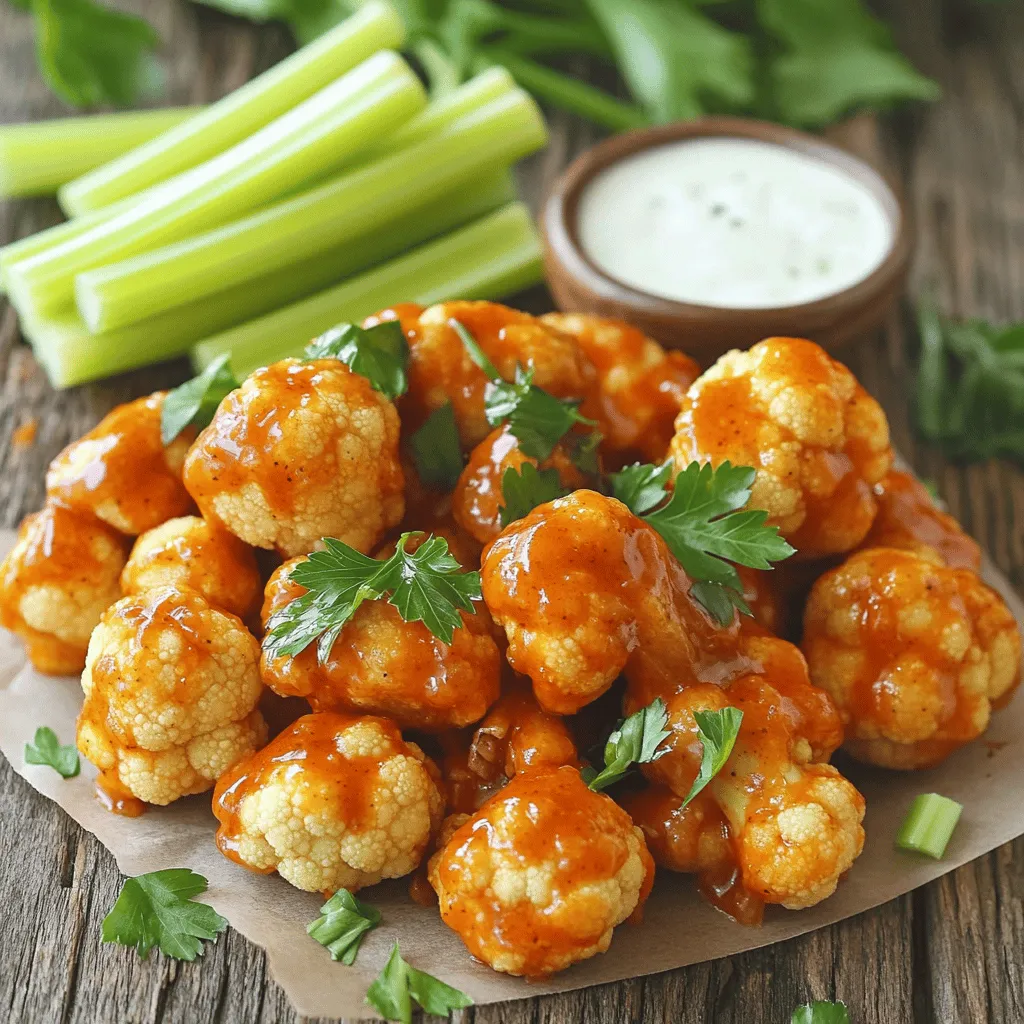
10. Once done, take the wings out and garnish with fresh parsley. Serve them with crunchy celery sticks and your favorite dipping sauce.

For the full recipe, check the earlier section. Enjoy your crispy and flavorful Cauliflower Buffalo Wings!

Tips & Tricks

Perfecting the Texture

Achieving a crispy exterior

To get that perfect crunch, you need a few key steps. First, make sure to coat each cauliflower floret well in the batter. A thick layer helps it crisp up nicely in the oven. Bake at a high temperature, around 450°F (232°C). This high heat creates a wonderful crust.

How to avoid sogginess

To keep the wings from getting soggy, space them out on the baking sheet. This allows hot air to circulate around each piece. Also, make sure to let them cool slightly after baking. This helps maintain their crispiness.

Flavor Enhancements

Using homemade versus store-bought buffalo sauce

Homemade buffalo sauce often tastes fresher and brighter. You can control the heat level and flavor profile. If you’re short on time, store-bought sauce works great too. Just ensure it’s a brand you love.

Adjusting spice levels to personal preference

Feel free to tweak the amount of cayenne pepper in the batter. Start with a small amount and taste as you go. This way, you can find the perfect balance of heat for your palate. If you’re feeling adventurous, try adding different spices to the batter for a unique twist.

Each of these tips can help elevate your Cauliflower Buffalo Wings. For the full recipe, check out the complete guide.
Variations

Alternative Sauces

You can find many kinds of buffalo sauce. Some are mild, while others pack a punch. For a twist, try a honey buffalo sauce. It gives a sweet touch that balances the heat. You can also mix in some garlic or herbs for extra flavor. If you enjoy a tangy kick, consider a sriracha or chipotle sauce. These add a new depth and heat level to your cauliflower wings.

Additional Ingredients

You can add more than just cauliflower to your dish. Try mixing in carrots or broccoli florets. This adds color and nutrients to your meal. You might even toss in some bell peppers for sweetness.

Seasoning is also key to flavor. Consider adding Italian herbs or smoked paprika for a different taste. You can even sprinkle some nutritional yeast for a cheesy flavor without dairy. These small changes can make your cauliflower wings even more exciting and tasty.

Storage Info

Storing Leftovers

To keep your cauliflower buffalo wings fresh, store them in an airtight container. Place a paper towel in the container to absorb excess moisture. This helps maintain their crispy texture. You can store them in the fridge for up to three days. After that, they may lose their taste and texture.

Reheating Tips

When it comes to reheating, I recommend using the oven. Preheat it to 350°F (175°C). Place the wings on a baking sheet lined with parchment paper. Bake for about 10-15 minutes until they are hot and crispy again. The microwave can be quick, but it often makes the wings soggy. If you must use the microwave, heat them in short bursts. Check often to avoid overcooking.

Follow these steps to enjoy every bite of your cauliflower buffalo wings from the fridge! For the full recipe, check the earlier section.

FAQs

What are Cauliflower Buffalo Wings?

Cauliflower buffalo wings are a tasty, plant-based snack. They mimic traditional buffalo wings but use cauliflower instead of chicken. This dish fits well in vegetarian and vegan diets. They are crispy, spicy, and full of flavor. You can enjoy them as an appetizer or a main dish.

Can I make this recipe gluten-free?

Yes, you can make this recipe gluten-free! Just swap the all-purpose flour for a gluten-free flour blend. Many brands offer great options. You can also use almond flour or chickpea flour. Both work well and add a nice flavor.

How long do Cauliflower Buffalo Wings last?

Cauliflower buffalo wings last about 3 to 4 days in the fridge. Store them in an airtight container to keep them fresh. If you want to keep them longer, freeze them. They can last up to 3 months in the freezer.

Can I air fry cauliflower wings?

Absolutely! Air frying is a great way to cook cauliflower wings. Preheat your air fryer to 400°F (200°C). Toss the battered cauliflower in the air fryer basket in a single layer. Cook for 10 to 15 minutes. Shake the basket halfway through for even cooking. They will turn out crispy and delicious!

What dips pair well with Cauliflower Buffalo Wings?

Many dips work well with cauliflower buffalo wings. Here are some popular choices:

– Creamy ranch dressing

– Tangy blue cheese dressing

– Cool cucumber yogurt dip

– Spicy sriracha mayo

Feel free to mix and match! Enjoy your meal with crunchy celery sticks on the side. For the full recipe, check the main content above.

In this post, we explored how to make delicious cauliflower buffalo wings. We covered every step, from preparing the cauliflower to baking and finishing touches. I shared tips for achieving a crispy texture and ways to enhance flavor. We also discussed variations and how to store and reheat leftovers.

Now, you can enjoy a tasty, healthy snack that anyone can love. Get creative with flavors and dips to make this dish your own!
For the perfect cauliflower buffalo wings, you'll need these key items: - 1 medium cauliflower head, broken into bite-sized florets - 1 cup all-purpose flour - 1 cup almond milk (or any plant-based milk of your choice) - 1 cup buffalo sauce (store-bought or homemade) - 2 tablespoons unsalted butter or vegan butter, melted To enhance the flavor and presentation, gather these extras: - 1 teaspoon garlic powder - 1 teaspoon onion powder - 1 teaspoon smoked paprika - 1/2 teaspoon cayenne pepper (adjust for spice) - 1/2 teaspoon salt - 1/2 teaspoon freshly ground black pepper - Fresh parsley, finely chopped (for garnish) - Crunchy celery sticks (for serving) - Creamy ranch or tangy blue cheese dressing (for dipping) These ingredients create a crispy and flavorful treat. For the full recipe, check the detailed steps outlined earlier. Enjoy cooking! 1. Preheat your oven to 450°F (232°C). This high heat helps make the wings crispy. 2. Prepare a baking sheet by lining it with parchment paper. This keeps the wings from sticking. 3. In a large bowl, mix the dry ingredients. Combine 1 cup of all-purpose flour, 1 teaspoon of garlic powder, 1 teaspoon of onion powder, 1 teaspoon of smoked paprika, 1/2 teaspoon of cayenne pepper, 1/2 teaspoon of salt, and 1/2 teaspoon of black pepper. Whisk these until they are well mixed. 4. Gradually pour in 1 cup of almond milk. Whisk until you have a smooth batter without lumps. It should be thick enough to coat the cauliflower. 5. Take each cauliflower floret and dip it into the batter. Make sure each piece is well-coated. Then, place the battered florets on the baking sheet. Space them out so they cook evenly. 6. Bake the cauliflower wings for about 20 minutes. They should turn golden brown and crispy. 7. While the wings bake, prepare your buffalo sauce. In a bowl, mix 1 cup of buffalo sauce with 2 tablespoons of melted butter. Stir well to blend the flavors. 8. After 20 minutes, take the baking sheet from the oven. Toss the baked cauliflower in the buffalo sauce, coating each piece well. 9. Return the wings to the oven and bake for another 10-15 minutes. This helps the sauce stick and makes the wings extra crispy. 10. Once done, take the wings out and garnish with fresh parsley. Serve them with crunchy celery sticks and your favorite dipping sauce. For the full recipe, check the earlier section. Enjoy your crispy and flavorful Cauliflower Buffalo Wings! Achieving a crispy exterior To get that perfect crunch, you need a few key steps. First, make sure to coat each cauliflower floret well in the batter. A thick layer helps it crisp up nicely in the oven. Bake at a high temperature, around 450°F (232°C). This high heat creates a wonderful crust. How to avoid sogginess To keep the wings from getting soggy, space them out on the baking sheet. This allows hot air to circulate around each piece. Also, make sure to let them cool slightly after baking. This helps maintain their crispiness. Using homemade versus store-bought buffalo sauce Homemade buffalo sauce often tastes fresher and brighter. You can control the heat level and flavor profile. If you're short on time, store-bought sauce works great too. Just ensure it's a brand you love. Adjusting spice levels to personal preference Feel free to tweak the amount of cayenne pepper in the batter. Start with a small amount and taste as you go. This way, you can find the perfect balance of heat for your palate. If you're feeling adventurous, try adding different spices to the batter for a unique twist. Each of these tips can help elevate your Cauliflower Buffalo Wings. For the full recipe, check out the complete guide. {{image_4}} You can find many kinds of buffalo sauce. Some are mild, while others pack a punch. For a twist, try a honey buffalo sauce. It gives a sweet touch that balances the heat. You can also mix in some garlic or herbs for extra flavor. If you enjoy a tangy kick, consider a sriracha or chipotle sauce. These add a new depth and heat level to your cauliflower wings. You can add more than just cauliflower to your dish. Try mixing in carrots or broccoli florets. This adds color and nutrients to your meal. You might even toss in some bell peppers for sweetness. Seasoning is also key to flavor. Consider adding Italian herbs or smoked paprika for a different taste. You can even sprinkle some nutritional yeast for a cheesy flavor without dairy. These small changes can make your cauliflower wings even more exciting and tasty. To keep your cauliflower buffalo wings fresh, store them in an airtight container. Place a paper towel in the container to absorb excess moisture. This helps maintain their crispy texture. You can store them in the fridge for up to three days. After that, they may lose their taste and texture. When it comes to reheating, I recommend using the oven. Preheat it to 350°F (175°C). Place the wings on a baking sheet lined with parchment paper. Bake for about 10-15 minutes until they are hot and crispy again. The microwave can be quick, but it often makes the wings soggy. If you must use the microwave, heat them in short bursts. Check often to avoid overcooking. Follow these steps to enjoy every bite of your cauliflower buffalo wings from the fridge! For the full recipe, check the earlier section. Cauliflower buffalo wings are a tasty, plant-based snack. They mimic traditional buffalo wings but use cauliflower instead of chicken. This dish fits well in vegetarian and vegan diets. They are crispy, spicy, and full of flavor. You can enjoy them as an appetizer or a main dish. Yes, you can make this recipe gluten-free! Just swap the all-purpose flour for a gluten-free flour blend. Many brands offer great options. You can also use almond flour or chickpea flour. Both work well and add a nice flavor. Cauliflower buffalo wings last about 3 to 4 days in the fridge. Store them in an airtight container to keep them fresh. If you want to keep them longer, freeze them. They can last up to 3 months in the freezer. Absolutely! Air frying is a great way to cook cauliflower wings. Preheat your air fryer to 400°F (200°C). Toss the battered cauliflower in the air fryer basket in a single layer. Cook for 10 to 15 minutes. Shake the basket halfway through for even cooking. They will turn out crispy and delicious! Many dips work well with cauliflower buffalo wings. Here are some popular choices: - Creamy ranch dressing - Tangy blue cheese dressing - Cool cucumber yogurt dip - Spicy sriracha mayo Feel free to mix and match! Enjoy your meal with crunchy celery sticks on the side. For the full recipe, check the main content above. In this post, we explored how to make delicious cauliflower buffalo wings. We covered every step, from preparing the cauliflower to baking and finishing touches. I shared tips for achieving a crispy texture and ways to enhance flavor. We also discussed variations and how to store and reheat leftovers. Now, you can enjoy a tasty, healthy snack that anyone can love. Get creative with flavors and dips to make this dish your own!
Cauliflower Buffalo Wings

Discover the ultimate Cauliflower Buffalo Wings recipe that packs a punch without sacrificing flavor! This simple yet delicious dish combines crispy cauliflower with a spicy buffalo sauce, making it the perfect appetizer or snack. Follow our easy steps for perfectly baked wings that are sure to impress. Don’t miss out on this tasty plant-based treat—click through to explore the full recipe and get ready to savor every bite!

Ingredients
  

1 medium cauliflower head, broken into bite-sized florets

1 cup all-purpose flour

1 cup almond milk (or any plant-based milk of your choice)

1 teaspoon garlic powder

1 teaspoon onion powder

1 teaspoon smoked paprika (for an extra depth of flavor)

1/2 teaspoon cayenne pepper (adjust based on your spice preference)

1/2 teaspoon salt

1/2 teaspoon freshly ground black pepper

1 cup buffalo sauce (store-bought for convenience or homemade for a personal touch)

2 tablespoons unsalted butter or vegan butter, melted

Fresh parsley, finely chopped (for garnish)

Crunchy celery sticks (for serving)

Creamy ranch or tangy blue cheese dressing (for dipping)

Instructions
 

Begin by preheating your oven to 450°F (232°C). Prepare a baking sheet by lining it with parchment paper or a silicone mat to prevent sticking and facilitate easy cleanup.

    In a large mixing bowl, combine the all-purpose flour, garlic powder, onion powder, smoked paprika, cayenne pepper, salt, and black pepper. Whisk these dry ingredients together until they are thoroughly mixed.

      Gradually pour in the almond milk, whisking as you go to create a lump-free batter. Aim for a consistency that is thick enough to adhere to the cauliflower yet smooth enough to coat without being runny.

        Take each cauliflower floret and dip it into the batter, ensuring a thorough coating. Then, transfer the battered florets to the prepared baking sheet, spacing them out to allow for even cooking.

          Place the baking sheet in the preheated oven and bake the cauliflower wings for approximately 20 minutes, or until they turn a beautiful golden brown and develop a crispy exterior.

            While the cauliflower is baking, prepare the buffalo sauce mixture. In a small bowl, combine the buffalo sauce with the melted butter, stirring well to blend the flavors together.

              After the initial baking time of 20 minutes, remove the baking sheet from the oven. Carefully toss the baked cauliflower wings in the buffalo sauce mixture, ensuring they are thoroughly coated.

                Return the sauced cauliflower wings back to the oven for an additional 10-15 minutes. This will help them achieve a delightful crispiness and allow the sauce to thicken and cling beautifully to each piece.

                  Once baked to perfection, take the cauliflower wings out of the oven. Garnish with freshly chopped parsley for a burst of color and flavor. Serve immediately alongside crunchy celery sticks and your choice of creamy ranch or tangy blue cheese dressing for dipping.

                    - Prep Time: 15 minutes | Total Time: 50 minutes | Servings: 4

                      Präsentationstipps: Arrange the buffalo wings on a vibrant platter, sprinkling additional parsley on top for a pop of color. Place the celery sticks centrally with the dressings in small bowls to create an inviting and shareable experience. Enjoy!

                        Leave a Comment

                        Recipe Rating