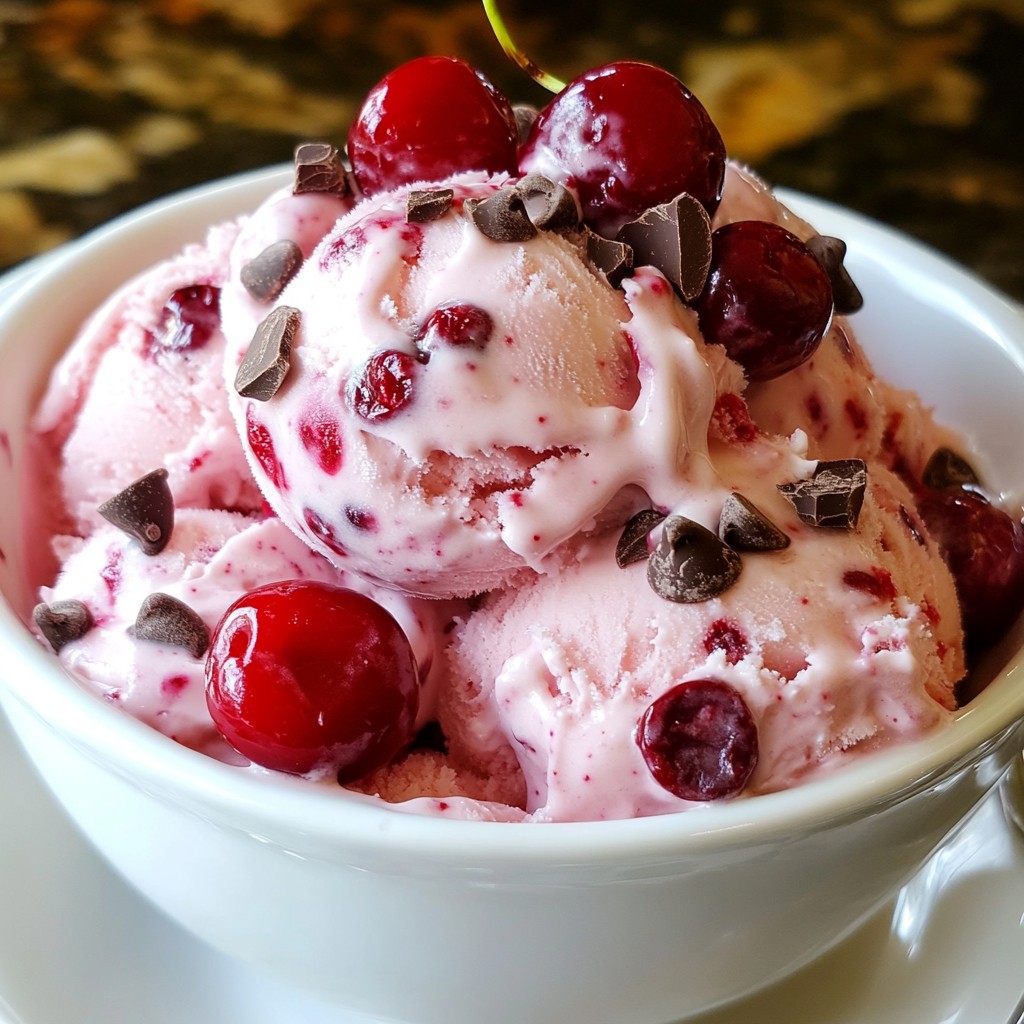
Summer is the perfect time for a sweet treat, and nothing beats Cherry Chocolate Chip Ice Cream. This delightful dessert combines the tartness of cherries with creamy goodness and rich chocolate. You’ll love how easy it is to make at home. I’ll guide you through each step, from picking fresh cherries to churning this delicious mix. Grab your ingredients, and let's create a summer favorite that will impress everyone!
Why I Love This Recipe
- Fresh and Fruity: This recipe uses fresh cherries, which not only add a delicious flavor but also provide a burst of color and nutrition.
- Decadent Chocolate: The semi-sweet chocolate chips create a delightful contrast with the tartness of the cherries, making every bite a treat.
- Easy to Make: With simple ingredients and straightforward steps, this ice cream is accessible for both novice and experienced cooks.
- Perfect for Any Occasion: This cherry chocolate chip delight is a crowd-pleaser, making it a great dessert for gatherings or a sweet indulgence for yourself.
Ingredients
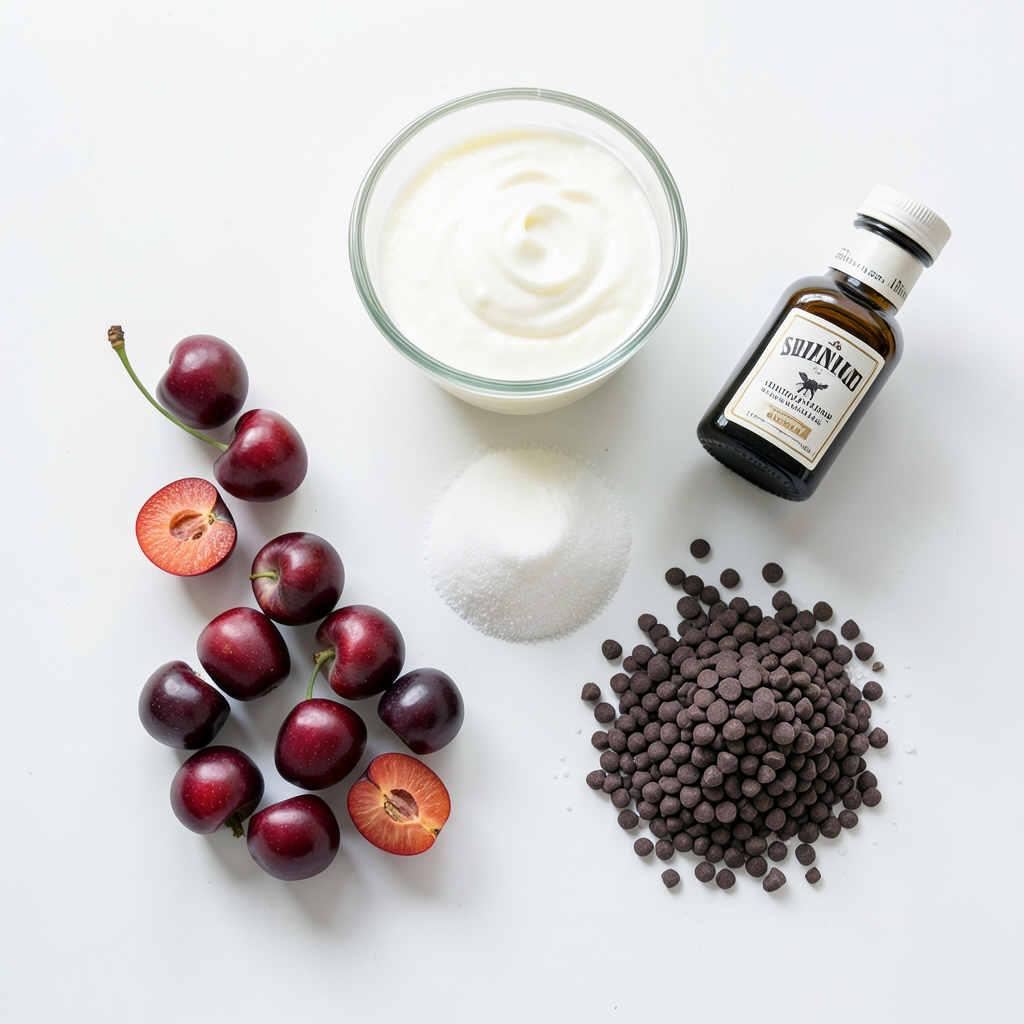
To make Cherry Chocolate Chip Ice Cream, you will need the following ingredients:
- 2 cups fresh cherries, pitted and halved
- 1 cup heavy cream
- 1 cup whole milk
- 3/4 cup granulated sugar
- 1 teaspoon pure vanilla extract
- 1/4 teaspoon almond extract
- 1/2 cup semi-sweet chocolate chips
- Pinch of salt
These simple ingredients come together to create a sweet and creamy treat. Fresh cherries add a burst of flavor, while the chocolate chips give a rich contrast. The heavy cream and whole milk ensure a smooth and rich texture. Each ingredient plays a vital role in making this ice cream delightful.
Step-by-Step Instructions
Preparation of Cherries
Start by preparing the cherries. Take 2 cups of fresh cherries. Remove the pits and slice them in half. Place the cherries in a medium bowl. Use a fork to gently mash them. This helps release their juices. Make sure to keep some chunks for texture. Set the cherries aside for later.
Mixing Cream and Sugar
Next, mix the cream and sugar. In a separate bowl, add 1 cup of heavy cream and 1 cup of whole milk. Then, pour in 3/4 cup of granulated sugar. Add 1 teaspoon of pure vanilla extract, 1/4 teaspoon of almond extract, and a pinch of salt. Whisk everything together. Make sure the sugar dissolves completely. You want a smooth, silky mixture.
Churning the Ice Cream
Now it’s time to churn the ice cream. Fold the prepared cherries into the cream mixture. Make sure every cherry is coated well. Pour the mixture into your ice cream maker. Churn according to the machine’s instructions. This usually takes 20 to 25 minutes. Stop when the ice cream reaches a soft-serve texture. In the last 5 minutes, add 1/2 cup of semi-sweet chocolate chips. This gives you yummy chocolate bites. Once done, transfer the ice cream to an airtight container. Freeze for at least 4 hours to firm it up. Before serving, let it sit out for a few minutes. This helps soften it for easy scooping.
Tips & Tricks
How to Achieve the Perfect Texture
To get the best texture, focus on the churning time. Churn the mixture for 20 to 25 minutes. This process adds air, making the ice cream light and fluffy. Don't skip the step of mashing the cherries. This creates small bits that enhance texture. It’s important to fold them gently into the cream. This way, you keep some chunks intact.
When to Add Chocolate Chips
Timing is key when adding chocolate chips. Add them in the last 5 minutes of churning. This ensures even distribution throughout the ice cream. If you add them too early, they may melt and lose their shape. The result should be delightful bites of chocolate in every scoop.
Serving Suggestions
Serve your ice cream in chilled bowls for a refreshing touch. Top it with extra cherry halves for color and flavor. A sprinkle of chocolate shavings adds elegance. You can also pair it with a warm brownie or a slice of pie. This will create a fun contrast between hot and cold. Enjoy your delicious creation on warm summer days!
Pro Tips
- Choose Ripe Cherries: Using ripe, in-season cherries will enhance the flavor of your ice cream, giving it a fresh and natural sweetness.
- Chill Your Base: For a creamier texture, chill the cream mixture in the refrigerator for about 30 minutes before churning.
- Don't Overmix: When folding in the cherries, mix gently to keep some chunks intact for a delightful texture in every scoop.
- Storage Tips: To maintain the best quality of your ice cream, store it in an airtight container and press a piece of parchment paper directly onto the surface before sealing.
Variations
Dairy-Free Options
You can make this ice cream dairy-free. Use coconut milk instead of whole milk. For the cream, try coconut cream. It gives a rich flavor and nice texture. Use the same amount of sugar. You can still add the cherry and chocolate chips for great taste.
Alternative Flavor Combinations
Want to mix it up? Try using raspberries or strawberries instead of cherries. They pair well with chocolate, too. You can also add a splash of orange juice. This gives a bright twist to the flavor. Experiment with different fruits to find your favorite combo!
Using Different Types of Chocolate
While semi-sweet chocolate chips work great, you can try dark chocolate or white chocolate. Dark chocolate adds a rich taste, while white chocolate gives a sweet touch. You can even chop up chocolate bars for a fun texture. Just make sure the chocolate fits your taste!
Storage Information
Best Practices for Freezing
To keep your cherry chocolate chip ice cream fresh, store it in an airtight container. Make sure to fill the container to the top, leaving no air gaps. This helps prevent ice crystals from forming. You can also place a piece of plastic wrap directly on the surface of the ice cream before sealing the lid. This extra step protects the texture and flavor.
How Long It Lasts in the Freezer
Cherry chocolate chip ice cream can last up to two weeks in the freezer. After that, it may lose some taste and texture. For the best experience, try to eat it within the first week. Always check for any signs of freezer burn, which can make the ice cream less enjoyable.
Reconditioning Ice Cream for Serving
Before serving, let the ice cream sit at room temperature for about 5 to 10 minutes. This softens it slightly, making it easier to scoop. If it’s too hard, you can use a warm scoop or an ice cream spade. Just dip the scoop in warm water for a few seconds. This makes the scooping process smooth and enjoyable.
FAQs
Can I use frozen cherries instead?
Yes, you can use frozen cherries. Just thaw them first. Drain any excess juice. This keeps the ice cream from being too watery. You still want the cherry flavor to shine through.
What if I don’t have an ice cream maker?
No ice cream maker? No problem! Pour the cherry-cream mix into a shallow dish. Freeze it for about an hour. Stir it every 30 minutes. This helps break up ice crystals. Keep doing this until it’s firm but creamy.
Is this recipe suitable for kids?
Absolutely! This recipe is great for kids. It has fresh fruit and no scary ingredients. Just make sure to supervise when using any kitchen tools. They will love helping to mash the cherries and mix the ingredients!
This blog post covered how to make a delicious cherry ice cream. We listed the key ingredients, shared step-by-step instructions, and provided helpful tips for the best texture. Variations let you customize flavors, and storage tips ensure your treat stays fresh.
Always remember, making ice cream is fun and easy. With these steps, you can create a yummy dessert that friends and family will love. Enjoy every scoop of your homemade cherry delight!