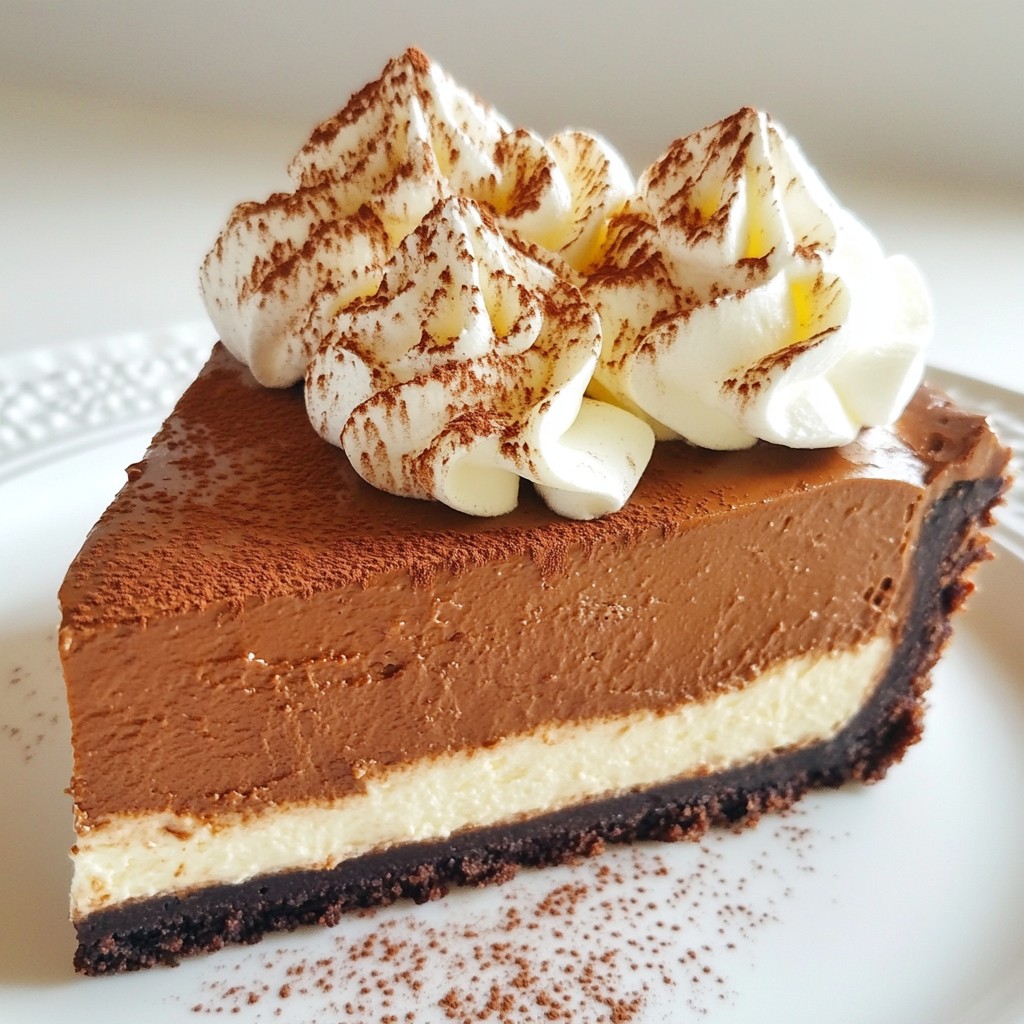
Craving a dessert that combines rich chocolate and bold espresso? You're in the right place! This Chocolate Espresso Cheesecake is a delicious blend of flavors that will wow your taste buds. Whether you're new to baking or a pro, this creamy treat is easy to make. I’ll guide you through the simple steps to create a dessert that looks great and tastes even better. Ready to get started? Let’s dive in!
Why I Love This Recipe
- Decadent Flavor: This cheesecake perfectly combines rich chocolate and bold espresso, creating a dessert that is irresistibly delicious.
- Rich Texture: The creamy consistency of the cheesecake paired with the crunchy chocolate crust offers a delightful contrast in every bite.
- Perfect for Any Occasion: Whether it's a holiday gathering or a casual dinner, this cheesecake impresses guests and makes any event special.
- Make Ahead Delight: This cheesecake can be prepared in advance, allowing flavors to develop and making it a stress-free dessert option.
Ingredients
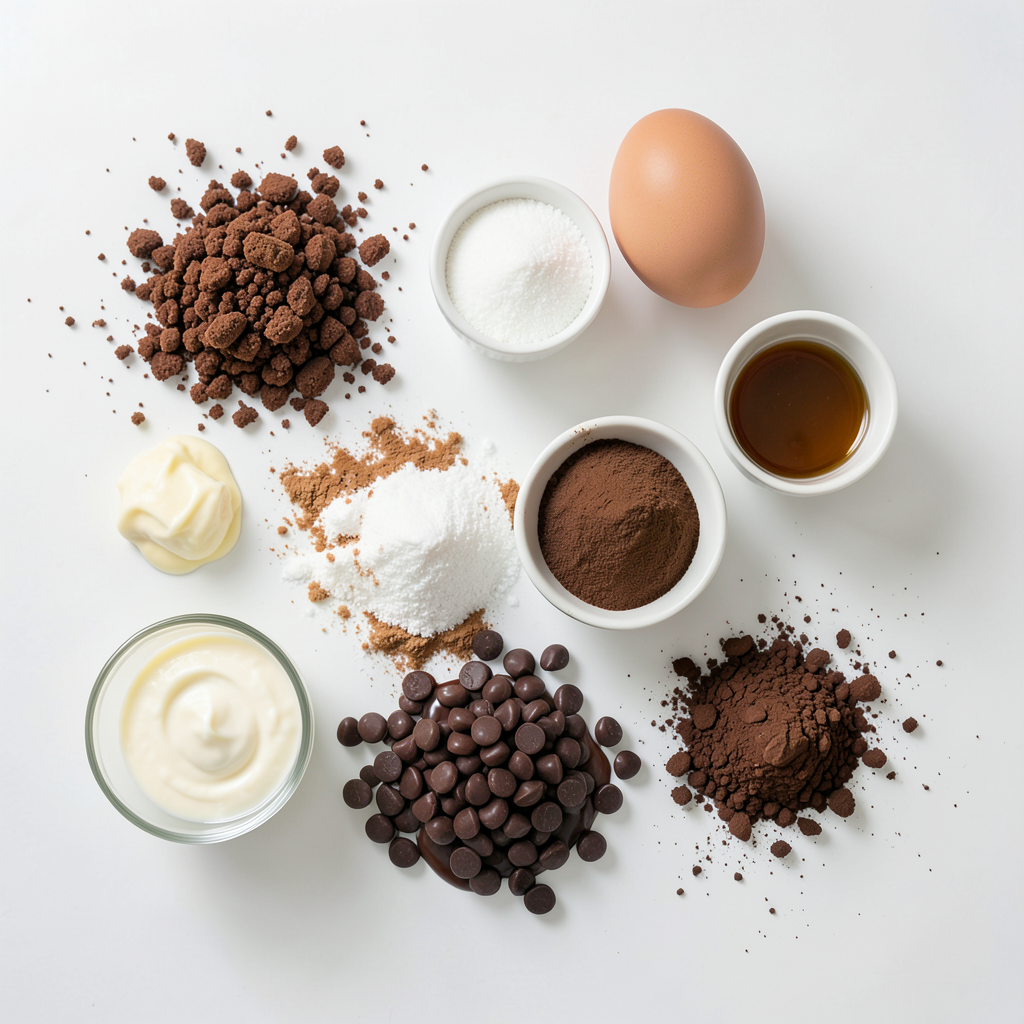
To make a rich and creamy Chocolate Espresso Cheesecake, you need the following ingredients:
- 1 ½ cups chocolate cookie crumbs
- ½ cup unsalted butter, melted
- 3 packages (8 oz each) cream cheese, softened at room temperature
- 1 cup granulated sugar
- 3 large eggs, at room temperature
- 1 cup sour cream, at room temperature
- 2 teaspoons pure vanilla extract
- 2 tablespoons espresso powder
- 1 cup semi-sweet chocolate chips, melted and slightly cooled
- A pinch of salt
- Cocoa powder for dusting (optional)
- Whipped cream for topping (optional)
Each ingredient plays a key role in creating the perfect balance of flavors. The chocolate cookie crumbs form a crunchy crust, while the cream cheese gives the cheesecake its rich texture. The espresso powder adds a delightful kick, enhancing the chocolate flavor. The melted chocolate chips ensure the cake is smooth and luxurious.
Using unsalted butter helps control the saltiness in your dessert. I recommend using high-quality chocolate for the best taste. If you want a touch of elegance, the cocoa powder and whipped cream will make your cheesecake look stunning. Enjoy gathering these ingredients, as they will lead to an unforgettable dessert!
Step-by-Step Instructions
Preheat the Oven
Set your oven to 325°F (160°C). This heat is perfect for our cheesecake.
Preparing the Crust
In a large bowl, mix 1 ½ cups of chocolate cookie crumbs with ½ cup of melted unsalted butter. Stir until the crumbs look like wet sand. Firmly press this mix into the bottom of a 9-inch springform pan. Bake the crust for 8-10 minutes until it feels slightly firm. Let it cool completely before adding the filling.
Beating the Cream Cheese
Take 3 packages of softened cream cheese and place them in a large bowl. Use an electric mixer on medium speed to beat the cream cheese. Do this for about 2 to 3 minutes until it is smooth and creamy. Gradually add 1 cup of granulated sugar while mixing.
Incorporating Eggs and Other Ingredients
Add 3 large eggs to the bowl, one at a time. Mix well after each egg to avoid lumps. Next, add 1 cup of sour cream, 2 teaspoons of pure vanilla extract, and 2 tablespoons of espresso powder. Blend on low speed until everything is smooth.
Mixing in the Chocolate
Now, gently fold in 1 cup of melted semi-sweet chocolate chips. Add a pinch of salt to enhance the flavor. Make sure the chocolate is fully mixed into the batter.
Baking the Cheesecake
Pour this filling over your cooled crust in the springform pan. Use a spatula to smooth the top. Place the pan back in the oven and bake for 55-60 minutes. The edges should be set, and the center should jiggle slightly. After baking, turn off the oven and crack the door open. Let the cheesecake cool inside for an hour.
Chilling the Cheesecake
Once it cools in the oven, refrigerate the cheesecake for at least 4 hours. For the best taste, let it chill overnight. This will help it set and deepen the flavors.
Serving Suggestions
When you're ready to serve, dust the top with cocoa powder for a nice touch. Add dollops of whipped cream if you like a rich finish. Enjoy your chocolate espresso cheesecake!
Tips & Tricks
Ensuring a Smooth Cheesecake
To get a smooth cheesecake, start with room temperature cream cheese. Cold cream cheese can make lumps. Use an electric mixer on medium speed to beat it well. This process should take about 2 to 3 minutes. Add sugar gradually. This helps it blend nicely. Mixing should be gentle when adding eggs and other ingredients. Always mix until smooth.
Preventing Cracks
Cracks can spoil the look of your cheesecake. To avoid this, do not overmix the batter. Bake at a low temperature, around 325°F (160°C). When baking is done, turn off the oven but leave the door ajar. Let the cheesecake cool slowly inside for about an hour. This helps it set without cracking. Always chill it in the fridge for at least 4 hours or overnight. This gives it time to firm up.
Best Tools for Cheesecake Making
Having the right tools makes a big difference. A springform pan is key for easy removal. Use an electric mixer for smooth mixing. A rubber spatula helps fold in ingredients without adding air. For baking, always have a thermometer handy to check your oven’s temperature. It ensures even baking.
Decorating Ideas
Decorating your cheesecake can be fun! Dust cocoa powder on top for a classy look. You can also add whipped cream for a rich finish. Fresh berries or chocolate shavings make great toppings too. Consider adding a drizzle of chocolate sauce for extra flair. These touches make your cheesecake not just tasty but also beautiful.
Pro Tips
- Use Room Temperature Ingredients: Make sure your cream cheese, eggs, and sour cream are at room temperature before mixing. This helps create a smoother, creamier batter with fewer lumps.
- Prevent Cracking: Bake the cheesecake in a water bath to help regulate the temperature and moisture. Wrap the springform pan in aluminum foil to prevent water from seeping in.
- Let It Chill: Patience is key! Allow the cheesecake to chill in the refrigerator for at least 4 hours, or overnight if possible, to let the flavors meld and the texture firm up.
- Garnish Wisely: For an elegant presentation, dust the top with cocoa powder and add fresh whipped cream or chocolate shavings just before serving for a delightful finish.
Variations
Alternative Crust Options
You can change the crust to fit your taste. Try using graham cracker crumbs for a sweeter base. A nut crust made from ground almonds or pecans can add a nice crunch. For a gluten-free option, use gluten-free chocolate cookies.
Flavor Variations
This cheesecake can be more than just chocolate and espresso. For a mocha twist, add more espresso powder and a touch of coffee extract. If you love hazelnut, mix in hazelnut extract and sprinkle crushed hazelnuts on top. You can even try a peppermint flavor by adding peppermint extract.
Vegan or Dairy-Free Adaptations
You can make this cheesecake vegan or dairy-free too. Replace cream cheese with vegan cream cheese. Use coconut cream instead of sour cream for a rich texture. Swap eggs for flax eggs or unsweetened applesauce. Use dairy-free chocolate chips to complete the recipe without dairy.
Storage Info
Proper Storage Techniques
After making the chocolate espresso cheesecake, you want to keep it fresh. First, let the cheesecake cool completely. Then, cover the springform pan tightly with plastic wrap. This helps keep moisture in and prevents any odors from the fridge affecting the taste. If you have already sliced the cheesecake, place the slices on a plate and cover them with plastic wrap or foil. You can also use an airtight container for individual slices.
How Long Does It Last?
When stored properly in the fridge, your cheesecake can last about 5 to 7 days. It tastes best within the first few days. However, it can still be enjoyed later. Just be sure to check for any signs of spoilage, like an off smell or changes in texture. If you see or smell anything strange, it is best to discard it.
Freezing Instructions
If you want to save some cheesecake for later, freezing is a great option. First, let the cheesecake cool completely and chill it in the fridge. Once chilled, slice it into individual pieces. Wrap each slice tightly in plastic wrap, ensuring no air gets in. Then, place the wrapped slices in a freezer-safe bag or container. This helps prevent freezer burn. The cheesecake can last up to 2 months in the freezer. When you're ready to eat it, thaw the slices in the fridge overnight. Enjoy your delicious treat!
FAQs
Can I use different types of chocolate?
Yes, you can use different types of chocolate. Dark chocolate gives a rich taste. Milk chocolate adds sweetness. You can also mix them for a unique flavor.
How do I know when the cheesecake is done baking?
The cheesecake is done when the edges are set. The center should jiggle slightly. This means it will firm up as it cools. Keep an eye on the time.
What's the best way to slice a cheesecake?
Use a sharp, warm knife for slicing. Dip the knife in hot water, then wipe it dry. This method helps avoid sticking and gives you clean slices.
Can I make this cheesecake in advance?
Yes, you can make this cheesecake in advance. It tastes even better after chilling overnight. Just store it in the fridge.
What can I substitute for espresso powder?
You can use instant coffee as a substitute. You may also try strong brewed coffee. Just make sure to adjust the amount for taste.
To sum up, this blog post covered the essential ingredients for a rich cheesecake. I outlined clear steps to prepare, bake, and chill the dessert. You learned helpful tips to avoid cracks and ensure a smooth finish. There are exciting variations to try, plus storage options to keep your cheesecake fresh. Remember, making cheesecake can be fun and rewarding. Experiment with flavors, and enjoy the process. You’ll impress friends and family with your tasty creations. Happy baking!