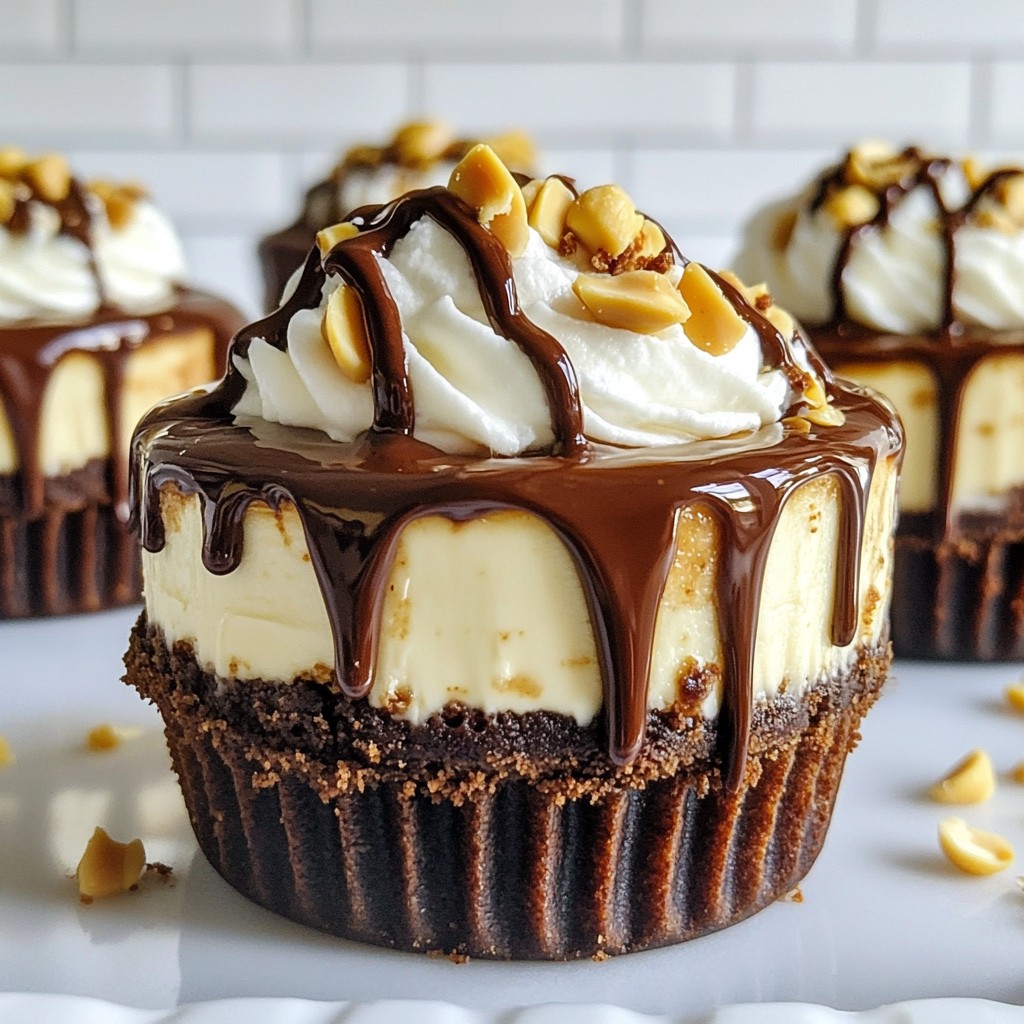
If you love chocolate and peanut butter, I have a treat for you! These Chocolate Peanut Butter Cheesecake Cups are rich, creamy, and oh-so-delicious. They’re perfect for parties or a sweet family dessert. In this guide, I’ll share ingredients, step-by-step directions, and helpful tips to make your treats shine. Get ready to impress your friends with a dessert that’s as easy as it is tasty!
Why I Love This Recipe
- Decadent Flavor: The rich combination of chocolate and creamy peanut butter creates an irresistible flavor that satisfies any sweet tooth.
- Easy to Make: With simple ingredients and straightforward steps, this recipe is perfect for both novice and experienced bakers.
- Perfect for Any Occasion: These cheesecake cups are ideal for parties, potlucks, or just a cozy night in, making them versatile for any event.
- Impressive Presentation: The individual servings are not only delicious but also look stunning, making them a showstopper on any dessert table.
Ingredients
Key Ingredients for Chocolate Peanut Butter Cheesecake Cups
To make these amazing cups, you need some simple ingredients. Here’s what you will need:
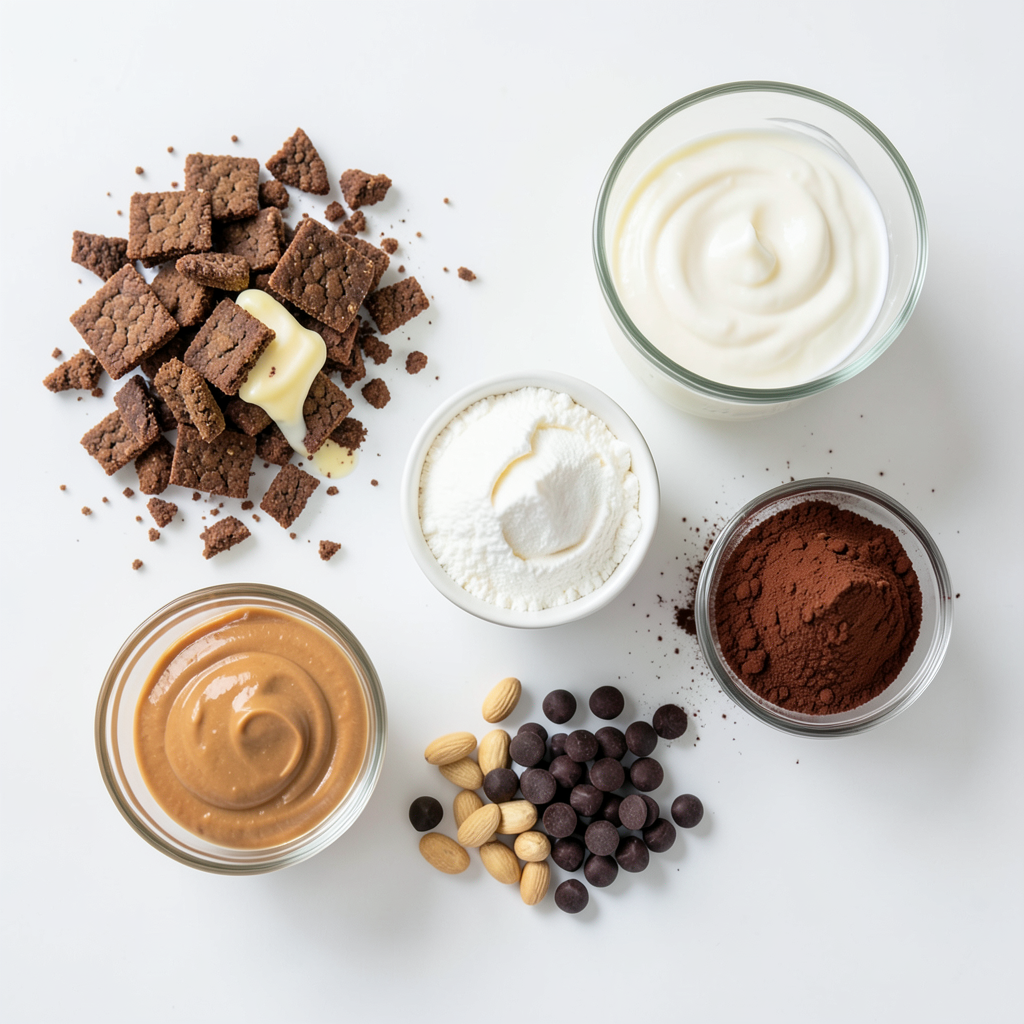
- 1 cup crushed chocolate graham crackers
- 4 tablespoons unsalted butter, melted
- 8 oz cream cheese, softened to room temperature
- 1/2 cup creamy peanut butter
- 1/3 cup powdered sugar
- 1 teaspoon pure vanilla extract
- 1 cup heavy whipping cream, chilled
- 1/4 cup cocoa powder
- 1/2 cup chocolate chips (optional, for garnish)
- Chopped peanuts (optional, for garnish)
Each ingredient plays a key role. The chocolate graham crackers form a tasty crust. Cream cheese and peanut butter create a rich filling. Powdered sugar adds sweetness, while vanilla gives a nice flavor.
Optional Garnishes and Toppings
You can add a little extra flair to your cheesecake cups. Here are some ideas:
- Melted chocolate drizzle on top
- Chopped peanuts for a crunchy touch
- A sprinkle of cocoa powder for elegance
- Fresh berries for a pop of color
These garnishes not only look great but also boost flavor. Try mixing and matching to find your favorite combo!
Measurement Conversions for Ease of Use
Here are some handy conversions to make cooking easier:
- 1 cup = 240 ml
- 4 tablespoons = 1/4 cup
- 8 oz cream cheese = 226 grams
- 1/2 cup = 120 ml
- 1/3 cup = 80 ml
- 1 teaspoon = 5 ml
These quick conversions help you avoid confusion. You can measure right and make your cheesecake cups perfect!
Step-by-Step Instructions
Preparation of the Crust
First, gather your materials. In a medium bowl, mix 1 cup of crushed chocolate graham crackers with 4 tablespoons of melted unsalted butter. Stir with a fork until the mix looks like wet sand. This step is key for a tasty base.
Next, line a standard muffin tin with cupcake liners. Take about 1 tablespoon of the graham cracker mix and press it into the bottom of each liner. Make sure it is compact and even. This crust will hold your cheesecake filling. Place the muffin tin in the fridge to chill while you prepare the filling.
Creating the Cheesecake Filling
For the filling, start with a large bowl. Beat 8 ounces of softened cream cheese with 1/2 cup of creamy peanut butter using an electric mixer. Mix until it is smooth and free of lumps.
Gradually add 1/3 cup of powdered sugar and 1 teaspoon of pure vanilla extract. Continue mixing until everything is silky smooth. This mixture will give you a rich, creamy texture.
In another bowl, whip 1 cup of chilled heavy cream until stiff peaks form. Be careful not to over-whip, as you want it fluffy. Gently fold the whipped cream into the cream cheese mix. This will make your filling light and airy.
Final Assembly and Chilling Process
Now it's time to fill the cups. Spoon the cheesecake filling over the chilled crusts. Fill each liner about three-quarters full. Use a spatula to smooth the tops, ensuring a nice look.
If you want a chocolate drizzle, melt 1/2 cup of chocolate chips in a microwave-safe bowl. Heat in 30-second bursts and stir each time until smooth. Drizzle the melted chocolate over the filled cups for an extra treat.
Finally, place the muffin tin back in the fridge. Chill for at least 4 hours or until the cheesecake is firm. This step is vital for the best texture. Enjoy your delightful treat when ready!
Tips & Tricks
How to Avoid Over-whipping Cream
To avoid over-whipping cream, start with chilled heavy cream. Use clean beaters for best results. Beat on medium speed until soft peaks form. Stop mixing when you see the peaks holding shape. If you whip too long, the cream can turn into butter. Remember to fold the whipped cream gently into the other ingredients. This keeps the mixture light and airy.
Perfecting the Cheesecake Texture
For a smooth cheesecake texture, start with softened cream cheese. This helps it blend well with the peanut butter. Mix on low speed to prevent air bubbles. Gradually add in the powdered sugar to keep it silky. After mixing, fold in the whipped cream carefully. This step is key to keeping the filling fluffy and not too dense.
Alternatives for Dairy-Free Options
For a dairy-free version, use vegan cream cheese and coconut cream. Substitute creamy peanut butter with a nut-free option if needed. You can use maple syrup instead of powdered sugar for sweetness. These swaps keep the flavor while catering to dietary needs. Always check labels to ensure they meet your needs.
Pro Tips
- Use Room Temperature Ingredients: Make sure your cream cheese and peanut butter are at room temperature before mixing. This will help achieve a smoother and creamier filling without lumps.
- Don't Over-Whip the Cream: When whipping the heavy cream, be careful not to over-whip it. Stop once stiff peaks form to maintain a light and airy texture in your cheesecake filling.
- Chill for Best Results: Allowing the cheesecake cups to chill for at least 4 hours is crucial. This helps the filling set properly and enhances the overall flavor and texture.
- Garnish Creatively: Elevate your presentation by garnishing with chopped peanuts and a drizzle of melted chocolate. Consider adding a fresh berry on top for a pop of color.
Variations
Different Flavors for the Cheesecake Base
You can change the base flavor easily. Instead of peanut butter, try almond or cashew butter. Each nut brings its own unique taste. You can also swap in different cream cheeses, like strawberry or pumpkin. They add a fun twist and enhance the taste. For a chocolate kick, mix in cocoa powder directly into the cheesecake base. This variation gives you a rich, chocolatey flavor that pairs well with the crust.
Healthier Ingredient Substitutions
Want to make it healthier? You can use Greek yogurt instead of cream cheese. It keeps the creaminess while cutting fat. For a lower-calorie option, replace powdered sugar with a natural sweetener like stevia or honey. You can also use whole grain graham crackers. They add fiber to your dessert. If you're looking for a nut-free version, try sun butter in place of peanut butter. This keeps it safe for those with allergies.
Seasonal Flavors and Add-ins
Seasonal flavors can make your cheesecake cups even more special. In the fall, add pumpkin puree and spices like cinnamon and nutmeg. For summer, mix in fresh berries or a berry compote. You can also try adding chopped nuts for crunch. They add texture and taste. During the holidays, consider peppermint extract for a festive twist. Each season offers new ways to enjoy these delightful treats.
Storage Info
Proper Storage Methods
To keep your chocolate peanut butter cheesecake cups fresh, store them in an airtight container. Use a container that fits the cups snugly. This prevents them from drying out or absorbing other smells. Line the bottom of the container with parchment paper for extra protection.
How Long They Last in the Fridge
These cheesecake cups will last for about five days in the fridge. Make sure to check for any changes in texture or smell before serving. If they look or smell off, it's best to discard them.
Freezing Instructions for Later
If you want to save them for later, you can freeze the cheesecake cups. Wrap each cup tightly in plastic wrap, then place them in a freezer-safe bag. They can last for up to three months in the freezer. When you're ready to enjoy them, transfer them to the fridge overnight to thaw. Enjoy the ease of having a sweet treat ready when you need it!
FAQs
Can I use crunchy peanut butter instead?
Yes, you can use crunchy peanut butter. It adds a fun texture to the cheesecake. The small pieces of peanuts give each bite a nice crunch. If you love peanut butter, this twist can make your dessert even tastier!
How do I know when they are fully set?
You will know they are set when the filling feels firm to the touch. They should not jiggle when you gently shake the muffin tin. Chill them for at least four hours. For best results, overnight chilling works great too!
What can I substitute for heavy cream?
You can use coconut cream as a great substitute. It gives a nice richness and flavor. You can also try using whole milk mixed with a bit of butter. This can help mimic the creaminess. Just remember, the texture may change a little with these swaps.
You’ve learned how to make Chocolate Peanut Butter Cheesecake Cups, including key ingredients and optional toppings. You practiced measuring for ease and followed step-by-step instructions for the crust and filling. You gained tips to avoid over-whipping and explored fun variations. Now, you know how to store these treats for later enjoyment. Enjoy your delicious dessert and share it with friends! Trust me, they will love it. Happy baking!