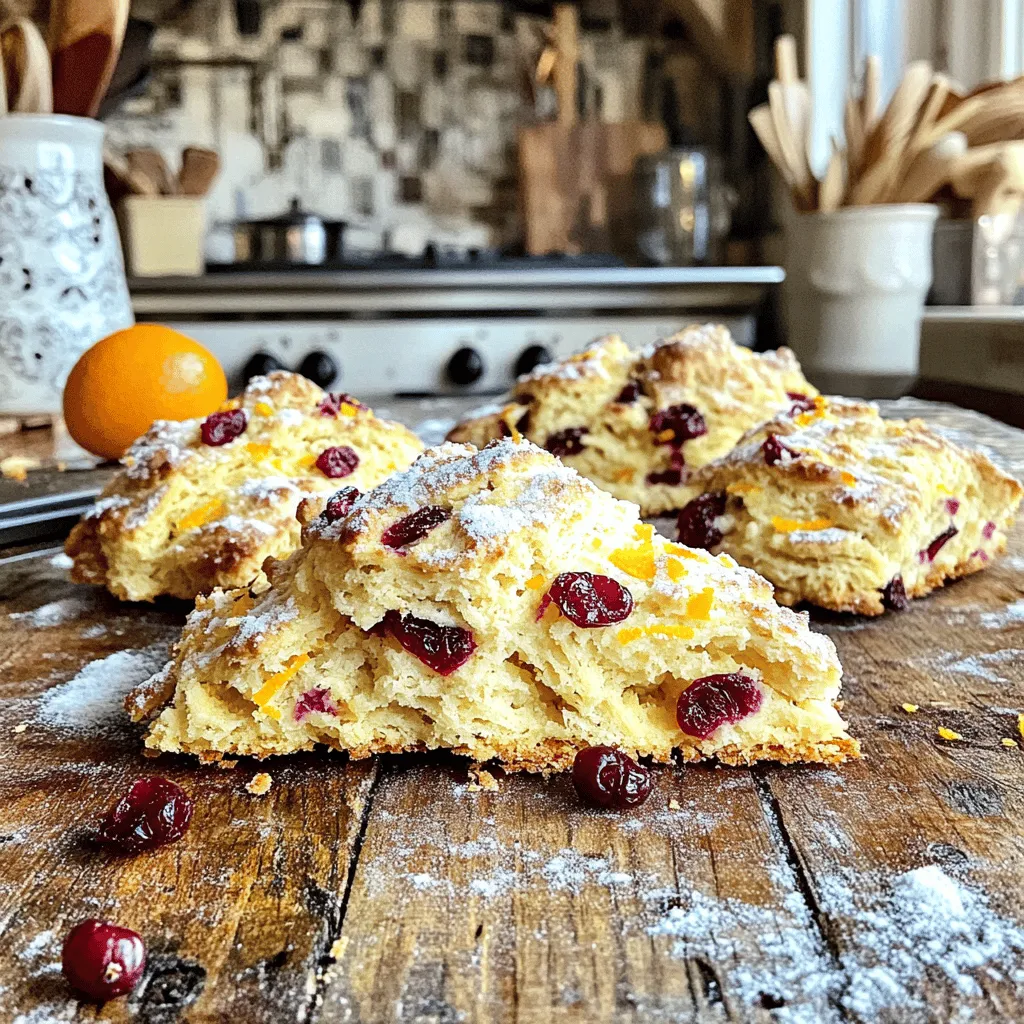
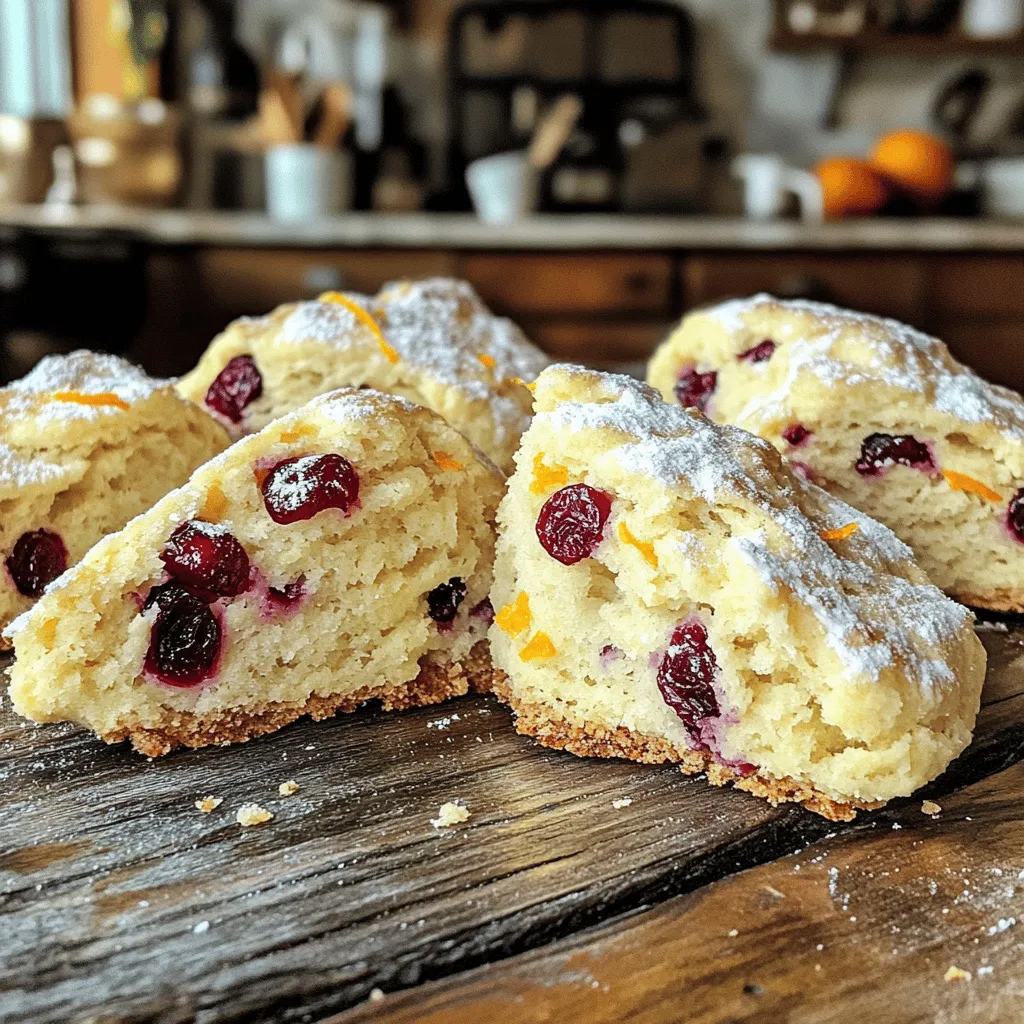
Welcome to a delightful journey of baking! Today, we’re making Cranberry Orange Scones, a treat that’s both flavorful and simple. With just a few fresh ingredients, you’ll create tender scones that burst with zesty orange and sweet cranberries. Whether you’re a baking pro or just starting, this guide will help you every step of the way. Let’s dive into the world of scones and make something delicious together!
Ingredients
Detailed List of Ingredients
– 2 cups all-purpose flour
– 1/3 cup granulated sugar
– 1 tablespoon baking powder
– 1/2 teaspoon salt
– 1/2 cup unsalted butter, chilled and cut into small cubes
– 1/2 cup dried cranberries
– Zest of 1 large orange (about 1 tablespoon)
– 1/2 cup heavy cream
– 1 large egg
– 1 teaspoon pure vanilla extract
– Extra granulated sugar for sprinkling
Tips for Choosing the Best Ingredients
When making cranberry orange scones, fresh ingredients matter. Use high-quality butter for a rich taste. Look for unsalted butter to control the salt level. Choose dried cranberries that are plump and moist. They add great flavor and texture. Fresh oranges give the best zest. The zest adds bright, citrus notes. For the flour, use a good all-purpose brand. It helps create a light and tender scone.
Substitutions for Dietary Restrictions
You can adjust the recipe for dietary needs. For a dairy-free version, use coconut cream instead of heavy cream. Replace butter with vegan butter or coconut oil. If you need gluten-free scones, try a gluten-free flour blend. This will still keep the scones light and fluffy. For a lower sugar option, you can cut the sugar in half. The cranberries will still add sweetness.
Step-by-Step Instructions
Preparation Overview
– Preheat the Oven
Start by preheating your oven to 400°F (200°C). This step is key for a nice rise.
– Prepare Baking Sheet
Line a baking sheet with parchment paper. This helps prevent the scones from sticking.
Mixing Dry and Wet Ingredients
In a large bowl, whisk together the dry ingredients. Combine 2 cups of all-purpose flour, 1/3 cup of granulated sugar, 1 tablespoon of baking powder, and 1/2 teaspoon of salt. Make sure they mix well to aerate.
Next, add 1/2 cup of chilled, cubed unsalted butter. Use a pastry cutter, fork, or your fingers to work the butter into the flour until it looks like coarse crumbs. You should see small chunks of butter. This will make your scones flaky.
Now, gently fold in 1/2 cup of dried cranberries and the zest of 1 large orange. The zest gives a fresh flavor that brightens the scones.
In a separate bowl, whisk together 1/2 cup of heavy cream, 1 large egg, and 1 teaspoon of pure vanilla extract. Blend them until smooth. Slowly pour this wet mixture into the dry ingredients. Mix gently with a spatula until just combined. Do not overmix; the dough should be slightly sticky.
Shaping and Cutting the Dough
Turn the dough onto a floured surface. Knead it gently about 5-6 times until it comes together. This keeps your scones tender.
Shape the dough into a circle about 1-inch thick. Cut this circle into 8 equal wedges. Arrange the wedges on the prepared baking sheet, leaving space between them.
For a nice finish, brush the tops with a bit of extra heavy cream. Sprinkle some sugar on top for added sweetness.
Now, bake them in the preheated oven for 15 to 20 minutes. They should turn golden brown. A toothpick inserted in the center should come out clean.
Once baked, let the scones cool on the sheet for a few minutes. Then, transfer them to a wire rack to cool completely. Enjoy your delicious cranberry orange scones!
Tips & Tricks
Achieving the Perfect Texture
To get the right texture, start with cold butter. Cut the butter into small cubes. This keeps the butter cold and helps create flaky layers. When mixing, use a pastry cutter or your fingertips. You want the mixture to look like coarse crumbs, with some small bits of butter still visible. This step is key for light and fluffy scones.
Preventing Overmixing
Mixing is where many go wrong. Once you add the wet ingredients, stir gently. Mix just until combined. The dough should be slightly sticky but not wet. Overmixing can lead to tough scones. Aim for a smooth dough with visible chunks of cranberries and zest.
Baking Tips for Golden Brown Scones
– Oven Placement: Place your baking sheet in the center of the oven. This helps ensure even cooking. Avoid placing it too close to the heating elements.
– Baking Time and Temperature: Bake at 400°F (200°C) for 15-20 minutes. Keep an eye on them. They should turn golden brown. A toothpick inserted in the center should come out clean. If they brown too fast, cover them loosely with foil. This will help avoid burning while the insides cook fully.
Variations
Adding Nuts or Other Fruits
You can change the flavor by adding nuts. Chopped walnuts or pecans work great. They add crunch and depth. If you want a fruity twist, try diced apples or fresh blueberries. Both will mix well with cranberries and orange.
Flavor Enhancements
Spices to Consider
Think about adding spices for warmth. Cinnamon or nutmeg can boost flavor without overpowering. A pinch of cardamom also brings a unique taste. Experiment to find your favorite spice blend.
Alternative Sweeteners
If you want a healthier option, consider using honey or maple syrup. These natural sweeteners can replace granulated sugar. Adjust the amount slightly since they are sweeter than sugar. This change adds a richer flavor to the scones.
Glazes and Toppings
Simple Glaze Recipe
A simple glaze can make your scones shine. Mix 1 cup of powdered sugar with 2 tablespoons of orange juice. Drizzle this over cooled scones for a sweet finish. You can add zest for extra flavor.
Creative Serving Suggestions
Serve scones warm with clotted cream or butter. For a fresh twist, add a side of fruit preserves. You might also pair them with a cup of tea or coffee. These options make any gathering special.
Storage Info
How to Store Leftover Scones
To keep your scones fresh, place them in an airtight container. This helps prevent them from drying out. If you have leftover scones, try to store them at room temperature. They will stay soft for a couple of days. If you want to keep them longer, refrigeration is an option, but it may change the texture.
Freezing for Longer Shelf Life
Freezing scones is an excellent way to enjoy them later. First, let the scones cool completely. Then, wrap each scone tightly in plastic wrap. Next, place them in a freezer-safe bag or container. They can last for up to three months in the freezer. When you’re ready to enjoy, simply thaw them at room temperature.
Reheating Tips for Freshness
To bring back the fresh-baked taste, you can reheat your scones. Preheat your oven to 350°F (175°C). Place the scones on a baking sheet for about 5-10 minutes. This will warm them up nicely and restore some of their crispness. You could also microwave them for about 15-20 seconds, but avoid overheating to keep them soft.
FAQs
How do I know when scones are done baking?
You can tell if scones are done by checking their color. They should be golden brown on top. Insert a toothpick into the center; if it comes out clean, they’re ready. The edges should feel firm but not hard. Trust your nose too; the aroma will fill your kitchen when they’re ready.
Can I make the dough ahead of time?
Yes, you can make the dough ahead of time. After mixing, wrap it tightly in plastic wrap. Store it in the fridge for up to 24 hours. This can save you time on busy mornings. When you’re ready to bake, just cut the dough into wedges and follow the baking steps.
What can I serve with cranberry orange scones?
Cranberry orange scones pair well with various toppings and drinks. Here are some ideas:
– Pairing Suggestions
– Clotted cream adds richness.
– Honey brings natural sweetness.
– A bit of butter enhances flavor.
– Best Beverages to Accompany
– Tea complements the scones nicely.
– Coffee adds a nice kick.
– Fresh orange juice is refreshing.
In this blog post, we covered the essential ingredients needed to make delicious cranberry-orange scones. You learned how to choose the best ingredients, as well as useful substitutions for dietary needs. The step-by-step guide showed you how to mix, shape, and bake for perfect results. We also shared variations, storage tips, and answers to common questions.
To sum up, making scones is simple and fun. With these tips, you’ll create tasty treats that everyone will enjoy. Now, it’s time to gather your ingredients and start baking!