Are you ready to elevate your snack game? Crispy Cheese Balls are the ultimate treat. They’re gooey inside, crunchy outside, and easy to make. Whether you’re hosting a party or need a quick bite, this guide has you covered. I’ll share the best ingredients, foolproof steps, and creative tips to make your cheese balls unforgettable. Let’s dive in and get cooking!
Why I Love This Recipe
- Cheesy Goodness: This recipe combines a delightful mix of sharp cheddar and stretchy mozzarella, creating a rich and indulgent flavor that cheese lovers will adore.
- Crispy Texture: Coating the cheese balls in panko breadcrumbs ensures an extra crispy exterior that contrasts beautifully with the creamy cheese inside.
- Quick and Easy: With a prep time of just 15 minutes, this recipe is perfect for a last-minute snack or party appetizer that impresses without requiring hours in the kitchen.
- Versatile Dipping Sauces: These crispy cheese balls pair wonderfully with a variety of dipping sauces, allowing you to customize each bite to your taste preferences.
Ingredients
Detailed List of Ingredients
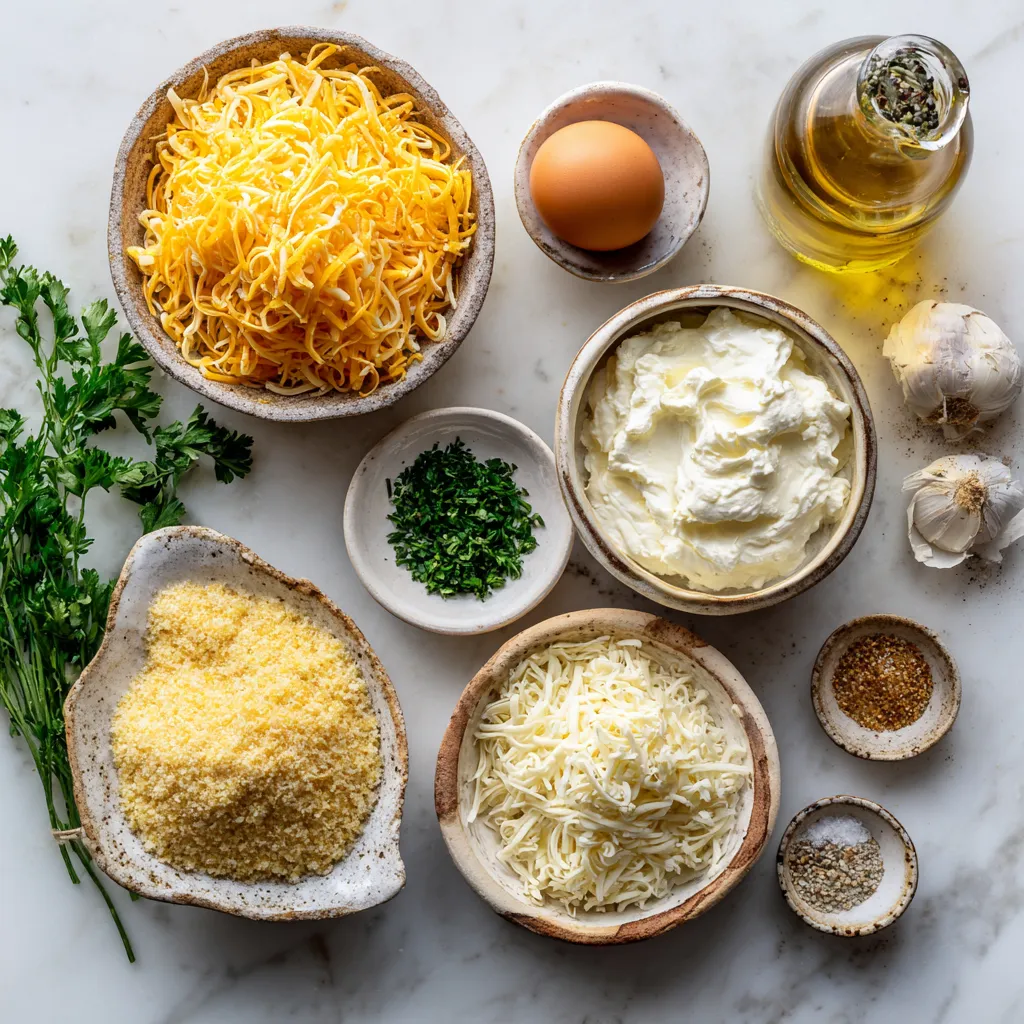
To make crispy cheese balls, you need the following:
– 2 cups shredded cheese (a blend of sharp cheddar and stretchy mozzarella)
– 1 cup cream cheese, softened to room temperature
– 1 cup panko breadcrumbs (for an extra crispy texture)
– 2 tablespoons fresh parsley, finely chopped
– 1 teaspoon garlic powder
– 1 teaspoon onion powder
– Salt and freshly ground black pepper to taste
– 1 large egg, beaten until smooth
– Vegetable oil, for frying
Importance of Ingredient Quality
Using good-quality cheese makes a big difference. The best cheese melts well and adds flavor. Sharp cheddar gives a nice tang, while mozzarella adds stretch. Cream cheese binds everything together, making the mix creamy. Fresh parsley brightens the taste and looks great too. Always choose fresh spices for better flavor.
Substitutions and Alternatives
You can change some ingredients if needed. Use any cheese you like, such as gouda or pepper jack. If you want a lighter option, try using Greek yogurt instead of cream cheese. For a gluten-free version, swap panko for crushed cornflakes. Add spices like paprika or cayenne for a kick!
Step-by-Step Instructions
Preparation of the Cheese Mixture
To make the cheese mixture, grab a large mixing bowl. First, add 2 cups of shredded cheese. I like to use a mix of sharp cheddar and stretchy mozzarella for great taste. Next, add 1 cup of softened cream cheese. Mix these cheeses until they blend smoothly. Then, add 2 tablespoons of finely chopped parsley, 1 teaspoon of garlic powder, and 1 teaspoon of onion powder. Don’t forget to sprinkle in some salt and pepper to taste. Stir everything until it is well combined.
Rolling and Coating the Cheese Balls
Now it’s time to form the cheese balls. Take about one tablespoon of the cheese mixture in your hands. Roll it into a ball shape, making around 20 cheese balls. Once you have all your cheese balls ready, get a shallow dish and pour in 1 cup of panko breadcrumbs. Dip each cheese ball into 1 large beaten egg. Make sure it is fully coated. After that, roll it in the breadcrumbs. Press gently to help the crumbs stick well.
Frying Technique for Perfect Texture
For frying, heat some vegetable oil in a deep pan over medium heat. To check if the oil is ready, drop a small pinch of breadcrumbs into it. If it sizzles and rises, you are good to go! Carefully place the cheese balls in the hot oil, but do it in small batches. Fry them for about 3 to 4 minutes. Make sure to turn the balls so they brown evenly. You want them to be a nice golden brown color all over. When they are done, use a slotted spoon to lift them out and place them on a plate lined with paper towels to soak up extra oil. Enjoy these warm with your favorite dipping sauces!
Tips & Tricks
Achieving Optimal Crispiness
To get the best crunch, use panko breadcrumbs. They are lighter and crispier than regular ones. Make sure to fry in hot oil. If the oil is too cold, the cheese balls will soak up oil and become soggy. Always test the oil with a breadcrumb. It should sizzle and rise right away.
Preventing Cheese Balls from Breaking
Keep the cheese balls chilled before frying. This helps them hold their shape. If they fall apart, try adjusting the cheese blend. A firmer cheese like gouda or a bit more cream cheese can help. Also, roll them gently but firmly to make sure they stay intact.
Recommended Dipping Sauces
Serving crispy cheese balls with the right dips can enhance their flavor. I recommend marinara or ranch dressing. Both add a nice tangy kick. You can also try spicy ketchup or garlic aioli for something different. These dips will make your snack even more delightful!
Pro Tips
- Chill the Mixture: Before rolling the cheese balls, refrigerate the cheese mixture for about 30 minutes. This helps the balls hold their shape during frying.
- Use a Thermometer: For perfectly fried cheese balls, use a kitchen thermometer to maintain the oil temperature around 350°F (175°C) for optimal crispiness.
- Experiment with Cheeses: Feel free to mix different types of cheese such as pepper jack or gouda for varied flavors and textures in your cheese balls.
- Serve with Variety: Pair your cheese balls with a range of dipping sauces like spicy sriracha or honey mustard for an exciting flavor experience.
Variations
Flavor Variations
You can change the taste of your crispy cheese balls easily. Add spices or herbs to make them unique. For a spicy kick, mix in some chopped jalapeños or cayenne pepper. If you love herbs, try adding fresh basil or oregano. You can even use a blend of Italian seasoning for a zesty touch. Each flavor brings a new life to these tasty bites!
Cheese Alternatives
Not everyone eats dairy, but that’s okay! You can make vegan cheese balls too. Use plant-based cheese that melts well, like cashew or almond cheese. Instead of cream cheese, use a vegan cream cheese. It gives a creamy texture without the dairy. This way, everyone can enjoy crispy cheese balls!
Baking vs. Frying Methods
Frying gives crispy cheese balls a crunchy coat. But baking is a healthier choice if you prefer less oil. To bake, preheat your oven to 400°F (200°C). Place the coated cheese balls on a lined baking sheet. Bake for 15-20 minutes until they turn golden brown. You still get great flavor and texture!
Storage Info
How to Store Leftover Cheese Balls
To keep leftover cheese balls fresh, place them in an airtight container. Line the bottom with paper towels to absorb moisture. This step helps maintain their crispiness. Store the container in the fridge for up to three days. When ready to enjoy again, you can reheat them.
Freezing Guidance for Long-Term Storage
For long-term storage, freezing is a great option. First, place the cheese balls on a baking sheet in a single layer. Freeze them for about an hour until solid. Then, transfer the frozen cheese balls to a freezer bag. Remove as much air as possible before sealing. They can last in the freezer for up to three months.
Reheating Tips to Retain Crispiness
To reheat and keep the cheese balls crispy, preheat your oven to 375°F (190°C). Spread the cheese balls on a baking sheet lined with parchment paper. Heat them for about 10-12 minutes until warm and crispy. Avoid using a microwave, as it can make them soggy. Enjoy your crispy cheese balls just like the first day!
FAQs
How long do crispy cheese balls stay fresh?
Crispy cheese balls stay fresh for about 2 to 3 days in the fridge. After frying, let them cool down. Then, place them in an airtight container. This keeps them from drying out. For best taste, eat them soon after frying.
Can I make crispy cheese balls ahead of time?
Yes, you can make crispy cheese balls ahead of time. Prepare the cheese mixture and form the balls. Then, place them on a tray and freeze them for about an hour. Once firm, transfer them to a sealed bag. You can fry them later when you are ready to enjoy.
What are the best sauces for crispy cheese balls?
Some great sauces to dip your crispy cheese balls in are:
– Marinara sauce
– Ranch dressing
– Spicy aioli
– Honey mustard
– Barbecue sauce
These sauces enhance the cheese balls and add extra flavor. Try them all to find your favorite!
In this blog post, we explored the essential ingredients and their quality, the step-by-step process to create perfect cheese balls, and valuable tips for the best results. You learned about various flavor options and how to store leftovers properly. Remember, quality ingredients lead to better taste. Use these tips to impress your family or friends. Enjoy experimenting with flavors and find your favorite dipping sauce. Your next cheese ball creation is just around the corne