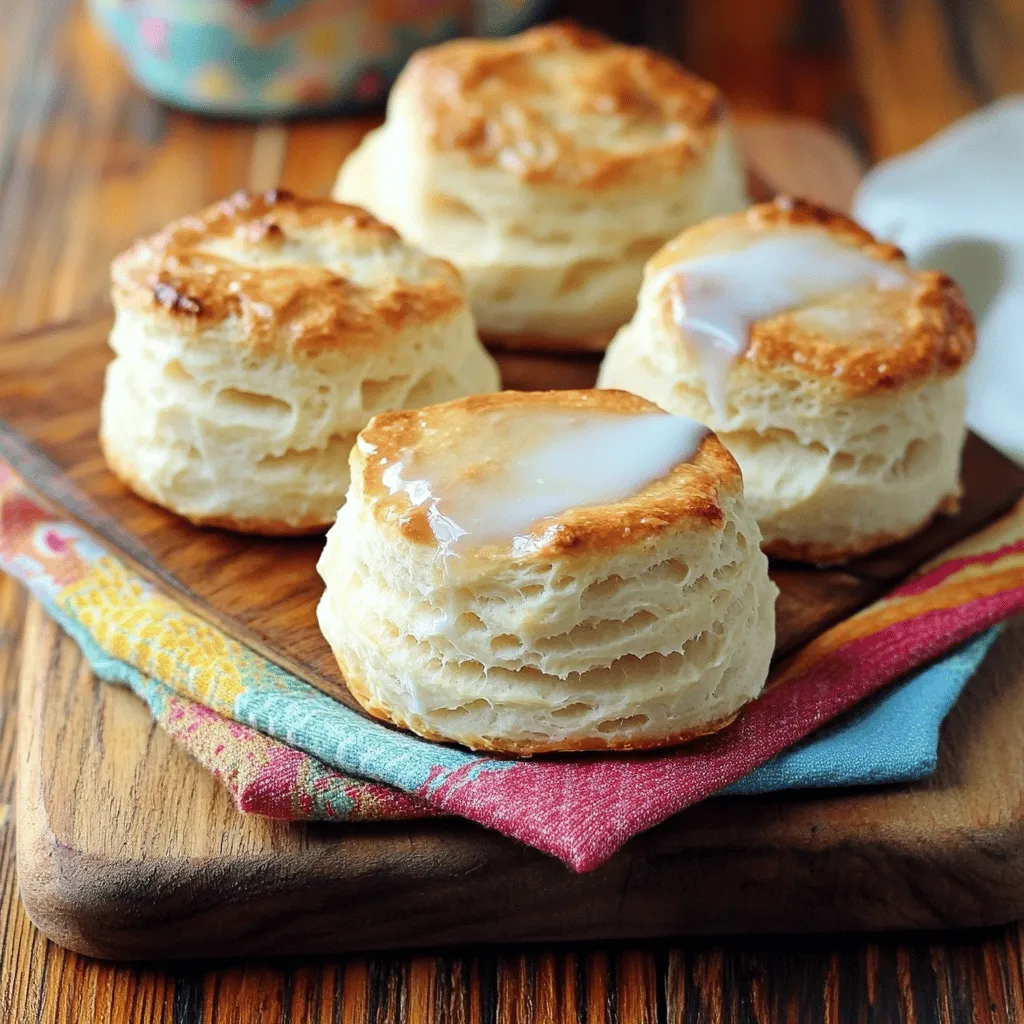
If you’re craving something warm and comforting, look no further than fluffy buttermilk biscuits. With just a few simple ingredients, you can create light, airy treats perfect for breakfast or a cozy dinner. I’ll guide you through each step, from selecting the right flour to baking tips that ensure your biscuits rise beautifully. So, grab your apron, and let’s make the best biscuits ever!
Ingredients
List of Ingredients
– 2 cups all-purpose flour
– 1 tablespoon baking powder
– 1 teaspoon baking soda
– 1 teaspoon salt
– 1/4 cup unsalted butter, chilled and cubed
– 3/4 cup buttermilk (plus a splash for brushing)
– 1 tablespoon honey (optional)
Measurement Tips
Using a kitchen scale helps you measure flour accurately. This can make a big difference. It ensures the right texture for your biscuits.
Chilling the butter is key. Cold butter creates steam during baking. This steam makes your biscuits fluffy and light.
Substitutions
If you don’t have buttermilk, you can use milk mixed with lemon juice or vinegar. Just let it sit for five minutes before using it.
For gluten-free options, look for all-purpose gluten-free flour blends. This way, you can enjoy biscuits without gluten.
Step-by-Step Instructions
Preparation and Mixing
Start by preheating your oven to 450°F (230°C). This hot oven helps the biscuits rise well. Line a baking sheet with parchment paper to stop sticking. In a large mixing bowl, gather your dry ingredients: 2 cups of all-purpose flour, 1 tablespoon of baking powder, 1 teaspoon of baking soda, and 1 teaspoon of salt. Whisk these dry items together until they mix evenly. This step is key for a good biscuit texture.
Incorporating Butter
Now, let’s add the butter. You’ll need 1/4 cup of unsalted butter, chilled and cubed. Use a pastry cutter or your fingers to blend the butter into the flour mixture. Aim for a crumbly texture that looks like coarse crumbs. You should see bits of butter the size of peas. This step keeps the biscuits light and fluffy.
Forming the Dough
Next, create a well in the center of your dry mixture. Pour in 3/4 cup of buttermilk gently. Mix with a spatula or wooden spoon until a soft dough starts to form. Be careful not to overmix. Overmixing makes biscuits tough. You want a soft and slightly sticky dough.
Shaping and Cutting
Transfer the dough to a lightly floured surface. Use your hands to pat it into a rectangle that’s about 1 inch thick. Patting helps keep the dough light. Now, grab a biscuit cutter or glass. Cut out rounds from the dough. If you have scraps, knead them gently and cut more biscuits.
Baking
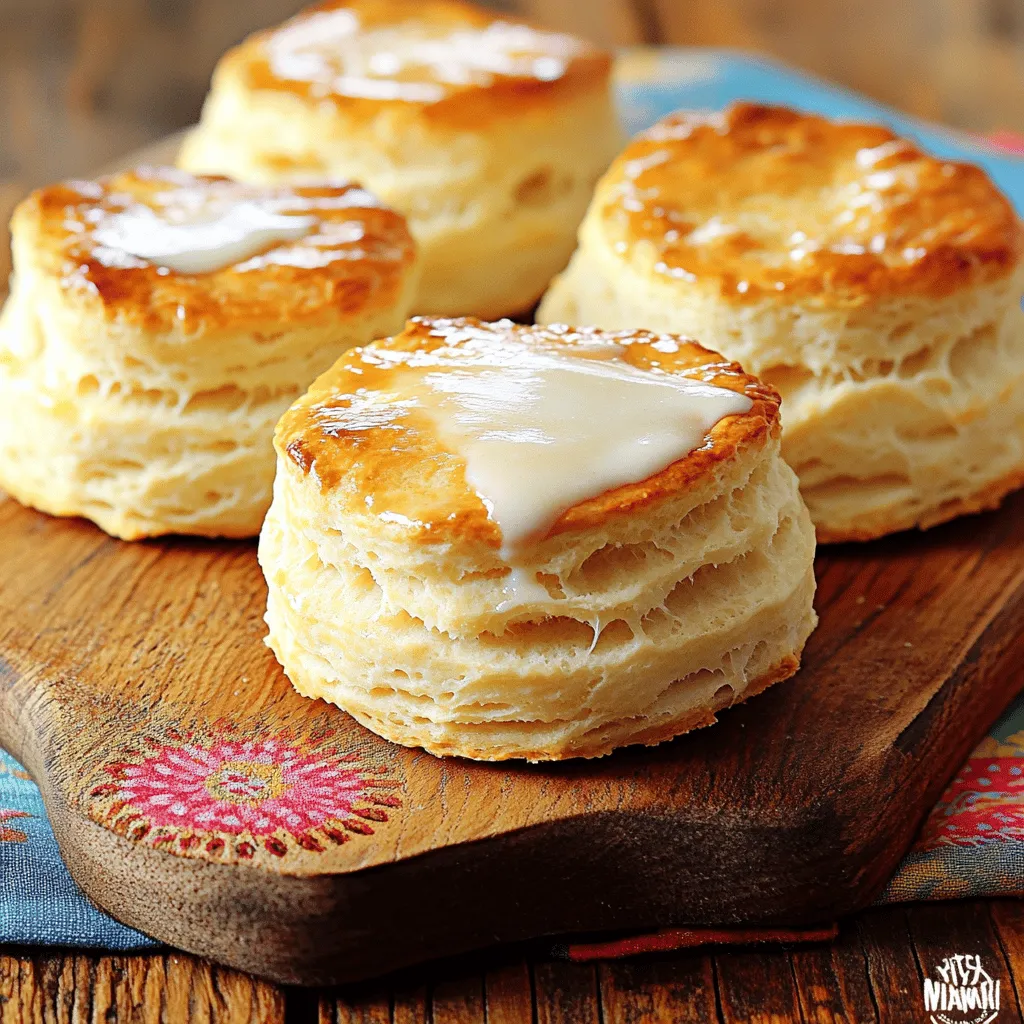
Arrange the biscuits on the prepared baking sheet. Place them close together but not touching. For a nice golden top, brush the biscuits with a splash of buttermilk. Bake in the preheated oven for 12-15 minutes. Watch for golden brown tops and a lovely rise. The smell will fill your kitchen, making it hard to wait!Enjoy making these fluffy buttermilk biscuits!
Tips & Tricks
Achieving Fluffiness
To get those light and fluffy layers, cold ingredients are key. Use chilled butter and buttermilk. Cold butter creates pockets of steam, making the biscuits rise beautifully. When you mix in the butter, aim for small pea-sized pieces. This helps build those tender layers.
To achieve layers, gently pat the dough rather than rolling it out. This keeps the air in the dough. Fold the dough over itself a couple of times. Each fold adds more layers. When you cut the biscuits, press straight down without twisting the cutter. Twisting seals the edges and prevents rising.
Common Mistakes to Avoid
One big mistake cooks make is overworking the dough. Mixing too much can make your biscuits tough. Just mix until the dough comes together, then stop.
Another mistake is not checking your oven temperature. An oven that is too hot or too cold affects baking. Use an oven thermometer to ensure accurate heat. Baking at the right temperature is crucial for that perfect rise and golden color.
Tools & Equipment
For biscuit making, a few tools make the process easier. A mixing bowl, a pastry cutter, and a biscuit cutter are essentials. A spatula helps in combining the ingredients smoothly.
When choosing a biscuit cutter, look for one with sharp edges. This helps cut the dough cleanly. Avoid using a dull cutter, as it can seal the edges. A round cutter works best, but you can also try fun shapes!
Variations
Flavor Enhancements
You can make your fluffy buttermilk biscuits even more exciting. Add herbs like rosemary or thyme for a savory twist. Cheese, such as cheddar, melts perfectly inside. You can also create sweet versions. Mixing in a bit of cinnamon or chocolate chips adds a fun flavor. These options allow you to enjoy biscuits in many ways.
Dietary Modifications
If you want to make vegan biscuits, use coconut oil instead of butter. For buttermilk, almond milk with a splash of vinegar works great. You can also explore low-carb options. Almond flour can replace regular flour for a tasty, healthier treat. These changes keep the joy of biscuits while meeting your needs.
Serving Suggestions
Warm biscuits taste heavenly with a pat of butter and your favorite jam. They also pair well with soups or stews, adding comfort to your meal. Enjoy them with a cup of hot tea or coffee. You can even serve them alongside fried chicken for a delightful brunch. These biscuits are perfect for any time of the day.
Storage Info
Short-term Storage
To keep your fluffy buttermilk biscuits fresh, store them at room temperature. Place the biscuits in an airtight container. This method helps maintain their light texture. You can also wrap them in a clean kitchen towel. Avoid plastic wrap, as it can trap moisture and make them soggy. For best results, eat them within two days.
Long-term Storage
If you want to enjoy your biscuits later, freezing is the way to go. First, let them cool completely after baking. Then, wrap each biscuit tightly in plastic wrap. After that, place the wrapped biscuits in a freezer bag. This keeps air out and prevents freezer burn. When you’re ready to eat them, remove the biscuits from the freezer. Let them thaw in the fridge overnight. To reheat, place them in a 350°F (175°C) oven for about 10 minutes. This restores their fluffy texture and warms them through.
Shelf Life
How long do biscuits last? When stored properly at room temperature, they stay fresh for about 2 days. If frozen, biscuits can last up to 3 months without losing quality. Always check for any off smells or changes in texture before eating. Enjoy your fluffy buttermilk biscuits at their best!
FAQs
How can I make my biscuits more tender?
To make your biscuits more tender, use cold butter. Cold butter helps create layers. Avoid overmixing the dough, as this can toughen the biscuits. Gently handle the dough for the best texture. Each step you take matters in the process.
Can I make the dough ahead of time?
Yes, you can make the dough ahead of time! After mixing, wrap the dough tightly in plastic wrap. Store it in the fridge for up to 24 hours. When ready to bake, simply roll it out and cut the biscuits. This saves time and keeps the fresh taste.
Why are my biscuits not rising?
If your biscuits are not rising, check your baking powder and baking soda. Old or expired leavening agents can cause flat biscuits. Also, ensure your oven is preheated properly. The heat helps the biscuits rise quickly. Lastly, avoid overmixing, as this can affect the rise.
Is it necessary to use buttermilk?
Using buttermilk adds a great flavor and tenderness to your biscuits. It reacts with baking soda, creating a nice lift. If you don’t have buttermilk, you can make a substitute. Mix 3/4 cup milk with 1 tablespoon of vinegar or lemon juice. Let it sit for a few minutes.
Can I double the recipe for a larger batch?
Absolutely! You can double the recipe for more biscuits. Just keep the same ratios for all your ingredients. Make sure your mixing bowl is big enough. This way, you’ll have plenty to share with friends and family. Enjoy a larger batch of fluffy buttermilk biscuits!
Making fluffy biscuits is simple with the right steps. We reviewed key ingredients, measurement tips, and substitutions. You learned how to mix and shape the dough effectively. Tips on achieving the perfect texture and avoiding common mistakes will lead you to success. Remember, variations let you get creative while serving suggestions help you enjoy your biscuits even more. Store them properly to keep them fresh. With these insights, you’re ready to bake delicious biscuits that impress. Enjoy every bite and share them with others!