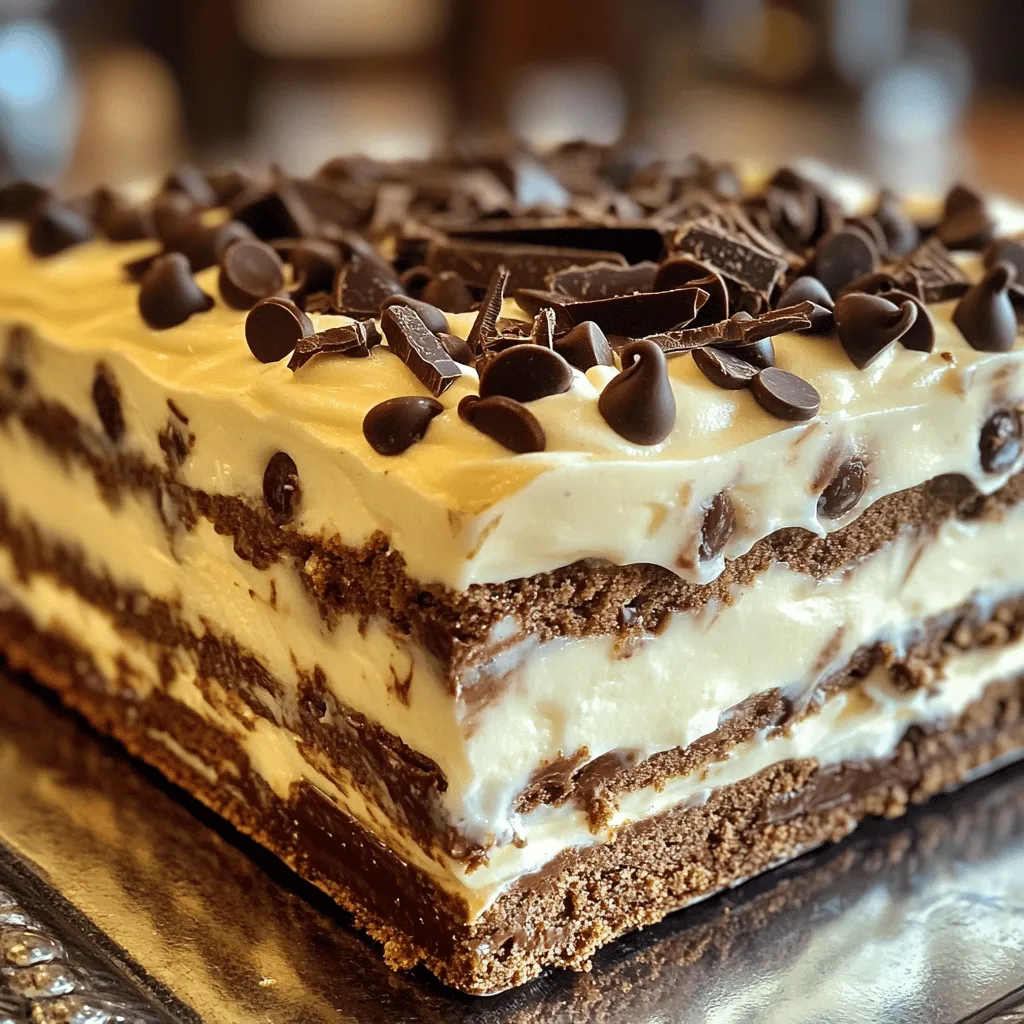
Looking for a quick and irresistible dessert? The Mocha Chip Icebox Cake is your answer! This no-bake delight combines rich chocolate and coffee flavors in a simple, layered treat. Whether you’re hosting a party or craving something sweet, this cake is sure to impress. I’ll guide you through gathering ingredients and assembling this dreamy dessert. Get ready for a taste that’s easy and oh-so-decadent!
Ingredients
Essential Ingredients for Mocha Chip Icebox Cake
To make the best Mocha Chip Icebox Cake, you need just a few key ingredients. Each one plays an important role in creating this delicious dessert.
– 2 cups heavy whipping cream
– 1/2 cup powdered sugar
– 1 tablespoon instant coffee granules
– 1 teaspoon vanilla extract
– 2 cups semi-sweet chocolate chips
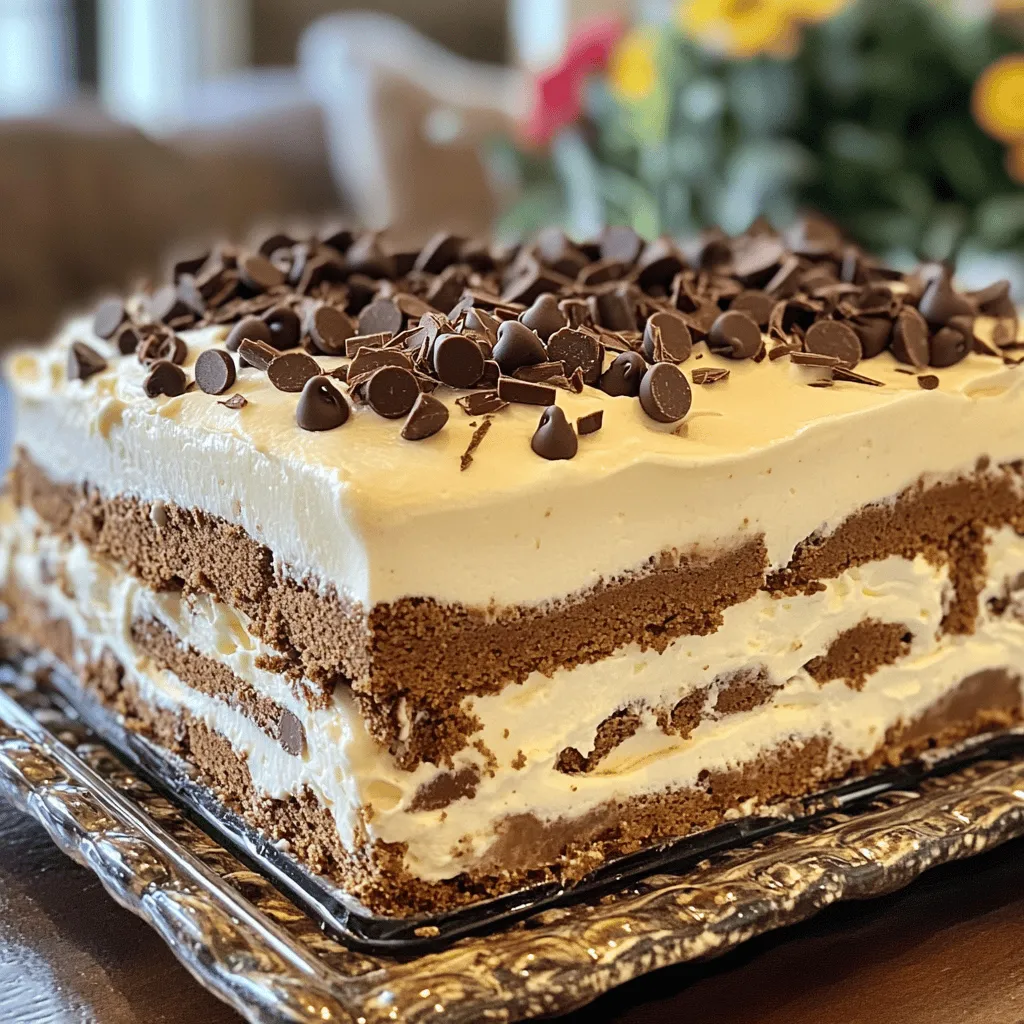
– 1 package (14 ounces) coffee-flavored or chocolate graham crackers
– Optional garnish: chocolate shavings or cocoa powder
You can find these ingredients at your local grocery store. Heavy whipping cream gives the cake its rich texture. Powdered sugar adds sweetness without grittiness. Instant coffee granules give it that strong coffee flavor. Vanilla extract adds warmth and depth. Semi-sweet chocolate chips bring chocolatey goodness in every bite. The graham crackers are the base that holds everything together.
Optional garnishes like chocolate shavings or cocoa powder make it look fancy. These simple ingredients come together to create a delightful no-bake dessert.
Step-by-Step Instructions
Preparation
1. Whipping the Cream: Start by taking a large mixing bowl. Add 2 cups of heavy whipping cream, 1/2 cup of powdered sugar, 1 tablespoon of instant coffee granules, and 1 teaspoon of vanilla extract. With an electric mixer, beat the mixture on medium-high speed. This takes about 3-4 minutes until stiff peaks form. Be careful not to overwhip, as it can turn grainy.
2. Preparing the Base Layer: Grab a 9×13 inch baking dish. Spread a thin layer of the whipped cream mixture at the bottom. This layer keeps the graham crackers from sticking to the dish.
3. Assembling the Layers: Place a single layer of coffee-flavored or chocolate graham crackers on top of the cream. You can break the crackers if needed to fit your dish. Next, take half of the whipped cream mixture and spread it evenly over the graham crackers. Then, sprinkle half of the 2 cups of semi-sweet chocolate chips on top. This gives a nice chocolatey surprise in every bite.
Final Assembly
1. Adding the Second Layer of Graham Crackers: Now, place another layer of graham crackers over the chocolate chips. This creates a nice balance of flavors.
2. Topping with the Remaining Whipped Cream and Chips: Spread the remaining whipped cream mixture over this layer. Make sure it’s even. After that, sprinkle the rest of the chocolate chips on top for extra flavor.
3. Sealing the Cake for Chilling: Finally, add one last layer of graham crackers on top. This seals in all the yummy layers below. Cover the dish tightly with plastic wrap.
Chilling Instructions
1. Recommended Chilling Time: Place the baking dish in the refrigerator. Chill for at least 4 hours. For best results, leave it overnight. This allows all the flavors to blend well.
2. Importance of Chilling for Flavor Development: Chilling helps the graham crackers soften and soak up the cream. This makes the cake taste richer and creamier when you serve it.Enjoy making this delightful no-bake dessert!
Tips & Tricks
Achieving Perfect Whipped Cream
To make smooth whipped cream, avoid overwhipping. When you see soft peaks, stop mixing. You want a light and fluffy texture. Use a medium-high mixer speed. This speed helps the cream whip evenly without turning grainy.
Cake Assembly Tips
When breaking graham crackers, use a sharp knife. This method gives you clean edges. You can also place them in a zip-top bag and crush them gently. For even layers, spread the cream consistently across the crackers. Press down lightly to help the layers stick together.
Presentation Enhancements
Serve the cake on a nice platter to impress your guests. For a pop of color, add whole chocolate chips or mint leaves by each slice. You can also dust cocoa powder on top for added flair. Chocolate shavings make a lovely garnish, too!
Variations
Flavor Substitutions
You can switch up the chocolate for a new twist. Dark chocolate chips give a rich taste. White chocolate can add a sweet touch. You might like milk chocolate for a creamier feel.
For coffee, try using espresso powder instead of instant coffee. It brings a bold kick. You can also use flavored coffee granules, like hazelnut or vanilla, for a fun twist.
Healthier Versions
If you want a lighter cake, swap heavy cream for Greek yogurt. This cuts calories and adds protein. You can also use a sugar substitute, like stevia, instead of powdered sugar.
For a dairy-free option, choose coconut cream. It whips up nicely and adds a tropical flavor. Use dairy-free chocolate chips to keep it all plant-based.
Holiday or Seasonal Variations
For special occasions, add festive garnishes. Use crushed peppermint candies for a holiday feel. In fall, sprinkle cinnamon on top for warmth. You can even add seasonal fruit like berries or sliced bananas for freshness.
Adjust flavors to match the season. In winter, try adding a hint of nutmeg. For summer, a splash of orange zest can brighten the dessert. These little changes keep your icebox cake exciting!
Storage Info
Best Practices for Storing
To keep your Mocha Chip Icebox Cake fresh, store it in the fridge. Use an airtight container to keep out air and moisture. If you have leftovers, slice the cake before storing. This way, it’s easy to grab a piece when you want a treat.
For longer storage, you can freeze the cake. Wrap it tightly in plastic wrap, then place it in a freezer-safe container. This helps prevent freezer burn.
Shelf Life
When stored in the fridge, the cake lasts about 4 to 5 days. It may still taste good after this, but the texture can change. If you freeze it, the cake can last up to 2 months.
Watch for signs that the cake has gone bad. If you see mold or it has an off smell, it’s best to throw it away.
Re-serving Recommendations
If you freeze your cake, thaw it in the fridge overnight. This keeps the texture nice. Before serving, consider refreshing the look.
Add a sprinkle of cocoa powder or chocolate shavings on top. You can also place fresh mint leaves beside each slice. These simple touches make your cake look fancy and inviting.
FAQs
How long can I store Mocha Chip Icebox Cake?
You can store Mocha Chip Icebox Cake in the fridge for up to five days. Keep it covered with plastic wrap to keep it fresh. After that, the flavor and texture may start to change.
Can I make this cake ahead of time?
Yes! This cake is perfect for making ahead of time. You can prepare it a day or two before you plan to serve it. Just keep it in the fridge to let the layers meld together. This waiting time enhances the flavors and makes each bite even better.
What type of coffee granules should I use?
I suggest using instant coffee granules for this recipe. Brands like Nescafé or Starbucks VIA work well. They dissolve easily and give a nice coffee flavor. You can also use espresso powder for a stronger taste if you prefer.
Can I use homemade whipped cream instead?
Absolutely! Using homemade whipped cream can add a fresh taste. Just make sure you whip it to stiff peaks. Store-bought whipped cream is easy and saves time, but it may not have the same creamy texture as homemade.
Is it possible to make this dessert gluten-free?
Yes, you can make this dessert gluten-free. Look for gluten-free graham crackers made from almond flour or rice flour. Brands like Schär or Kinnikinnick offer great options. Just check the package to ensure they are certified gluten-free.
To make a Mocha Chip Icebox Cake, gather simple yet tasty ingredients. You whip cream, layer graham crackers and chocolate chips, and chill the cake. This helps the flavors blend well. Remember, perfect whipped cream is key. You can get creative with flavors and toppings too. Store leftovers properly to enjoy later. With these tips, you’ll impress everyone with your delicious cake. Now, get ready to enjoy a fun treat!