No-Bake Pumpkin Oreo Cheesecake Bars Delightful Treat

WANT TO SAVE THIS RECIPE?

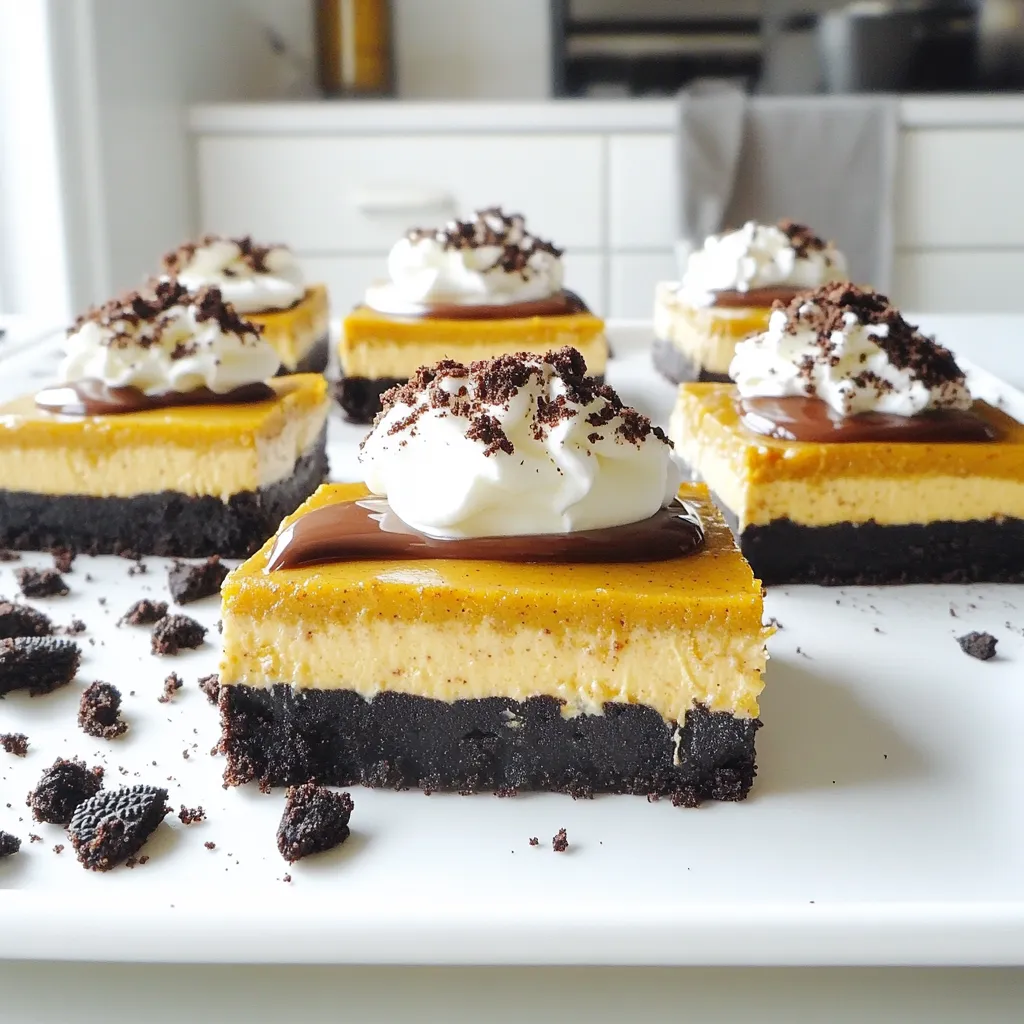
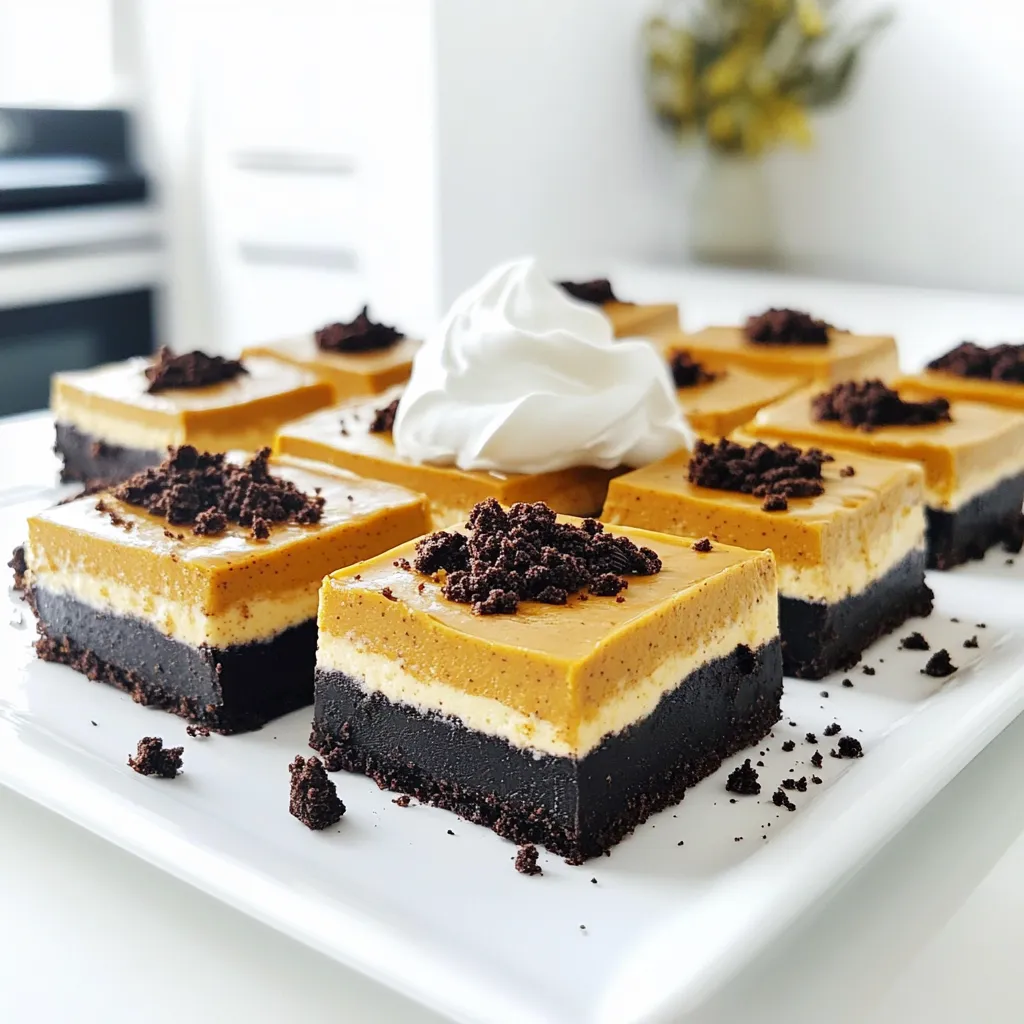
If you crave a sweet and simple autumn treat, you’ll love this No-Bake Pumpkin Oreo Cheesecake Bars recipe! These bars blend creamy pumpkin filling with the crunch of Oreo crust for a taste that sings fall flavors. Plus, there’s no baking required! Join me as I guide you through easy steps and tips to create this delightful dessert. Get your ingredients ready, and let’s dive into this mouth-watering treat!

Ingredients

Main Ingredients

– 24 Oreo cookies, finely crushed

– ½ cup unsalted butter, melted

– 1 cup cream cheese, softened

– 1 cup canned pumpkin puree

– ½ cup powdered sugar

– 1 teaspoon vanilla extract

– 1 teaspoon pumpkin pie spice

– 1 cup whipped topping

To make these No-Bake Pumpkin Oreo Cheesecake Bars, you need a few simple ingredients. First, the Oreo cookies form a tasty crust. Crush them finely to get a smooth base. Mix the crushed cookies with melted butter until it looks like wet sand.

Next, cream cheese is key for a rich filling. Make sure it’s softened to blend well. The star of this dessert is canned pumpkin puree. It brings the fall flavor we all love. Add in powdered sugar for sweetness and vanilla extract for depth. Don’t forget the pumpkin pie spice; it adds warmth and aroma.

Finally, whipped topping gives the cheesecake a light and airy texture. Use a good brand, like Cool Whip, to ensure a great result.

Optional Toppings

– Chocolate sauce

– Extra whipped cream

– Crushed Oreos

You can elevate your bars with optional toppings. Drizzle chocolate sauce over the bars for added sweetness. A dollop of extra whipped cream adds richness, making each bite delightful. For a bit of crunch, sprinkle crushed Oreos on top. These toppings can make your dessert look even more tempting!

Equipment Needed

– Mixing bowls

– Electric mixer

– 9×9-inch square baking pan

Make sure you have the right tools for this recipe. Mixing bowls help combine your ingredients well. An electric mixer is essential for beating the cream cheese until smooth. Lastly, a 9×9-inch square baking pan is perfect for setting your cheesecake bars. This size ensures even cutting and serving later on.

Step-by-Step Instructions

Prepare the Oreo Crust

– Combine 24 finely crushed Oreo cookies and ½ cup melted unsalted butter in a bowl.

– Stir until the mix looks like wet sand.

– Press this mixture firmly into a 9×9-inch square baking pan.

– Use a spatula or the bottom of a glass to get an even base.

Make the Pumpkin Cheesecake Filling

– In a large bowl, beat 1 cup of softened cream cheese with an electric mixer.

– Mix until it is creamy and smooth, with no lumps.

– Add 1 cup of canned pumpkin puree, ½ cup powdered sugar, 1 teaspoon vanilla extract, and 1 teaspoon pumpkin pie spice.

– Stir until everything is well mixed and smooth.

Combine and Set

– Carefully fold in 1 cup of whipped topping with a rubber spatula.

– Be gentle to keep the mixture light and fluffy.

– Pour the pumpkin cheesecake mixture over the crust.

– Spread it evenly with a spatula.

– Cover the pan with plastic wrap and refrigerate for at least 4 hours to set.

– Once set, slice the dessert into bars and serve chilled.

Tips & Tricks

Achieving the Perfect Crust

Pressing firmly is key to a solid crust. This step helps it hold together when you slice. Use the flat bottom of a glass or spatula to press down. This ensures an even layer that won’t crumble. A 9×9-inch pan works best for this recipe. It gives the bars the right thickness and shape, making them easy to serve.

Cream Cheese Mixture

Make sure your cream cheese is at room temperature. Cold cream cheese can cause lumps in your filling. Use an electric mixer to beat it until it’s creamy and smooth. This step is crucial for a silky texture. When adding canned pumpkin puree and other ingredients, mix until everything is fully blended. This will give your bars a rich and velvety feel.

Storage Tips

To store leftovers, cover the bars tightly with plastic wrap. Keep them in the fridge for up to five days. For the best taste, serve them cold. The bars taste even better after chilling overnight. This allows the flavors to meld beautifully.

Variations

Flavor Alternatives

You can switch up the flavor of your bars with different Oreo cookies. Try using mint, peanut butter, or even birthday cake Oreos for a fun twist. Each flavor adds its own unique taste to the dessert. You can also enhance the pumpkin flavor by adding spices like nutmeg or cinnamon. A sprinkle of these spices will make your cheesecake even more delightful.

Dietary Adjustments

If you’re looking for gluten-free options, use gluten-free Oreo cookies. Many brands offer these, so check your local store. For vegan substitutions, swap the cream cheese for a plant-based cream cheese. You can also replace the whipped topping with coconut whipped cream. These changes keep the taste yummy while fitting different diets.

Portioning Ideas

Serving your cheesecake bars as mini bars is a fun way to enjoy them. Simply cut smaller squares, and they are perfect for parties or snacks. You can also use cookie cutters to create fun shapes. This way, your treats look festive and appealing for any gathering. Plus, kids will love the fun shapes!

Storage Info

Refrigeration Instructions

You can store the No-Bake Pumpkin Oreo Cheesecake Bars in the fridge for up to five days. Make sure to keep them covered. This helps them stay fresh and tasty. The creamy pumpkin filling and Oreo crust stay great for several days. I always recommend enjoying them cold for the best flavor.

Freezing Instructions

Yes, you can freeze these cheesecake bars! They freeze well for up to three months. To freeze, cut them into bars first. Wrap each bar tightly in plastic wrap and then place them in a freezer bag. This keeps the air out and prevents freezer burn.

When you are ready to eat, take them out and thaw in the fridge for a few hours. They will taste just as good as fresh!

Container Recommendations

For best results, use airtight containers. These keep moisture out and help maintain the bars’ flavor. If you don’t have an airtight container, you can use regular ones, but make sure to cover them well. This will help keep your treats safe from drying out in the fridge.

FAQs

How long does it take for the cheesecake to set?

The recommended chilling time for the cheesecake is a minimum of 4 hours. This allows it to firm up properly. If you can wait longer, that’s even better! Chilling it overnight makes it taste even better.

Can I use homemade whipped cream instead?

Yes, you can use homemade whipped cream instead of store-bought. Homemade whipped cream has a fresh taste and creamy texture. However, store-bought whipped topping, like Cool Whip, holds its shape well. If you use homemade, serve right after mixing to keep it fluffy.

What can I substitute for pumpkin puree?

You can substitute pumpkin puree with sweet potato puree or butternut squash puree. Both will give a similar texture and flavor. If you want a different twist, use applesauce too. It will change the taste slightly but still add moisture.

This post offers a clear guide to making pumpkin cheesecake bars using simple ingredients. You learned about the key components: Oreo cookies, cream cheese, and pumpkin puree. We also covered tips for a perfect crust, different flavor variations, and smart storage methods.

Remember, you can customize this dessert to fit your taste. Experiment with toppings and layer shapes for fun. Enjoy creating your own delicious treats!

- 24 Oreo cookies, finely crushed - ½ cup unsalted butter, melted - 1 cup cream cheese, softened - 1 cup canned pumpkin puree - ½ cup powdered sugar - 1 teaspoon vanilla extract - 1 teaspoon pumpkin pie spice - 1 cup whipped topping To make these No-Bake Pumpkin Oreo Cheesecake Bars, you need a few simple ingredients. First, the Oreo cookies form a tasty crust. Crush them finely to get a smooth base. Mix the crushed cookies with melted butter until it looks like wet sand. Next, cream cheese is key for a rich filling. Make sure it’s softened to blend well. The star of this dessert is canned pumpkin puree. It brings the fall flavor we all love. Add in powdered sugar for sweetness and vanilla extract for depth. Don’t forget the pumpkin pie spice; it adds warmth and aroma. Finally, whipped topping gives the cheesecake a light and airy texture. Use a good brand, like Cool Whip, to ensure a great result. - Chocolate sauce - Extra whipped cream - Crushed Oreos You can elevate your bars with optional toppings. Drizzle chocolate sauce over the bars for added sweetness. A dollop of extra whipped cream adds richness, making each bite delightful. For a bit of crunch, sprinkle crushed Oreos on top. These toppings can make your dessert look even more tempting! - Mixing bowls - Electric mixer - 9x9-inch square baking pan Make sure you have the right tools for this recipe. Mixing bowls help combine your ingredients well. An electric mixer is essential for beating the cream cheese until smooth. Lastly, a 9x9-inch square baking pan is perfect for setting your cheesecake bars. This size ensures even cutting and serving later on. - Combine 24 finely crushed Oreo cookies and ½ cup melted unsalted butter in a bowl. - Stir until the mix looks like wet sand. - Press this mixture firmly into a 9x9-inch square baking pan. - Use a spatula or the bottom of a glass to get an even base. - In a large bowl, beat 1 cup of softened cream cheese with an electric mixer. - Mix until it is creamy and smooth, with no lumps. - Add 1 cup of canned pumpkin puree, ½ cup powdered sugar, 1 teaspoon vanilla extract, and 1 teaspoon pumpkin pie spice. - Stir until everything is well mixed and smooth. - Carefully fold in 1 cup of whipped topping with a rubber spatula. - Be gentle to keep the mixture light and fluffy. - Pour the pumpkin cheesecake mixture over the crust. - Spread it evenly with a spatula. - Cover the pan with plastic wrap and refrigerate for at least 4 hours to set. - Once set, slice the dessert into bars and serve chilled. Pressing firmly is key to a solid crust. This step helps it hold together when you slice. Use the flat bottom of a glass or spatula to press down. This ensures an even layer that won’t crumble. A 9x9-inch pan works best for this recipe. It gives the bars the right thickness and shape, making them easy to serve. Make sure your cream cheese is at room temperature. Cold cream cheese can cause lumps in your filling. Use an electric mixer to beat it until it’s creamy and smooth. This step is crucial for a silky texture. When adding canned pumpkin puree and other ingredients, mix until everything is fully blended. This will give your bars a rich and velvety feel. To store leftovers, cover the bars tightly with plastic wrap. Keep them in the fridge for up to five days. For the best taste, serve them cold. The bars taste even better after chilling overnight. This allows the flavors to meld beautifully. {{image_4}} You can switch up the flavor of your bars with different Oreo cookies. Try using mint, peanut butter, or even birthday cake Oreos for a fun twist. Each flavor adds its own unique taste to the dessert. You can also enhance the pumpkin flavor by adding spices like nutmeg or cinnamon. A sprinkle of these spices will make your cheesecake even more delightful. If you're looking for gluten-free options, use gluten-free Oreo cookies. Many brands offer these, so check your local store. For vegan substitutions, swap the cream cheese for a plant-based cream cheese. You can also replace the whipped topping with coconut whipped cream. These changes keep the taste yummy while fitting different diets. Serving your cheesecake bars as mini bars is a fun way to enjoy them. Simply cut smaller squares, and they are perfect for parties or snacks. You can also use cookie cutters to create fun shapes. This way, your treats look festive and appealing for any gathering. Plus, kids will love the fun shapes! You can store the No-Bake Pumpkin Oreo Cheesecake Bars in the fridge for up to five days. Make sure to keep them covered. This helps them stay fresh and tasty. The creamy pumpkin filling and Oreo crust stay great for several days. I always recommend enjoying them cold for the best flavor. Yes, you can freeze these cheesecake bars! They freeze well for up to three months. To freeze, cut them into bars first. Wrap each bar tightly in plastic wrap and then place them in a freezer bag. This keeps the air out and prevents freezer burn. When you are ready to eat, take them out and thaw in the fridge for a few hours. They will taste just as good as fresh! For best results, use airtight containers. These keep moisture out and help maintain the bars' flavor. If you don’t have an airtight container, you can use regular ones, but make sure to cover them well. This will help keep your treats safe from drying out in the fridge. The recommended chilling time for the cheesecake is a minimum of 4 hours. This allows it to firm up properly. If you can wait longer, that’s even better! Chilling it overnight makes it taste even better. Yes, you can use homemade whipped cream instead of store-bought. Homemade whipped cream has a fresh taste and creamy texture. However, store-bought whipped topping, like Cool Whip, holds its shape well. If you use homemade, serve right after mixing to keep it fluffy. You can substitute pumpkin puree with sweet potato puree or butternut squash puree. Both will give a similar texture and flavor. If you want a different twist, use applesauce too. It will change the taste slightly but still add moisture. This post offers a clear guide to making pumpkin cheesecake bars using simple ingredients. You learned about the key components: Oreo cookies, cream cheese, and pumpkin puree. We also covered tips for a perfect crust, different flavor variations, and smart storage methods. Remember, you can customize this dessert to fit your taste. Experiment with toppings and layer shapes for fun. Enjoy creating your own delicious treats!

No-Bake Pumpkin Oreo Cheesecake Bars

Indulge in the creamy, deliciousness of No-Bake Pumpkin Oreo Cheesecake Bars! This easy recipe combines a rich Oreo crust with a velvety pumpkin filling, making it the perfect fall dessert. Ready in just 20 minutes and chilled to perfection, these bars are a must-try for any pumpkin lover. Click to explore the full recipe and elevate your autumn gatherings! #PumpkinDesserts #NoBakeCheesecake #FallRecipes #DessertIdeas

Ingredients
  

24 Oreo cookies, finely crushed

½ cup unsalted butter, melted

1 cup cream cheese, softened to room temperature

1 cup canned pumpkin puree

½ cup powdered sugar

1 teaspoon vanilla extract

1 teaspoon pumpkin pie spice

1 cup whipped topping (such as Cool Whip)

Instructions
 

In a medium mixing bowl, combine the finely crushed Oreo cookies with the melted unsalted butter. Stir until the mixture is fully blended and resembles wet sand.

    Transfer the Oreo mixture into a 9x9-inch square baking pan. Firmly press the mixture into the bottom of the pan using a spatula or the flat bottom of a glass to create an even crust. Ensure it reaches the edges for better support.

      In a large bowl, use an electric mixer to beat the softened cream cheese until it's creamy and smooth, with no lumps remaining.

        Gradually add in the canned pumpkin puree, powdered sugar, vanilla extract, and pumpkin pie spice to the cream cheese. Mix thoroughly until all ingredients are well incorporated and the mixture is velvety smooth.

          Carefully fold in the whipped topping using a rubber spatula until just combined. Take care not to over-mix, as you want to maintain the lightness of the whipped topping.

            Pour the pumpkin cheesecake mixture evenly over the prepared Oreo crust. Use a spatula to gently spread it into an even layer.

              Cover the pan tightly with plastic wrap and refrigerate for a minimum of 4 hours, allowing the bars to firm up and set completely.

                After the mixture has set, slice the dessert into bars and serve chilled.

                  Prep Time: 20 minutes | Total Time: 4 hours 20 minutes | Servings: 12

                    - Presentation Tips: Plate each bar on a decorative dessert plate. Drizzle with rich chocolate sauce or add a dollop of extra whipped cream. For an added crunch, sprinkle some crushed Oreos on top before serving. Enjoy the seasonal flavors!

                      WANT TO SAVE THIS RECIPE?

                      Leave a Comment

                      Recipe Rating