Craving a sweet treat that’s both easy to make and bursting with flavor? Look no further! In this post, I’ll share my simple recipe for No-Bake Snickers Bars. With just a handful of ingredients, you’ll create a delicious dessert that impresses every time. Whether you’re a baking pro or a kitchen novice, I’ll guide you step by step to achieve that perfect chewy and crunchy texture. Let’s dive into dessert bliss!
Ingredients
List of Ingredients
To make these delicious No-Bake Snickers Bars, you will need:
– 1 cup graham cracker crumbs
– 1/2 cup unsweetened cocoa powder
– 1/2 cup creamy peanut butter
– 1/3 cup honey or maple syrup
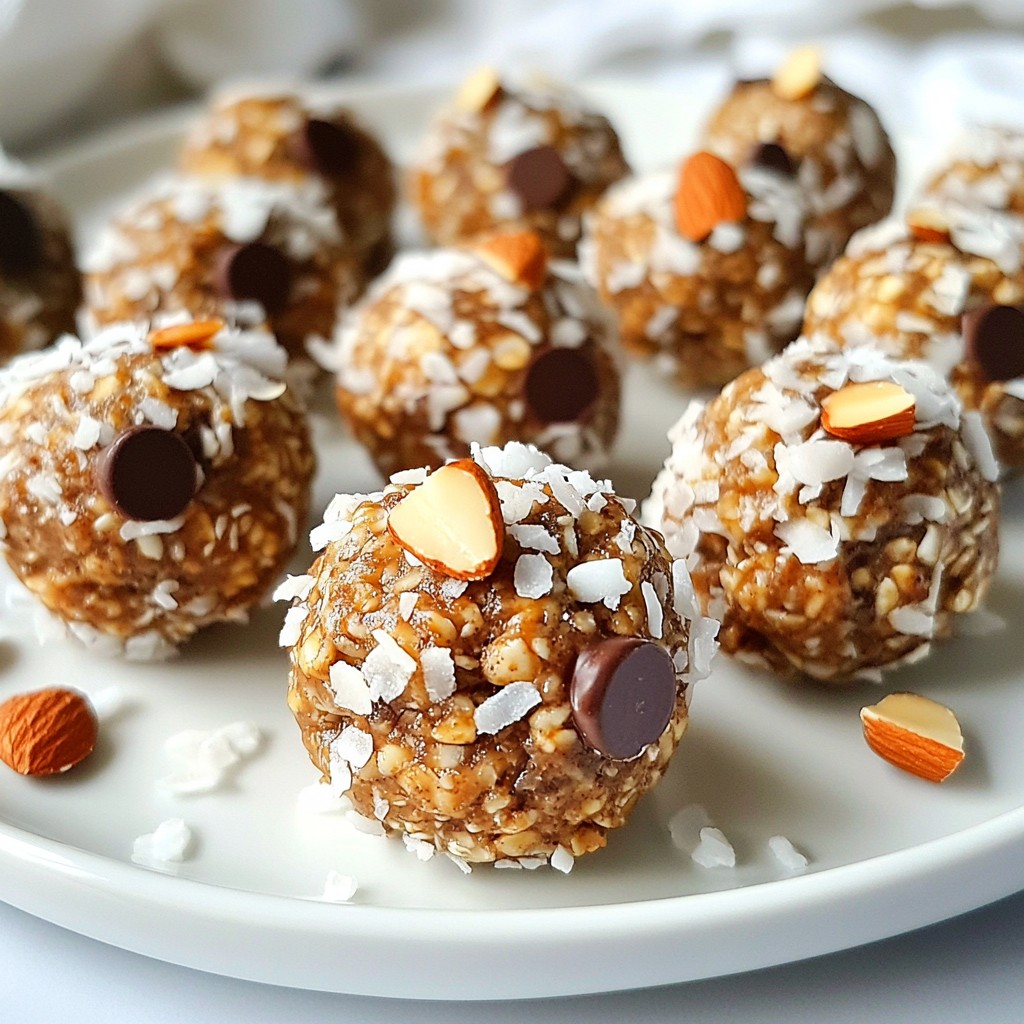
– 1 cup salted peanuts, roughly chopped
– 1 cup chocolate chips (milk or dark chocolate)
– 1/4 cup heavy cream or coconut cream
– A pinch of sea salt for finishing
These ingredients come together to create a rich and satisfying treat.
Ingredient Substitutions
If you want to switch things up, here are some easy swaps:
– Use almond butter instead of peanut butter for a nutty twist.
– Try agave syrup if you prefer a different sweetener.
– Coconut cream can replace heavy cream for a dairy-free option.
These substitutions keep the flavor while catering to your taste or dietary needs.
Choosing Quality Ingredients
Selecting the right ingredients makes a big difference. Here are tips for two key components:
– Chocolate Chips: Look for high-quality chocolate chips. Choose brands that have a rich flavor. Dark chocolate adds depth, while milk chocolate is sweeter.
– Salted Peanuts: Fresh, crunchy peanuts enhance the texture. Buy whole peanuts and chop them yourself for a fresher taste.
Investing in good ingredients leads to a more delicious No-Bake Snickers Bar.
Step-by-Step Instructions
Detailed Preparation Steps
To make No-Bake Snickers Bars, follow these simple steps:
1. Prepare the Base: In a medium bowl, mix the graham cracker crumbs and cocoa powder. This step sets the base flavor.
2. Mix the Peanut Butter: In a separate bowl, blend the creamy peanut butter and honey (or maple syrup). Stir until smooth.
3. Combine Mixtures: Add the peanut butter mix into the graham cracker blend. Stir until you form a thick dough.
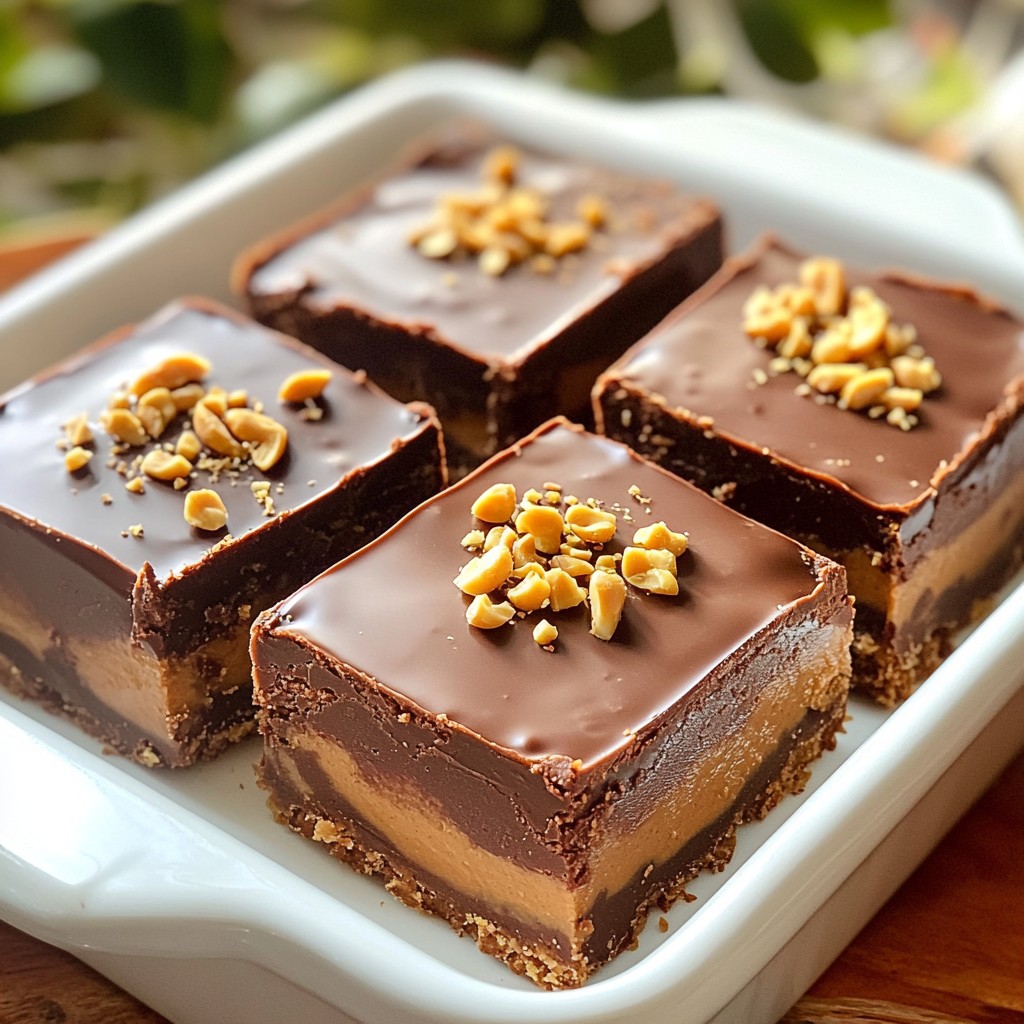
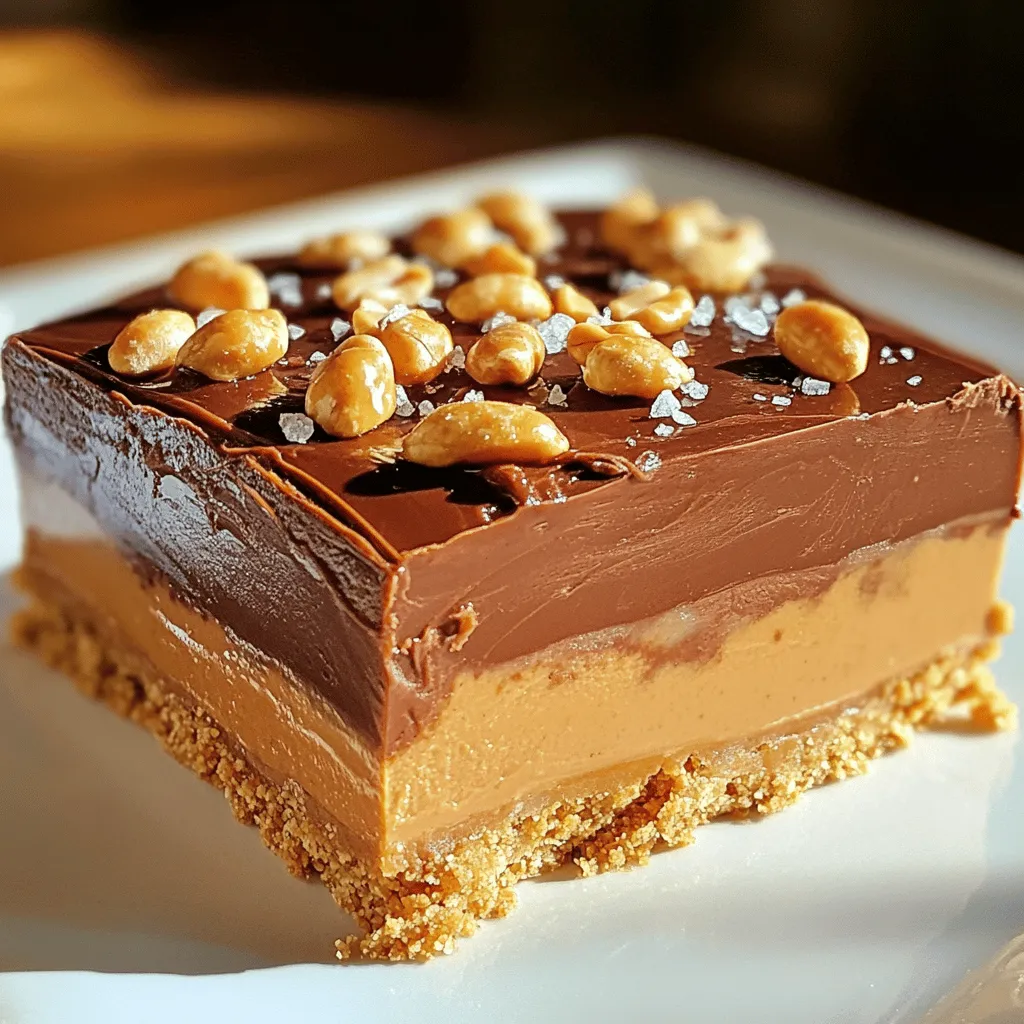
4. Press into Pan: Line a 9×9 inch dish with parchment paper. Press the mixture firmly into the bottom to create a base layer.
5. Add Peanuts: Sprinkle the chopped salted peanuts over the crust. Press them down gently to stick.
6. Melt the Chocolate: In a microwave-safe bowl, mix the chocolate chips with heavy cream. Heat in 30-second bursts, stirring until melted.
7. Pour Chocolate Layer: Pour the melted chocolate over the peanut layer. Spread it evenly with a spatula.
8. Chill: Place the dish in the fridge. Chill for at least 2 hours until the chocolate sets.
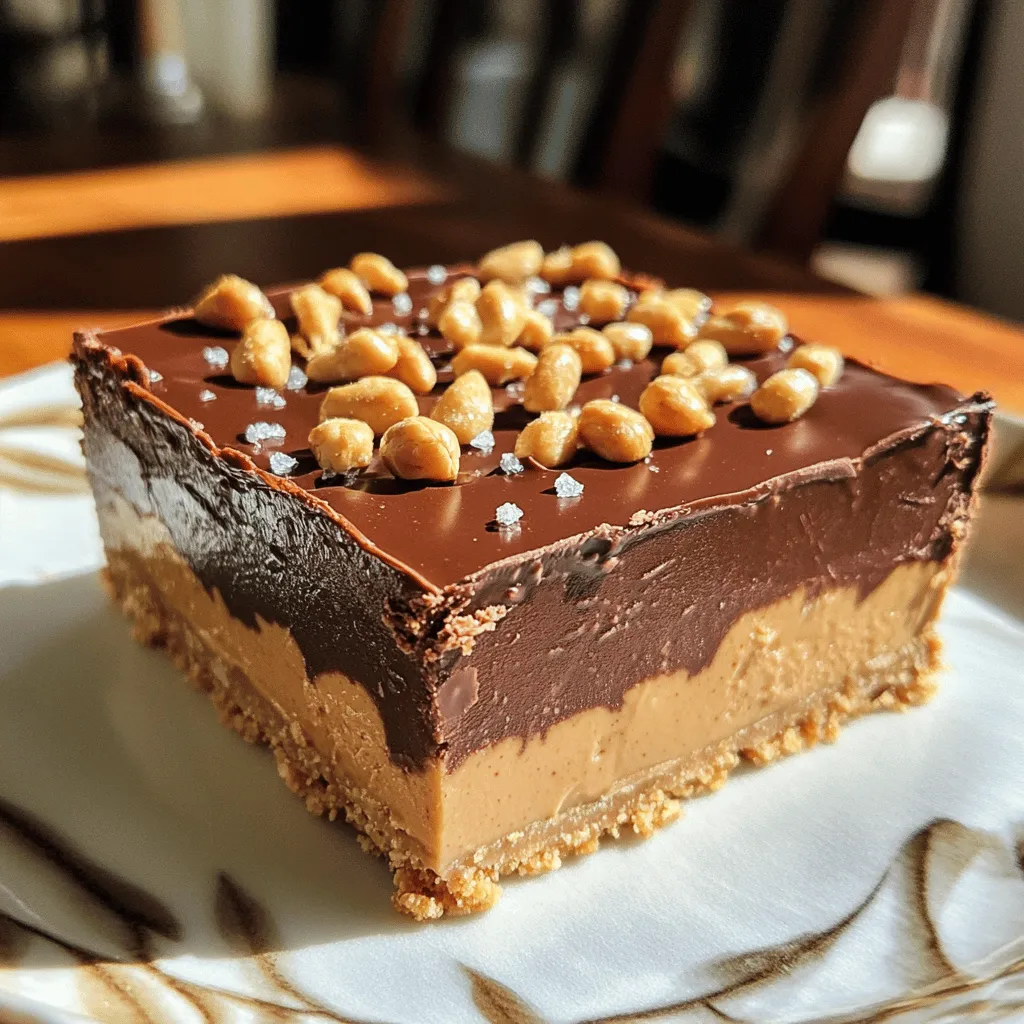
9. Serve: Once firm, lift the bars out using the parchment paper. Cut into squares and sprinkle with sea salt.
Tips for Each Step
– Mixing: Make sure not to leave dry spots in your base mix. Stir well.
– Peanut Butter: Use room temperature peanut butter for easy mixing.
– Pressing: Press firmly to avoid a crumbly base.
– Peanuts: Use fresh salted peanuts for the best crunch.
– Melting Chocolate: Stir often to prevent burning. Stop as soon as it’s smooth.
– Chilling: Don’t skip the chill time; it helps the bars set properly.
Visual Aids
– Consider showing images of each step, like mixing the base, pressing it into the pan, and pouring the chocolate.
– A video clip demonstrating the melting chocolate process can be helpful.
– Before and after photos of the bars can inspire your readers and show the final result.
These steps ensure a tasty, easy-to-make treat that everyone will love.
Tips & Tricks
Achieving the Perfect Texture
To create a thick and cohesive dough, mix the graham cracker crumbs and cocoa powder well. Use a large bowl to give yourself enough space. When blending the peanut butter and honey, make sure they are creamy and smooth. If your dough feels too dry, add a bit more peanut butter or honey. If it’s too wet, a little extra graham cracker crumbs can help. Press the mixture firmly into your pan for best results.
Serving Suggestions
These No-Bake Snickers Bars shine at parties! Cut them into squares or rectangles for easy serving. You can arrange them on a colorful plate or tiered stand. For a fun twist, try adding a sprinkle of sea salt or some chopped nuts on top. You could even serve them with fresh fruit or a scoop of ice cream for an extra treat.
Making the Recipe Healthier
You can reduce sugar by using less honey or maple syrup. Consider swapping in natural nut butters for added nutrients. You can also use dark chocolate chips for a less sweet option. Adding a few tablespoons of ground flaxseed or chia seeds can boost fiber without changing the taste much. These simple changes help make your No-Bake Snickers Bars a bit healthier.
Variations
Flavor Enhancements
You can easily boost the flavor of your No-Bake Snickers Bars. Try adding a splash of vanilla extract to the base mix. This small change adds a warm, sweet note. Another idea is to drizzle some sea salt caramel over the chocolate layer. This adds a rich and salty twist that pairs well with the sweetness.
Different Toppings
Get creative with your toppings! Instead of just salted peanuts, consider using crushed pretzels for a salty crunch. You could also try chopped almonds or walnuts. Each nut adds its unique flavor and texture, making your bars even more interesting. If you love coconut, sprinkle some shredded coconut on top to give it a tropical flair.
Dietary Variations
Need a gluten-free option? Swap the graham cracker crumbs for gluten-free ones. You can also use almond butter instead of peanut butter for a nut-free version. For a vegan treat, replace honey with maple syrup and use dairy-free chocolate chips. These simple swaps let everyone enjoy these tasty bars without missing out!
Storage Info
How to Store
To keep your No-Bake Snickers Bars fresh, store them in an airtight container. Place parchment paper between layers to prevent sticking. This method helps maintain their texture and taste. Keep them in the fridge for the best results. They will stay fresh and tasty this way.
Freezing Instructions
If you want to freeze these bars, follow these steps:
1. Cut the bars into squares.
2. Place them in a single layer on a baking sheet.
3. Freeze for about 1 hour until solid.
4. Transfer the squares into an airtight container or freezer bag.
5. Label the container with the date. This way, you can track how long they’ve been in the freezer.
When you’re ready to enjoy, take them out and let them sit at room temperature for about 10-15 minutes. This will help them soften a bit for the best taste.
Shelf Life
In the fridge, your No-Bake Snickers Bars can last up to one week. If you freeze them, they can stay good for about three months. Remember to check for any freezer burn if they are stored for a long time. Enjoy these treats fresh for the best flavor!
FAQs
Can I make these bars ahead of time?
Yes, you can make these bars ahead of time. They taste great after sitting in the fridge. I recommend making them up to three days in advance. Just keep them covered in the fridge. This way, the flavors blend nicely. You can enjoy them fresh when you want a sweet treat!
What can I substitute for chocolate chips?
If you need a substitute for chocolate chips, there are a few great options. You can use chopped dark chocolate, carob chips, or even white chocolate. Each option will give a different taste, but they will still work well. If you want a healthier choice, try using cacao nibs. They add a nice crunch and are less sweet.
How do I make the bars more chocolatey?
To make these bars more chocolatey, you can add more cocoa powder to the mixture. A tablespoon or two will do! You can also drizzle extra melted chocolate on top after chilling. Another fun idea is to mix in chocolate chunks with the peanuts. This will give you a rich chocolate taste in every bite!
You learned about the key ingredients for No-Bake Snickers Bars, how to prepare them, and tips for success. Quality ingredients, like premium chocolate chips, enhance flavor. You also discovered fun variations, healthier options, and how to store them for freshness.
Remember, making these bars is easy and customizable. With a little creativity, you can impress your friends and family. Enjoy your homemade treats, and happy cooking!