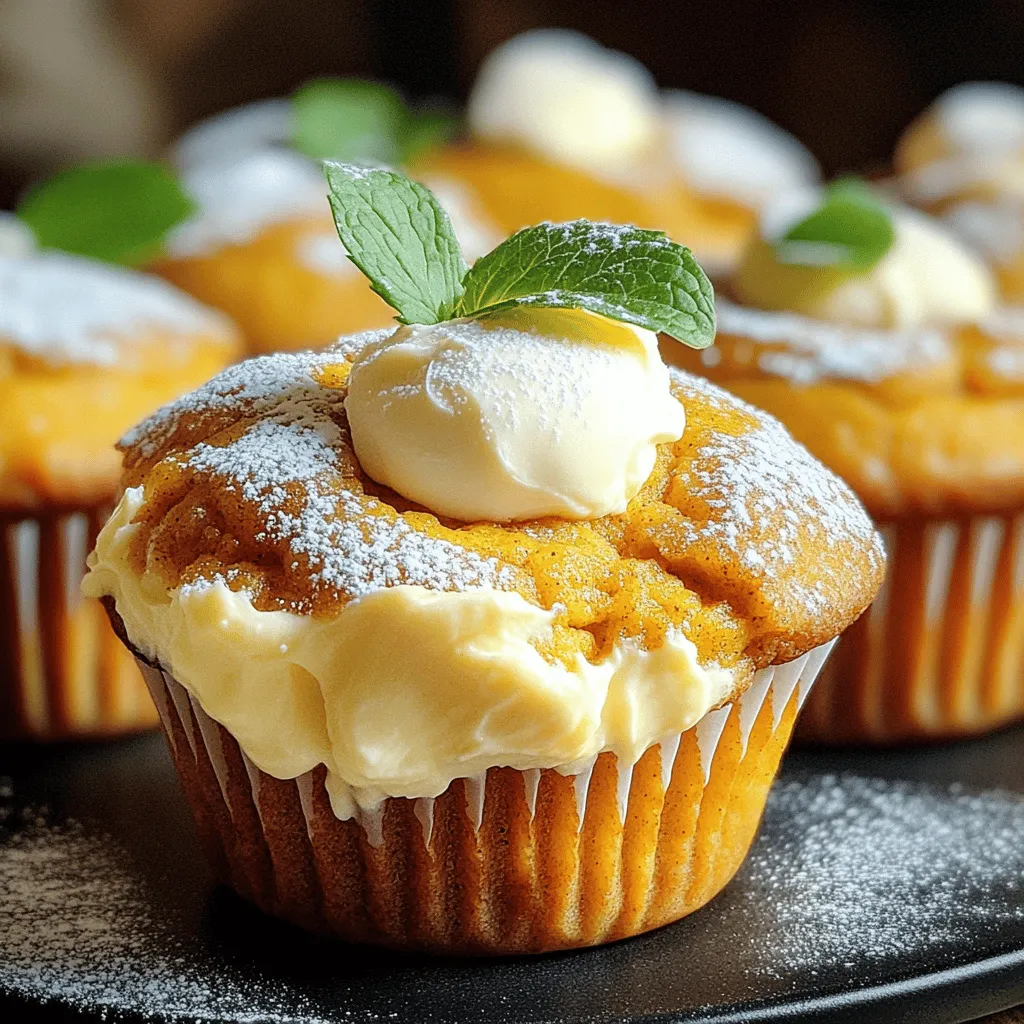
Get ready to indulge in Pumpkin Cheesecake Muffins that are both tasty and easy to make! This delightful treat combines the flavors of fall with a creamy cheesecake filling. Perfect for breakfast or a snack, this recipe uses simple ingredients you likely have at home. Join me as we dive into a step-by-step guide that will have you baking these delicious muffins in no time!
Ingredients
Dry Ingredients
– 1 cup all-purpose flour
– 1/2 cup granulated sugar
– 1 teaspoon baking powder
– 1/2 teaspoon baking soda
– 1 teaspoon ground cinnamon
– 1/2 teaspoon ground nutmeg
– 1/2 teaspoon ground ginger
– 1/2 teaspoon salt
Wet Ingredients
– 1/2 cup canned pumpkin puree
– 1/4 cup vegetable oil
– 1 large egg
– 1 teaspoon vanilla extract
Cream Cheese Filling
– 1/2 cup cream cheese, softened to room temperature
– 1/4 cup powdered sugar
– 1 tablespoon milk
To create delicious pumpkin cheesecake muffins, you will need both dry and wet ingredients. The dry mix includes flour, sugar, baking powder, baking soda, spices, and salt. These build the muffin’s texture and flavor.
For the wet mix, you’ll use canned pumpkin puree, oil, egg, and vanilla. The pumpkin gives moisture and a rich taste. The egg helps bind everything together.
Next, we prepare the cream cheese filling. This sweet and creamy layer adds a delightful surprise inside each muffin. You just mix cream cheese, powdered sugar, and milk until smooth.
Gather all these ingredients, and you’ll be ready to make some tasty muffins!
Step-by-Step Instructions
Preparation
First, preheat your oven to 350°F (175°C). This step is key for even baking. Next, prepare your muffin tin. You can use paper liners or grease each cup lightly. This makes it easy to remove the muffins later.
Mixing Ingredients
In a large bowl, combine the dry ingredients. Use the following:
– 1 cup all-purpose flour
– 1/2 cup granulated sugar
– 1 teaspoon baking powder
– 1/2 teaspoon baking soda
– 1 teaspoon ground cinnamon
– 1/2 teaspoon ground nutmeg
– 1/2 teaspoon ground ginger
– 1/2 teaspoon salt
Whisk these until well mixed. In another bowl, mix the wet ingredients. You’ll need:
– 1/2 cup canned pumpkin puree
– 1/4 cup vegetable oil
– 1 large egg
– 1 teaspoon vanilla extract
Stir until the mixture is smooth. Now, combine the wet and dry ingredients. Pour the wet mix into the dry bowl. Gently stir until just combined. It’s okay if some lumps remain. Avoid overmixing to keep the muffins soft.
Filling Muffin Tins
Now, let’s prepare the cream cheese filling. In a small bowl, beat together:
– 1/2 cup cream cheese, softened
– 1/4 cup powdered sugar
– 1 tablespoon milk
Mix until creamy and smooth. Grab a spoon or cookie scoop. Fill each muffin liner halfway with pumpkin batter. Then, add a dollop of cream cheese filling right in the center of each cup. Cover the cream cheese with more pumpkin batter. Fill each liner about three-quarters full.
Baking Process
Place your muffin tin in the preheated oven. Bake for 18-20 minutes. To check for doneness, insert a toothpick into the center of a muffin. It should come out clean or with a few moist crumbs. Once baked, take the muffins out and let them cool for about 5 minutes. After that, transfer them to a wire rack to cool completely.
Tips & Tricks
Perfecting the Muffins
To ensure your muffins turn out great, avoid overmixing. When combining wet and dry ingredients, stir gently. Stop as soon as you see no dry flour. A few lumps are fine. Overmixing can make your muffins tough.
For an even bake, use a muffin tin that heats well. Rotate the tin halfway through baking. This helps the muffins rise evenly. Also, check for doneness with a toothpick. It should come out clean or with a few crumbs.
Presentation Tips
Make your muffins pop with a light dusting of powdered sugar. You can also drizzle cream cheese icing on top for extra flavor. Serve them on a pretty platter. Adding fresh mint leaves will make it look fancy and fresh.
For a fun touch, try placing them in cupcake liners with fun designs. This can make them more inviting for guests or kids.
Making Ahead
You can prepare the batter in advance. Mix the dry ingredients in one bowl and the wet in another. Keep them separate until you are ready to bake. This can save time, especially for busy mornings.
If you want to make the cream cheese filling ahead, store it in the fridge. Just remember to stir it before using. This makes it easy to whip up fresh muffins anytime you like.
Variations
Flavor Enhancements
To make these muffins even more fun, you can add chocolate chips. Just mix in about half a cup of mini chocolate chips with the pumpkin batter. This addition gives a rich, sweet surprise in each bite. You can also try incorporating nuts or seeds. Chopped walnuts or pecans add a nice crunch. Pumpkin seeds sprinkle a bit of extra flavor and texture.
Dietary Alternatives
If you want a gluten-free version, swap the all-purpose flour for a gluten-free blend. Many blends work well in baking, so choose your favorite. For those who follow a vegan diet, you can replace the egg with a flax egg. Just mix one tablespoon of ground flaxseed with three tablespoons of water. Let it sit until it thickens. Use a plant-based cream cheese to keep the cream cheese filling vegan-friendly.
Seasonal Twists
You can spice things up with different spices. Try adding cardamom or allspice to the mix. These spices bring a warm flavor that fits right in with fall. You can also incorporate additional fall flavors, like maple syrup or apple. A touch of maple in the batter can bring out the sweetness. Chopped apples mixed into the pumpkin batter can create a delicious apple-pumpkin combo.
Storage Info
Storing Muffins
To keep your pumpkin cheesecake muffins fresh, store them in the fridge. Place them in an airtight container. This helps prevent them from drying out. They can last up to five days this way.
For long-term storage, freezing is a great option. Allow the muffins to cool completely first. Wrap each muffin tightly in plastic wrap, then place them in a freezer bag. They can stay good in the freezer for up to three months. When you’re ready to enjoy them again, just take out the muffins you need.
Reheating Instructions
To reheat your muffins, the oven works best. Preheat your oven to 350°F (175°C). Place the muffins on a baking sheet. Heat them for about 10 minutes. This keeps the texture nice and soft.
You can also use the microwave. Place a muffin on a microwave-safe plate. Heat it for about 15-20 seconds. This method is quick but may make the muffin a bit chewy.
FAQs
Common Baking Questions
How do I know when the muffins are done baking?
You can check if your muffins are done by inserting a toothpick into the center. If it comes out clean or with a few moist crumbs, they are ready. This usually takes 18-20 minutes in the oven at 350°F.
Can I double the recipe?
Yes, you can double the recipe! Simply double each ingredient and follow the same steps. Just be sure to use two muffin tins or bake in batches.
Ingredient Substitutions
What can I use instead of cream cheese?
If you need a substitute for cream cheese, try using Greek yogurt or silken tofu. They both create a creamy texture and add moisture to your muffins.
Can I substitute fresh pumpkin for canned?
Yes, you can use fresh pumpkin. Just cook and puree the pumpkin first. Measure it to match the amount in the recipe. This can add a lovely flavor!
Troubleshooting Issues
Why are my muffins dense?
Dense muffins often result from overmixing the batter. Mix just until combined to keep them light and fluffy. Another reason could be too much flour, so be careful when measuring.
How do I fix overmixed muffin batter?
If you overmix, there’s not much you can do. However, you can add a bit of milk to loosen the batter. This can help, but best to mix gently from the start!
You learned how to make delicious pumpkin muffins from scratch using simple ingredients. I shared tips for mixing, baking, and storage to ensure success. Don’t forget variations like adding chocolate chips for extra fun. With these easy steps, you can impress friends and family alike. Enjoy your tasty muffins fresh from the oven or keep some for later. Baking is joyful, and now you have the tools to create amazing flavors. Happy baking!