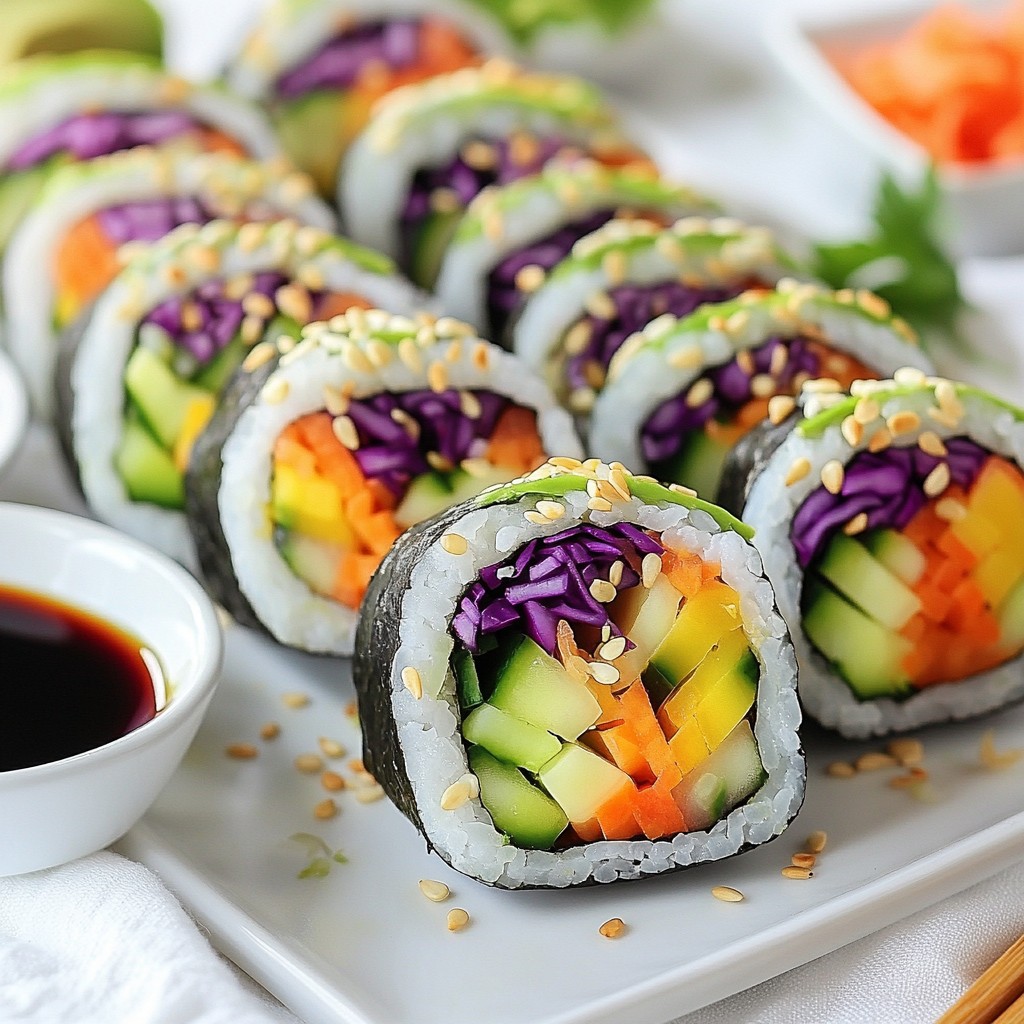
Ready to impress your friends with a vibrant and tasty dish? Rainbow Veggie Sushi is not only colorful, but it's also packed with fresh flavors. In this guide, I’ll walk you through every step, from preparing the sushi rice to rolling your masterpiece. You’ll learn tips for perfect texture and how to make it Instagram-worthy. Let's dive into the delightful world of sushi and create something beautiful together!
Why I Love This Recipe
- Vibrant Colors: This sushi is not just delicious; it’s a feast for the eyes with its rainbow of fresh veggies.
- Healthy Ingredients: Packed with vegetables and healthy fats from avocado, this sushi is a nutritious option for any meal.
- Customizable: You can easily swap out the vegetables for your favorites or what you have on hand, making it versatile.
- Fun to Make: Rolling sushi can be a fun activity, perfect for gatherings or a creative cooking night at home.
Ingredients
Main Ingredients
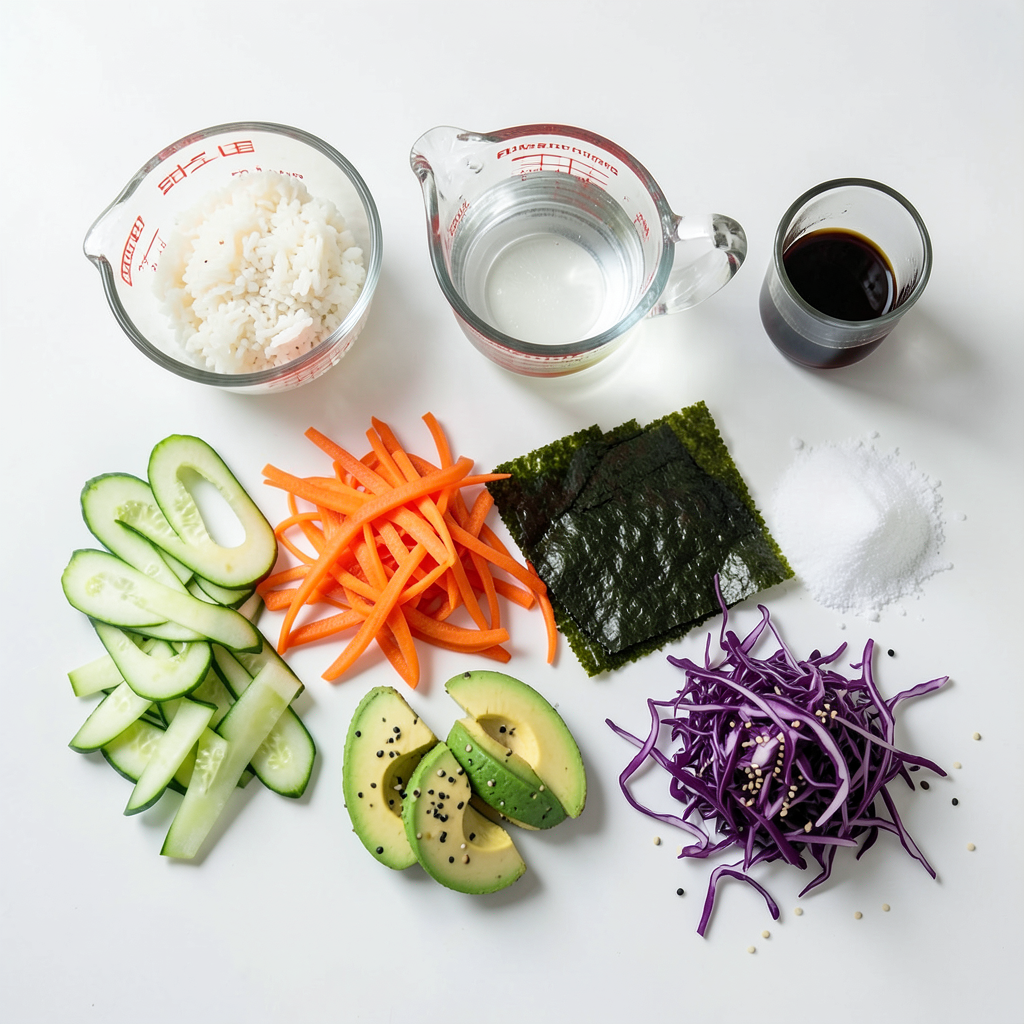
For Rainbow Veggie Sushi, you will need:
- 2 cups sushi rice
- 2 1/4 cups water
- 5 sheets nori (seaweed)
- 1/2 cup cucumber, julienned
- 1/2 cup carrots, julienned
- 1/2 cup bell pepper (choose red, yellow, or orange), julienned
- 1/2 avocado, thinly sliced
- 1/2 cup purple cabbage, shredded
- Sesame seeds, for garnish
Each ingredient brings its own color and flavor. The sushi rice forms the base. The nori holds everything together. The veggies add crunch and taste.
Seasoning Ingredients
The right seasoning makes sushi special. Here are the key ingredients:
- 1/4 cup rice vinegar
- 1 tablespoon granulated sugar
- 1 teaspoon salt
Mix these three to create a tasty dressing for the rice. This adds a nice tang and balances the flavors.
Optional Accompaniments
To enhance your sushi experience, consider these extras:
- Soy sauce
- Wasabi
- Pickled ginger
These sides add more flavor to your sushi. Soy sauce provides saltiness. Wasabi offers a spicy kick. Pickled ginger cleanses your palate.
Step-by-Step Instructions
Preparing the Sushi Rice
- Rinse the rice: Start by rinsing 2 cups of sushi rice under cold water. Keep rinsing until the water runs clear. This step removes extra starch. It helps the rice cook evenly.
- Cook the rice: In a medium pot, mix the rinsed rice with 2 1/4 cups of water. Bring it to a boil over high heat. Once boiling, lower the heat. Cover the pot and let it simmer for 18-20 minutes. The rice should absorb all the water and become tender. After cooking, keep the pot covered for 10 minutes. This allows the rice to steam.
- Season the rice: In a small bowl, combine 1/4 cup rice vinegar, 1 tablespoon sugar, and 1 teaspoon salt. Stir until everything dissolves. When the rice cools a bit, gently mix this mixture into the rice. Use a spatula to avoid mashing. Let the seasoned rice cool to room temperature.
Rolling the Sushi
- Set up the rolling station: Place a bamboo sushi mat on a clean and flat surface. Put a sheet of nori on the mat, shiny side down.
- Spread the rice on nori: Wet your hands to prevent sticking. Take a handful of sushi rice and spread it over the nori. Cover it evenly but leave about 1 inch at the top free. Press down gently to stick the rice to the nori.
- Add the fillings: Lay out your fillings across the bottom third of the rice. Use 1/2 cup of julienned cucumber, carrots, and bell peppers. Add 1/2 avocado slices and 1/2 cup of shredded purple cabbage. Make sure to arrange them evenly.
Finalizing the Sushi Roll
- Roll the sushi tightly: Start rolling from the bottom edge of the mat. Carefully lift it up and over the fillings. Apply gentle pressure as you roll away from you. Keep rolling to the bare edge of the nori. To seal it, dampen the edge with a bit of water.
- Slice the roll into pieces: Use a sharp knife to cut the roll into 6-8 bite-sized pieces. Wipe the knife with a damp cloth between cuts. This keeps the slices neat and clean.
- Serve attractively: Sprinkle sesame seeds over the sushi rolls. Arrange them on a colorful serving platter. Add small bowls of soy sauce for dipping. For extra flair, include pickled ginger and wasabi on the side.
Tips & Tricks
Achieving the Perfect Rice Texture
To make great sushi, start with rinsing the rice. Rinse it under cold water until it runs clear. This step removes excess starch and helps the rice stick together. Next, cook the rice in a pot with water. Bring it to a boil, then cover and simmer for 18-20 minutes. This method makes the rice tender. After cooking, let it steam for 10 more minutes.
Seasoning the rice is key. Mix rice vinegar, sugar, and salt in a bowl. Stir until dissolved. Once the rice cools a bit, gently fold this mixture in. This adds flavor and gives that classic sushi taste.
Rolling Techniques
When rolling sushi, stickiness can be an issue. Moisten your hands with water to prevent the rice from sticking. This helps you spread the rice evenly on the nori. To keep your rolls tight, start rolling from the bottom. Use your fingers to apply gentle pressure as you roll. This helps create a compact roll. Seal the edge with a little water to keep it together.
Presentation Ideas
For serving, choose a bright platter. Arrange the sushi pieces in a fun way. Sprinkle sesame seeds over the rolls for extra flair. Small bowls of soy sauce can enhance the look too. You might want to add pickled ginger and wasabi on the side. These not only look good but also add flavor.
Pro Tips
- Rinse Thoroughly: Properly rinsing the sushi rice until the water runs clear removes excess starch, resulting in a fluffy texture.
- Cooling the Rice: Allow the seasoned rice to cool to room temperature before rolling; this prevents the nori from becoming soggy.
- Moisten Your Hands: Keeping your hands wet while handling the rice will prevent it from sticking to your fingers, making the rolling process easier.
- Sharp Knife for Slicing: Use a sharp knife to slice the rolls, and clean it with a damp cloth between cuts for neat slices.
Variations
Different Vegetable Options
You can mix and match your veggies for rainbow veggie sushi. Try using seasonal vegetables like zucchini in summer or roasted sweet potatoes in fall. These choices give your sushi a new twist. Think about the colors too! You can pick purple carrots or yellow bell peppers. This adds fun and variety to your meal.
Adding Protein
If you want to include protein, tofu or tempeh works great. Both add a nice chewy texture. Simply slice them thin and add them to your sushi. For seafood lovers, consider shrimp or crab. Just make sure to cook seafood properly before using it. This way, you get flavor and health in each bite.
Vegan & Gluten-Free Substitutes
For those with dietary needs, adjust your ingredients easily. You can use avocado or extra veggies as your filling. To make it gluten-free, choose gluten-free soy sauce. It tastes just as good and keeps your sushi safe for everyone. Don't hesitate to explore these options for a delicious twist!
Storage Info
Refrigeration Guidelines
To store leftover sushi, wrap each roll in plastic wrap. This keeps them fresh and moist. Place the wrapped sushi in an airtight container. Store it in the fridge. Always eat leftover sushi within 24 hours for the best taste.
To maintain freshness, keep sushi cool. Avoid leaving it out at room temperature. If you have rice and fillings left, store them separately. This helps keep the rice from getting soggy.
Freezing Sushi
You can freeze sushi rolls if you must save them for later. First, wrap each roll tightly in plastic wrap. Then, place them in a freezer-safe bag. Remove as much air as you can before sealing.
When you’re ready to eat, take the sushi out of the freezer. Let it thaw in the fridge overnight. This method helps preserve the taste and texture. Avoid thawing sushi at room temperature, as this can cause spoilage.
Shelf Life
In the fridge, your sushi lasts about one day. After that, the rice can dry out, and the veggies may spoil. Always check for signs of spoilage before eating.
If you see any changes in color or smell, throw it away. Fresh sushi should smell clean and bright. If it smells sour or off, it is best to discard it.
FAQs
What is Rainbow Veggie Sushi?
Rainbow veggie sushi is a bright, colorful dish made with fresh vegetables and sushi rice. Each roll showcases a mix of colors, making it fun to eat. The appeal lies in its vibrant look and fresh taste. It’s healthy, light, and perfect for sharing. You can customize your rolls with any veggies you love. This dish not only pleases the eye but also delights the taste buds.
How do I make sushi rice sticky?
To make sushi rice sticky, rinse it well before cooking. This removes excess starch, which helps with texture. Cook the rice in water until it absorbs fully. After cooking, mix rice vinegar, sugar, and salt into the rice. This seasoning adds flavor and stickiness. Gently fold in the mixture without mashing the grains. Allow the rice to cool to room temperature for the best results.
Can I make sushi rolls in advance?
Yes, you can make sushi rolls in advance! Prepare the sushi rice and veggies ahead of time. Roll them up but leave them uncut until ready to serve. Wrap the rolls tightly in plastic wrap to keep them fresh. Store them in the fridge for a few hours. When ready, slice and serve for a quick meal or snack. Just remember, fresh is best!
You learned how to create tasty sushi at home. From choosing fresh ingredients to rolling techniques, these steps guide you. Remember, practice makes perfect. Experiment with flavors and options. This way, you’ll find your favorite sushi style. Enjoy sharing your homemade sushi with friends and family. With these tips, you'll impress everyone, even yourself. Keep exploring different ingredients and presentations. The fun of sushi making lies in your unique creations. Happy rolling!